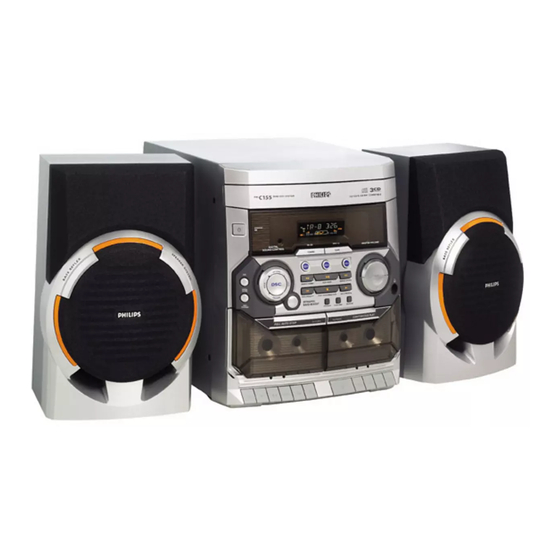
Philips FW-C155 Owner's Manual
Philips mini hi-fi system owner's manual
Hide thumbs
Also See for FW-C155:
- Specifications (2 pages) ,
- User manual (29 pages) ,
- Service manual (43 pages)
Table of Contents
Advertisement
Quick Links
Advertisement
Table of Contents

Related Manuals for Philips FW-C155


Summary of Contents for Philips FW-C155
- Page 1 C155 C155 Mini Hi-Fi System...
-
Page 2: Mains Plug
See Copyright Act 1956 and The Performer’s Protection Acts 1958 to 1972. Italia DICHIARAZIONE DI CONFORMITA’ Si dichiara che l’apparecchio FW-C155 Philips risponde alle prescrizioni dell’art. 2 comma 1 del D.M. 28 Agosto 1995 n. 548. Fatto a Eindhoven... - Page 3 STANDBY POWER DIGITAL SOUND CONTROL OPEN/ CLOSE DISC CHANGE PLAY / REC CD 1/2/3 TUNER TAPE 1/2 REPEAT SHUFFLE SLEEP ë í É Ç Å á á MUTE MUTE NEWS/TA MINI HIFI SYSTEM BAND TAPE 1 • 2 TUNER TAPE CD 2 CD 3 SEARCH •TUNING...
- Page 4 Advarsel: Usynlig laserstråling ved åbning når sikkerhedsafbrydere er ude af funktion. Undgå utsættelse for stråling. Bemærk: Netafbryderen er sekundært indkoblet og ofbryder ikke strømmen fra nettet. Den indbyggede netdel er derfor tilsluttet til lysnettet så længe netstikket sidder i stikkontakten. Klass 1 laseraparat Varning! Om apparaten används på...
- Page 5 Index English ------------------------------------------------ 6 Français -------------------------------------------- 28 Español --------------------------------------------- 50 Deutsch --------------------------------------------- 73 Nederlands ---------------------------------------- 95 Italiano -------------------------------------------- 117 Svenska ------------------------------------------- 140 Dansk --------------------------------------------- 161 Suomi --------------------------------------------- 184 Português ---------------------------------------- 206 ∂ÏÏËÓÈο ----------------------------------------- 228...
-
Page 6: Table Of Contents
Contents General Information Supplied accessories ... 7 Acknowledgement ... 7 Environmental information ... 7 Safety information ... 7 Preparations Rear connections ... 8–9 Power Antennas connection Speakers connection Inserting batteries into the remote control ... 9 Controls Controls on the system and remote control ... -
Page 7: General Information
This product complies with the radio interference requirements of the European Community. Supplied accessories – 2 speaker boxes – remote control – AM loop antenna – FM wire antenna Acknowledgement Energy Star As an ENERGY STAR Partner, Philips has determined that this product meets the ENERGY STAR guidelines for energy efficiency. -
Page 8: Preparations
Preparations speaker (right) AC power cord Rear connections The type plate is located at the rear of the system. For users in the U.K.: please follow the instructions on page 2. Power Before connecting the AC power cord to the wall outlet, ensure that all other connections have been made. -
Page 9: Speakers Connection
FM Antenna For better FM stereo reception, connect an outdoor FM antenna to the FM ANTENNA terminal. Speakers Connection Front Speakers Connect the speaker wires to the SPEAKERS terminals, right speaker to "R" and left speaker to "L", coloured (marked) wire to "+" and black (unmarked) wire to "-". -
Page 10: Controls On The System And Remote Control
Controls (illustrations on page 3) Controls on the system and remote control STANDBY ON y – to switch the system on or to standby mode. TUNER (BAND) – to select waveband : FM or MW. TAPE (TAPE 1•2) – to select tape mode. ECO POWER –... - Page 11 PREV í / PRESET 4 NEXT ë / PRESET3 for CD ... to skip to the beginning of the current, previous, or next track. for Tuner ... to select a preset radio station. for Clock ... (on the system only) to set the minute.
-
Page 12: Basic Functions
Basic Functions STANDBY POWER BAND DIGITAL SOUND CONTROL TUNER SEARCH •TUNING OPEN/ CLOSE PREV/ PRESET DISC DYNAMIC CHANGE BASS BOOST IMPORTANT! Before you operate the system, complete the preparation procedures. Plug and Play Plug and Play allows you to store all available radio stations automatically. -
Page 13: Demonstration Mode
Demonstration mode The system has a demonstration mode that shows the various features offered by the system. To activate the demonstration In standby mode, press and holdÇon the system until " WELCOME" is displayed. The demonstration will begin. To deactivate the demonstration Press and holdÇon the system until "DEMO OFF"... -
Page 14: Volume Control
Basic Functions Volume control Press MASTER VOLUME v or w (VOL + or - on the remote control) to increase or decrease the volume level. To listen through the headphones Connect the headphones plug to the n socket at the front of the system. -
Page 15: Cd Operation
MINI HIFI SYSTEM STANDBY POWER BAND DIGITAL SOUND CONTROL TUNER SEARCH •TUNING OPEN/ CLOSE PREV/ PRESET STOP• CLEAR DISC DYNAMIC CHANGE BASS BOOST IMPORTANT! – This system is designed for regular discs. Therefore, do not use any accessories such as disc stabiliser rings or disc treatment sheets, etc., as offered on the market, because they may jam the changer mechanism. -
Page 16: Playing Discs
CD Operation Playing discs a disc is loaded in the disc tray the current selected disc tray is empty the current selected disc tray is loaded or playing To play all discs on the disc tray PressÉ Å . All the available discs will play once, then stop. During playback, the selected disc tray, track number and elapsed playing time of the current track are displayed. -
Page 17: Programming The Disc Tracks
Programming the disc tracks Programming tracks is possible when playback is stopped. Up to 40 tracks can be stored in the memory in any order. Load the desired discs on the disc tray (refer to “Loading discs”). Press PROGRAM to start programming. starts flashing. -
Page 18: Radio Reception
Radio Reception STANDBY POWER BAND DIGITAL SOUND CONTROL TUNER SEARCH •TUNING OPEN/ CLOSE PREV/ PRESET DISC DYNAMIC CHANGE BASS BOOST Tuning to radio stations Press TUNER to select TUNER mode. "TUNER" is displayed. A few seconds later, the current radio frequency will appear on the display. -
Page 19: Manual Preset Programming
To stop storing the automatic preset Press PROGRAM or Ç on the system. Note: – If no preset number is selected, automatic preset will begin from preset (1) and all your former presets will be overridden. Manual Preset Programming Tune to your desired radio station (refer to “Tuning to radio stations”). -
Page 20: Tape Operation/Recording
Tape Operation/Recording STANDBY POWER BAND DIGITAL SOUND CONTROL TUNER SEARCH •TUNING OPEN/ CLOSE PREV/ PRESET DISC DYNAMIC CHANGE BASS BOOST PLAY / REC IMPORTANT! – Before playing a tape, check and tighten slack tape with a pencil. Slack tape may get jammed or may burst in the mechanism. -
Page 21: Rewinding/Fast Forwarding
Rewinding / Fast forwarding Stop playback, press à or á. The tape will stop automatically at the end of rewinding or fast forwarding. Press 70 to stop rewinding or fast forwarding. Note: – During rewinding or fast forwarding of a tape, it is also possible to select another source (CD or TUNER, for example). -
Page 22: Cd Synchronised Start Recording
Tape Operation/Recording CD Synchronised start recording Press CD 1/2/3 to select the disc. You can programme the tracks in the order you want them to be recorded (refer to “CD Operation - Programming the disc tracks”). Press on tape deck 1 to start recording. The disc will start playback automatically. -
Page 23: Clock/Timer
STANDBY POWER BAND DIGITAL SOUND CONTROL TUNER SEARCH •TUNING OPEN/ CLOSE PREV/ PRESET DISC DYNAMIC CHANGE BASS BOOST IMPORTANT! When in Eco Power standby mode, it is not possible to show the clock time or set the clock/timer function. View clock The clock (if it is set) will be shown in standby mode. -
Page 24: Deactivating The Timer
Clock/Timer Press and hold CLOCK•TIMER for more than two seconds to select timer mode. "12:00 " or "00:00" or the last timer setting starts flashing. starts flashing. Press CD 1/2/3, TUNER or PROGRAM to select the desired source. “CD1 [or 2, 3] XX:XX" indicates the CD mode is selected. -
Page 25: Specifications
AMPLIFIER Output power ... 2 x 10 W MPO ... 2 x 5 W RMS Signal-to-noise ratio ... 67 dBA (IEC) Frequency response ... 50 – 15000 Hz Impedance loudspeakers ... 3 Impedance headphones ... 32 (1) (3 , 1 kHz, 10% THD) CD PLAYER Number of programmable tracks ... -
Page 26: Maintenance
Maintenance Cleaning the Cabinet Use a soft cloth slightly moistened with a mild detergent solution. Do not use a solution containing alcohol, spirits, ammonia or abrasives. Cleaning Discs When a disc becomes dirty, clean it with a cleaning cloth. Wipe the disc from the centre out. - Page 27 RADIO RECEPTION Radio reception is poor. TAPE OPERATION/RECORDING Recording or playback cannot be made. GENERAL The system does not react when buttons are pressed. Sound cannot be heard or is of poor quality. The left and right sound outputs are reversed.