Table of Contents
Advertisement
Advertisement
Table of Contents

Related Manuals for Bosch D6412


Summary of Contents for Bosch D6412
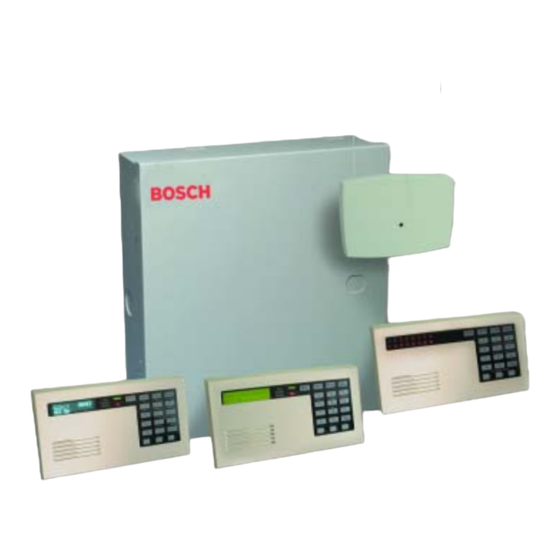
- Page 1 Control Panels D6412/D4412 Operation and Installation Guide...
-
Page 2: Table Of Contents
4.1.1 Primary (AC) Power Circuit .............................. 19 4.1.2 Installing the Transformer ..............................19 Secondary Power ................................19 4.2.2 Installing the Battery ................................19 4.2.3 Replacement ..................................19 D6412/D4412 Operation and Installation Guide 45349E Page 2 © 2003 Bosch Security Systems... - Page 3 DX2010 Status LED ................................38 On-Board Outputs ................................... 39 10.0 Off-Board Outputs ................................... 41 10.1 Overview ....................................41 10.2 DX3010 Octo-Output Module ............................41 10.2.1 Overview ....................................41 D6412/D4412 Operation and Installation Guide © 2003 Bosch Security Systems Page 3 45349E...
- Page 4 D6412/D4412 Contents 10.2.2 Configuring the DX3010 Octo-Output Module ......................41 10.2.3 Relay Outputs ..................................41 10.2.4 Installation ..................................... 42 10.2.5 DX3010 to D6412/D4412 SDI Bus Wiring Connections ..................42 10.2.6 Address Programming ................................ 44 11.0 Arming Devices ....................................45 11.1 Description ...................................
- Page 5 Table 7: Point Expansion Mapping ..............................31 Table 8: DX2010 Wire Lengths ..............................34 Table 9: DX2010 Address 106 ............................... 37 Table 10: DX2010 Address 107 (for D6412 only) ........................37 Table 11: DX2010 Address Settings ............................. 38 Table 12: DX2010 Address Jumper Settings ..........................38 Table 13: DX3010 Wire Lengths ..............................
- Page 6 Figure 14: Installing the DX2010 in the Panel Enclosure ....................... 33 Figure 15: Optional Enclosure Mounting Locations for the DX2010 ................... 34 Figure 16: Wiring the DX2010 to the D6412/D4412 ......................35 Figure 17: Wiring the DX2010 for External Power Supply ...................... 35 Figure 18: Auxiliary Output Connections .............................
-
Page 7: Introduction
D6412/D4412 Introduction Introduction This guide addresses the installation of the D6412 and D4412 Control Panel only, and should not be used for any other panel. Organization This guide is divided into 16 sections with seven appendices. Table 1 contains a summary of each section. -
Page 8: Other Literature Referenced
Part Number D6412/D4412 Program Entry Guide 45351 D6412 Program Record Sheet 45350 D4412 Program Record Sheet 50485 D6412/D4412 TSN: Smoke Detector Compatibility 46928 User's Guide for LED Command Centers 46840 User's Guide for Text Command Centers 46841 D6412 Firmware Release Notes... -
Page 9: Fcc Notice
RENs, contact the telephone company to determine the maximum REN for the calling area. If the D6412/D4412 Control Panel causes harm to the telephone network, the telephone company notifies you in advance. If advance notice isn’t practical, the telephone company notifies the customer as soon as possible. Also, you are advised of your right to file a complaint with the FCC if you believe it is necessary. -
Page 10: Overview
400 mA for Fire and combined Fire/Burglary; 1500 mA for UL Burglary; 1850 mA for other Alarm Power: (not investigated by UL). Applies to all four outputs combined. See the Outputs section of the D6412/D4412 Program Entry Guide (P/N: 45351). Battery Discharge/Recharge Schedule • Discharge AC Off: Command centers indicate trouble. - Page 11 DS RF3341 Keypad (not investigated by UL) • Programming Key (PK32) • Control Panel D6412 - Complete control panel assembly in the D2203 Universal Enclosure. A CX4010 Configurations Transformer is supplied. • D6412LT - Complete control panel assembly in the D2203 Universal Enclosure. A CX4010 Transformer must be ordered separately.
-
Page 12: Sia Control Panel Standard
Areas and Accounts The system supports up to four separate areas for the D6412 and up to two separate areas for the D4412. You can assign all points to a single area or spread them out over a maximum of two or four areas, model dependent. -
Page 13: Command Centers
You can view the log at a text command center (the D623 for example), print it locally using the DX4010 Serial Interface Module and a serial printer, or upload it to the Remote Account Manager (RAM IV). See Appendix B in the D6412/D4412 Program Entry Guide (P/N: 45351) for a listing of log events and how to view them. 2.3.8 EMI/Lightning Transient Protection The panel maintains Bosch Security Systems high level of quality and field dependability. -
Page 14: Control Panel Assembly
D6412/D4412 Overview 2.3. 1 1 Control Panel Assembly The Bosch Security Systems control panel is shipped from the factory pre-assembled. You should receive the following parts with your panel. Literature Package D6412 D6412/D4412 Installation Guide (P/N: 45349)* Control Panel D6412 Program Record Sheet (P/N: 45350)*... -
Page 15: Installation
(RAM IV). Enclosure Options The D2203 Enclosure is supplied with the standard D6412/D4412 Control Panel. To mount the D6412 in one of the Bosch Security Systems enclosures listed below, order the D6412M version (order the D4412M version for the D4412). -
Page 16: Installing The Assembly
Closing the Installer Switch disables the panel (see Figure 3). System reporting is disabled and the system cannot be armed. A system trouble shows at all keypads. INSTALLER SWITCH NORMAL (OPEN) AUXILIARY INSTALLER SWITCH Installer LOCKED (CLOSED) Figure 3: Installer Switch D6412/D4412 Operation and Installation Guide 45349E Page 16 © 2003 Bosch Security Systems... -
Page 17: Finishing The Installation
(Installer Switch OPEN). See Section 3.5.7 Power Up and Section 13.3.10 Exiting the Installer’s Menu for more information. During this period, a screen showing the panel model number (D6412 or D4412), firmware revision number, and a “Please Wait...” message appears for approximately 10 seconds. -
Page 18: Power Up
Please Wait... Programming the Panel If you have not created a program for the panel, review the D6412/D4412 Program Entry Guide (P/N: 45351). Make certain you have all the required accessory modules installed for the features you want to use. -
Page 19: Power Supply
Primary (AC) Power Circuit An 18 VAC, 22 VA internally fused transformer (Bosch Security Systems CX4010) is the primary power source. The AC power circuit provides 700 mA of rectified AC power. The panel reserves 100 mA of this power for internal operations, leaving 600 mA for powered devices. -
Page 20: Battery Charging Circuit - Float Charge
• Fire Applications use a UL1481 Listed power supply operating voltage range of 11.8 VDC to 12.4 VDC for fire applications. Figure 4: System Status LED D6412/D4412 Operation and Installation Guide 45349E Page 20 © 2003 Bosch Security Systems... -
Page 21: Power Outputs
Formula format: 600 mA – NSC current required (Step 1) = Alarm Current available (480 mA maximum) Refer to A-4: Current Rating Chart for Standby Battery Calculations for module/accessory current requirements. D6412/D4412 Operation and Installation Guide © 2003 Bosch Security Systems... -
Page 22: Output Programming
• Programmable Output 2 (PO2): Output PO2 can be used with Alarm+ as a supervised siren driver. Connect an approved 4 or 8 Ω siren. Alternatively, PO2 can sink up to 500 mA 12 VDC. For larger loads, use a Bosch Security Systems D133 Relay Module or Bosch Security Systems D134 Dual Relay Module. -
Page 23: Telephone Connections
The System Status LED shows system status, including phone status as described in Table 4. Figure 4 shows the location of the LED on the panel. Dialing Format You can program the system to use DTMF or pulse dialing. See DTMF/Pulse Dialing in the D6412/D4412 Program Entry Guide (P/N: 45351). D6412/D4412 Operation and Installation Guide ©... -
Page 24: Phone Line Fault
The panel routes reports to two routing destinations, each of which can be programmed with two phone numbers. See Appendix A: Routing Dialing Tables in the D6412/D4412 Program Entry Guide (P/N: 45351). Numbers in [ ] are the numbers assigned to panel events. For more panel event information, see Appendix B in the D6412/D4412 Program Entry Guide. -
Page 25: Figure 7: Ground Start
PO 1 Jumper Open JP2-PO1 Select Alrm PO 2, 3, 4 Configuration using a D133/D134 for Ground Start AUXILIARY Installer JP2-PO1 Select Alrm D133/D134 Figure 7: Ground Start D6412/D4412 Operation and Installation Guide © 2003 Bosch Security Systems Page 25 45349E... - Page 26 D6412/D4412 Telephone Connections Notes: D6412/D4412 Operation and Installation Guide 45349E Page 26 © 2003 Bosch Security Systems...
-
Page 27: On-Board Sensor Loops
Sensor Loop 1 can be used as a fire point for connection of two-wire smoke detectors (see Figure 8). This sensor loop cannot be used for point doubling and must terminate a 2.21 kΩ EOL resistor (P/N: 25899). See the D6412/D4412 TSN: Smoke Detector Compatibility (P/N: 46928) for compatible smoke detectors and the maximum number of devices allowed on Sensor Loop 1. -
Page 28: Sensor Loop 1 Configuration
The sensor loops must be connected and the 2.2 kΩ EOL resistor in place. Table 5 shows the on-board sensor loops for D6412/D4412 Loops 2 through 8. EOL Resistor... -
Page 29: Doubled Point Configuration
Pulse Count Time, detection devices may go into alarm and reset without exceeding the Pulse Count or Pulse Count Time. Bosch Security Systems recommends using the default settings for Pulse Count and Pulse Count Time. D6412/D4412 Operation and Installation Guide ©... - Page 30 D6412/D4412 On-Board Sensor Loops Notes: D6412/D4412 Operation and Installation Guide 45349E Page 30 © 2003 Bosch Security Systems...
-
Page 31: Off-Board Sensor Loops
Point Expansion module to add wired points. Use a compatible Premises RF Receiver to add wireless points. Table 7 shows how point expansion devices map to the panel’s point locations. See the Locations section in the D6412/D4412 Program Entry Guide (P/N: 45351) for a description of the relationship between locations and points. - Page 32 SDI Addr 51 0901 (0) 0902 (0) 0903 (1) 0904-0905 105 Loop 107 Loop 8, Transmitter Transmitter 40 8, 2.2 KΩ 2.2 kΩ Table 7 (cont’d): Point Expansion Mapping D6412/D4412 Operation and Installation Guide 45349E Page 32 © 2003 Bosch Security Systems...
-
Page 33: Dx2010 Point Expander Module
DX2010 Overview You can connect up to five DX2010 Point Expander Modules to the D6412 (three to the D4412). In the single point configuration, each DX2010 adds eight points to the system. In the doubled point configuration, each DX2010 adds 16 points to the system. -
Page 34: Dx2010 To Panel Sdi Bus Connections
Do not use twisted pair or shielded cable. Do not share cable with the keypad lines. The maximum distance may be limited to 76 m (250 ft.) if the Aux Output is used. See Section 8.2.4 DX2010 Auxiliary Output Connections. IMPORTANT D6412/D4412 Operation and Installation Guide 45349E Page 34... -
Page 35: Figure 16: Wiring The Dx2010 To The D6412/D4412
Black (-) Red (+) Figure 16: Wiring the DX2010 to the D6412/D4412 If you need to power the DX2010 with an external 12 VDC power supply, wire it as shown in Figure 17. See Section 4.3 External Power Supply for external power supply restrictions. -
Page 36: Dx2010 Auxiliary Output Connections
See Figure 18. When using the DX2010’s auxiliary output, the maximum distance between the D6412/D4412 and the DX2010 must be limited to 76 m (250 ft.) when using #18 AWG (1.2 mm) wire, or 30 m (100 ft.) when using #22 AWG (0.8 mm) wire. -
Page 37: Dx2010 Address Programming
Table 9: DX2010 Address 106 DX2010 Sensor Loop 3.65 K 2.2 K Table 10: DX2010 Address 107 (for D6412 only) 8.2.7 DX2010 Address Programming Each DX2010 module connected to the panel must have its address jumpers set to the addresses. These address settings are listed in Table 11. -
Page 38: Dx2010 Status Led
Table 11: DX2010 Address Settings For example: You want to use a DX2010 sensor loop for panel Point Location 9 (see Locations in the D6412/D4412 Program Entry Guide [P/N: 45351] for a detailed description of locations and their relationship to points). You must connect a DX2010 and set its address DIP switches to 102. -
Page 39: On-Board Outputs
The panel supports up to four on-board programmable outputs (PO1 to PO4). PO2 can be configured as a supervised siren driver. Refer to Global Output Configuration in the D6412/D4412 Program Entry Guide (P/N: 45351) for programming instructions. When programmed as a siren driver, PO2 draws power from the Alrm + terminal. - Page 40 • Check the programming for Programmable Outputs in the Outputs section of the D6412/D4412 Program Entry Guide (P/N: 45351). • Check the Point Index Configuration section of the D6412/D4412 Program Entry Guide to verify the points you are activating are programmed for alarm output.
-
Page 41: Off-Board Outputs
DX3010 Octo-Output Module (two required for twenty outputs) or DX3020 Module. Instructions for the DX3010 Module are included in this guide (as well as with the module). The DX3020 Module emulates two DX3010 Modules with the D6412 (emulates one with the D4412). DX3020 specific instructions are included with the module. -
Page 42: Installation
Figure 27: Installing the DX3010 in a Remote Enclosure 10.2.5 DX3010 to D6412/D4412 SDI Bus Wiring Connections Table 13 identifies the SDI bus wiring length requirements. If the DX3010 is to be installed far from the control panel, then the control panel cannot be used to power the DX3010. -
Page 43: Figure 28: Wiring The Dx3010 To The D6412/D4412
Output Activated State Output De-activated State Figure 28: Wiring the DX3010 to the D6412/D4412 If necessary to power the DX3010 from an external power source, connect it to the power source and the panel as shown in Figure 29. See Section 4.3 External Power Supply for external power supply restrictions. -
Page 44: Address Programming
Table 15: DX3010 Address Jumper Settings OPEN =Switch OPEN (Up) Example: Module Address 150 1 2 3 4 5 6 =Switch CLOSED (Down) Figure 30: DX3010 Address DIP Switches D6412/D4412 Operation and Installation Guide 45349E Page 44 © 2003 Bosch Security Systems... -
Page 45: 11.0 Arming Devices
Command centers, maintained or momentary contact keyswitches, Premises RF arming devices, or any of these devices in combination are used to arm and disarm areas. The D6412 may contain up to four areas (up to two areas on the D4412) that can be armed and disarmed individually. -
Page 46: Command Center Installation
Green Black Back of Command Center D6412/D4412 PCB Figure 32: Wiring Command Centers to the D6412/D4412 Refer to Table 17 for panel SDI Bus to command center wiring length requirements. #22 AWG (0.8 mm) #18 AWG (1.2 mm) D6421/D4412 to D621/D623 305 m (1000 ft.) -
Page 47: D268/D269, D279 Independent Zone Control
The keyswitch is connected to an on-board or off-board point’s sensor loop. Outputs can be programmed to activate arming status LEDs for keyswitch arming stations. See the Outputs section of the D6412/ D4412 Program Entry Guide (P/N: 45351) for more information. -
Page 48: Keyswitch Installation
11.4.4 Keyswitch Operation Arming/Disarming The panel offers a wide variety of keyswitch arming options. See Point Index Configuration in the D6412/D4412 Program Entry Guide (P/N: 45351) for details on configuring keyswitch arming options. Silencing Alarms • Momentary Keyswitch: To silence alarms (stop Alarm output), operate the keyswitch. If the area is armed, operating the keyswitch to silence the alarm also disarms the area. -
Page 49: 12.0 Sdi Devices
For UL certificated accounts, use a UL Listed power supply. Figure 36 shows the common from the External Power Supply Module connected to the command centers’ common and the common on the control panel. D6412/D4412 Operation and Installation Guide © 2003 Bosch Security Systems Page 49... -
Page 50: Dx4010 Rs-232 Serial Interface Module
DX4010 RS-232 Serial Interface Module Bosch Security Systems’ DX4010 RS-232 Serial Interface Module can be used to connect a standard serial printer, or other serial devices, to the panel. It can also be used for a RAM IV remote programming direct connection. Refer to the DX4010 Installation Guide (P/N: 48210) for complete installation, addressing, and operating instructions. -
Page 51: Dx4010 To D6412/D4412 Sdi Bus Wiring Connections
Wire the flying leads of the colored cable connector (included with panel) to the DX4010’s SDI Bus terminals. Plug the connector end onto the D6412/D4412. See Figure 39 for details. Plug the connector end of the cable onto the panel PCB. See Figure 40 for details. -
Page 52: Configuration Jumpers
2 - RxD 5 - GND 8 - CTS 3 - TxD 6 - DSR 9 - RI 6 7 8 9 Figure 42: DX4010 D89 Connector Layout D6412/D4412 Operation and Installation Guide 45349E Page 52 © 2003 Bosch Security Systems... -
Page 53: Installer's Keypad And Installer Mode
Figure 43 shows you how to connect and disconnect an Installer’s Keypad (D623 or D625 Text Command Center) and enter the Installer’s Mode. Refer to D6412/D4412 Program Entry Guide (P/N: 45351) for complete information on programming the panel from a keypad. -
Page 54: Service Start/Service End Reports
Pressing [5] displays the sensor loop status for the first location in the system. The location, area, point number, and electrical status (open, short, or normal) are shown. See Locations in the D6412/D4412 Program Entry Guide (P/N: 45351) for a complete description of the relationship between locations, areas, and points. -
Page 55: Press [6] For Output Test
During this period, the RF Receiver’s LED blinks approximately once every second until all ID bytes have been recognized. If the devices are successfully configured, the display returns to the scrolling RF Menu. If an error message appears, make sure the RF Receiver’s transmit lines are properly connected to the D6412/D4412 and no shorted conditions are present. -
Page 56: Press [8] For Keypad Program
Keypad programming must be enabled. The default setting enables keypad programming. See the D6412/D4412 Program Entry Guide (P/N: 45351) for more information. IMPORTANT See Appendix E Keypad Programming in the D6412/D4412 Program Entry Guide for complete instructions for programming from the keypad. D6412/D4412 Operation and Installation Guide... -
Page 57: Press [9] Program Key
Press [Cmd] to abort the check. • Erase Key: Press [4] to erase the contents of the Programming Key. A panel program stored on a PK32 key can only be used on like panel types (D6412 to D6412 and D4412 to D4412). IMPORTANT The PK32 connects to the pins marked AUXILIARY (JP1) on the panel’s PCB as shown in Figure 50. -
Page 58: Exiting The Installer's Menu
Comm Fail, Destination 1 [2]: System tried to send report to this routing destination but failed. See Appendix A Routing Dialing Tables in the D6412/D4412 Program Entry Guide (P/N: 45351) for details on the communication failed event. System battery is low: Battery connected to the panel fell below 12.1 V. -
Page 59: 14.0 Installation Label
Green Data on the installed smoke detector(s) is to be used. Auxilliary Powered Devices 11.5 to 12.4 VDC. Below 10.2 VDC, the D6412 stops processing Loop inputs. Yellow Data With 7.0 Ah battery,... - Page 60 Model D8122 derived channel subscriber terminal unit. 6) Proprietary Burglar Alarm units, Grade A. Proprietary Burglar Alarm unit, Grade BB when installed with the Model D8122 derived channel subscriber terminal unit. D4412 must be installed in accordance with D6412/D4412 Installation Instructions (P/N:45349).
-
Page 61: Terminal Quick Reference
Jumper sets PO 1 terminals A (14) and B (15) for 'dry' Form "A" contact or for Alarm PO1, A Output. PO1, B Positive terminal of powered loop. Supports up to 15 smoke detectors (see the D6412/D4412 L-1 (+) Smoke Compatibility List, P/N: 46928). PTC protected, L-1 (-) Negative terminal of powered loop. - Page 62 D6412/D4412 Terminal Quick Reference Notes: D6412/D4412 Operation and Installation Guide 45349E Page 62 © 2003 Bosch Security Systems...
-
Page 63: 16.0 Troubleshooting
Bosch Security Systems provides this guide to help you troubleshoot panel problems. To prevent problems from occurring, read the preceding sections of this guide and the D6412/D4412 Program Entry Guide (P/N: 45351) to verify the panel is correctly installed and programmed. Explanations of the problems (causes) and solutions are included in the following charts. -
Page 64: Command Center Issues
3.4.2 Closing the Installer Switch and 13.2 Entering the Installer Mode. Enabled Open/Close Reports, Open/Close Reports for Part On In Areas of the D6412/D4412 Program Entry Guide but when in the Panel Part On Mode is not programmed (P/N: 45351), see the Area # Opening/Closing Mode, these reports are still correctly. -
Page 65: Appendix A: Approved Applications Compliance Guide
Two-wire smoke detectors only connect to the panel on the sensor loop for Location 1. Two-wire detectors must be evaluated for electrical compatibility, and must be UL listed for use with the panel. See the Bosch Security Systems D6412/ D4412 Technical Service Note: Smoke Detector Compatibility (P/N: 46928), or you may contact the detector manufacturer. -
Page 66: System Chart
Appendix A: Approved Applications Compliance Guide Enclosures Bosch Security Systems offers three optional enclosures for the control panel. The D8103 enclosure is suitable for residential fire and/or burglary installations and commercial burglary applications that do not require attack resistance or approval by Factory Mutual or NYC-MEA. (See Appendix B: System Chart for acceptable applications.) -
Page 67: System Wiring Diagrams, Issue A
The D6412/D4412 control panel is suitable for Central Station, Grade C applications. It is suitable for Central Station, Grade B applications when the Model D6412/D4412 DACT unit is installed with a UL Listed local sounding device. Also suitable for Central Station Mercantile, Grade AA applications when installed with the Model D8122 derived channel subscriber terminal unit. -
Page 68: Current Rating Chart For Standby Battery Calculations
NFPA 72 (Chapter 2) Ampere-Hour Calculation Formula: (Total B ___ x 24 hrs) + (Total C x 0.067 hrs) + (10% Contingency) = Total Ah required. Total Ah requirements must not exceed Ah capacity of batteries. D6412/D4412 Operation and Installation Guide 45349E Page 68... -
Page 69: Appendix B: Sdi Address Chart
DX2010 Wired Point Expanders D6412 only 150, 151 DX3010 Octo Outputs and/or DX3020 Module D4412 only DX3010 Octo Outputs and/or DX3020 Module D6412/D4412 DX4010 Serial RS-232 Interface D6412/D4412 Operation and Installation Guide © 2003 Bosch Security Systems Page 69 45349E... - Page 70 D6412/D4412 Appendix B: SDI Address Chart Notes: D6412/D4412 Operation and Installation Guide 45349E Page 70 © 2003 Bosch Security Systems...
- Page 71 A small, hand-held wireless device usually designed to fit on a key chain that consists of buttons that allow the user to perform various functions, depending on the keyfob, such as arming/disarming the system, operating outputs or sending reports. D6412/D4412 Operation and Installation Guide © 2003 Bosch Security Systems Page 71...
- Page 72 Other reporting formats typically use “Zones” (Zn). in their reports instead of “Points.” Point Index Used to construct “personality types” for points used in the D6412/D4412 system. Each unique point index number determines responses to specific conditions occurring on the protected points.
- Page 73 Glossary Programmable Outputs The D6412 provides up to 20 programmable outputs (D4412 provides up to 12). These outputs are activated by installer-selectable panel events. Event options include alarms, troubles, and scheduled events (Skeds). The panel’s on-board outputs provide power or dry contact switching upon activation.
- Page 74 D6412/D4412 Glossary Notes: D6412/D4412 Operation and Installation Guide 45349E Page 74 © 2003 Bosch Security Systems...
- Page 75 Sensor Loop Response Time ....29 Single Point Configuration ....28 Optional Compatible Equipment Approved Applications Compliance Guide ..........65 Output Programming ......22 Output Test ..........55 D6412/D4412 Operation and Installation Guide © 2003 Bosch Security Systems Page 75 45349E...
- Page 76 Service Reports ........54 Service End ......... 54 Windows® is either a registered trademark or trademark of Microsoft Corporation in the United States and/or other countries. © 2003 Bosch Security Systems 45349E 07/03 130 Perinton Parkway, Fairport, NY 14450-9199 USA...