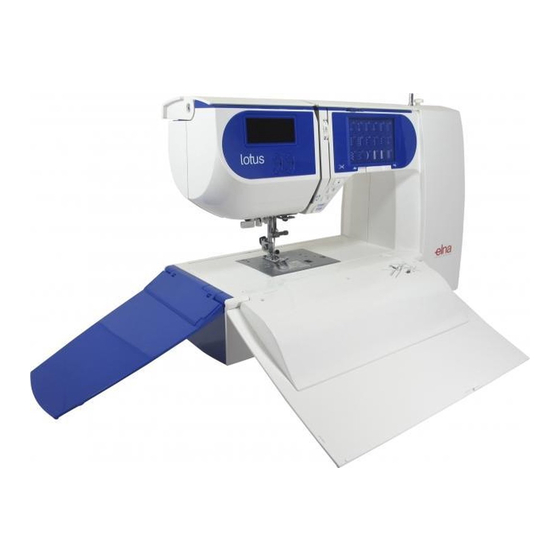
ELNA Lotus Instruction Manual
Hide thumbs
Also See for Lotus:
- Instructions manual (11 pages) ,
- Instruction manual (96 pages) ,
- Sewing manual (15 pages)
Table of Contents
Advertisement
Advertisement
Table of Contents

Related Manuals for ELNA Lotus


Summary of Contents for ELNA Lotus
- Page 1 | Instruction Manual |...
-
Page 2: Important Safety Instructions
IMPORTANT SAFETY INSTRUCTIONS This appliance is not intended for use by persons (including children) with reduced physical, sensory or mental capabilities, or lack of experience and knowledge, unless they have been given supervision or instruction concerning use of the appliance by a person responsible for their safety. Children should be supervised to ensure that they do not play with the appliance. -
Page 3: Table Of Contents
Table of Contents SECTION I. NAMES OF PARTS SECTION IV CARE OF YOUR MACHINE Names of Parts ............2-3 Cleaning the Hook Race, Feed Dog and the Thread Standard Accessories ........... 3 Cutter Mechanism ............42 Accessory Storages ............4 Installing the Bobbin Holder ........ -
Page 4: Names Of Parts
SECTION I. NAMES OF PARTS Names of Parts q LCD screen w Stitch width adjusting buttons e Stitch length adjusting buttons r Start/stop button t Reverse stitch button y Auto-lock button u Needle up/down button i Thread cutter button o Speed control slider !0 Touch panel r t y u... -
Page 5: Standard Accessories
$1 Feed adjusting screw $2 Drop feed lever $3 Carrying handle $4 Handwheel $5 Power switch $6 Foot control jack $7 Machine inlet $8 Presser foot lifter $9 Thread cutter %0 Foot control %1 Power supply cable NOTE: Sewing machine design and specifications are subject to change without prior notice. -
Page 6: Accessory Storages
Accessory Storages Accessories can be stored in the accessory storage and the accessory drawer. Open the top cover to access the accessory storage. Open the protection flap (front) and pull the tab on the right side of the flap to open the accessory drawer. -
Page 7: Protection Flaps
Protection Flaps • Opening and closing protection flaps To open the protection flaps, slide the protection flap release lever q to the right. To close the protection flaps, fold the rear and front flaps w e, then fold the left flap r until it snaps to the both flaps. -
Page 8: Section Ii. Getting Ready To Sew Connecting The Power Supply
SECTION II. GETTING READY TO SEW Connecting the Power Supply • Using the foot control Turn off the power switch q. Pull the foot control cord from the foot control. Insert the foot control plug w into the foot control jack e. Insert the machine plug r into the machine inlet t. -
Page 9: Presser Foot Lifter
Presser Foot Lifter The presser foot lifter q raises and lowers the presser foot. You can raise the foot about 1/4˝ (0.6 cm) higher than the normal up position w for easy removal of the presser foot, or to help you place thick material under the foot. q Presser foot lifter w Normal up position e Highest position... -
Page 10: Changing The Needle
Changing the Needle CAUTION: Turn OFF the power switch before changing the needle. z Turn off the power switch. Raise the needle to its highest position by turning the handwheel counterclockwise, and lower the presser foot. Loosen the needle clamp screw q by turning it counterclockwise. -
Page 11: Needle Definitions
Needle Definitions The illustration identifies the main parts of a sewing machine needle. q Body w Shaft e Long groove (round side of needle) r Short groove (flat side of needle) t Eye y Point A: Universal – an all-purpose needle that handles most woven and knit fabrics. -
Page 12: Machine Operating Buttons
Machine Operating Buttons q Start/Stop button Lower the presser foot lifter. Press the start/stop button q to start the machine. The machine starts running slowly for the first few stitches; it then runs at the speed set by the speed control slider. -
Page 13: Pattern Selection
i Stitch width adjusting button Press “ ” or “ ” to change the stitch width or needle drop position (see pages 23 and 25). The indicator !0 will show the stitch width or needle drop position. o Stitch length adjusting button Press “... -
Page 14: Bobbin Winding
Bobbin Winding • Removing the bobbin Gently slide the hook cover release button q to the right and remove the hook cover plate w. Lift out the bobbin. q Hook cover release button w Hook cover plate • Setting the spool z Turn the spool thread guide e as illustrated, and the spool pin r will lift up. - Page 15 • Bobbin winding NOTES: • Set the speed control slider at its fastest position for bobbin winding. • Close the retractable thread guide after the bobbin winding. z Turn the spool guide as illustrated. Draw the thread from the spool and pass it through the spool guide.
- Page 16 • Inserting the bobbin z Place a bobbin in the bobbin holder w with the thread running off counterclockwise. q End of thread w Bobbin holder x Guide the thread into the first notch e on the front side of the bobbin holder. e Notch c Draw the thread to the left, sliding it between the tension spring blades.
-
Page 17: Threading The Machine
Threading the Machine Raise the presser foot. Press the needle up/down button q to raise the thread take-up lever to its highest position. q Needle up/down button CAUTION: Turn OFF the power switch before threading the machine. • Threading the machine z Turn the spool thread guide w in the direction of arrow as illustrated. - Page 18 • Needle Threader CAUTION: Turn OFF the power switch when using the needle threader. z Lower the presser foot. Raise the needle to its highest position. Pull down the needle threader knob q as far as it will go. The hook comes out through the needle eye from behind.
- Page 19 • Drawing up the Bobbin Thread z Raise the presser foot. Hold the needle thread lightly with your left hand. x Press the needle up/down button q twice to lower and raise the needle to pick up the bobbin thread. q Needle up/down button c Pull both threads 4˝...
-
Page 20: Adjusting The Needle Thread Tension
Adjusting the Needle Thread Tension • Correct tension q Needle thread (top thread) w Bobbin thread (bottom thread) e To loosen r To tighten The ideal straight stitch has threads locked between two layers of fabric, as illustrated (magnified to show detail). -
Page 21: Dropping Or Raising The Feed Dog
Dropping or Raising the Feed Dog The drop feed lever is located underneath the free arm bed on the back of the machine. q To drop the feed dog, push the lever in the direction of the arrow q. Set the stitch length value at “0.0” e. w To raise the feed dog, push the lever in the direction of the arrow w, as illustrated, and turn the handwheel r toward you. -
Page 22: Setting Mode
Setting Mode To enter the setting mode, press and hold the thread cutter button and turn the power switch on until the setting mode screen appears. The LCD display will show “01”, “on” and “oF”, and the “on” mark will blink. In this mode you can set the following machine functions. - Page 23 • Key position adjustment You can adjust the key position when you think the key sensor is off from the actual key position. z Enter the setting mode. Press the thread cutter button twice to enter the key position adjustment. x The key position adjustment screen appears and “P1”...
-
Page 24: Section Iii. Basic Sewing
SECTION III. BASIC SEWING Straight Stitch Sewing q Stitch pattern: w Needle thread tension: 2 to 6 e Presser foot: Zigzag foot A • Starting to sew Raise the presser foot and position the fabric next to a seam guide line on the needle plate (5/8˝ (1.6 cm) is most common). - Page 25 • Needle Plate The seam guides on the needle plate and the hook cover help you to measure seam allowance. The numbers on the needle plate indicate the distance between the center needle position q and the edge of the fabric w. q Center needle position w Edge of the fabric 1/2 5/8 3/4...
-
Page 26: Lock-A-Matic Stitch
Lock-a-Matic Stitch q Stitch pattern: w Needle thread tension: 2 to 6 e Presser foot: Zigzag foot A r Reverse stitch button Use this stitch to secure the beginning and the end of a seam with backstitching. When you reach the end of the seam, press the reverse stitch button r once. -
Page 27: Zigzag Stitch
Zigzag Stitch q Stitch pattern: w Needle thread tension: 2 to 5 e Presser foot: Zigzag foot A The zigzag stitch is one of the most useful and versatile stitches. It is used for overcasting, mending, appliqué, and also used as a decorative stitch. NOTE: Use an interfacing when sewing on stretch fabrics such as knit, jersey or tricot. -
Page 28: Super Stretch Stitch
This industrial inspired overlock stitch is excellent for assembling and finishing fabrics together in one step. Apply ribbing to knits and garment retains its shape. Elna invented this stitch in 1982. Place the fabric edges together under the presser Overedge Stitch... -
Page 29: Zipper Sewing
Zipper Sewing q Stitch pattern: w Needle thread tension: 1 to 4 e Presser foot: Zigzag foot A Zipper foot E • Attaching the zipper foot Fit the pin w on the zipper foot into the groove q in the foot holder. To sew the left side of the zipper, attach the zipper foot with the right-hand side of the pin e. - Page 30 x Attach the zipper foot with the pin on the right. Sew through all the layers from the end of the zipper opening, guiding the zipper teeth along the edge of the foot. c Stop the machine 2˝ (5 cm) before the foot reaches the slider on the zipper tape.
-
Page 31: Rolled Hem
Rolled Hem q Stitch pattern: w Needle thread tension: 1 to 4 e Presser foot: Rolled hem foot D z Attach the rolled hem foot D. Fold the fabric edge twice to form a hem, 0.3 cm (1/8˝) wide and 5 cm (2˝) long then press. 0.3 cm 5 cm x Place the fabric aligning the hem edge with the guide... -
Page 32: Pintuckis
Pintuckis q Stitch pattern: w Needle thread tension: 1 to 4 e Presser foot: Blind hem foot G A beautiful accent to any project. Pintucks should be added to your fabric before cutting out the pattern piece. Use a washable marker to draw parallel lines for pintucks on fabric right side. -
Page 33: Button Sewing
Button Sewing q Stitch pattern: w Needle thread tension: 3 to 7 e Presser foot: Satin stitch foot F r Feed dog: Dropped z Lower the feed dog r. z x c x Slide the speed control slider to the left to decrease the sewing speed. -
Page 34: Blind Hem
Blind Hem q Stitch pattern: w Needle thread tension: 1 to 4 e Presser foot: Blind hem foot G z Use the same color thread as the fabric. On heavy weight fabrics that ravel, the raw edge 0.4 – 0.7 cm 0.4 –... -
Page 35: Applique
Applique q Stitch pattern: w Needle thread tension: 1 to 4 e Presser foot: Satin stitch foot F Place an applique on the fabric and baste or pin it in place. Reduce the foot pressure. Sew while guiding the fabric so the needle falls along the outer edge of the applique. -
Page 36: Sculpture Stitch
Sculpture Stitch q Stitch pattern: w Needle thread tension: 3 to 6 e Presser foot: Satin stitch foot F For top stitching and outlining designs. Sew slowly at the corners. Patchwork q Stitch pattern: w Needle thread tension: 3 to 6 e Presser foot: Satin stitch foot F z A fun method of decorating your quilt (often called... -
Page 37: Bridging (Fagoting)
Bridging (Fagoting) q Stitch pattern: w Needle thread tension: 3 to 6 e Presser foot: Satin stitch foot F Two folded edges are joined together by threads over an open area. Use linen, cotton or blend of linen/cotton. Select 013. Attach satin stitch foot F. -
Page 38: Various Kinds Of Buttonholes And Their Uses
Various Kinds of Buttonholes and Their Uses 16 Classic Square Buttonhole The most common buttonhole, found on blouses, shirts, pants, etc. It consists of a bartack at each end and a compact zigzag stitch along each side. 17 Classic Keyhole Buttonhole Accommodates the shank found on large buttons used on heavy coats and jackets. - Page 39 x Pull the button holder e to the back, and place the button in it. Push it together tightly against the button. NOTE: If the button is extremely thick, make a test buttonhole on an extra piece of the fabric. If it is difficult to fit the button through the test buttonhole, you can lengthen the buttonhole by pulling the button holder back a little.
- Page 40 b Start the machine to sew the buttonhole. The buttonhole will be automatically sewn. The machine will sew the left row first. n The machine will sew the back bartack and the right row. m The machine will sew the front bartack, then it stops automatically with the needle in the up position.
-
Page 41: Adjusting The Stitch Width And Density For Buttonholes
Adjusting the Stitch Width and Density for Buttonholes • Adjusting the stitch width Press the stitch width adjustment key q to change the stitch width. Press the “ ” button to decrease buttonhole width w. Press the “ ” button to increase buttonhole width e. The stitch width can be varied from 2.5 to 7.0 depending on the selected buttonhole. -
Page 42: Corded Buttonhole
Corded Buttonhole q Stitch pattern: w Needle thread tension: 1 to 5 e Presser foot: Automatic buttonhole foot R z Use the same procedure as the square buttonhole procedure. Set the stitch width to match the thickness of the cord used. With the buttonhole foot raised, hook the filler cord on the spur q at the back of the buttonhole foot. -
Page 43: Darning Stitch
Darning Stitch q Stitch pattern: w Needle thread tension: 3 to 6 e Presser foot: Automatic buttonhole foot R • Starting to sew z x c v z Pull the button holder q to the back. x Place the garment under the foot. Press the needle up/down button twice. -
Page 44: Cutter Mechanism
SECTION IV. CARE OF YOUR MACHINE Cleaning the Hook Race, Feed Dog and the Thread Cutter Mechanism WARNING: •Turn the power switch off and unplug the machine before cleaning. •Do not dismantle the machine other than as explained in this section. CAUTION: Do not store the machine in a high-humidity area, near a heat radiator, or in direct sunlight. -
Page 45: Problems And Warning Signs
Problems and Warning Signs Warning sign Cause Try this The machine will not sew with the start/stop Disconnect the foot control button because the foot control is connected. and start the machine. A buttonhole is sewn without lowering the Lower the buttonhole lever buttonhole lever. -
Page 46: Troubleshooting
Troubleshooting Reference Cause Condition See page 15, 16 The needle thread 1. The needle thread is not threaded properly. breaks. See page 18 2. The needle thread tension is too tight. See page 8 3. The needle is bent or blunt. See page 8 4. - Page 48 809-800-342...