Table of Contents
Advertisement
Advertisement
Table of Contents

Related Manuals for ELNA 2110


Summary of Contents for ELNA 2110
- Page 1 PDFMAILER.DE INSTRUCTION BOOK 2110/2130...
- Page 2 PDFMAILER.DE IMPORTANT SAFETY INSTRUCTIONS Your Elna 2000 series sewing machine is designed and constructed for HOUSEHOLD use only. Read all instructions before using this machine. DANGER – To reduce the risk of electric shock: 1. Your sewing machine should never be left unattended when plugged in. Always unplug the machine from the electrical outlet immediately after using and before cleaning.
-
Page 3: Table Of Contents
Gathering ..............19 NOTE: Information found in this instruction Zipper Insertion ..........20-21 manual is current at the time of printing. Elna Pintucks ..............22 reserves the right to change and update specifi- Twin Needle Hem (Optional needle) ..... 23... -
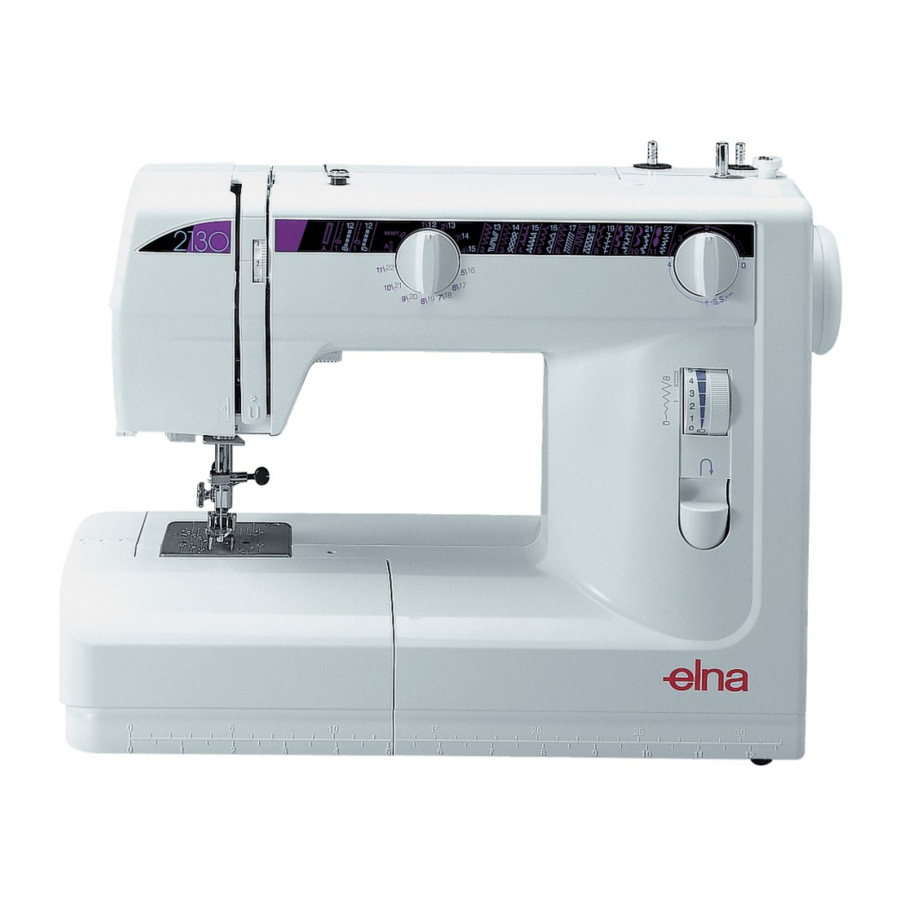
Page 4: Machine Parts And Functions Part Names
2. Satin stitch foot (Model 2130 only) 3. Zipper foot (Model 2130 only) 4. Blind hem foot 5. R: Automatic buttonhole foot (Model 2130 only) 6. 4-step buttonhole foot (Model 2110 only) 7. Needles 8. Bobbins (4 total) 9. Seam ripper 10. -
Page 5: Extension Table (Accessory Storage Box) And Free Arm
PDFMAILER.DE Extension Table (Accessory Storage Box) and Free Arm Extension Table The extension table provides more sewing space to make sewing easier. The extension can be easily removed for free arm sewing. Free arm sewing is good for circle areas like sleeves, waistbands and pant legs. -
Page 6: Additional Presser Foot Clearance
PDFMAILER.DE Additional Presser Foot Clearance You can raise the presser foot higher than the nor- mal up position for easy removal of the presser foot or to place heavy fabrics under the presser foot. Pull the presser foot lever up beyond the normal up posi- tion. -
Page 7: Seam Allowance Lines
Set the stitch length knob between 0 and 4 to access stitches 1-11 (2130) and 1-7 (2110). Set the stitch length knob on “+S.S-” to access stretch stitches 12-22 (2130) and 8-14 (2110). Set stitch length at... -
Page 8: Stitch Length Knob
PDFMAILER.DE Stitch Length Knob Turn the stitch length knob. The lower the number, the shorter the stitch length. The higher the number, the longer the stitch length. Each stitch will have a suggested length range. Fine Tuning Stretch Stitches If the stretch stitch doesn’t look right, you can adjust it. -
Page 9: Thread Tension Dial
PDFMAILER.DE Thread Tension Dial Straight Stitch In straight seams, the needle thread and the bobbin thread should lock together in the center of the two layers of fabric. If you look at the top and bottom of the stitch, you will notice that there are no gaps;... -
Page 10: Getting Ready To Sew
PDFMAILER.DE SECTION II Getting Ready to Sew Selecting the Correct Needle and Thread Weight Fabric Needle Type Needle Size There are many kinds of fabrics, threads and Very Chiffon, Fine Lace, Universal 9 (65) needles. It is important to use the correct ones to- Light Organdy Ball Point... -
Page 11: Needle Definitions
PDFMAILER.DE Needle Definitions The illustration identifies the main parts of a sewing machine needle. 1. Body 2. Shaft 3. Long groove (round side of needle) 4. Short groove (flat side of needle) 5. Eye 6. Point Universal – an all-purpose needle that handles most woven and knit fabrics. -
Page 12: Connecting The Machine To Power Supply
PDFMAILER.DE Connecting the Machine to Power Supply Your machine is equipped with a detachable power cord. Before connecting the power cord, make sure the voltage and frequency shown on the machine are identical to your electrical power. Check that the power/light switch is in the off posi- tion. -
Page 13: Foot Control And Sewing Speed
PDFMAILER.DE Foot Control and Sewing Speed Sewing speed is determined by how hard you press on the foot control. The harder you press on the foot control, the faster the machine runs. IMPORTANT: Before using your sewing machine (U.S.A.) the first time, place waste fabric under the presser foot and run the machine without thread for a few minutes. -
Page 14: Winding A Bobbin
PDFMAILER.DE Winding a Bobbin 1. Pull out the flywheel to keep the needle from moving up and down. 2. Place the spool of thread on the spool pin with the thread coming off the spool as shown. Pull the thread over around the bobbin winder thread guide. -
Page 15: Inserting The Bobbin
PDFMAILER.DE Inserting the Bobbin 1. Place the bobbin in the bobbin case. Make sure the thread unwinds in the direction shown in the illustration. 2. Pull the thread into the bobbin case slot. 3. Draw the thread under the tension spring and into the delivery eye. -
Page 16: Threading The Machine
PDFMAILER.DE Threading the Machine Turn the flywheel toward you to raise the needle to its highest position. Raise the presser foot. Pull the thread under the thread guide. Guide the thread down the right side slot into the tension area, continuing down around the check spring holder. -
Page 17: Drawing Up The Bobbin Thread
PDFMAILER.DE Drawing Up the Bobbin Thread 1. Raise the presser foot and hold the needle thread lightly with your left hand. 2. Turn the flywheel towards you to lower needle into machine. Continue turning until the needle has risen and the take-up lever is at its highest position. -
Page 18: Sewing Basics
R: Automatic buttonhole foot (Model 2130 only) – Place button in foot. The machine will automati- cally sew the correct size. 4-step buttonhole foot (Model 2110 only) – Use the measurements on the foot to make a properly sized buttonhole. -
Page 19: Straight Stitch
PDFMAILER.DE Straight Stitch The straight stitch is used to sew a seam in woven fabrics and may also be used for gathering, basting, sewing in a zipper, pintucks, rolled hems and twin needle hems. NOTE: Fine fabrics should have a stitch length be- tween 1.5 and 2.5, medium fabrics between 2.0 and 3.0 and heavier fabrics between 3.0 and 4.0. -
Page 20: Gathering
PDFMAILER.DE Gathering Gathering/shirring evenly distributes fullness in an area with very tiny pleats. Gathering is one row or two parallel rows. Shirring is three or more parallel rows. Light to medium weight fabrics provide the best results. Decrease tension to 2.0 – 4.0. Increase stitch length to 4. -
Page 21: Zipper Insertion
PDFMAILER.DE Zipper Insertion (Model 2110 – optional foot) Lapped Application Lapped zippers are usually inserted into a side seam of skirts or pants, for example. Attach the pin on the zipper foot to the groove on the shank. To sew the left side of the zipper, attach the zip- per foot on the right-hand side. - Page 22 PDFMAILER.DE Stop just before the zipper foot reaches the slider on the zipper tape. Lower the needle slightly into the fabric. Raise the zipper foot and open the zipper. Lower the foot and stitch the remainder of the seam. Close the zipper and spread the fabric flat with the right side facing up.
-
Page 23: Pintucks
PDFMAILER.DE Pintucks Pintucks should be added to your fabric before cut- ting out the pattern piece. 1. Use a washable fabric marker and draw lines for pintucks on the fabric right side. 2. Fold the fabric together on the first line with wrong sides together. -
Page 24: Twin Needle Hem (Optional Needle)
PDFMAILER.DE Twin Needle Hem (optional needle A twin needle hem is quick and easy. It is especially useful for very stretchy fabrics. Be sure to use a stretch twin needle for knit fabrics. Turn off the power switch and insert a twin needle. Thread the machine in the same manner as for single thread (see page 15), using both spool pins. -
Page 25: Whip And Roll Hem
PDFMAILER.DE Whip and Roll Hem (Model 2110 – optional foot) This technique makes a beautiful edge on ruffles and hems. It should only be used for lightweight fabrics. 1. The fabric edge must be clean cut with no unrav- eling threads. -
Page 26: 3-Step Zigzag
PDFMAILER.DE 3-Step Zigzag The 3-step zigzag (sometimes called a multiple zig- zag) is used to finish raw seam edges. This stitch gives a flatter edge finish than the regular zigzag. It is also used for mending tears in fabric. Place the fabric under the presser foot so the needle swings off the fabric to the right or trim away any excess fabric. -
Page 27: Stretch Blind Hem Or Woven Blind Hem
Woven Blind Hem (#5) The blind hem may be used to sew a blind hem on either knit or woven fabrics. Elna invented the stretch blind hem in 1952. Finish the raw hem edge with a zigzag or 3-step zig- zag before sewing the blind hem. -
Page 28: Shell Tuck
PDFMAILER.DE Shell Tuck (Model 2110 – optional foot) This is a pretty hem finish for lingerie and tricot fab- rics. May also be used for decorative rows of stitching. Use a lightweight fabric such as tricot. Fold and stitch on the bias. Set the stitch width and length as you desire. -
Page 29: Picot Stitch
PDFMAILER.DE Picot Stitch The picot stitch may be used to sew fabrics together “edge-to-edge”. 1. Fold and press under the seam allowance to wrong side of fabric on both fabric edges. 2. With the fabric right side up, place the folded edges next to each other under the middle of the presser foot. -
Page 30: Automatic Buttonhole (Model 2130 Only)
PDFMAILER.DE Automatic Buttonhole (Model 2130 Only) All buttonholes should use interfacing that is the same weight as the fabric. Interfacing is especially important when sewing on stretch fabrics. Always make a test buttonhole on extra fabric before sewing on your garment. Use a shorter stitch length for finer fabrics j. - Page 31 PDFMAILER.DE 4.. Mark the buttonhole area on the fabric. Place both threads to the left under the foot. Insert the garment under the foot and turn the flywheel until the needle comes down into the fabric. The needle should go in exactly at the marked line for the buttonhole.
-
Page 32: 4-Step Buttonhole (Model 2110 Only)
PDFMAILER.DE 4-Step Buttonhole Model 2110 Only) All buttonholes should use interfacing that is the same weight as the fabric. Interfacing is especially important when sewing on stretch fabrics. Always make a test buttonhole on extra fabric before sewing on your garment. -
Page 33: Corded Buttonhole
Position the cord into the forks on the front of the foot to hold the ends tight. (A – model 2130, B – model 2110) Sew a corded buttonhole using the same directions as for a buttonhole. -
Page 34: How To Sew On A Button
PDFMAILER.DE How To Sew On a Button (Model 2110 – optional foot) Hand sewing buttons to a garment is very time-con- suming. Sew them on in one quick, easy step. Drop the feed dog. See page 6. 2. Place the button on the fabric and turn the fly- wheel to lower the needle into a hole of the but- ton. -
Page 35: Stretch Stitches Triple Seam
This stitch can also be used for topstitching. Elna invented this stitch in 1952. Using a straight stitch (stitch length 4), baste a seam together. Verify the fit. Reset the machine for triple seam and sew. -
Page 36: Smocking
PDFMAILER.DE Smocking Smocking is a delicate, decorative treatment on children’s clothing or women’s blouses. Choose a soft, lightweight fabric such as batiste, gingham or challis. Cut the fabric three times the finished width. 1. Set needle thread tension to 2.5. Use the straight stitch with the stitch length at 4.0. -
Page 37: Super Stretch Stitch
PDFMAILER.DE Super Stretch Stitch This stitch is recommended for sewing fabrics such as swimwear and stretch velour as it provides the greatest amount of stretchability and strength. Seams lie flat and do not lose their shape. Foot pres- sure may need to be lowered for fabric to maintain its shape. -
Page 38: Satin Stitches
PDFMAILER.DE SECTION V Satin Stitches (Model 2130 only) Express your creative talents by using one of the pretty satin stitches to add a decorative accent. It is very important to use a stabilizer with your fabric or the stitch will not form correctly. The weight of the stabilizer should be the same as the fabric. -
Page 39: Taking Care Of Your Machine
PDFMAILER.DE SECTION VI Taking Care of Your Machine The area around the bobbin, hook and feed dog must be cleaned each time the machine has been used a lot. Clean the outside of the machine with a soft cloth and pure soap. Cleaning the Bobbin Case and Hook Loose threads and dust may cause puckered stitches and thread breakage during stitching. -
Page 40: Cleaning The Feed Dog
PDFMAILER.DE Cleaning the Feed Dog Unplug the machine. Remove the needle and presser foot. Remove the needle plate set screws and the needle plate. With a brush, clean out dust and lint clogging the feed dog teeth. Attach the needle plate. Replace needle and presser foot. -
Page 41: Troubleshooting
PDFMAILER.DE TROUBLESHOOTING Condition Cause See page(s) 1. Threads have been caught in the hook area. The machine is noisy and does not run 2. The feed dog is packed with lint. smoothly. The needle thread 1. The needle is not threaded properly. breaks. -
Page 42: Index
PDFMAILER.DE INDEX Multiple Zigzag ..........25 Accessories ............3 Accessory Box ..........3, 4 Applique ............24 Needle Position .......... 7, 17 Automatic Buttonhole ........ 29-30 Needles ............9-10 Bobbin Oil & Oiling ..........12, 39 Drawing Up Bobbin Thread ....16 Overcasting ..........