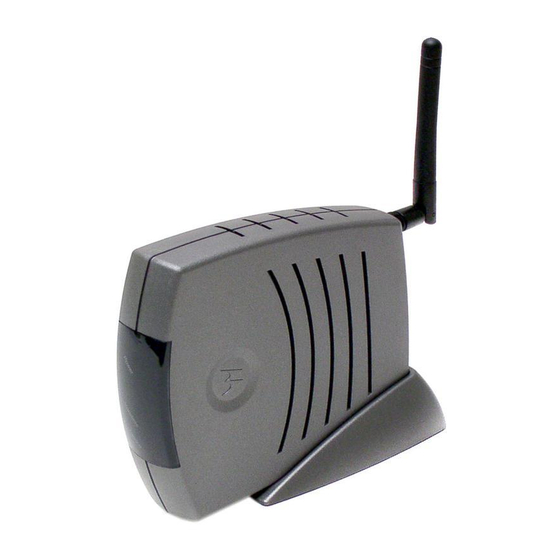
Motorola WE800G User Manual
Motorola wireless ethernet bridge user guide
Hide thumbs
Also See for WE800G:
- User manual (71 pages) ,
- Troubleshooting (5 pages) ,
- Specifications (2 pages)
Table of Contents
Advertisement
Quick Links
Download this manual
See also:
Troubleshooting
Advertisement
Table of Contents

Related Manuals for Motorola WE800G


Summary of Contents for Motorola WE800G
- Page 1 User Guide Wireless Ethernet Bridge WE800G...
-
Page 2: Fcc Declaration Of Conformity
Connect the equipment into an outlet on a circuit different from that to which the receiver is connected. • Consult the dealer or an experienced radio/TV technician for help. : Changes or modifications not expressly approved by Motorola for compliance could void the user’s authority to CAUTION operate the equipment. -
Page 3: Fcc Certification
Motorola, Inc. Motorola reserves the right to revise this publication and to make changes in content from time to time without obligation on the part of Motorola to provide notification of such revision or change. Motorola provides this guide without warranty of any kind, either implied or expressed, including but not limited to, the implied warranties of merchantability and fitness for a particular purpose. -
Page 4: Table Of Contents
Wireless Ethernet Bridge Infrastructure Mode...1-8 Wireless Ethernet Bridge Ad-Hoc Mode...1-9 Multiple Clients Mode ...1-10 Wireless Ethernet Bridge Physical Description... 1-11 Back of WE800G...1-11 Front of WE800G ...1-13 LED Description ...1-14 Section 2:Installation Hardware Setup ... 2-1 Antenna Installation...2-2 Wireless Ethernet Bridge Physical Installation ...2-2 Horizontal Installation ...2-3... - Page 5 Contact Us ...4-1 Hardware Solutions...4-1 Software Solutions...4-3 I cannot access the Configuration Manager for the WE800G..4-3 My WE800G cannot associate with the wireless access point/router..4-4 I cannot browse past the first screen of the Configuration Manager..4-4 Section 5:Glossary...
- Page 6 Say, your home and office. Or home and the coffee shop. Or wherever you want to connect. Add the WE800G to a game console or other Ethernet equipped device to join an 802.11g wireless network. Once connected, you can access an Internet broadband connection on a wireless network.
-
Page 7: Features
Compatibility with both 802.11g and 802.11b standards CD-ROM based Installation Wizard for easy installation Built-in Web interface for easy configuration Firmware upgrade to stay current with latest specification Your Motorola WE800G enables you to extend your wireless network and increase your productivity. Overview WE800G... -
Page 8: Understanding Your User Guide
WE800G. It is assumed that you will use the Installation Wizard on the CD-ROM to set up your WE800G. If not, refer to this section for instructions on getting your WE800G up and running. -
Page 9: Box Contents
Overview Section 1 Box Contents Your box contains the following: Antenna Ethernet Cable CD-ROM Base Station Stand WE800G Power Supply Quick Start Guide WE800G... -
Page 10: Understanding Functions
Overview Understanding Functions Before installing your WE800G, please take a few minutes to review the wireless networking functions described in this section. Wireless Ethernet Bridge Connectivity Your WE800G allows you to: Connect wired and wireless networks together Create your own private wireless ad-hoc network by configuring... -
Page 11: Positioning Your Wireless Ethernet Bridge
Placing the WE800G in a higher location, such as on top of a cabinet, helps to disperse the signal cleanly, especially to receiving locations on upper stories. -
Page 12: Technical Specifications
Overview Technical Specifications Your WE800G uses a radio transmission technology defined by the Institute of Electrical and Electronics Engineers (IEEE) called 802.11 or Wi-Fi (Wireless Fidelity). This 802.11 standard is subdivided into distinct categories of speed and the frequency spectrum used, designated by the lower case letter after the standard. -
Page 13: Types Of Networks
Section 1 Types of Networks Your WE800G can be used in several ways. The following examples illustrate the flexibility of your WE800G. Some scenarios require additional hardware. Wireless Ethernet Bridge Infrastructure Mode In this mode, the WE800G functions like a bridge, connecting wired Ethernet clients to a wireless network. -
Page 14: Wireless Ethernet Bridge Ad-Hoc Mode
Overview Wireless Ethernet Bridge Ad-Hoc Mode This mode is very similar to the WE800G Infrastructure mode, except the WE800G will connect to other client devices using Ad-Hoc mode. One limitation of operating in this mode is that all client devices must... -
Page 15: Multiple Clients Mode
Section 1 Multiple Clients Mode In this mode, the WE800G connects multiple clients to your network wirelessly. 1-10 Overview WE800G... -
Page 16: Wireless Ethernet Bridge Physical Description
Overview Wireless Ethernet Bridge Physical Description The following sections describe the physical characteristics of the WE800G. For instructions on installing your WE800G, see Section 2: Installation. Back of WE800G The following illustration shows the WE800G back panel: Feature Power Receptacle... -
Page 17: Section 1 Overview
Button Antenna 1-12 Description Resets your WE800G or returns the WE800G to the default login settings. If the WE800G experiences trouble connecting to the Internet, briefly press and release the Reset button to reset the router. This retains the router’s configuration information. -
Page 18: Front Of We800G
Overview Front of WE800G The following illustration shows the WE800G front panel: The LEDs of the WE800G indicate its operational status. WE800G SECTION 1 1-13... -
Page 19: Led Description
If the reset button is held down for more than five seconds, the LED starts to blink, during which time the WE800G’s default user name, password, and IP address will be restored. The LED then turns off until the reset button is released. -
Page 20: Section 2:Installation
The following sections provide detailed instructions for completing these tasks. Hardware Setup Hardware setup includes: Antenna Installation: connecting the antenna to the WE800G. Physical Installation: where you physically place your WE800G. Electrical Connection: how to power your WE800G. WE800G Use only the Motorola supplied WE800G power adapter. -
Page 21: Antenna Installation
Section 2 Antenna Installation When shipped, the antenna is already connected to the WE800G. If, for some reason, you have to detach and than re-attach the antenna to the WE800G: Locate the antenna connection on the back of the Wireless Ethernet Bridge (the threaded knob). -
Page 22: Horizontal Installation
To install the Wireless Ethernet Bridge horizontally, as shown in the illustration below: Place the Wireless Ethernet Bridge in the desired location. Follow the procedures in “Electrical Connection to Wireless Ethernet Bridge” located later in this section to connect the WE800G. WE800G Section 2... -
Page 23: Vertical Installation
Ensure that the antenna’s location is on top. The Wireless Ethernet Bridge’s foot slides snugly into the base to keep the WE800G stable. Follow the procedures in “Electrical Connection to Wireless Ethernet Bridge” located later in this section to connect the WE800G. -
Page 24: Wall Mount Installation
Wall Mount Installation To mount the Wireless Ethernet Bridge on the wall, you must: Position the WE800G as specified by the local or national codes governing residential or business communications services. Follow all local standards for installing a network interface unit/network interface device (NIU/NID). - Page 25 If necessary, seat an anchor in each hole. Use M5 x 38 mm (#10-16 x 1½ inch) screws with a flat underside and maximum screw head diameter of 10.5 mm to mount the WE800G. Before drilling holes, check the structure for potential damage to water, gas, or electric lines.
- Page 26 10 Remove the front two plastic feet, nearest to the LED panel, from the bottom of the WE800G to uncover the keyholes. 11 Place the WE800G so the keyholes are above the mounting screws. 12 Slide the Wireless Ethernet Bridge down until it stops against the top of the keyhole opening.
-
Page 27: Electrical Connection To Wireless Ethernet Bridge
Wireless Ethernet Bridge: CAUTION! Connect the power adapter to the Wireless Ethernet Bridge’s Power port, found on the back of the WE800G: Plug the power adapter into a grounded and surge-protected power outlet. The Power LED on the front panel lights green when connected properly. -
Page 28: Easy Software Setup
This section applies if you are connecting your PC with an Ethernet adapter to the Wireless Ethernet Bridge. Your PC must first have an Ethernet adapter installed. You need the supplied Ethernet cable to connect the PC to the Wireless Ethernet Bridge. WE800G Section 2... - Page 29 Ethernet adapter and the other end to the LAN port on the Wireless Ethernet Bridge: You are now ready to configure the Wireless Ethernet Bridge. To configure the Wireless Ethernet Bridge, see Section 3:Configuration. 2-10 Reset Po wer An t enna Installation WE800G...
-
Page 30: Configure Your Computers
Determine the operating system for each computer you will include in your wireless network and follow the steps to configure the network settings for that PC. WE800G Reconfigure the PC’s settings to Obtain an IP address automatically. Continue to use the Static IP settings. -
Page 31: Configuring Windows 98Se And Me
Ethernet adapter on your PC. There may be multiple adapters installed – choose only the one that is configured for your adapter. In the example above, a 3Com Ethernet adapter card is installed and is the appropriate choice. 2-12 Installation WE800G... - Page 32 First check to see if the installation files are installed at c:\windows\options\cabs. Otherwise, load your Windows CD and follow the prompts. 12 Restart your computer to save your settings. 13 Proceed to Section 3 to set up your WE800G. WE800G Section 2 2-13...
-
Page 33: Configuring Windows 2000
Section 2 Configuring Windows 2000 Click Start. Select Settings. Select Control Panel. Double-click Network and Dial-Up Connections. Double-click Local Area Connection. Click Properties. 2-14 Installation WE800G... - Page 34 Installation Ensure the box next to Internet Protocol (TCP/IP) is selected. Click to highlight Internet Protocol (TCP/IP) and click Properties. WE800G Section 2 2-15...
- Page 35 Enter 192.168.30.10 into the IP Address field. 10 Enter 255.255.255.0 into the Subnet Mask field. 11 Click OK twice to exit and save your settings. 12 Restart your computer to save your settings. 13 Proceed to Section 3 to set up your WE800G. 2-16 Installation WE800G...
-
Page 36: Configuring Windows Xp
Windows XP. If you are running the ‘Classic’ interface, please follow the instructions for Windows 2000. Click Start. Select Settings. Select Control Panel. Double-click Network and Dial-Up Connections. Double-click Local Area Connection. The Local Area Connection Status window appears: WE800G Section 2 2-17... - Page 37 Section 2 Click Properties. Ensure the box next to Internet Protocol (TCP/IP) is selected. 2-18 Installation WE800G...
- Page 38 Properties. Enter 192.168.30.10 into the IP Address field. 10 Enter 255.255.255.0 into the Subnet Mask field. 11 Click OK twice to exit and save your settings. 12 Proceed to Section 3 to set up your WE800G. WE800G Section 2 2-19...
-
Page 39: Section 3:Configuration
Using the Configuration Manager Logging In Once the Wireless Ethernet Bridge is connected, open your web browser. In the URL field enter http://192.168.30.1 (the Wireless Ethernet Bridge’s default IP address). Press the Enter key. The login screen is displayed. WE800G... -
Page 40: Navigation
Section 3 Enter the USER ID. The default factory setting is admin. Enter the PASSWORD. The default factory setting is Motorola. Once you have logged in, for security reasons you should change the User ID and Password. See Click LOG IN to enter the Wireless Ethernet Bridge’s Configuration Manager. -
Page 41: Help, Restart, And Log Out
Associate to a Wireless Access Point The instructions below indicate how to connect an Ethernet-ready device to your wireless LAN. Login to the WE800G from your computer. Click Site Survey > Site Monitor and, if necessary, click Scan to search for additional wireless networks. - Page 42 If your Active Profile indicates Not Associated, click Disconnect and then Connect. Your Wireless Connection Status information will appear when successfully connected. 12 Connect your device to the WE800G using an Ethernet cable. See example below. Your device can now communicate wirelessly on your LAN.
-
Page 43: Configure Your Wireless Security Settings
Configuration Configure Your Wireless Security Settings Due to the limitation of the Wi-Fi WPA Test Plan, your WE800G’s factory default settings are not set at their maximum security level. Adjustments are strongly recommended to ensure that you communicate securely on your wireless network at maximum strength. -
Page 44: Configuring Site Survey Settings
Profile enables you to maintain your primary settings. If you have previously associated the WE800G to a wireless network and it doesn’t appear immediately, click Refresh to see if the connection information appears. - Page 45 Connection Status SSID AP’s MAC Address ESS Auth Mode WE800G Description Select the Profile you want to enable. The Profile selected here activates the settings of Wireless Profile 1 or 2. If the unit is already associated with a wireless network, then the wireless connection information appears below.
-
Page 46: Monitoring Wireless Networks
Click to save your settings. Click to cancel any changes. Associate to a Wireless Access Point Description Click to search for more access points/routers. Network Type - either Infrastructure (Infra) or Ad-Hoc is displayed. Configuration WE800G... - Page 47 Channel Signal Strength Wireless Mode Security Apply Cancel WE800G Description The SSID of the device found. The MAC address of the device found. The channel on which the device is broadcasting. The Signal Strength of the device found. The protocol used, 802.11b, 802.11g, or 802.11b/g.
-
Page 48: Configuring Wireless Profile 1 Or 2
The same SSID has to be entered on every wireless device on your wireless network. The default SSID is empty. Type of network. For a discussion of Network Types, refer to Section 1:Types of Networks. The options are: Infrastructure Ac-Hoc WE800G... -
Page 49: Configuring Wireless Security Settings
To access the screen, click Wireless Profile 1 or 2 > Security. WE800G Description When using the WE800G in Ad-Hoc mode, this feature becomes available. Select the transmission type to activate for this profile. It should match the transmission type of the wireless network to which you are connecting. - Page 50 No authentication is used. System Default setting. Pre-Shared Pre-Shared Key (PSK) Key (PSK) authentication method is used. You need to share the same key between your WE800G and wireless network. Pre-Shared Key is the best choice as it provides stronger security. WE800G...
- Page 51 This feature is unavailable when an Open System is selected with no Encryption or Passphrase is not selected in Key Input Method. The default is pass phrase is motorola. Available if Pre-Shared Key (PSK) is selected. The options are: Passphrase (default setting)
- Page 52 ESS Authentication and Encryption Status fields. The Key selected here must match between the WE800G and the wireless network in Infrastructure mode or other clients in Ad-Hoc mode. For example, if you select Key 1 here you have to match Key 1 of the wireless network.
- Page 53 For the key content, the phrase is Key 3 auto-generated by the password entered in the Passphrase field. For non-Motorola clients, you Key 4 will use these Keys (and not Passphrase) when using WEP for security. The Key will not automatically fill in until you have clicked Apply.
-
Page 54: Configuring Advanced Wireless Settings
This selection is only available in Ad-Hoc mode. In Infrastructure mode, the channel is automatically selected based on the connecting wireless network’s channel. Select the channel number on which the device will broadcast for Ad-Hoc mode. Click to save your settings. Click to cancel any changes. WE800G... -
Page 55: Configuring Wireless Professional Settings
WE800G Description Improves the efficiency of a network's throughput when transmitting and receiving data. Motorola recommends that you enable this feature. The default is disabled. Allows you to modify the RTS threshold, which is the packet size at which an access point issues a request to send (RTS). - Page 56 (collection of packets) within a given time period. This feature works with other Motorola products to increase performance throughput. The WE800G and the wireless network must have Frame Bursting enabled for this feature to work. The default is disabled. Click to save your settings.
-
Page 57: Configuring Control Panel Settings
LAN Ethernet MAC Address and select a connection mode. To access the screen, click Control Panel > Network Address. Field LAN Ethernet MAC Address WE800G Description Displays the MAC address used for accessing a Local Area Network (LAN). This is the Ethernet MAC address of the unit. - Page 58 Ethernet connection status of the Wireless Ethernet Bridge. This is the IP address you use to connect to the WE800G. If connecting to a DHCP server, the IP address will appear here. If using Static Assignment, enter the IP address here.
-
Page 59: Configuring Device Security
Bridge’s web based utility. It cannot be longer than 63 bytes. A blank password is not allowed. The default is motorola. Sets the amount of idle time (no actions occur) that elapses before the Wireless Ethernet Bridge automatically logs off the user. -
Page 60: Updating Firmware
Section 3 Updating Firmware The Firmware Update screen allows you to update your WE800G’s firmware (the mechanism that controls your router’s hardware). Listed on this screen is the current version of the Model Number and Firmware Revision, which enables you to verify what version you are running. -
Page 61: Saving And Restoring Configuration Settings
The Control Panel – Configuration Data screen enables you to save and restore the settings that you have currently configured to a file. You can also reset the WE800G to the factory default settings. To access the screen, click Control Panel > Configuration Data. -
Page 62: Section 4:Troubleshooting
Section 4:Troubleshooting This section details possible solutions to problems that might occur when using the Wireless Ethernet Bridge, the WE800G. Contact Us If you are unable to locate a solution here, please access our website www.motorola.com/broadband/networking You can also reach us 7 days a week, 24 hours a day at 1-877-466-8646. - Page 63 RJ-45. Ensure that your Ethernet adapter is enabled. To check the status of your WE800G, click the monitor icon in the System Tray at the bottom right of your screen. You can also check the status of your WE800G by selecting Start >...
-
Page 64: Software Solutions
IP address. The default IP address of WE800G is 192.168.30.1. If after initial set up, the PC that’s used to configure the WE800G has been assigned a different IP address by DHCP or assigned a different static IP address which is not on the same 192.168.30.x... -
Page 65: My We800G Cannot Associate With The Wireless Access Point/Router
I cannot browse past the first screen of the Configuration Manager. Sometimes, especially when upgrading, some leftover files may be in your Internet Cache. Flush your cache and restart your WE800G to fix: From Internet Explorer’s menu, select Tools > Options and click Delete Files to clear your cache. - Page 66 The transmission capacity of a medium in terms of a range of frequencies. Greater bandwidth indicates the ability to transmit more data over a given period of time. Bits Per Second Broadband A communications medium that can transmit a relatively large amount of data in a given time period. WE800G...
- Page 67 Internet IP address. It is used when you are hosting your own web server, FTP server, or another server behind the router. Default Gateway A routing device that forwards traffic not destined to a station within the local subnet. Glossary WE800G...
- Page 68 The DNS lookup table is a distributed Internet database; no one DNS server lists all domain name to IP address matches. Domain Name A unique name, such as motorola.com, that maps to an IP address. Domain names are typically much easier to remember than are IP addresses. See DNS.
- Page 69 Internet and the LAN for protection. Firmware Code written onto read-only memory (ROM) or programmable read-only memory (PROM). Once firmware has been written onto the ROM or PROM, it is retained even when the device is turned off. Firmware is upgradeable. Glossary WE800G...
- Page 70 The Institute of Electrical and Electronics Engineers, Inc. (http://www.ieee.org) is an organization that produces standards, technical papers, and symposiums for the electrical and electronic industries and is accredited by ANSI. 802.11b and 802.11g are examples of standards they have produced. WE800G Section 5...
- Page 71 You need to provide the MAC Address to the cable service provider. Also called an Ethernet address, physical address, hardware address, or NIC address. One megabyte; equals 1,024 x 1,024 bytes, 1,024 kilobytes, or about 8 million bits. Glossary WE800G...
- Page 72 Every Ethernet NIC has a MAC address permanently saved in its ROM. Packet The unit of data that is routed between the sender and destination on the Internet or other packet-switched network. WE800G Section 5...
- Page 73 Different computer types (for example PC, UNIX, or mainframe) can communicate if they support common protocols. Public IP Address The IP address assigned to the router by the service provider. A public IP address is visible to devices on the Internet. See also Private IP Address. Glossary WE800G...
- Page 74 Also see client. Service Provider A company providing Internet connection services to subscribers. SMTP Simple Mail Transfer Protocol is a standard Internet protocol for transferring e-mail. WE800G Section 5...
- Page 75 TCP/IP The Transmission Control Protocol/Internet Protocol suite provides standards and rules for data communication between networks on the Internet. It is the worldwide Internetworking standard and the basic communications protocol of the Internet. 5-10 Glossary WE800G...
- Page 76 PSTN (Public Switched Telephone Network) using a dedicated circuit for each line. VoIP enables calls to travel as discrete data packets on shared lines. VoIP is an important part of the convergence of computers, telephones, and television into a single integrated information network. WE800G Section 5 5-11...
- Page 77 IEEE 802.11b/g. WLAN Wireless LAN. Wi-Fi Protected Access. A security regimen developed by IEEE for protection of data on a WLAN. World Wide Web. An interface to the Internet that you use to navigate and hyperlink to information. 5-12 Glossary WE800G...
- Page 78 Visit our website at: www.motorola.com/broadband 509106-001 12/03 MGBI...