Table of Contents
Advertisement
Quick Links
Before connecting, operating or adjusting this product, please read the instructions completely.
Region number
The player plays DVD-Video marked with labels
containing the region number "3" or "ALL".
Example:
3
ALL
GA
Please keep this manual for future reference.
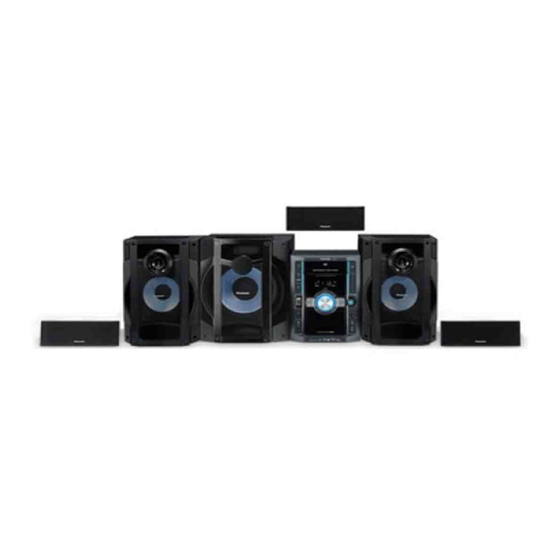
Your unit may not look exactly the same as illustrated.
2
3
5
Operating Instructions
DVD Stereo System
Model No.
Operations in these instructions are described using
the remote control, but you can do the operations on
the main unit if the controls are the same.
SC-VK880
RQTX0286-L
Advertisement
Table of Contents

Related Manuals for Panasonic SC-VK880


Summary of Contents for Panasonic SC-VK880
-
Page 1: Show Disc Information/Select A Disc
Operating Instructions DVD Stereo System SC-VK880 Model No. Before connecting, operating or adjusting this product, please read the instructions completely. Please keep this manual for future reference. Your unit may not look exactly the same as illustrated. Region number Operations in these instructions are described using... -
Page 2: Accessories
Dear customer System SC-VK880 Thank you for purchasing this product. Main unit SA-VK880 (1 unit) For optimum performance and safety, please read these Front speakers SB-PF880 (2 units) instructions carefully. Surround speakers SB-PS880 (2 units) Center speaker SB-PC880 (1 unit) -
Page 3: Table Of Contents
To record your karaoke performance ......30 Sound field and sound quality ......... 31 Changing the main unit and remote control mode ..35 Operating a Panasonic television ........35 Surround ................31 Selecting other surround modes ........31 REFERENCE Troubleshooting guide .......... -
Page 4: Safety Precautions
Safety precautions Placement Foreign matter Do not let metal objects fall inside the unit. This can cause Set the unit up on an even surface away from direct electric shock or malfunction. sunlight, high temperatures, high humidity, and excessive Do not let liquids get into the unit. This can cause electric vibration. -
Page 5: Discs Information
Recorded using a format different from DVD-Video Format, therefore, some functions cannot be used. 5 MPEG4 data recorded with the Panasonic SD multi cameras or DVD video recorders [conforming to SD VIDEO specifications 6 (ASF standard)/MPEG4 (Simple Profile) video system/G.726 audio system]. -
Page 6: Tips For Making Data Discs
Keep the number specifications (ASF standard)/MPEG4 (Simple Profile) video of sessions to a minimum to avoid this. system/G.726 audio system] recorded with Panasonic SD Naming folders and files Example: multi cameras or DVD video recorders with this unit. -
Page 7: About Divx Video-On-Demand
ABOUT DIVX VIDEO-ON-DEMAND This DivX ® Certified device must be registered in order to play DivX Video-on-Demand (VOD) content. First generate the DivX VOD registration code for your device and submit it during the registration process. [Important: DivX VOD content is protected by a DivX DRM (Digital Rights Management) system that restricts playback to registered DivX Certified devices. If you try to play DivX VOD content not authorized for your device, the message “Authorization Error”... -
Page 8: Control Reference Guide
Control reference guide Remote control TV operations Turn the unit on/off (14, 33) (Aim the remote control to a Panasonic TV and press the button. Only works Show disc information/Select a disc with some models) (17, 18) [^]: turn the TV on/off Play loaded discs in order (18) [AV]: change the TV’s video input... -
Page 9: Main Unit
Main unit AC supply indicator (AC IN) This indicator lights when the unit is connected to Remote control signal sensor the AC mains supply. Standby/on switch (8) Press to switch the unit from on to standby mode or vice versa. Disc trays (7, 16) In standby mode, the unit is still consuming a small... -
Page 10: Simple Setup
Simple setup Television, antenna and AC mains lead connections Connect the AC mains lead after all other connections are complete. Conserving power The unit consumes power (approx. 0.4 W) even when it is turned off with [^] (main unit: [8]). To save power when the unit is not to be used for a long time, unplug it from the household AC power socket. -
Page 11: Other Television Connection
Other television connection Antenna connections Connecting a television with a VIDEO IN terminal AM loop antenna VIDEO IN Rear panel of this unit Television (not included) White Black VIDEO OUT terminal Do not connect the unit through a video cassette recorder, because the picture may not be displayed correctly due to copy guard protection. -
Page 12: Placement Of Speakers
Simple setup (continued) Placement of speakers Place the front, center, and surround speakers at approximately the same distance from the seating position. Front speakers Speakers are designed identically so that no left or right Center speaker channel orientation is necessary. Center speaker ( S B - P C 8 8 0 ) Do not place the center speaker directly on the television as... -
Page 13: Preparing The Remote Control
Preparing the remote control Press on the tab Batteries to open • Use a manganese dry battery or an alkaline dry battery. • Insert so the poles (+ and –) match those in the remote control. • Remove if the remote control is not going to be used for a long period of time. -
Page 14: Easy Setup
CLOCK zPLAY zREC Original display Note Reset the clock regularly to maintain accuracy. -
Page 15: Smart Control
Smart control Selecting the source from the START menu Selecting the source by remote control You can select desired source or access playback/menus by DVD/CD: ( page 16) using the START menu. Press [START] to show the START menu screen. This unit automatically turns on. -
Page 16: Discs - Basic Play
Discs — Basic play Using the main unit Close the disc tray. Turn on the unit. Place disc. Label must face upward. OPEN/ CLOSE DVD-VR Start play. Open the disc tray. Disc tray Remove the disc from its cartridge Load double-sided discs so the DVD/CD OPEN/ before use. -
Page 17: Using The Remote Control
Using the remote control Volume adjustment Search (during play) • Play speed increases up to 5 steps. • Press [DVD/CD q] to continue normal play. Stop Slow-motion (during pause) The stopped play position is memorized • Play speed increases up to 5 steps. when “RESUME”... -
Page 18: Discs - Convenient Functions
Discs — Convenient functions Disc information Repeat play You can select the disc after checking the discs loaded with the (Only when the elapsed play time can be displayed. “DISC CHANGE” screen. : Works with all JPEG contents.) JPEG You can also select the disc directly with the disc buttons on the During play main unit. -
Page 19: Program And Random Play
Program and Random play Press [PLAY MODE] while stopped. Program Random Program and random playback screens appear sequentially. Off (Normal play) To exit program or random play mode Press [PLAY MODE] several times while stopped. Program play (up to 30 items) Random play When CD MODE is off (... -
Page 20: Discs - Using Navigation Menus
Discs — Using navigation menus Playing RAM and DVD-R/ Playing data discs RW (DVD-VR) discs DVD-VR • DVD-VR Select “DATA” in “OTHERS” menu ( page 24) to • Titles appear only if the titles are recorded on the disc. play WMA, MP3, JPEG, MPEG4 or DivX. •... -
Page 21: Discs - Using On-Screen Menus
Discs — Using on-screen menus Show the on-screen menu. Select the item. Make the settings. Press to exit. Select Select Select On-Screen Menu 1 (Disc/Play) On-Screen Menu 2 (Video) On-Screen Menu 3 (Audio) Confirm Confirm On-Screen Menu 4 (Karaoke) Exit Items shown differ depending on the type of disc as well as the recording format. -
Page 22: On-Screen Menu 2 (Video)
On-Screen Menu 1 (Disc/Play) (continued) Displays the photograph date JPEG DATE DISPLAY DATE (during pause) JPEG To rotate the still picture ROTATION On-Screen Menu 2 (Video) To select the picture quality for movie viewing NORMAL: Normal images. CINEMA1: Mellows images and enhances detail in dark scenes. PICTURE MODE CINEMA2: Sharpens images and enhances detail in dark scenes. -
Page 23: Discs - Changing The Player Settings
Discs — Changing the player settings Display Select the Select the Make the settings. Press to exit. the Setup menu. item. menu. Select Select Select Select Confirm Confirm Confirm • The settings remain intact even if you switch the unit to standby. •... -
Page 24: Audio" Menu
Discs — Changing the player settings (continued) “VIDEO” menu (continued) STILL MODE AUTO Specify the type of picture shown when FIELD : The picture is not blurred, but picture quality is lower. 4 FRAME : Overall quality is high, but the picture may appear blurred. paused. -
Page 25: Changing The Delay Time (Speaker Settings)
Changing the delay time (Speaker settings) For optimum listening with 5.1 channel sound, all the speakers, except for the subwoofer, should be the same distance from the seating position. If you have to place the center or surround closer to the seating position, adjust the delay time to make up for the difference. -
Page 26: The Radio
The radio Cassette tapes — Play and Recording Manual tuning Play Press [FM/AM] to select “FM” or “AM”. You can use the deck for tape playback. Use normal position tapes. Press [t] or [y] (main unit: [2/REW/u] or [1/FF/i]) to select the frequency of the desired High position and metal position tapes can be played, but the unit will not be able to identify the characteristics of these tapes. -
Page 27: Recording
Cassette tapes — Play and Recording (continued) Stop recording Recording If the tape finishes before the disc The disc continues playing. Press [g] (main unit: [g, –DEMO]) to stop it. Use normal position tapes. High position and metal position tapes can be used, but the unit will not be able to record or erase them correctly. -
Page 28: Usb - Play And Recording
It may not be possible to play all the files due to the condition 1 “WRITING” is displayed for a few seconds. on how they were created. Note For Panasonic D-Snap/DIGA 2 • MP3 file needs to be selected before recording can begin. All Note files in the current folder will be recorded. - Page 29 Recording from audio disc (CDDA) Track Divide This function allows you to divide between tracks. You can Connect the USB mass storage device choose; Insert the disc(s) you want to record. • AUTO 5M, track is automatically divided every 5 minutes. Press [DVD/CD q] and then [g] twice.
-
Page 30: Enjoying Karaoke
Enjoying karaoke Using karaoke mode Press [FUNCTIONS] to display the Karaoke mode on-screen menu. To select “ON”, press [OK] followed by [e,r] and [OK] to confirm. Press [e,r,w, q] to select the item and [OK] to confirm. Press [e,r] to make the settings and [OK] to confirm. •... -
Page 31: Sound Field And Sound Quality
Sound field and sound quality • The following sound effects may not be available or have no effect depending on the type of source, or when microphone(s) or headphones are inserted, or karaoke function is on or play speed is on. •... -
Page 32: Adjusting The Subwoofer
Sound field and sound quality (continued) Adjusting the subwoofer To adjust speaker level during play Press [SOUND] to select “SUBW LVL” and press [q] to (Effective when playing multi-channel audio or when Dolby Pro Logic II, Super Surround or Surround Enhancer is turned on.) make selection: Press [SOUND] to select “CH SEL.”... -
Page 33: Using The Timers
Using the timers Preparation • Turn the unit on and set the clock ( Setting the time, page 14). • For the play timer, prepare the desired music source (cassette, CD, radio, external or USB) and set the volume. • For the record timer, check the cassette’s erasure prevention tabs (... -
Page 34: Auto-Off Function
Auto-off function Using other equipment Peripheral cables and equipment are sold separately unless otherwise indicated. Using the sleep timer/Auto-off Before connection function • Disconnect the AC mains lead. • Turn off all equipment and read the appropriate operating Sleep timer: This timer turns the unit off after a set time. instructions. -
Page 35: Using An External Unit
Note You can still operate a television using the remote control ( below) even after switching the mode. Operating a Panasonic television Aim the remote control at the television for the following Turning the television on/off Switching the television’s video input mode... -
Page 36: Troubleshooting Guide
Troubleshooting guide Before requesting service, make the following checks. If you are in doubt about some of the check points, or if the remedies indicated in the chart do not solve the problem, consult your dealer for instructions. Page Power No power. - Page 37 Page Sound No sound. • Check the connections. • Turn the volume up. – • There may be a pause in sound when you change the play speed. DivX • Audio may not be output due to how files were created. –...
- Page 38 Troubleshooting guide (continued) Page USB The USB drive or it’s • The USB drive format or it’s contents is/are not compatible with the system. contents cannot be read. • The USB host function of this product may not work with some USB devices. –...
-
Page 39: Language Code List
Language code list Abkhazian: 6566 Danish: 6865 Italian: 7384 Norwegian: 7879 Swedish: 8386 Afar: 6565 Dutch: 7876 Japanese: 7465 Oriya: 7982 Tagalog: 8476 Afrikaans: 6570 English: 6978 Javanese: 7487 Pashto, Pushto: 8083 Tajik: 8471 Albanian: 8381 Esperanto: 6979 Kannada: 7578 Persian: 7065 Tamil:... -
Page 40: Glossary
Glossary Decoder I/P/B A decoder restores the coded audio signals on DVDs to normal. I: Intra coded picture This is called decoding. This picture has the best quality and is the best to use when adjusting the picture. DivX P: Predictive coded picture DivX is a popular media technology created by DivX, Inc. -
Page 41: Specifications
USB device file system FAT12, FAT16, FAT32 and narrow pictures may not be displayed. USB port power 500 mA (Max) MPEG4 data recorded with the Panasonic SD multi cameras 5 Bit rate up to 4 Mbps (DivX) or DVD video recorders... - Page 42 Specifications (continued) SPEAKER SECTION GENERAL Front speakers Power supply AC 110 to 127 V/220 to 240 V, 50/60 Hz Type 2 way, 2 speaker system (Bass reflex) Power consumption 132 W Impedance 3 Ω Speaker unit(s) Dimensions (WxHxD) 250 mm x 331 mm x 334 mm 1.
- Page 44 Panasonic Corporation Web Site: http://panasonic.net RQTX0286-L H0509AB0...