Table of Contents
Advertisement
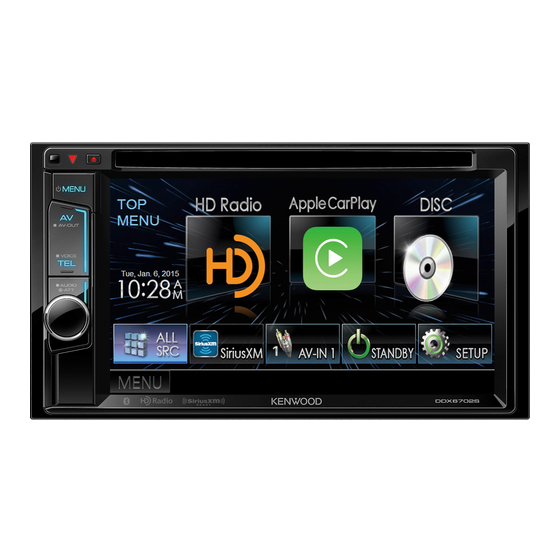
DDX6902S
DDX6702S
MONITOR WITH DVD RECEIVER
INSTRUCTION MANUAL
Take the time to read through this instruction manual.
Familiarity with installation and operation procedures will help you obtain the best performance from your new DVD-receiver.
For your records
Record the serial number, found on the back of the unit, in the spaces designated on the warranty card, and in the space provided below. Refer to the model and serial
numbers whenever you call upon your Kenwood dealer for information or service on the product.
Model DDX6902S/DDX6702S Serial number
US Residents Only
Register Online
Register your Kenwood product at www.Kenwoodusa.com
© 2015 JVC KENWOOD Corporation
B5A-0987-00 (KN)
Advertisement
Table of Contents

Related Manuals for Kenwood DDX6902S


Summary of Contents for Kenwood DDX6902S
-
Page 1: Instruction Manual
Record the serial number, found on the back of the unit, in the spaces designated on the warranty card, and in the space provided below. Refer to the model and serial numbers whenever you call upon your Kenwood dealer for information or service on the product. -
Page 2: Table Of Contents
How to read this manual: may result in hazardous radiation exposure. In • Illustrations of DDX6902S are mainly used for explanation. The displays and panels shown in this manual compliance with Federal Regulations, the following are examples used to provide clear explanations of the operations. For this reason, they may be different are reproductions of labels on, or inside the product from the actual displays or panels. -
Page 3: How To Reset Your Unit
BEFORE USE BEFORE USE V Cautions on the monitor: FCC WARNING IC (Industry Canada) Notice This equipment may generate or use radio This device complies with Industry Canada license- • The monitor built into this unit has been frequency energy. Changes or modifications to this exempt RSS standard(s). -
Page 4: Initial Settings
INITIAL SETTINGS INITIAL SETTINGS Finish the procedure. Initial setup Activating the security function When you power on the unit for the first time or You can activate the security function to protect reset the unit, the initial setting screen appears. your receiver system against theft. - Page 5 INITIAL SETTINGS INITIAL SETTINGS Set date (1), time (2), then confirm the Clock settings setting (3). Display the <TOP MENU> screen. • Adjust the date/time by pressing [J]/[K]. On the source control screen: Display the <Setup> screen. Finish the procedure. Display the <Clock>...
-
Page 6: Basics
BASICS BASICS 4 B MENU button Component names and functions Common operations • Displays the <TOP MENU> screen. (Press) ❏ Turning on the power (Page 8) V Caution on the volume setting: • Turns on the power. (Press) (See the right Digital devices produce very little noise compared column.) with other sources. -
Page 7: Common Screen Operations
BASICS BASICS ❏ Adjusting the volume ❏ Putting the unit in standby Common screen operations To adjust the volume Display all <TOP MENU> items. ❏ Common screen descriptions You can adjust the volume for the following four On the <TOP MENU> screen: situations. - Page 8 BASICS BASICS Easy control screen <Setup> screen ❏ Touch screen operations Pressing [ ] switches between the normal source Changes the detailed settings. (Page 58) control screen and easy control screen. The easy control screen allows you to control the source easily with simple buttons.
-
Page 9: Selecting The Playback Source
BASICS BASICS [PANDORA] ❏ Using short-cut buttons Switches to the Pandora broadcast. Selecting the playback source (Page 23) While displaying the source control screen or the [iHeartRadio] Switches to the iHeartRADIO On the <TOP MENU> screen: <Setup> screen, you can use the short-cut buttons broadcast. -
Page 10: Discs
DISCS DISCS ❏ Ejecting a disc Playing a disc Playback operations • If a disc does not have a disc menu, all tracks on When the operation buttons are it will be played repeatedly until you change the not displayed on the screen, touch source or eject the disc. - Page 11 DISCS DISCS Operation buttons For audio playback Operation buttons • Available buttons on the screen and operations • Available buttons on the screen and operations differ depending on the type of disc/file being differ depending on the type of disc/file being played back.
- Page 12 DISCS DISCS ❏ Selecting a folder/track on the list ❏ Video menu operations [ZOOM] Displays the picture size selection screen. (Page 54) You can display the video menu screen during video [Aspect] Selects the aspect ratio. playback. (Page 54) • The operation buttons disappear when the screen [PictureAdjust] Displays the picture adjustment is touched or when no operation is done for about Select the folder (1), then the item in the...
- Page 13 DISCS DISCS For VCD To select a track directly on a VCD ❏ Selecting playback mode Selects Repeat playback mode. ] Selects Random playback mode. • Available playback modes differ depending on the type of disc/file being played back. • You cannot activate the repeat mode and the [ZOOM] Displays the picture size selection random mode at the same time.
-
Page 14: Settings For Disc Playback
DISCS DISCS Setting the parental lock Settings for disc playback <Angle Select whether to display the angle The parental lock cannot be set during DVD Mark> mark. playback. • ON (Initial): Select this to display Display the <Parental Pass> screen. the angle mark. -
Page 15: Usb
[O] [N] Reverse/forward search. ❏ Indications and buttons on the source Connecting a USB device [IW] Starts/pauses playback. control screen You can connect a USB mass storage class device Displays other operation buttons. such as a USB memory, Digital Audio Player etc. to •... - Page 16 ❏ Setting <Picture Display Time> From <Link Search>: Select the track. Select the tag type (1) to display a list of • You can change the page to display more Set the interval between slides during slide-shows of content that contains the same tag as the track/ items by pressing [J]/[K].
-
Page 17: Ipod/Iphone
iPod/iPhone iPod/iPhone ❏ Selecting the iPod/iPhone device to Select the connection method (1), then Preparation play and connection method press [Next] (2). ❏ Connecting iPod/iPhone When connecting the iPod/iPhone device for • For details about connecting iPod/iPhone, see first time, the setup screen (for connection, etc.) page 64. - Page 18 iPod/iPhone iPod/iPhone ❏ Selecting preference settings for iPod/ When selecting <Bluetooth> as the Playback operations iPhone playback connection method, the device selection screen appears. Search for the available When the source is “iPod”... When the operation buttons are iPod/iPhone devices (1), select the target not displayed on the screen, touch the area shown on the illustration.
- Page 19 iPod/iPhone iPod/iPhone Operation buttons ❏ Selecting an audio/video file from the Video menu: Displays the easy control screen. menu (Page 8) Displays the audio/video file list. (See the right column.) [S] [T] Selects an audio/video file. Select the menu ( : audio or : video) [O] [N] Reverse/forward search.
-
Page 20: Apps
APPS APPS You can use an App of the connected iPod touch/ ❏ Preparation Connect iPhone via USB input terminal. iPhone/Android on this unit. (Page 64) To use the navigation function of the maps App, • You can use an App on the following sources: •... - Page 21 You can use the Apps of the connected iPhone. For Apps you can use on this unit, visit • The items displayed and the language used on the <http://www.kenwood.com/cs/ce/>. On the home screen of CarPlay: screen differ among the connected devices.
- Page 22 APPS APPS ❏ Playback operations ❏ Operation buttons on the source • You can operate some functions of the App on the touch panel. control screen When the operation buttons are not displayed on • For some applications such as navigation the screen, touch the screen to show them.
-
Page 23: Pandora
Pandora® Pandora® Operation buttons Playback operations You can stream Pandora from iPod touch/iPhone, Displays the easy control screen. Android or BlackBerry devices. (Page 8) You can operate Pandora using the remote • Install the latest version of the Pandora Displays the list selection screen. application on your iPod touch/iPhone/Android/ controller (optional accessory). - Page 24 Pandora® Pandora® ❏ Selecting a station from the list • The indicator appears on the left of the Android™ item when Shuffle is activated. (All songs on • Visit Google Play™ and search for “Pandora” to Display the list selection screen. the registered stations are played randomly.) install.
-
Page 25: Iheartradio
iHeartRADIO iHeartRADIO iHeartRADIO is a free, all-in-one digital radio service Operation buttons Playback operations that lets you listen to your favorite Live Stations or Displays the easy control screen. create commercial-free, all-music Custom Stations (Page 8) You can operate iHeartRADIO using the remote featuring songs from the artists you select and Displays the <Station Search>... - Page 26 iHeartRADIO iHeartRADIO ❏ Selecting the variety level for your • Press [ ] to return to the top layer. • Connect iPod touch/iPhone to this unit with a • Press [ ] to return to the upper layer. cable or via Bluetooth. When connecting with a custom station cable: Use KCA-iP202, KCA-iP102 or KCA-iP103 You can adjust the amount of lesser-known music...
-
Page 27: Aupeo
AUPEO! AUPEO! AUPEO! Personal Radio plays free music you really Operation buttons Playback operations like. You can develop your own personalized Displays the easy control screen. Internet radio by rating or skipping tracks. (Page 8) You can operate AUPEO! using the remote Displays the <Station Search>... - Page 28 AUPEO! AUPEO! ❏ Selecting a station NOTE Requirements for AUPEO! • Ensure you are logged in to your smartphone Display the <Station Search> screen. iPhone or iPod touch application. If you do not have an AUPEO! account, • Install the latest version of the AUPEO! application you can create one for free from your smartphone on your iPhone or iPod touch.
-
Page 29: Hd Radio™ Tuner
HD Radio™ tuner HD Radio™ tuner 8 Seek mode About HD Radio™ Technology Listening to the HD Radio™ 9 TI indicator broadcast p HD indicator: Lights up when receiving an HD Radio broadcast. ❏ Indications and buttons on the source q MC indicator: Lights up when receiving an HD control screen Radio multicast channel. - Page 30 HD Radio™ tuner HD Radio™ tuner Operation buttons ❏ Changing the display information Press [ ] to change the mode. Displays the easy control screen. (Page 8) [AM] Selects the AM band. [FM] Selects the FM band. <Auto> Switch between digital and analog audio automatically.
-
Page 31: Presetting Stations
HD Radio™ tuner HD Radio™ tuner ❏ Searching for FM HD Radio programs— ❏ Selecting a preset station from the list Presetting stations PTY Search ❏ Storing stations in the memory You can search for your favorite programs being You can preset 6 stations for each band. broadcast by selecting the PTY code. -
Page 32: Siriusxm® Satellite Radio
SiriusXM® Satellite Radio SiriusXM® Satellite Radio Only SiriusXM® brings you more of what you love When the following screen appears, press Listening to the SiriusXM® Satellite to listen to, all in one place. Get over 140 channels, [Return]. Radio including commercial-free music plus the best sports, news, talk, comedy and entertainment. - Page 33 SiriusXM® Satellite Radio SiriusXM® Satellite Radio Operation buttons ❏ Storing channels in the memory Registers the artist of the [Song Title]/ Changes the displayed information current song as an alert content. You can preset 6 channels for each band. [Info]/ each time this button is pressed.
-
Page 34: Selecting A Channel
SiriusXM® Satellite Radio SiriusXM® Satellite Radio Select a channel. Selecting a channel Replay On the <Preset List> screen ❏ Selecting a channel on the list You can pause, rewind and replay content from the Select a band (1), and then select a preset currently tuned channel. - Page 35 SiriusXM® Satellite Radio SiriusXM® Satellite Radio ❏ Replaying content SmartFavorites TuneScan™ Display operations buttons for replay. User stored channels (P1 to P6) are recognized as When you activate TuneScan™, you will hear 6 SmartFavorites channels. The SiriusXM Connect seconds of the songs, which have not been listened Vehicle Tuner automatically buffers their broadcast to, from each of the music channel presets on the content in the background.
- Page 36 SiriusXM® Satellite Radio SiriusXM® Satellite Radio The checkmark appears besides the selected Select the league (1) and the team (2) Receiving alerts for desired content item. then register the content alert (3). — Content Alert • To show the details of the item, press [<]. The unit informs you when receiving the content •...
- Page 37 SiriusXM® Satellite Radio SiriusXM® Satellite Radio ❏ Activating content alerts Enter a new four-digit code (1), and then Setting reception restrictions confirm (2). For artists/songs/sports teams ❏ Setting the parental control You can limit access to SiriusXM channels, such as those with mature content.
- Page 38 SiriusXM® Satellite Radio SiriusXM® Satellite Radio Selecting the channels to lock—Parental Lock Repeat this step if you want to set the lock on • You can change the page to display more Channel multiple channels. items by pressing [J]/[K]. • To list all the channels, select [All Channels]. This parental control option allows you to pick the channels to be locked by the parental control To deactivate the parental lock for all locked...
-
Page 39: Other External Components
OTHER EXTERNAL COMPONENTS OTHER EXTERNAL COMPONENTS ❏ Starting playback Using external audio/video Using a rear view camera players—AV-IN Connect an external component to the • To connect a rear view camera, see page 64. AV-IN1 or iPod/AV-IN2 input terminal. • To use a rear view camera, a REVERSE lead When the operation buttons are (Page 64) connection is required. - Page 40 OTHER EXTERNAL COMPONENTS OTHER EXTERNAL COMPONENTS ❏ Displaying the picture from the rear ❏ Using the parking guidelines view camera You can display parking guidelines to enable easier parking when you shift the gear to the reverse (R) The rear view screen is displayed when you shift the position.
-
Page 41: Using An External Component Via Ads Adapter-Oem Features
OTHER EXTERNAL COMPONENTS OTHER EXTERNAL COMPONENTS Adjusting the parking guidelines Adjust the parking guidelines by selecting Using an external component via Adjust the parking guidelines according to the size mark (1), then adjusting the ADS adapter—OEM Features of the car, parking space and so on. position of the selected mark (2). -
Page 42: Bluetooth
BLUETOOTH BLUETOOTH Auto pairing Information for using Bluetooth® Connecting Bluetooth devices When <Auto Pairing> is set to [ON], iOS devices devices ❏ Registering a new Bluetooth device (such as iPhone) are automatically paired when connected via USB. (Page 49) When you connect a Bluetooth device to the unit for the first time, pair the unit and the device. -
Page 43: Bluetooth Settings
BLUETOOTH BLUETOOTH Pairing a Bluetooth device from the target device Change the PIN code. Select the unit (“DDX****”) on your using a PIN code (for Bluetooth 2.0) • If you wish to skip changing the PIN code, go Bluetooth device. Display the <Bluetooth Setup>... - Page 44 BLUETOOTH BLUETOOTH Pairing a Bluetooth device from this unit using a ❏ Deleting a registered Bluetooth device Select the device you want to connect (1), PIN code (for Bluetooth 2.0) then press [Connection] (2). Display the <Bluetooth Setup> screen. Display the <Bluetooth Setup> screen. (Page 43) (Page 43) Search for the available devices.
- Page 45 BLUETOOTH BLUETOOTH ❏ Adjusting the volume of calls/earpiece/ ❏ Adjusting the echo cancel level/ Using a Bluetooth mobile phone microphone reducing noise ❏ Receiving a call While talking... While talking... When a call comes in... • Call information is displayed if acquired. •...
- Page 46 BLUETOOTH BLUETOOTH ❏ Sending text during a call ❏ Making a call • You can display the <Bluetooth Setup> screen by pressing [ You can send text during a call using the DTMF (Dual Display the phone control screen. Tone Multi Frequency) function. * When the mobile phone is not compatible with Phone Book Access On the <TOP MENU>...
- Page 47 BLUETOOTH BLUETOOTH Voice dialing • To use the A to Z search in the phone book: • To display other phone numbers: When the phone book list is displayed, you can When the phone book list is displayed, you can •...
-
Page 48: Using The Bluetooth Audio Player
BLUETOOTH BLUETOOTH ❏ Presetting phone numbers Playback information Using the Bluetooth audio player 1 Playback status* You can preset up to 5 phone numbers. 2 Playing time* Display the phone control screen. • To register a new device, see page 42. 3 Tag data (current track title/artist name/album •... - Page 49 BLUETOOTH BLUETOOTH ❏ Setting items < Auto Pairing> • ON (Initial): Establishes Settings for Bluetooth devices pairing automatically with the <Paired Device Press [Enter] to show the list You can change various settings for using Bluetooth connected iOS device (such as List>...
-
Page 50: Settings
SETTINGS <Bluetooth>* Select this when the iPod/ c i l iPhone is connected via iPod/iPhone/Android Bluetooth. When selecting <USB + AV-IN> or <USB 1 Before using applications of iPod/iPhone/Android If you do not need to change the setting, Wire>, go to step 8. such as Pandora, iHeartRADIO, or AUPEO! select press [OK] to exit from the setup screen. -
Page 51: Sound Adjustment
SETTINGS SETTINGS • You can also display the <Equalizer> screen ❏ Setting the car type and speakers Sound adjustment by pressing and holding the volume knob Display the <Car Setting> screen. ❏ Using the sound equalization when <ATT Key Long Press> is set to [AUDIO] On the <TOP MENU>... - Page 52 SETTINGS SETTINGS ❏ Setting the speakers—speaker size and ❏ Setting the listening position Adjust the crossover frequency of the crossover frequency selected speaker. You can adjust the sound effects according to your listening position. Display the <Speaker Select> screen. Display the <Position> screen. On the <TOP MENU>...
-
Page 53: Adjustment For Video Playback
SETTINGS SETTINGS Adjusting the Digital Time Alignment (DTA) Determining the value for <Position DTA> Adjustment for video playback Make fine adjustments to the delay time of adjustment ❏ Adjusting the picture the speaker output to create a more suitable If you specify the distance from the center of the environment for your vehicle. - Page 54 SETTINGS SETTINGS ❏ Zooming the picture Adjust the picture. Select the aspect ratio. You can zoom the picture. Zooming is available only when discs are played back. Display the adjustment menu. <Bright> Adjusts the brightness. (−15 to +15) <Full> For 16:9 original pictures <Contrast>...
-
Page 55: Changing The Display Design
SETTINGS SETTINGS ❏ Storing your favorite image for the • The number of preset backgrounds and the Changing the display design designs available differ depending on the background You can change the background and panel color. model. You can set your favorite image stored on the Display the <User Customize>... -
Page 56: Customizing The
SETTINGS SETTINGS Customizing the <TOP MENU> Customizing the system settings screen ❏ Memorizing/recalling the settings You can arrange the items to display on the <TOP • You can memorize the settings changed in the MENU> screen. <Setup> menu and recall the memorized settings any time.Screen - Page 57 SETTINGS SETTINGS ❏ Locking the settings ❏ Adjusting the touch position You can lock the settings to prevent them from You can adjust the touch position on the touch being changed. panel if the position touched and the operation • is shown beside the settings that can be performed do not match.
-
Page 58: Setting Menu Items
SETTINGS SETTINGS Balance: Adjust the left and right speaker output <Car Setting>* Setting menu items balance. Select a car type and speaker location. (Page 51) ❏ Displaying the <Setup> menu screen • L6 to R6 (Initial: 0) • Car type: Off (Initial)/Compact/Full Size Car/ Press [J]/[K]/[H]/[I] or drag [ ] to adjust. - Page 59 SETTINGS SETTINGS ❏ <Display> setting screen <Screen Adjustment> ❏ <Input> setting screen Adjust the brightness and blackness of the screen. <Dimmer> <R-CAM Interrupt> Press [Enter] to display the setting screen, select • Auto (Initial): Dims the screen and button • ON: Displays the picture from the rear view [DIM ON] (dimmer on)/[DIM OFF] (dimmer off), illumination when you turn on the headlights.
- Page 60 SETTINGS SETTINGS ❏ <System> setting screen <Bluetooth Setup> <SI> Configure settings for using a Bluetooth device, Activate or deactivate the security function. <Language> such as connection and other general operations. (Page 4) Select the text language used for on-screen (Page 49) <Serial Number> information.
-
Page 61: Connection/Installation
CONNECTION/INSTALLATION CONNECTION/INSTALLATION • If your car’s ignition does not have an ACC • This unit has a cooling fan to decrease the Before installing the unit position, connect the ignition wires to a power internal temperature. Do not mount the unit V WARNING source that can be turned on and off with the in a place where the cooling fan of the unit is... -
Page 62: Installing The Unit
CONNECTION/INSTALLATION CONNECTION/INSTALLATION ❏ Installation procedure ❏ Installing the trim plate Installing the unit To prevent a short circuit, remove the key Attach the trim plate ( ❏ Installing the unit · from the ignition and disconnect the battery. Make the proper input and output wire connections for each unit. -
Page 63: Connecting Wires To Terminals
CONNECTION/INSTALLATION CONNECTION/INSTALLATION Connection ❏ Connecting wires to terminals Page 64 USB input terminal (1.0 m): Connect to the vehicle’s reverse lamp harness when Page 65 Page 64 using the optional rear view camera. Purple with white stripe (Reverse sensor wire) GPS antenna terminal: Page 65 Light green (Parking Connect to the vehicle’s parking... -
Page 64: Connecting External Components
CONNECTION/INSTALLATION CONNECTION/INSTALLATION ❏ Connecting an iPod/iPhone ❏ Connecting a USB device 1 AV-OUT/Video output (Yellow) 2 Rear view camera input (Yellow) iPod/iPhone (Lightning iPod/iPhone (30-pin USB device* 3 Audio Video input (AV-IN1)* connector models) connector models) 4 iPod/Audio Video input (iPod/AV-IN2)* (commercially available) (commercially available) (commercially available) - Page 65 CONNECTION/INSTALLATION CONNECTION/INSTALLATION ❏ Connecting microphone for Bluetooth ❏ Connecting the GPS antenna • Depending on the type of car, reception of the GPS satellite signals might not be possible with an Connect the microphone (7) to the MIC terminal. Connect the GPS antenna (8) to the GPS terminal. internal installation.
-
Page 66: Removing The Unit
CONNECTION/INSTALLATION CONNECTION/INSTALLATION ❏ Removing the unit Removing the unit Remove the trim plate. (See the left ❏ Removing the trim plate column.) Engage the catch pins on the extraction Insert the two extraction keys (4), then key (4) and remove the two locks on the pull them as illustrated so that the unit can lower part. -
Page 67: References
REFERENCES ❏ To keep discs clean Maintenance • Dirty discs may not play correctly. ❏ Caution on cleaning the unit extension code <.jpg>, <.jpeg>, <.bmp> or If a disc does become dirty, wipe it with a soft cloth <.png>. Do not use any solvent (for example, thinner, in a straight line from the center to the edge. -
Page 68: Disc Playback
REFERENCES REFERENCES ❏ Disc playback Unplayable discs • This unit can play back files recorded in VBR (variable bit rate). • Unplayable disc types and formats are as follows: Playable disc types • Files recorded in VBR have a discrepancy in –... - Page 69 USB device then reset this may not be performed correctly or as intended. In – JPEG/BMP/PNG/MPEG1/MPEG2/MP3/WMA/ unit and the USB device. this case, visit the following KENWOOD web site: WAV/AAC/FLAC/H.264/WMV (VC-1) • Operation and power supply may not work as <www.kenwood.com/cs/ce/ipod>...
-
Page 70: Error Message List
REFERENCES REFERENCES ❏ Language codes (for DVD/DVD-VR language selection) Error message list Afar Galician Maori Somali If an error occurs while using the unit, a message Abkhazian Guarani Macedonian Albanian appears. Take appropriate action according to the Afrikaans Gujarati Malayalam Serbian following message/remedy/cause list. - Page 71 REFERENCES REFERENCES “USB Device Error”: “Failed to save your thumb rating”: “SXM No Signal”: • The USB power voltage is abnormal. • Thumb-up/down is prohibited. • Make sure the SiriusXM Satellite Radio antenna is • Turn off and turn on the unit. mounted outside the vehicle.
-
Page 72: Troubleshooting
REFERENCES REFERENCES “SXM Subscription Updated – Press Enter to ❏ Discs While playing a track, sound is sometimes Continue”: interrupted. Recordable/Rewritable discs cannot be played • Your subscription has been updated. Press the • The tracks are not properly copied into the USB back. -
Page 73: Specifications
REFERENCES REFERENCES Videos cannot be played. Sound quality changes when receiving HD Radio The Bluetooth device does not detect the unit. stations. • Connect with USB Audio and Video cable • Search from the Bluetooth device again. KCA-iP202 (optional accessory) to iPod/iPhone •... -
Page 74: Bluetooth Section
❏ DVD player section ❏ Bluetooth section ❏ DSP section D/A Converter 24 bit Technology Bluetooth Ver 3.0 + EDR Graphics equalizer DDX6902S: Audio Decoder Linear PCM/Dolby Digital/MP3/ Frequency 2.402 GHz to 2.480 GHz WMA/AAC BAND 7 Band Output Power... - Page 75 United States and/or other countries. Preout Level Analog: 68 dB (MONO) • “Made for iPod,” and “Made for iPhone” mean DDX6902S: 5 V/10 kΩ Selectivity (±400 kHz) that an electronic accessory has been designed DDX6702S: 4 V/10 kΩ...
- Page 76 Bluetooth SIG, INDIRECT, INCIDENTAL, SPECIAL, EXEMPLARY, OR INCLUDING THAT RELATING TO PROMOTIONAL, Inc. and any use of such marks by JVC KENWOOD CONSEQUENTIAL DAMAGES (INCLUDING, BUT INTERNAL AND COMMERCIAL USES AND Corporation is under license. Other trademarks...