Table of Contents
Advertisement
Advertisement
Table of Contents

Related Manuals for Hyundai HYT140


Summary of Contents for Hyundai HYT140
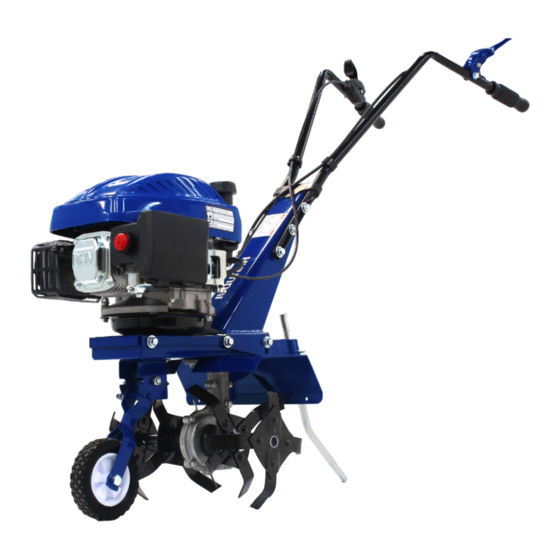
- Page 1 TILLER Model HYT140 User Manual...
-
Page 2: Carbon Monoxide Poisoning - Fuel Warning
BEFORE USE YOU MUST READ THIS MANUAL COMPLETELY – RETAIN FOR FUTURE USE Page 2... -
Page 3: Oil Warning
BEFORE STARTING MACHINE! The engine is shipped from the factory without oil. Fill with SAE 15W/40, API CH-4/CF/SJ/SL or higher grade lubricating oil for petrol engines, check oil level before starting engine. If you start engine without oil, the engine will be damaged beyond repair and will not be covered by warranty. ... -
Page 4: Table Of Contents
CONTENTS o’s Section Description Page N CARBON MONOXIDE POISONING – FUEL WARNING OIL WARNING 1. SAFETY 5 – 8 2. MACHINE PARTS 3. ASSEMBLY PROCEDURE 4. OPERATING PROCEDURES 10 – 14 5. MAINTENANCE 14 – 16 6. TROUBLESHOOTING 16 -17 7. -
Page 5: Safety
SAFETY. 1.1. The operator of the machine is responsible for and has a duty of care in making sure that the machine is operated safely and in accordance with the instructions in this user manual. Please note the following safety points 1.1.2. - Page 6 1.3. Carbon Monoxide. 1.3.1. Carbon monoxide is a colourless and odourless gas, inhaling this gas can cause death as well as serious long term health problems such as brain damage. 1.3.2. The symptoms of carbon monoxide poisoning can include the following; Headaches, dizziness, nausea, breathlessness, collapsing or loss of consciousness.
- Page 7 1.6. Machine safety. Continual and regular users should monitor closely the condition of their hands with regard to White finger disease or carpal tunnel syndrome. If you think you have been affected seek medical advice immediately. DO NOT modify the unit in any way. Only use the machine for the job for which it is intended.
-
Page 8: Machine Parts
1.6.19. If the machine comes into contact with big blocks, root or vine, the equipment will spring upwards or leap forwards. Stop machine and remove HT lead before removing any blockages 1.6.20. Avoid pulling the tiller whilst the engine is running. 1.6.21. -
Page 9: Assembly Procedure
3. ASSEMBLY PROCEDURE 3.1. Remove machine from packaging. 3.1.1. Dispose packaging in accordance with local recycling regulations. (Check that the machine is undamaged and in working order before disposing of packaging – We recommend that you retain packaging to use should you wish to return the machine for servicing). 3.2. -
Page 10: Operating Procedures
3.4.3. Attach the depth bar (1) onto its support bracket (2) and fix in place with the supplied ‘B’ Clip (4). 3.4.4. Adjust the wheel assembly (3) so that it helps to support the machine when moving tiller. N.B. Only adjust wheel when rotating blades are stopped. - Page 11 4.4. Drag bar (Rotavating spur) adjustment. 4.4.1. Pull B-shaped clip connecting piece outwards, glide the resistance bar to the depth needed, reinsert the connecting piece B. The drag bar (Rotavating spur), the device forward motion is impeded by means of the spur. The desired rotavating depth can be achieved by pushing the spur into the soils at different levels.
- Page 12 4.6.1. The handle will engage the pinch roller against the drive belt, pulling it tight on the drive shaft. The clutch needs to be set correctly so that the drive is removed from the revolving blades once the dead-man’s handle is released. 4.6.2.
- Page 13 4.7.2.4. Firstly pull the recoil starter gently, then pull sharply, do not let go of recoil starter handle, release slowly and repeat until engine starts. When starting warm engine, turn throttle choke lever to same position as in 4.7.2.3 4.7.2.5. above.
-
Page 14: Maintenance
For normal operating angle push the handles downwards, so that the front part of the machine rise 6 to 8". 4.7.4.1. The required final depth of tilling may only be reached by increasing depth over several passes. 4.7.4.2. During the first pass, the you should keep the depth shallow 4.7.4.3. - Page 15 5.2. Air Filter. 5.2.1. Your machine will run more efficiently if you clean the air filter after every 8 working hours. 5.2.2. Remove filter, check for contamination and clean as required. 5.2.3. Clean filter by blowing air through it using an air gun not exceeding 30psi. 5.2.4.
-
Page 16: Troubleshooting
Loose spark plugs can overheat and damage engine. 5.5. The Tiller Blade. 5.5.1. The blade is made of pressed steel, in order to obtain a good cut sharpen the blade frequently, around every 25 hours of work. 5.5.2. Make sure that the blade is always well balanced. 5.5.3. -
Page 17: Specification
Drain tank/carburettor and replace Incorrect/Stale fuel. with fresh unleaded petrol. Clutch does not Incorrect setting. Adjust clutch setting. release. 7. SPECIFICATION Model HYT140 Dry weight 31 Kg Engine type Hyundai Drive type Self-propelled Displacement 139 cc Engine Oil capacity 1.0 Litre... -
Page 18: Declarations Of Conformity
10. DECLARATIONS OF CONFORMITY 10.1. Genpower Ltd confirms that these Hyundai products conform to the following CE Directives; 2006/42/EC Machinery Directive 2004/108/EC EMC Directive 2000/14/EC, Amended by 2005/88/EC Noise Emissions Directive 97/68/EC NRMM Emissions Directive Page 18... - Page 19 Page 19...
- Page 20 GENPOWER LTD Isaac Way, London Road Pembroke Dock, UNITED KINGDOM, SA72 4RW T: +44 (0) 1646 687 880 F: +44 (0) 1646 686 198 e: info@hyundaipowerequipment.co.uk www.hyundaipowerequipment.co.uk Page 20...