Ricoh MP 2001L Operating Instructions Manual
Hide thumbs
Also See for MP 2001L:
- Service manual (976 pages) ,
- Operating instructions manual (120 pages) ,
- Operating instructions manual (120 pages)
Table of Contents
Advertisement
Read this manual carefully before you use this machine. For safe and correct use, be sure to read the Safety Information in "Copy Reference" before
using the machine.
General Settings Guide
1
Getting Started
2
Combined Function Operations
3
User Tools (System Settings)
4
Troubleshooting
5
Other Functions
6
Security
7
Specifications
Operating Instructions
Advertisement
Table of Contents

Related Manuals for Ricoh MP 2001L


Summary of Contents for Ricoh MP 2001L
-
Page 1: Operating Instructions
Operating Instructions General Settings Guide Getting Started Combined Function Operations User Tools (System Settings) Troubleshooting Other Functions Security Specifications Read this manual carefully before you use this machine. For safe and correct use, be sure to read the Safety Information in “Copy Reference” before using the machine. - Page 2 The model names of the machines do not appear in the following pages. Check the type of your machine before reading this manual. (For details, see page 4 “Machine Types”.) . Type 1: MP 2001L . Type 2: MP 2501L Certain types might not be available in some countries.
-
Page 3: Table Of Contents
TABLE OF CONTENTS Manuals for This Machine..........................3 Machine Types..............................4 Trademarks................................5 How to Read This Manual..........................6 Symbols................................6 Name of Major Option..........................6 ENERGY STAR Program............................ 8 Energy Saving Functions............................ 9 1. Getting Started Guide to Components............................11 Options................................14 External Options............................14 Control Panel.............................. - Page 4 Deleting a User Code..........................36 Displaying the Counter for Each User Code..................... 37 Printing the Counter for Each User Code....................37 Clearing the Counter........................... 38 4. Troubleshooting If Your Machine Does Not Operate As You Want..................39 Clearing Misfeeds............................41 Changing the Paper Size..........................44 Precautions for Changing the Paper Size....................
-
Page 5: Manuals For This Machine
Manuals for This Machine The following manuals describe the operational procedures of this machine. For particular functions, see the relevant parts of the manual. • Manuals provided are specific to machine type. ® ® ® • Adobe Acrobat Reader /Adobe Reader must be installed in order to view the manuals as PDF files. -
Page 6: Machine Types
Machine Types This machine comes in two models which vary by copy speed. Type 1 Type 2 20 copies/minute 25 copies/minute Copy speed (A4 , 8 " × 11" ) (A4 , 8 " × 11" ) -
Page 7: Trademarks
Trademarks Microsoft, Windows, and Windows Server are either registered trademarks or trademarks of Microsoft Corporation in the United States and/or other countries. Adobe, Acrobat, and Reader are either registered trademarks or trademarks of Adobe Systems Incorporated in the United States and/or other countries. The proper names of the Windows operating systems are as follows: •... -
Page 8: How To Read This Manual
How to Read This Manual Symbols This manual uses the following symbols: This symbol indicates a potentially hazardous situation that might result in death or serious injury when you misuse the machine without following the instructions under this symbol. Be sure to read the instructions, all of which are described in the Safety Information section. - Page 9 • Auto Document Feeder...
-
Page 10: Energy Star Program
ENERGY STAR Program ® ENERGY STAR Program Requirements for Imaging Equipment ® The ENERGY STAR Program Requirements for Imaging Equipment encourage energy conservation by promoting energy efficient computers and other office equipment. The program backs the development and dissemination of products that feature energy saving functions. -
Page 11: Energy Saving Functions
Energy Saving Functions To reduce its power consumption, this machine has the following functions: Sleep Mode • If this machine remains idle for a specified period, it automatically enters Sleep Mode to reduce its electrical consumption. • The default delay time the machine waits before entering Sleep Mode is 1 minute. This default time can be changed. -
Page 13: Getting Started
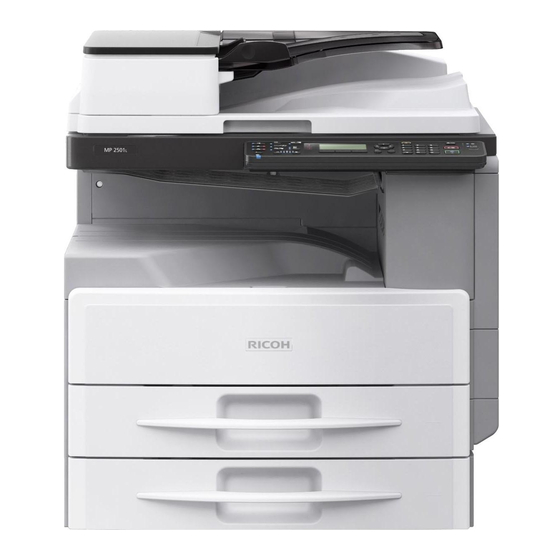
1. Getting Started Guide to Components CUA015 1. Exposure glass cover (optional) or ADF (optional) See page 14 "External Options" (The illustration shows the ADF.) 2. Exposure glass Place originals here face down. 3. Internal tray Copied or printed paper is delivered here. 4. - Page 14 1. Getting Started 6. Main power indicator Lights when the main power switch is turned on, and goes off when the switch is turned off. 7. On indicator The On indicator lights when the operation switch is turned on. 8. Operation switch Press to turn the power on.
- Page 15 Guide to Components CUA024...
-
Page 16: Options
1. Getting Started Options External Options CUA003 1. Exposure glass cover Lower this cover over originals. 2. ADF Place stacks of originals here. They will feed in automatically. This document feeder can be used for two-sided originals. 3. Paper tray unit (1-tray type) Holds 500 sheets. -
Page 17: Control Panel
Control Panel Control Panel This illustration shows the control panel of the machine with options fully installed. 17 18 CUA016 1. [Printer] key Press to activate the printer function. 2. [Scanner] key Press to activate the scanner function. 3. [Copy] key Press to activate the copy function. - Page 18 1. Getting Started 9. [User Tools/Counter] key • User Tools: Press to change default or operation parameters according to requirement. See page 25 "Accessing User Tools (System Settings)". • Counter: Press to check or print the counter value. See page 47 "Other Functions". 10.
-
Page 19: Display
Control Panel Clears an entered numeric value. • Stop: Stops a job in progress, such as scanning or printing. Display The display panel shows machine status, error messages, and function menus. • A force or impact of more than 30 N (about 3 kgf) will damage the display. •... -
Page 20: Common Key Operations
1. Getting Started 3. [OK] key Press to set a selected item or an entered numeric value. 4. Scroll keys Press to move the cursor in each direction, step by step. When the [ ], [ ], [ ], or [ ] key appears in this manual, press the scroll key of the same direction. Common key operations The following keys are common to all screens: Key list... -
Page 21: Combined Function Operations
2. Combined Function Operations Changing Modes • You cannot switch modes in any of the following situations: • During immediate transmission • When accessing User Tools • While scanning an original • The copying screen is displayed as default when the power is turned on. You can change this default setting. -
Page 22: Multi-Access
2. Combined Function Operations Multi-Access You can carry out another job using a different function while the current job is being performed. Performing multiple functions simultaneously like this is called "Multi-accessing". This allows you to handle jobs efficiently, regardless of how the machine is being used. For example: •... - Page 23 Multi-Access *1 You can operate the functions simultaneously if the preceding scanning jobs are complete and multiple pages are being copied. *2 Printing using copier or printer functions depends on the print priority settings. You cannot use the copy function when using the control panel on the printer screen (you cannot change the function). *3 You cannot display the printer screen.
- Page 24 2. Combined Function Operations...
-
Page 25: User Tools (System Settings)
3. User Tools (System Settings) User Tools Menu (System Settings) • For details about parallel interface, see Printer/Scanner Reference. General Features (See page 27 "General Features".) Default Panel Key Sound Copy Count Display Function Priority Copier Print Priority Display mode Display Contrast Center Key Repeat... - Page 26 3. User Tools (System Settings) Timer Settings (See page 29 "Timer Settings".) Default Sleep Mode 1 min. Energy Saver 1 min. System Auto Reset Timer On, 60 sec. Copier Auto Reset Timer On, 60 sec. Administrator Tools (See page 30 "Administrator Tools".) Default User Code Man.:Copier Copier...
-
Page 27: Accessing User Tools (System Settings)
Accessing User Tools (System Settings) Accessing User Tools (System Settings) This section is for administrators in charge of this machine. User Tools allow you to change or set defaults. • Operations for system settings differ from normal operations. Always quit User Tools when you have finished. -
Page 28: Quitting User Tools
3. User Tools (System Settings) Select the menu using the [ ] or [ ] key, and then press the [OK] key. • page 23 "User Tools Menu (System Settings)" Select the item using the [ ] or [ ] key, and then press the [OK] key. Change settings by following instructions on the display, and then press the [OK] key. -
Page 29: Settings You Can Change With User Tools
Settings You Can Change with User Tools Settings You Can Change with User Tools • To access User Tools, see page 25 "Accessing User Tools (System Settings)". General Features Panel Key Sound The beeper (key tone) sounds when a key is pressed. •... -
Page 30: Tray Paper Settings
3. User Tools (System Settings) • Default: On Measurement Unit You can switch the measurement between "mm" and "inch". • Default: • Metric version: mm • Inch version: inch Tray Paper Settings Paper Size:Tray 1–4 Select the size of the paper loaded in the paper tray. •... -
Page 31: Timer Settings
Settings You Can Change with User Tools • Default: Auto Detect • page 44 "Changing the Paper Size" Paper Type:Bypass Tray Set the display so you can see what type of paper is loaded in the bypass tray. The paper types you can set for the bypass tray are as follows: recycled paper, special paper, color paper, letterhead, prepunched paper, label paper, bond paper, thick paper, OHP, cardstock •... -
Page 32: Administrator Tools
3. User Tools (System Settings) Energy Saver Set the amount of time the machine waits before switching the panel off after a job is finished. • Default: 1 min. • The time can be set from 1 to 240 minutes, using the number keys. •... - Page 33 Settings You Can Change with User Tools • By using [Auto Program] for the printer, you can keep a print log for each user code entered from the driver. Key Counter Management Use the key counter to specify whether users are restricted or not. •...
- Page 34 3. User Tools (System Settings) Press the [User Tools/Counter] key. CUA023 Select [System Settings] using the [ ] or [ ] key, and then press the [OK] key. Select [Administrator Tools] using the [ ] or [ ] key, and then press the [OK] key. Select [Display/Print Counter] using the [ ] or [ ] key, and then press the [OK] key.
- Page 35 Settings You Can Change with User Tools Press the [Start] key. Press the [User Tools/Counter] key. Counter per User Code Allows you to view and print the numbers of prints accessed with user codes, and to set those values to 0. •...
-
Page 36: User Code
3. User Tools (System Settings) User Code Register user codes to restrict copier functions to certain users, and check on their use of copier functions: Registering a New User Code Press the [User Tools/Counter] key. CUA023 Select [System Settings] using the [ ] or [ ] key, and then press the [OK] key. Select [Administrator Tools] using the [ ] or [ ] key, and then press the [OK] key. -
Page 37: Changing A User Code
User Code Select [Program] using the [ ] or [ ] key, and then press the [OK] key. Enter the user code using the number keys, and then press the [OK] or [ ] key. The "Programmed" message appears, and then the "User Code" display returns. Press the [User Tools/Counter] key. -
Page 38: Deleting A User Code
3. User Tools (System Settings) Enter the new user code using the number keys, and then press the [OK] or [ ] key. The "Programmed" message appears, and then the "User Code" display returns. Press the [User Tools/Counter] key. Deleting a User Code •... -
Page 39: Displaying The Counter For Each User Code
User Code Enter the registered user code you want to delete using the number keys, and then press the [OK] or [ ] key. • When you select the user code from the User Code List, press [List]. Select the user codes you want to delete using the [ ] key, and then press the [OK] key. -
Page 40: Clearing The Counter
3. User Tools (System Settings) Press the [User Tools/Counter] key. Select [System Settings] using the [ ] or [ ] key, and then press the [OK] key. Select [Administrator Tools] using the [ ] or [ ] key, and then press the [OK] key. Select [Counter per User Code] using the [ ] or [ ] key, and then press the [OK] key. -
Page 41: Troubleshooting
4. Troubleshooting If Your Machine Does Not Operate As You Want The following chart gives explanations of common problems and messages. If other messages appear, follow the instructions displayed. • For further "Troubleshooting", refer to the other manuals for this machine. See page 3 "Manuals for This Machine". - Page 42 4. Troubleshooting Problem Causes Solutions Misfeeds occur frequently. The tray's side fences may not Check the side fences are be locked. locked. page 44 "Changing the Paper Size". The tray's end fence may not be Check the end fence is set set properly.
-
Page 43: Clearing Misfeeds
Clearing Misfeeds Clearing Misfeeds CUA020 • Some of this machine's internal components get very hot. For this reason, take care when removing misfed paper. Not doing so could result in burns. • When removing jammed paper, make sure not to trap or injure your fingers. •... -
Page 44: When Y Is Displayed
4. Troubleshooting When A is displayed (Type 1) When A is displayed (Type 2) Open the right cover Remove the misfed Open the right cover Remove the misfed of the machine. paper. of the machine. paper. Lift up the cover in Lift up the cover in front of the transfer front of the transfer... -
Page 45: When P Is Displayed
Clearing Misfeeds When P is displayed Open the ADF cover. Remove the misfed Remove the misfed originals. originals. If you cannot Close the ADF cover. Open the ADF. remover the misfed originals, open the ADF external cover, and then remove the misfed originals. -
Page 46: Changing The Paper Size
4. Troubleshooting Changing the Paper Size Precautions for Changing the Paper Size • When loading paper, take care not to trap or injure your fingers. • Do not stack paper over the limit mark. • After changing the paper size, be sure to specify the appropriate paper size in the User Tools menu. - Page 47 Changing the Paper Size Check that paper in the paper tray is not being used, and then pull the tray carefully out until it stops. CUA008 Remove paper if loaded. Release the lock on the side fence. CUA009 While pressing down the release lever of the side fence, slide the side fences outward. CUA010...
- Page 48 4. Troubleshooting While pinching the release lever of the end fence, slide the end fence outward. CUA011 Square the paper and load it print side up. Do not stack paper over the limit mark. CUA012 Align the back and side fences gently against the paper you loaded. CUA013 Re-lock the side fences.
-
Page 49: Other Functions
5. Other Functions Other Functions Displaying the Total Counter You can display the total counter value used for all functions. Press the [User Tools/Counter] key. CUA023 Select [Counter] using the [ ] or [ ] key, and then press the [OK] key. To print the counter list, press [Print]. -
Page 50: Changing The Language
5. Other Functions Changing the Language You can change the language used on the display. English is set as default. Press the [User Tools/Counter] key. CUA023 Select [Language] using the [ ] or [ ] key, and then press the [OK] key. Select the language using the [ ] or [ ] key, and then press the [OK] key. -
Page 51: Security
6. Security Security Confidential information is always at risk of being copied without permission or subject to unauthorized access through the network. To protect documents from such intrusion, not only can passwords be set, but also the Extended Security function can be used to strengthen security. For those who require increased document protection, we recommend the Extended Security function. -
Page 52: Operating Environment And Notes
6. Security Operating Environment and Notes Security for this machine is assured on the premises that the machine is used under the following conditions: Operating Environment • The condition of the machine is normal. (For example, it is not damaged, modified, or lacking components.) •... -
Page 53: Specifications
7. Specifications Main Unit Configuration: Desktop Photosensitivity type: OPC drum Original scanning: One-dimensional solid scanning system through CIS Copy process: Laser beam scanning and dry electrostatic transfer system Development: Dry two-component magnetic brush development system Fusing: Heating roll pressure system Resolution: •... - Page 54 7. Specifications Vertical: 90–297 mm, 3.55"–11.69" Horizontal: 148–600 mm, 5.83"–23.62" Copy paper weight: • Paper trays (Standard size): 60–105 g/m , 16–28 lb. • Bypass tray: 52–162 g/m , 14–43 lb. Duplex • Paper size: A3 , B4 JIS , A4 , B5 JIS , A5 , 11"...
- Page 55 Main Unit Metric version Inch version Reduction Zoom: From 50% to 200% in 1% steps. Continuous copying count: 1–99 copies Copy paper capacity: Type 1: • Tray 1: 250 sheets (80 g/m , 20 lb.) • Bypass tray: 100 sheets (80 g/m , 20 lb.) Type 2: •...
- Page 56 7. Specifications Noise Emission: • Sound power level • Main unit only Type 1 Type 2 Stand-by 40 dB (A) 40 dB (A) Copying 63.0 dB (A) 64.8 dB (A) • Complete system Type 1 Type 2 Stand-by 40 dB (A) 40 dB (A) Copying 67.0 dB (A)
-
Page 57: Options
Options Options Exposure Glass Cover Lower this over originals. Auto Document Feeder (ADF) Original size: • A3 –A5 • 11" × 17" –5 " × 8 " Original weight: • One-sided originals: 40–128 g/m (11–34 lb.) • Two-sided originals: 52–105 g/m (14–28 lb.) (64–105 g/m , 17–28 lb. -
Page 58: Paper Tray Unit (2-Tray Type)
7. Specifications Maximum power consumption: 15 W or less (power is supplied from the main frame.) Paper capacity: 500 sheets (80 g/m , 20 lb.) Dimensions (W × D × H): 553 × 548.5 × 137 mm, 21.8" × 21.6" × 5.4" Weight: 12 kg (26 lb.) or less •... -
Page 59: Copy Paper
Copy Paper Copy Paper Recommended Paper Sizes and Types The following limitations apply to each tray: Paper Paper size Paper weight capacity Paper tray Standard Size A3 , B4 JIS , A4 , B5 JIS 60–105 250 sheets 1 (Type 1) A5 , 11"... - Page 60 7. Specifications Paper Paper size Paper weight capacity Paper tray Standard Size A3 , B4 JIS , A4 , B5 JIS 60–105 500 sheets unit A5 , 11" × 17" , 8 " × 14" , ,16– (optional) " × 13" , 8 "...
- Page 61 Copy Paper Paper Paper size Paper weight capacity A3 , B4 JIS 10 sheets , B5 JIS , A5 , B6 JIS 52–162 , 14– 11" × 17" , 8 " × 14" , 8 " 100 sheets 43 lb. ×...
- Page 62 7. Specifications Paper Paper size Paper weight capacity OHP transparencies (A4 , 8 " × 10 sheets 11" ) Translucent paper (A3 , B4 JIS , 10 sheets , B5 JIS Adhesive labels (B4 JIS , A4 ) 1 sheet Envelope (C5 Env , C6 Env , DL Env , 4 "...
-
Page 63: Unusable Paper
Copy Paper Auto Tray switching. This saves interrupting a copy run to replenish paper even when making a large number of copies. You can cancel this setting. • To add paper, see Copy Reference. • To change the paper size, see page 44 "Changing the Paper Size". Unusable Paper •... -
Page 64: Paper Storage
7. Specifications Paper Storage • When storing paper, the following precautions should always be followed: • Do not store paper where it will be exposed to direct sunlight. • Avoid storing paper in humid areas (humidity: 70% or less). • Store on a flat surface. •... -
Page 65: Index
INDEX Accessing User Tools..........For administrator............ ADF.............. For user..............6, 14, 55 Administrator Code..........Front cover............. Administrator Tools..........Function Priority............. AOF (Always On)..........Auto Document Feeder........... General Features........... Guide to components..........Bypass tray............. If your machine does not operate as you want.. Changing a user code.......... - Page 66 Paper tray unit............Ppr Tray Priority Printer............Paper tray unit (1-tray type)......Print Priority................. 14, 55 Program/Change User Code.......... Paper tray unit (2-tray type)......14, 56 Sleep Mode............... Paper Type Bypass Tray........System Auto Reset Timer............ Ppr Tray Priority Printer.......... Timer Settings..............
- Page 67 The meanings of the symbols for the switches on this machine are as follows: means POWER ON. means POWER OFF. means STAND BY. © 2012...
- Page 68 D161-7504...