Advertisement
Quick Links
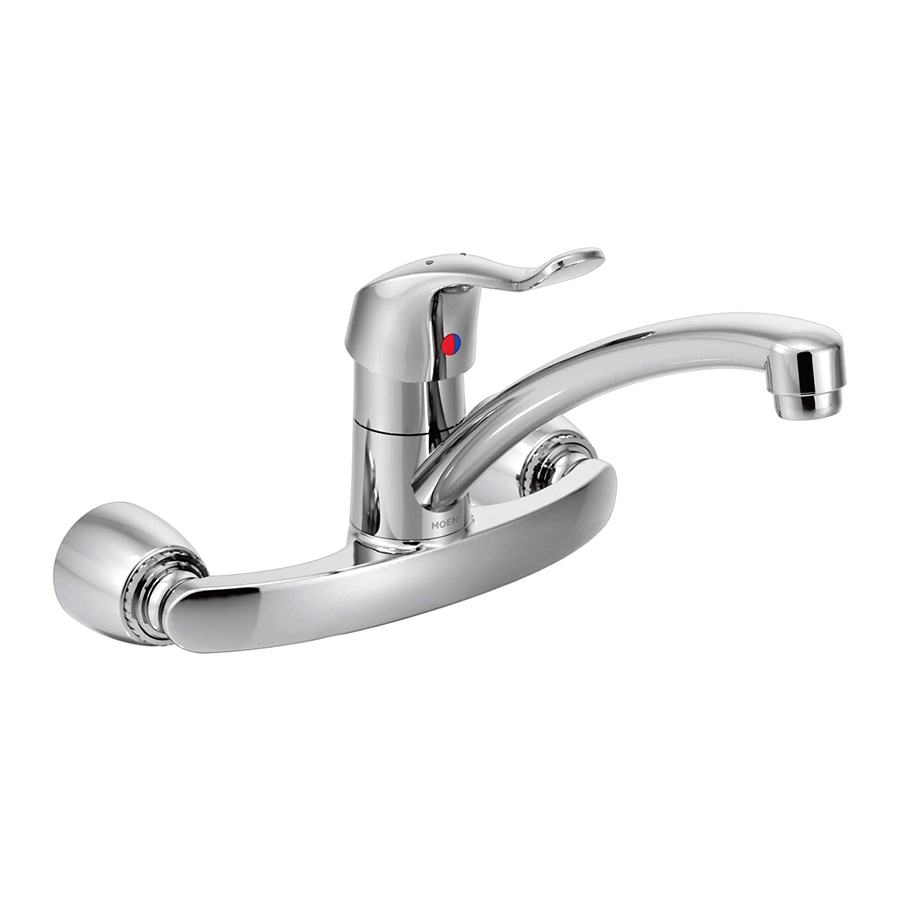
KITCHEN WALL MOUNT FAUCETS
Measurements
1/2"
1/2" VERTICAL
ADJUSTMENT
2-1/16"
CAUTION:
Before turning water on during either rough-in or trim-out, make sure that cartridge retainer clip is in place. The
cartridge and retainer clip were properly installed and tested before leaving the factory. Although it is unlikely, it
is nevertheless possible that through the handling of the valve by any number of persons the retainer clip may not
be properly installed. This should be carefully checked at time of rough-in and trim-out. If the retainer clip is not
properly installed, water pressure could force the cartridge out of the casting. Personal injury or water damage to
the premises could result.
®
Models 8713, 8714
ECCENTRICS
8" CENTERS
ADJUST FROM
7-1/2" TO 8-1/2"
Complies with ASME A112.18.1M and CSA B125
Always turn water off before disassembling the valve. Open valve handle to
alleviate water pressure to insure that complete water shut-off has been
accomplished.
INSTALLATION INSTRUCTIONS
THESE INSTRUCTIONS MUST BE
MT149A
LEFT WITH HOMEOWNER
9" SPOUT (MODEL 7400, 8713)
12" SPOUT (MODEL 8714)
7" NOMINAL
OPEN POSITION
CLIP
EAR
Advertisement

Related Manuals for Moen 8713


Summary of Contents for Moen 8713
-
Page 1: Installation Instructions
Personal injury or water damage to the premises could result. ® INSTALLATION INSTRUCTIONS Models 8713, 8714 Complies with ASME A112.18.1M and CSA B125 MT149A THESE INSTRUCTIONS MUST BE LEFT WITH HOMEOWNER 9" SPOUT (MODEL 7400, 8713) 12" SPOUT (MODEL 8714) 7" NOMINAL OPEN POSITION CLIP... - Page 2 Installation 1. Apply pipe joint compound or thread seal tape on the supply threads. 2. Screw eccentric assembly on the supply threads. 3. With escutcheon nut and escutcheon on valve casting, thread eccentric assembly onto valve threads making sure seal is in place as illustrated. Tighten by using wrench on flats of eccentrric assembly. 4.
- Page 3 Reassembly 1. With cartridge stem UP, insert cartridge with ears aligned front to back (illustra- tion 4). 2. Push the cartridge down by the ears (Illustration 5) until the top of the ears are flush with the top of the body. 3.
-
Page 4: Consumer Information
• If you are concerned about lead in your water, have your water tested by a certified laboratory in your area. Moen Incorporated 25300 Al Moen Drive, North Olmsted, OH 44070-8022, U.S.A. MT149A SEP 95 HELPLINE:...