
Related Manuals for Kohler 18TRES


Summary of Contents for Kohler 18TRES
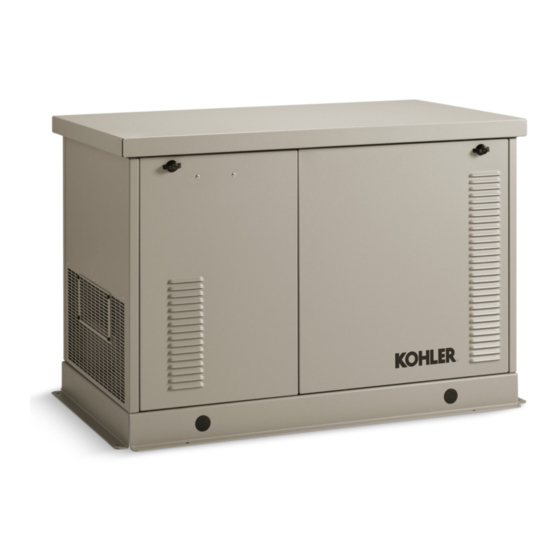
- Page 1 Installation Residential/Commercial Generator Sets Models: 8.5/12/17/18RES 12/18TRES Controller: Advanced Digital Control ADC-RES TP-6514 9/09e...
-
Page 2: Product Identification Information
California Proposition 65 WARNING Engine exhaust from this product contains chemicals known to the State of California to cause cancer, birth defects, or other reproductive harm. Product Identification Information Generator Set Identification Numbers Engine Identification Record the product identification numbers from the Record the product identification information from the generator set nameplate(s). -
Page 3: Table Of Contents
Table of Contents Product Identification Information ............Safety Precautions and Instructions . - Page 4 Notes TP-6514 9/09...
-
Page 5: Safety Precautions And Instructions
Safety Precautions and Instructions IMPORTANT SAFETY INSTRUCTIONS. Accidental Starting WARNING Electromechanical equipment, including generator sets, transfer WARNING switches, switchgear, and accessories, can cause bodily harm and pose life-threatening danger when improperly installed, operated, or maintained. To prevent accidents be Explosion. aware of potential dangers and act Can cause severe injury or death. -
Page 6: Exhaust System
Battery gases. Explosion can cause Servicing the fuel system. A flash Carbon monoxide symptoms. severe injury or death. Battery gases fire can cause severe injury or death. Carbon monoxide can cause severe can cause an explosion. Do not smoke Do not smoke or permit flames or nausea, fainting, or death. - Page 7 Hazardous Noise Short circuits. Hazardous CAUTION voltage/current can cause severe injury or death. Short circuits can CAUTION cause bodily injury and/or equipment damage. Do not contact electrical connections with tools or jewelry while making adjustments repairs. Remove all jewelry before servicing the Welding the generator set.
-
Page 8: Hot Parts
Hot Parts Notice NOTICE WARNING Canadian installations only. standby service connect the output of the generator set to a suitably rated transfer switch in accordance with Canadian Electrical Code, Part 1. Hot engine and exhaust system. Can cause severe injury or death. Do not work on the generator set until it cools. -
Page 9: Introduction
Information in this publication represents data available Residential/Commercial model generator sets listed on at the time of print. Kohler Co. reserves the right to the front cover. Refer to TP-6515, Operation Manual, for change this publication and the products represented generator set operation and maintenance instructions. - Page 10 Control detail See control detail ADV-7341A-B 1. Muffler 16. Oil drain valve 2. Oil check 17. Exhaust 3. Oil fill 18. Relay board location (optional) 4. Air cleaner 19. Carburetor heater access opening 5. Spark plug locations (both sides) 20. LP fuel orifice location (inside hose fitting) 6.
- Page 11 GM66010 1. Emergency stop button 2. Field-connection terminal block and circuit breakers 3. Cable inlet area Figure 3 Additional Components, TRES (3-phase) Models TP-6514 9/09...
-
Page 12: Service Assistance
Visit the Kohler Power Systems website at Phone: (86) 21 6288 0500 KohlerPower.com. Fax: (86) 21 6288 0550 Look at the labels and stickers on your Kohler product India, Bangladesh, Sri Lanka or review the appropriate literature or documents India Regional Office included with the product. -
Page 13: Section 1 Installation
Section 1 Installation 1.1 General 1.3 Generator Set Inspection Have an authorized distributor/dealer install the Complete a thorough inspection of the generator set. generator set outdoors according to the instructions in Check for the following: this manual. Do not install this generator set indoors. 1. - Page 14 Figure 1-2 Generator Set Mounting Details and Dimensions, 8.5RES, 12RES, and 12TRES (3-phase), ADV-7466, Sheet 1 Section 1 Installation TP-6514 9/09...
- Page 15 Figure 1-3 Generator Set Clearances, 8.5RES, 12RES, and 12TRES (3-phase), ADV-7466, Sheet 2 TP-6514 9/09 Section 1 Installation...
- Page 16 Figure 1-4 High Wind Mounting Detail, 8.5RES, 12RES, and 12TRES (3-phase), ADV-7466, Sheet 3 Section 1 Installation TP-6514 9/09...
- Page 17 Figure 1-5 Generator Set Mounting Details and Dimensions, 17RES and 18RES, ADV-7341-B, Sheet 1 TP-6514 9/09 Section 1 Installation...
- Page 18 Figure 1-6 Generator Set Clearances, 17RES and 18RES, ADV-7341-B, Sheet 2 Section 1 Installation TP-6514 9/09...
- Page 19 Figure 1-7 Generator Set Mounting Details and Dimensions, 18TRES (3-phase), ADV-7713, Sheet 1 TP-6514 9/09 Section 1 Installation...
- Page 20 Figure 1-8 Generator Set Clearances, 18TRES (3-phase), ADV-7713, Sheet 2 Section 1 Installation TP-6514 9/09...
-
Page 21: Exhaust Requirements
1.4.1 Exhaust Requirements 1.4.2 Air Requirements The generator set requires correct air flow for cooling WARNING and combustion. The inlet and outlet openings in the sound enclosure provide the cooling and combustion air. Figure 1-10 shows the locations of the cooling air intake and exhaust vents. -
Page 22: Power Supply
1.5 Power Supply 1.6 Fuel Requirements Power must be supplied from a source that is GFCI The generator set operates using natural gas or LP protected to the generator set location for the battery vapor fuel. The generator set is EPA-certified for both charger and the optional accessories shown in natural gas and LP vapor fuels. - Page 23 Fuel Consumption, Fuel Consumption, at % load, m /hr. (cfh) at % load, m /hr. (cfh) 60 Hz 50 Hz 60 Hz 50 Hz Natural Gas, m /hr. (cfh) Natural Gas, m /hr. (cfh) 100% 6.9 (242) 5.7 (203) 100% 3.7 (132) 3.3 (118) 5.8 (204)
-
Page 24: Fuel Pipe Size
1.6.2 Fuel Pipe Size 1.7 Fuel Conversion Ensure that the natural gas pipe size and length meet The multi-fuel system allows conversion from natural the specifications in Figure 1-18, Figure 1-19, or gas to LP vapor (or vice-versa) in the field while Figure 1-20. -
Page 25: Fuel Conversion, 8.5/12 Kw
1.7.1 Fuel Conversion, 8.5/12 kW 4. Turn off the fuel supply. Two fuel connections on the fuel block allow field- 5. Remove the hose clamp and fuel hose from the conversion between natural gas and LP vapor. The fuel hose fitting in the fuel block. See Figure 1-22. metering valves are factory-set and sealed to comply with applicable emission standards and to provide the best possible hot and cold starting. -
Page 26: Fuel Conversion, 17/18 Kw
10. For the 12 kW: Disconnect the DSAI leads for LP. 1.7.2 Fuel Conversion, 17/18 kW See Figure 1-23 and Figure 1-24. For LP vapor fuel, an orifice is used in the fuel line. The unit is typically shipped set up for natural gas, with the Fuel DSAI Leads loose orifice tied near the fuel line. - Page 27 Procedure to Convert from NG to LP, 17/18 kW 1. Place the generator set master switch in the OFF position. 2. Disconnect the power to the battery charger. 3. Disconnect the generator set engine starting battery, negative (--) lead first. 4.
-
Page 28: Electrical Connections
1.8 Electrical Connections Refer to the transfer switch specifications and the decal below the terminal block for the cable size range for each connection. Route AC leads through flexible WARNING conduit. Ensure that the leads and conduit do not interfere with the operation of the generator set or obstruct the service areas. - Page 29 4. Connect the engine start leads from the automatic transfer switch or remote start switch to terminals 3 and 4 on the terminal block. See Section 1.8.2. 5. The terminal block includes 120 VAC receptacles for the battery charger and optional carburetor heater.
-
Page 30: Remote Start Connection
1.8.2 Remote Start Connection type of transfer switch used in the application determine the grounding of the neutral at the generator. NEC 2002 Connect terminals 3 and 4 to the automatic transfer Section 250.20 is one example that has a very good switch’s engine start terminals or to an optional remote explanation of the neutral grounding requirements for start/stop switch. -
Page 31: Battery
1.9 Battery Battery gases. Explosion can cause severe injury or death. Battery gases can cause an explosion. Do not smoke or permit flames or sparks to occur near a battery at any time, particularly when it is charging. Do not dispose of a battery in a WARNING fire. -
Page 32: Accessories
Figure 1-33 shows the location of the engine starting If there are no accessories, proceed to Section 1.11, battery. Standard battery cables provide easy Prestart Installation Check. connection to the battery. Use the following procedure to install and connect the battery. 1.10.1 Common Fault and Auxiliary Run Relay Board The optional relay board provides two additional relays... -
Page 33: Carburetor Heater
Connect customer equipment to terminal strip TB1 on 1.10.2 Carburetor Heater the relay board, following the markings on the board. An optional carburetor heater is recommended for Connect to each relay’s normally open or normally improved cold starting in locations where the ambient closed contacts depending on the application. - Page 34 GM57969 1. Thermostat 2. Bulkhead opening for carburetor heater access 3. Carburetor heater cord with thermostat tp6514 4. 120 VAC receptacles for carburetor heater and battery 1. Carburetor heater location charger RES models) Figure 1-38 17/18 kW Carburetor Heater Location Figure 1-39 17/18 kW Carburetor Heater Location on (air intake side of generator set) Engine (bulkhead removed to show...
-
Page 35: Prestart Installation Check
Complete the startup and installation checklists supplied with the startup notification form. Complete and sign the startup notification form and submit copies to Kohler Co. and the distributor/dealer as instructed on the form. Standby systems not registered within 60 days of... -
Page 36: Application Code Version
Follow the instructions in Figure 1-42 to enter the Communication/Sleep Mode Setting (Cn). (Available configuration mode while the engine is not running and on controllers with application code version 1.13 or then step through the following parameters. Use the up higher.) The communication setting enables or disables ∧... - Page 37 Controller Configuration Mode: Hold the Select button: Display: Move the generator set master switch to the RUN position. (The generator set engine will not start.) Wait about 5 seconds until the display shows the v 1 1 3 program version number. (The number may be different than the one shown here.) Press the down arrow key and then the up arrow key 3 times to enter the configuration mode.
-
Page 38: Voltage And Frequency Adjustments
1.14 Voltage and Frequency Changes in voltage and speed adjustments are lost if not saved before the generator set shuts down. The Adjustments generator set continues to run with the new settings until it shuts down but then reverts to the previous settings at WARNING the next startup if the changes have not been saved. -
Page 39: Frequency Adjustment
8. Adjust the volts/Hz (parameter 3P) until the voltage Frequency Adjustment Procedure level measured by the multimeter begins to drop. Note: Refer to the flowcharts in Figure 1-46 through When the volts/Hz is set correctly, the generator Figure 1-48 during the following procedure. (as load is applied) attempts to maintain normal output until the engine speed drops below the 1. - Page 40 Output Voltage and Frequency Adjustment Mode: Display :* x x x x Move the generator set master switch to the RUN position. The generator set engine starts and the controller display shows the engine runtime hours. Hold: Wait about 5 seconds until the display changes from runtime hours to the program version number.
- Page 41 Display : * Continued from Figure 1-46: Press: To enter engine governor speed coarse adjustment mode. (Parameter 4P) To raise or lower the engine speed in large increments. To enter engine governor speed fine adjustment mode. (Parameter 4P) To raise or lower the engine speed in smaller increments.
- Page 42 There are 3 options when the display says SAVE: S A V E Press: To return to the first parameter, coarse voltage adjustment, to check or change settings before saving. See Figure 1-46. To save changes. Y E S To discard changes without saving. “Yes”or “no”...
-
Page 43: Section 2 Wiring Diagrams
ADV-7353 17/18RES Point-to-Point Wiring Diagram GM52541 12TRES (3-phase) Schematic Diagram ADV-7623 12TRES (3-phase) Point-to-Point Wiring Diagram GM63546 18TRES (3-phase) Schematic Diagram ADV-7637 18TRES (3-phase) Point-to-Point Wiring Diagram GM65661 Figure 2-1 Wiring Diagrams and Schematics TP-6514 9/09 Section 2 Wiring Diagrams... - Page 44 Figure 2-2 Schematic Diagram, Single Phase, 8.5/12RES, ADV-7325-D Section 2 Wiring Diagrams TP-6514 9/09...
- Page 45 Figure 2-3 Point-to-Point Wiring Diagram, Single Phase, 8.5/12RES, GM51414-C TP-6514 9/09 Section 2 Wiring Diagrams...
- Page 46 Figure 2-4 Schematic Diagram, Single Phase, 17/18RES, ADV-7353-F Section 2 Wiring Diagrams TP-6514 9/09...
- Page 47 Figure 2-5 Point-to-Point Wiring Diagram, Single Phase, 17/18RES, GM52541-E TP-6514 9/09 Section 2 Wiring Diagrams...
- Page 48 Figure 2-6 Schematic Diagram, Three-Phase, 12TRES, ADV-7623 Sheet 4 Section 2 Wiring Diagrams TP-6514 9/09...
- Page 49 Figure 2-7 Point-to-Point Wiring Diagram, Three-Phase, 12TRES, GM63546, Sheet 3 TP-6514 9/09 Section 2 Wiring Diagrams...
- Page 50 Figure 2-8 Schematic Diagram, Three-Phase, 18TRES, ADV-7637, Sheet 3 Section 2 Wiring Diagrams TP-6514 9/09...
- Page 51 Figure 2-9 Point-toPoint Wiring Diagram, Three-Phase, 18TRES, GM65661, Sheet 3 TP-6514 9/09 Section 2 Wiring Diagrams...
- Page 52 Notes Section 2 Wiring Diagrams TP-6514 9/09...
-
Page 53: Appendix A Abbreviations
(2 bytes) est. estimated Canadian Electrical Code KBus Kohler communication protocol E-Stop emergency stop cert. certificate, certification, certified kilogram etc. et cetera (and so forth) cubic feet per hour TP-6514 9/09 Appendix 53... - Page 54 kg/cm kilograms per square National Bureau of Standards remote terminal unit centimeter normally closed room temperature vulcanization kilogram-meter National Electrical Code read/write kg/m kilograms per cubic meter NEMA National Electrical Society of Automotive kilohertz Manufacturers Association Engineers kilojoule NFPA National Fire Protection scfm standard cubic feet per minute Association...
- Page 56 For the nearest sales/service outlet in the US and Canada, phone 1-800-544-2444 KohlerPower.com Kohler Power Systems Asia Pacific Headquarters TP-6514 9/09e 7 Jurong Pier Road Singapore 619159 E 2007, 2008, 2009 by Kohler Co. All rights reserved. Phone (65) 6264-6422, Fax (65) 6264-6455...