Table of Contents
Advertisement
Quick Links
Download this manual
See also:
User Manual
Advertisement
Table of Contents

Related Manuals for Planet WDAP-C7200AC


Summary of Contents for Planet WDAP-C7200AC
-
Page 2: Federal Communication Commission Interference Statement
Copyright Copyright 2014 by PLANET Technology Corp. All rights reserved. No part of this publication may be reproduced, transmitted, transcribed, stored in a retrieval system, or translated into any language or computer language, in any form or by any means, electronic, mechanical, magnetic, optical, chemical, manual or otherwise, without the prior written permission of PLANET. - Page 3 Federal Communication Commission (FCC) Radiation Exposure Statement This equipment complies with FCC radiation exposure set forth for an uncontrolled environment. In order to avoid the possibility of exceeding the FCC radio frequency exposure limits, human proximity to the antenna shall not be less than 20 cm (8 inches) during normal operation. R&TTE Compliance Statement This equipment complies with all the requirements of DIRECTIVE 1999/5/CE OF THE EUROPEAN PARLIAMENT AND THE COUNCIL OF 9 March 1999 on radio equipment and telecommunication...
- Page 4 Revision User Manual for PLANET 1200Mbps 11ac Dual Band Ceiling Mount Wireless Access Point Model: WDAP-C7200AC Rev: 1.0 (May, 2014) Part No. EM-WDAP-C7200AC_v1.0 (2080-E11010-000)
-
Page 5: Table Of Contents
CONTENTS Chapter 1. Product Introduction......................1 Package Contents ....................... 1 Product Description......................2 Product Features......................... 6 Product Specifications ....................... 7 Chapter 2. Hardware Installation ......................10 Product Outlook ........................10 2.1.1 Panel Layout......................11 2.1.2 Hardware Description ..................... 11 Chapter 3. Connecting to the AP ......................12 System Requirements ......................12 Installing the AP ........................12 Chapter 4. - Page 6 Chapter 6. Quick Connection to a Wireless Network ..............103 Windows XP (Wireless Zero Configuration) ..............103 Windows 7 (WLAN AutoConfig)..................105 Mac OS X 10.x........................108 iPhone / iPod Touch / iPad ..................... 112 Appendix A: Planet Smart Discovery Utility................... 115 Appendix B: Troubleshooting......................116 Appendix C: Glossary........................118...
- Page 7 FIGURE 2-1 WDAP-C7200AC P ..................10 IGURE RODUCT RAWING 2-2 WDAP-C7200AC P ..................11 IGURE ANEL AYOUT 3-1 WDAP-C7200AC I 1................12 IGURE NSTALLATION IAGRAM 3-2 WDAP-C7200AC I 2................13 IGURE NSTALLATION IAGRAM 3-3 WDAP-C7200AC I 3................13 IGURE NSTALLATION IAGRAM 3-4 WDAP-C7200AC I 4................14...
- Page 8 5-30 C – S ........................41 IGURE LIENT TATUS 5-31 5GH – WDS................42 IGURE IRELESS ASIC ETTINGS 5-32 5GH – WDS+AP..............44 IGURE IRELESS ASIC ETTINGS 5-33 W – 5GH ................46 IGURE IRELESS DVANCED ETTINGS 5-34 RF O – 5GH ....................48 IGURE UTPUT OWER 5-35 W...
- Page 9 5-75 WPS-PIN – 2.4GH -1......................90 IGURE 5-76 WPS-PIN – 2.4GH -2......................90 IGURE 5-77 WPS-PIN – 2.4GH -3......................90 IGURE 5-78 S – 2.4GH ......................91 IGURE CHEDULE 5-79 M – M ....................92 IGURE ANAGEMENT 5-79 S ..........................93 IGURE TATUS 5-80 S .........................94 IGURE TATISTICS 5-81 T...
-
Page 10: Chapter 1. Product Introduction
User Manual of WDAP-C7200AC Chapter 1. Product Introduction 1.1 Package Contents Thank you for choosing PLANET WDAP-C7200AC. Before installing the AP, please verify the contents inside the package box. WDAP-C7200AC Quick Guide CD-ROM (User Manual included) Quick Guide Mounting Kit... -
Page 11: Product Description
Its streamlined body without the protruding antennas also gives effects of embellishment in the surroundings. Moreover, the WDAP-C7200AC is compliant with the IEEE 802.3at PoE standard, so it is easy and flexible in client-side installation. It is definitely nice to have this eye-catching access point mount on the ceilings and walls of villas, hotels, exhibit halls, and other establishments. - Page 12 256-QAM modulation where higher transmitting/receiving rates go up to 867Mbps in 5GHz less interference frequency band. In addition, the WDAP-C7200AC is equipped with gigabit LAN port to eliminate the restriction of 100Mbps Fast Ethernet wired connection to let users fully enjoy the high speed provided by wireless.
- Page 13 WDAP-C7200AC offers more powerful and flexible capability for wireless clients. Flexible Deployment with PoE Feature Compliant with the IEEE 802.3at Power over Ethernet standard, the WDAP-C7200AC can be powered and networked by a single UTP cable. It thus reduces the needs of extra cables and dedicated electrical outlets on...
- Page 14 Easy Installation and Management With user-friendly Web UI and step-by-step Quick Setup Wizard, the WDAP-C7200AC is easy to install, even for users who never experience setting up a wireless network. Furthermore, with SNMP-based management interface, the WDAP-C7200AC is convenient to be managed and configured remotely in a small business wireless network.
-
Page 15: Product Features
User Manual of WDAP-C7200AC 1.3 Product Features Standard Compliant Hardware Interface Complies with IEEE 802.11ac (draft 2.0) and IEEE 802.11a/b/g/n standards 1 x 10/100/1000Base-TX Port with 1-port PoE (PD, Powered Device) IEEE 802.3at Power over Ethernet design RF Interface Characteristics ... -
Page 16: Product Specifications
User Manual of WDAP-C7200AC 1.4 Product Specifications WDAP-C7200AC Product 1200Mbps 802.11ac Dual Band Ceiling Mount Wireless Access Point Hardware Specifications 1 x 10/100/1000Base-T RJ45 port Interfaces Auto-negotiation and Auto MDI/MDI-X 2 x 2.4GHz 3dBi PCBA antenna Antennas Gain: 2 x 5GHz 2.5dBi PCBA antenna... - Page 17 User Manual of WDAP-C7200AC 802.11ac (VHT20, Nss2-MCS8): Up to 173.3Mbps 802.11ac (VHT40, Nss2-MCS9): Up to 400Mbps 802.11ac (VHT80, Nss2-MCS9): Up to 867Mbps 802.11n (HT40): 270/243/216/162/108/81/54/27Mbps Data Transmission 135/121.5/108/81/54/40.5/27/13.5Mbps (dynamic) Rates 802.11n (HT20): 130/117/104/78/52/39/26/13Mbps 65/58.5/52/39/26/19.5/13/6.5Mbps (dynamic) 802.11g: 54/48/36/24/18/12/9/6Mbps (dynamic) 802.11b: 11/5.5/2/1Mbps (dynamic) 802.11ac (draft): up to 30m...
- Page 18 User Manual of WDAP-C7200AC Supports WPS (Wi-Fi Protected Setup) Enable/ Disable SSID Broadcast WMM (Wi-Fi Multimedia): 802.11e Wireless QoS Multiple SSID: up to 5 at 2.4GHz and 5GHz, respectively Wireless Isolation: Enables to isolate each connected wireless client from Wireless Advanced communicating with each other IAPP (Inter Access Point Protocol): 802.11f Wireless Roaming...
-
Page 19: Chapter 2. Hardware Installation
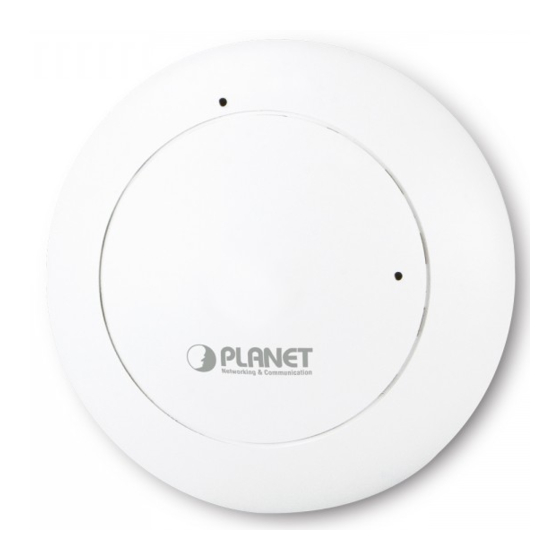
User Manual of WDAP-C7200AC Chapter 2. Hardware Installation Please follow the instructions below to connect WDAP-C7200AC to the existing network devices and your computers. 2.1 Product Outlook Dimensions: 194 x 49 mm Φ x H) Drawing : Figure 2-1 WDAP-C7200AC Product Drawing... -
Page 20: Panel Layout
2.1.1 Panel Layout The front and rear panel provide a simple interface monitoring the AP. Figure 2-2 shows the hardware interface of the WDAP-C7200AC. Hardware Interface Figure 2-2 WDAP-C7200AC Panel Layout 2.1.2 Hardware Description LED definition COLOR STATUS FUNCTION Green... -
Page 21: Chapter 3. Connecting To The Ap
PCs running Windows 98/ME, NT4.0, 2000/XP, Windows Vista / Win 7, MAC OS 9 or later, Linux, UNIX or other platforms compatible with TCP/IP protocols 1. The AP in the following instructions refers to PLANET WDAP-C7200AC. 2. It is recommended to use Internet Explore 7.0 or above to access the AP. 3.2 Installing the AP Before installing the AP, make sure your PoE switch is connected to the Internet through the broadband service successfully at this moment. - Page 22 ※ IEEE 802.3at PoE switch is required. Figure 3-2 WDAP-C7200AC Installation Diagram 2 Step 3. Plug the RJ-45 Ethernet cable into the PoE port of the WDAP-C7200AC. Figure 3-3 WDAP-C7200AC Installation Diagram 3 Step 4. Load the device into the mounting bracket, and be sure the device is mated with two fixed screws.
- Page 23 User Manual of WDAP-C7200AC Figure 3-4 WDAP-C7200AC Installation Diagram 4 Step 5. Plug the other end of the Ethernet cable into the PoE switch. Figure 3-5 WDAP-C7200AC Installation Diagram 4 -14-...
-
Page 24: Chapter 4. Quick Installation Guide
These values can be changed as you want. In this guide, we use all the default values for description. Connect the WDAP-C7200AC with your PC by an Ethernet cable plugging in LAN port on one side and in LAN port of PC on the other side. Please power on the WDAP-C7200AC by PoE switch through the PoE port. - Page 25 User Manual of WDAP-C7200AC Figure 4-1 TCP/IP Setting Now click OK to save your settings. Now, you can run the Ping command in the command prompt to verify the network connection between your PC and the AP. The following example is in Windows 7 OS. Please follow the steps below: Click on Start >...
- Page 26 User Manual of WDAP-C7200AC Figure 4-2 Windows Start Menu Open a command prompt, type ping 192.168.1.253 and then press Enter. If the result displayed is similar to Figure 4-3, it means the connection between your PC and the AP has been established well.
- Page 27 User Manual of WDAP-C7200AC Figure 4-4 Failed Result of Ping Command If the address is 0.0.0.0, check your adapter installation, security settings, and the settings on your AP. Some firewall software programs may block a DHCP request on newly installed adapters.
-
Page 28: Starting Setup In The Web Ui
User Manual of WDAP-C7200AC 4.2 Starting Setup in the Web UI It is easy to configure and manage the AP with the web browser. Step 1. To access the configuration utility, open a web-browser and enter the default IP address http://192.168.1.253... -
Page 29: Chapter 5. Configuring The Ap
5.1 Setup Wizard The Setup Wizard will guide the user to configure the WDAP-C7200AC easily and quickly. Select the Setup Wizard on the left side of the screen and by clicking on Next on the Setup Wizard screen shown below, you will then name your WDAP-C7200AC and set up its security. - Page 30 User Manual of WDAP-C7200AC Step 1: LAN Interface Setup Figure 5-3 LAN Interface SetupTopology Figure 5-4 Wizard – LAN Interface Setup The page includes the following fields: Object Description IP Address Displays the current IP address of the AP. (Default = 192.168.1.253) Subnet Mask Displays LAN mask of the AP.
- Page 31 User Manual of WDAP-C7200AC Figure 5-6 Wizard – Time Zone Setup The page includes the following fields: Object Description Enable NTP client update Check this box to connect NTP Server and synchronize internet time. Automatically adjust Check this box and system will adjust the daylight saving Daylight Saving automatically.
- Page 32 User Manual of WDAP-C7200AC Object Description Band Supports 802.11a, 802.11n, 802.11ac and mixed. Please choose its band according to your clients. Mode Supports AP, Client, WDS and AP+WDS mode. Service Set Identifier identifies your wireless network. SSID Channel Width Select 80MHz if you use 802.11ac; select 40MHz if you use 802.11n;...
- Page 33 User Manual of WDAP-C7200AC Encryption: WPA-PSK The following picture shows how to set up WPA-PSK security. You can select (TKIP), WPA2 (AES) Mixed mode. Figure 5-10 5GHz Wireless Security Setup – WPA Setting The page includes the following fields:...
- Page 34 User Manual of WDAP-C7200AC Object Description Band Supports 802.11b, 802.11g, 802.11n and mixed. Please choose its band according to your clients. Supports AP, Client, WDS and AP+WDS mode. Mode Service Set Identifier, it identifies your wireless network. SSID Channel Width Select 40MHz if you use 802.11n, otherwise 20MHz for the 802.11b/g mode.
- Page 35 User Manual of WDAP-C7200AC Object Description Key Length WEP supports 64-bit or 128-bit security key. Key Format User can enter key in ASCII or Hex format. Key Setting Enter the key whose format is limited by the Key format, ASCII or Hex.
-
Page 36: Tcp / Ip Settings
On the LAN Settings page, you can configure the IP parameters of the LAN on the screen as shown below. Figure 5-16 LAN Setting The page includes the following fields: Object Description IP Address The default LAN IP address of the WDAP-C7200AC is 192.168.1.253. You can change it according to your request. -27-... - Page 37 If you change the IP address of LAN, you must use the new IP address to login the When the IP address of the WDAP-C7200AC is changed, the clients on the network often need to wait for a while or even reboot before they can access the new IP address.
-
Page 38: Wlan1 (5Ghz)
Universal Repeater Client AP+WDS It is so easy to combine the WDAP-C7200AC with the existing wired network. The WDAP-C7200AC definitely provides a total network solution for the home and the SOHO users. Standard Access Point -29-... - Page 39 User Manual of WDAP-C7200AC AP(Multi-SSID) Mode WDAP-C7200AC Internet SSID-1(5G) Clients SSID-2(2.4G) AP Mode Clients Figure 5-18 5GHz Wireless Basic Settings of AP The page includes the following fields: -30-...
- Page 40 User Manual of WDAP-C7200AC Object Description Disable Wireless LAN Check the box to disable the wireless function. Interface Band Select the desired mode. Default is “5GHz (A+N+AC)”. It is strongly recommended that you set the Band to “5GHz (A+N+AC)”, and all of 802.11a, 802.11n, and 802.11ac wireless stations can connect to the...
- Page 41 User Manual of WDAP-C7200AC unless you know what will happen after modification. AP(Multi-SSID) Mode Default is “Auto”. Associated Clients Click the “Show Active Clients” button to show the status table of active wireless clients. Enable Universal Universal Repeater is a technology used to extend wireless coverage.
- Page 42 The device supports up to four multiple Service Set Identifiers. You can back to the Basic Settings page to set the Primary SSID. The SSID’s factory default setting is Planet 5G VAP1~4 (Multiple-SSID 1~4). The SSID can be easily changed to connect to an existing wireless network or to establish a new wireless network.
- Page 43 User Manual of WDAP-C7200AC and client simultaneously)”. Click “Apply Changes” to take effect. Figure 5-21 5GHz Universal Repeater-1 Step 2. Go to 5GHz Site Survey page to find the root AP. Select the root AP that you want to repeat the signal and then click “Next”.
- Page 44 User Manual of WDAP-C7200AC Figure 5-22 5GHz Universal Repeater-2 Step 3. Select the correct encryption method and enter the security key. Then, click “Connect”. Figure 5-23 5GHz Universal Repeater-3 Step 4. Check “Add to Wireless Profile” and click “Reboot Now”.
- Page 45 User Manual of WDAP-C7200AC Figure 5-25 5GHz Universal Repeater-5 Client (Infrastructure) Combine the Wireless Router to the Ethernet devices such as TV, game player, or HDD and DVD, to make them be wireless stations. Station (Client Mode) WDAP-C7200AC Internet...
- Page 46 User Manual of WDAP-C7200AC Figure 5-26 5GHz Wireless Basic Settings – Client The page includes the following fields: Object Description Check the box to disable the wireless function. Disable Wireless LAN Interface Band Select the desired mode. Default is “5GHz (A+N+AC)”. It is strongly recommended that you set the Band to “5GHz (A+N+AC)”, and all of...
- Page 47 Network Type In Infrastructure, the wireless LAN serves as a wireless station. And the user can use the PC equipped with the WDAP-C7200AC to access the wireless network via other access points. In Ad hoc, the wireless LAN will use the Ad-hoc mode to operate.
- Page 48 User Manual of WDAP-C7200AC To configure each wireless parameter, please go to the “WLAN1 (5GHz) → Basic Settings” page. Step 1. Go to “WLAN1 (5GHz) → Site Survey” page and click “Site Survey” button. Figure 5-27 Client – Survey Step 2. Choose the root AP from the list. If the root AP is not listed in the table, re-click “Site Survey” to update the list.
- Page 49 User Manual of WDAP-C7200AC Figure 5-28 Client – AP List Step 3. Enter the Security Key of the root AP and then click “Connect”. Figure 5-29 Client – Security -40-...
- Page 50 User Manual of WDAP-C7200AC Step 4. Wait until the connection established. Check the “Add to Wireless Profile” option and then reboot it. Figure 5-30 Client – Status Connect this Wireless AP with up to 8 WDS-capable wireless APs to expand the scope of network.
- Page 51 User Manual of WDAP-C7200AC Figure 5-31 5GHz Wireless Basic Settings – WDS The page includes the following fields: Object Description Check the box to disable the wireless function. Disable Wireless LAN Interface Band Select the desired mode. Default is “5GHz (A+N+AC)”. It is strongly recommended that you set the Band to “5GHz (A+N+AC)”, and all of...
- Page 52 User Manual of WDAP-C7200AC WDAP-C7200AC. 5 GHz (A): 802.11a mode, rate is up to 54Mbps 5 GHz (N): 802.11n mode, rate is up to 300Mbps 5 GHz (AC): 802.11n mode, rate is up to 867Mbps(2T2R) 5 GHz (A+N): 802.11a/n mode, rate is up to 300Mbps ...
- Page 53 User Manual of WDAP-C7200AC AP+ WDS Connect this wireless AP with up to 8 WDS-capable wireless APs, and connect another AP to provide service for all wireless stations within its coverage. WDS Repeater Mode Internet WDAP-C7200AC Clients a/n/ac 2.4G...
- Page 54 You can select the operating frequency of wireless network. Channel Number If you enable “Broadcast SSID”, every wireless station located within Broadcast SSID the coverage of the WDAP-C7200AC can discover its signal easily. If you are building a public wireless network, enabling this feature is -45-...
-
Page 55: Advanced Settings
User Manual of WDAP-C7200AC recommended. In private network, disabling “Broadcast SSID” can provide better wireless network security. Default is “Enabled”. Data Rate Set the wireless data transfer rate to a certain value. Since most of wireless devices will negotiate with each other and pick a proper data transfer rate automatically, it’s not necessary to change this value... -
Page 56: Rf Output Power
User Manual of WDAP-C7200AC The page includes the following fields: Object Description Fragment Threshold You can specify the maximum size of packet during the fragmentation of data to be transmitted. If you set this value too low, it will result in bad performance. -
Page 57: Security
The WDAP-C7200AC supports output power control levels up to 5. You can change the RF output power level here in accordance with various environments and signal strength. - Page 58 User Manual of WDAP-C7200AC Figure 5-35 Wireless Security Settings – 5GHz The page includes the following fields: Object Description Select SSID Select the SSID you want to configure the wireless security function, which includes the root one and the client one.
-
Page 59: Access Control
5.3.5 Access Control Choose menu “WLAN1 (5GHz) Access Control” to allow or deny the computer of specified MAC address to connect with the WDAP-C7200AC on this page. After the configuration, please click the “Apply Changes” button to save the settings. - Page 60 User Manual of WDAP-C7200AC You can make some comment on each MAC address on the list. Comment Current Access Control You can select some MAC addresses and click the “Delete Selected” button to List delete it. To deny a PC at the MAC address of 00:30:4F:00:00:01 (for example) to connect to your wireless network, do as follows: Step 1.
-
Page 61: Wds
User Manual of WDAP-C7200AC 5.3.6 WDS WDS (Wireless Distribution System) feature can be used to extend your existing 2.4G or 5G wireless network coverage. Here we present you how to configure such feature in 2.4GHz, which also applies to 5GHz. - Page 62 User Manual of WDAP-C7200AC Figure 5-38 WDS Mode – 5GHz Choose menu “WLAN1 (5GHz) WDS Settings” to configure WDS to connect the WDAP-C7200AC with another AP on this page. After the configuration, please click the “Apply Changes” button to save the settings.
- Page 63 User Manual of WDAP-C7200AC Figure 5-40 WDS – Set Security The page includes the following fields: Object Description Enable WDS Check the box to enable the WDS function. Please select WDS or AP+WDS in the Mode of Wireless Basic Settings before you enable WDS on this page.
-
Page 64: Site Survey
User Manual of WDAP-C7200AC 5.3.7 Site Survey Choose menu “WLAN1 (5GHz) Site Survey” to scan the available local AP. If any Access Point is found, you could choose any one to connect with manually when the Client Mode is enabled. - Page 65 You can check the box to disable the WPS function. WPS Status Here you can check if the connection via WPS is established or not. It is the PIN number of the WDAP-C7200AC here. Self-PIN Number Push Button Click the “Start PBC” to activate WPS as well in the client device within Configuration 2 minutes.
- Page 66 User Manual of WDAP-C7200AC Click the “Start PBC” Button on the WPS page of the AP. Figure 5-42 WPS-PBC – 5GHz-1 Figure 5-43 WPS-PBC – 5GHz-2 Press and hold the WPS Button equipped on the adapter directly for 2 or 3 seconds. Or you can click the WPS button with the same function in the configuration utility of the adapter.
- Page 67 User Manual of WDAP-C7200AC Figure 5-44 WPS-PIN – 5GHz-1 Figure 5-45 WPS-PIN – 5GHz-2 For the configuration of the wireless adapter, please choose the option that you want to enter PIN into the AP (Enrollee) in the configuration utility of the WPS and click Next until the process finishes.
-
Page 68: Schedule
User Manual of WDAP-C7200AC 5.3.9 Schedule Wireless Schedules will enable or disable your wireless access at a set time based on your predefined schedule. This feature is often used for restricting access to all users (such as children, employees and guests) during specific times of the day for parental control or security reasons. -
Page 69: Wlan2 (2.4Ghz)
Universal Repeater Client AP+WDS It is so easy to combine the WDAP-C7200AC with the existing wired network. The WDAP-C7200AC definitely provides a total network solution for the home and the SOHO users. Standard Access Point -60-... - Page 70 User Manual of WDAP-C7200AC AP(Multi-SSID) Mode WDAP-C7200AC Internet SSID-1(5G) Clients SSID-2(2.4G) AP Mode Clients Figure 5-49 2.4GHz Wireless Basic Settings – AP The page includes the following fields: Object Description Disable Wireless LAN Check the box to disable the wireless function.
- Page 71 User Manual of WDAP-C7200AC Band Select the desired mode. Default is “2.4GHz (B+G+N)”. It is strongly recommended that you set the Band to “2.4GHz (B+G+N)”, and all of 802.11b, 802.11g, and 802.11n wireless stations can connect to the WDAP-C7200AC. 2.4 GHz (B): 802.11b mode, rate is up to 11Mbps ...
- Page 72 The device supports up to four multiple Service Set Identifiers. You can back to the Basic Settings page to set the Primary SSID. The SSID’s factory default setting is Planet 2.4G VAP1~4 (Multiple-SSID 1~4). The SSID can be easily changed to connect to an existing wireless network or to establish a new wireless network.
- Page 73 User Manual of WDAP-C7200AC Figure 5-51 2.4GHz Multiple-SSID Once you have applied and saved those settings, you can then go to the “WLAN1 (2.4GHz) → Security” page on the AP to set up security settings for each of the SSIDs.
- Page 74 User Manual of WDAP-C7200AC Figure 5-52 2.4GHz Universal Repeater-1 Step 2. Go to 2.4GHz Site Survey page to find the root AP. Select the root AP that you want to repeat the signal, and then click “Next”. Figure 5-53 2.4GHz Universal Repeater-2...
- Page 75 User Manual of WDAP-C7200AC Step 3. Select the correct encryption method and enter the security key. Then, click “Connect”. Figure 5-54 2.4GHz Universal Repeater-3 Step 4. Check “Add to Wireless Profile” and click “Reboot Now”. Figure 5-55 2.4GHz Universal Repeater-4 Step 5.
- Page 76 User Manual of WDAP-C7200AC Client (Infrastructure) Combine the Wireless Router to the Ethernet devices such as TV, Game player, or HDD and DVD, to make them be wireless stations. -67-...
- Page 77 User Manual of WDAP-C7200AC Figure 5-57 2.4GHz Wireless Basic Settings – Client The page includes the following fields: Object Description Check the box to disable the wireless function. Disable Wireless LAN Interface Band Select the desired mode. Default is “2.4GHz (B+G+N)”. It is strongly recommended that you set the Band to “2.4GHz (B+G+N)”, and all of...
- Page 78 Network Type In Infrastructure, the wireless LAN serves as a wireless station. And the user can use the PC equipped with the WDAP-C7200AC to access the wireless network via other access points. In Ad hoc, the wireless LAN will use the Ad-hoc mode to operate.
- Page 79 User Manual of WDAP-C7200AC Step 1. Go to “WLAN2 (2.4GHz) → Site Survey” page and click “Site Survey” button. Figure 5-58 Client – Survey -70-...
- Page 80 User Manual of WDAP-C7200AC Step 2. Choose the root AP from the list. If the root AP is not listed in the table, re-click “Site Survey” to update the list. Figure 5-59 Client – AP List Step 3. Enter the Security Key of the root AP and then click “Connect”.
- Page 81 User Manual of WDAP-C7200AC Figure 5-60 Client – Security Step 4. Wait until the connection established. Check the “Add to Wireless Profile” option and then reboot it. Figure 5-61 Client – Status Connect this Wireless AP with up to 8 WDS-capable wireless APs to expand the scope of network.
- Page 82 User Manual of WDAP-C7200AC WDS Bridge-PtMP Mode WDAP-C7200AC Switch Clients Clients Switch Switch Clients Figure 5-62 2.4GHz Wireless Basic Settings – WDS -73-...
- Page 83 User Manual of WDAP-C7200AC The page includes the following fields: Object Description Disable Wireless LAN Check the box to disable the wireless function. Interface Band Select the desired mode. Default is “2.4GHz (B+G+N)”. It is strongly recommended that you set the Band to “2.4GHz (B+G+N)”, and all of 802.11b, 802.11g, and 802.11n wireless stations can connect to the...
- Page 84 User Manual of WDAP-C7200AC WDS Repeater Mode Internet WDAP-C7200AC Clients a/n/ac 2.4G 5G WDS a/n/ac Switch Figure 5-63 2.4GHz Wireless Basic Settings – WDS+AP -75-...
- Page 85 If you enable “Broadcast SSID”, every wireless station located within Broadcast SSID the coverage of the WDAP-C7200AC can discover its signal easily. If you are building a public wireless network, enabling this feature is recommended. In private network, disabling “Broadcast SSID” can...
-
Page 86: Advanced Settings
User Manual of WDAP-C7200AC provide better wireless network security. Default is “Enabled”. Data Rate Set the wireless data transfer rate to a certain value. Since most of wireless devices will negotiate with each other and pick a proper data transfer rate automatically, it’s not necessary to change this value unless you know what will happen after modification. - Page 87 User Manual of WDAP-C7200AC The page includes the following fields: Object Description Fragment Threshold You can specify the maximum size of packet during the fragmentation of data to be transmitted. If you set this value too low, it will result in bad performance.
-
Page 88: Rf Output Power
The WDAP-C7200AC supports output power control levels up to 5. You can change the RF output power level here in accordance with various environments and signal strength. -
Page 89: Security
User Manual of WDAP-C7200AC 5.4.4 Security Choose menu “WLAN2 (2.4GHz) Security” to configure the settings of wireless security for the wireless network on this page. After the configuration, please click the “Apply Changes” button to save the settings. Figure 5-66 Wireless Security Settings – 2.4GHz... - Page 90 User Manual of WDAP-C7200AC WPA2: WPA2 is a high level encryption and is supported by most wireless devices and operating systems. WPA / WPA2 / WPA-Mixed: WPA Mixed Mode allows the use of both WPA and WPA2 at the same time.
-
Page 91: Access Control
5.4.5 Access Control Choose menu “WLAN2 (2.4GHz) Access Control” to allow or deny the computer of specified MAC address to connect with the WDAP-C7200AC on this page. After the configuration, please click the “Apply Changes” button to save the settings. - Page 92 User Manual of WDAP-C7200AC Step 3. Click the “OK” button to save your settings and you can add more MAC addresses, if you like, simply repeat the above steps. Figure 5-68 Wireless Access Control – Deny -83-...
-
Page 93: Wds
User Manual of WDAP-C7200AC 5.4.6 WDS WDS (Wireless Distribution System) feature can be used to extend your existing 2.4G or 5G wireless network coverage. Here we present you how to configure such feature in 2.4GHz, which also applies to 2.4GHz. - Page 94 User Manual of WDAP-C7200AC Figure 5-69 WDS Mode – 2.4GHz Choose menu “WLAN2 (2.4GHz) WDS Settings” to configure WDS to connect the WDAP-C7200AC with another AP on this page. After the configuration, please click the “Apply Changes” button to save the settings.
- Page 95 User Manual of WDAP-C7200AC Figure 5-71 WDS – Set Security The page includes the following fields: Object Description Enable WDS Check the box to enable the WDS function. Please select WDS or AP+WDS in the Mode of Wireless Basic Settings before you enable WDS on this page.
-
Page 96: Site Survey
User Manual of WDAP-C7200AC 5.4.7 Site Survey Choose menu “WLAN2 (2.4GHz) Site Survey” to scan the available local AP. If any Access Point is found, you could choose any one to connect with manually when the Client Mode is enabled. - Page 97 Here you can check if the connection via WPS is established or not. WPS Status Self-PIN Number It is the PIN number of the WDAP-C7200AC here. Push Button Click the “Start PBC” to activate WPS as well in the client device within Configuration 2 minutes.
- Page 98 User Manual of WDAP-C7200AC By Push Button Configuration (PBC) Click the “Start PBC” Button on the WPS page of the AP. Figure 5-73 WPS-PBC – 2.4GHz-1 Figure 5-74 WPS-PBC – 2.4GHz-2 Press and hold the WPS Button equipped on the adapter directly for 2 or 3 seconds. Or you can click the WPS button with the same function in the configuration utility of the adapter.
- Page 99 User Manual of WDAP-C7200AC Figure 5-75 WPS-PIN – 2.4GHz-1 Figure 5-76 WPS-PIN – 2.4GHz-2 For the configuration of the wireless adapter, please choose the option that you want to enter PIN into the AP (Enrollee) in the configuration utility of the WPS and click Next until the process finishes.
-
Page 100: Schedule
User Manual of WDAP-C7200AC 5.4.9 Schedule Wireless Schedules will enable or disable your wireless access at a set time based on your predefined schedule. This feature is often used for restricting access to all users (such as children, employees and guests) during specific times of the day for parental control or security reasons. -
Page 101: Management
User Manual of WDAP-C7200AC When setting the Wireless Schedule, it is important to ensure that your System Clock settings have been configured. If not, your Wireless Schedule will not function correctly. 5.5 Management This section focuses on how to maintain AP, including Restore to Factory Default Setting, Backup/Restore, Firmware Upgrade, Reboot, Password Change and Syslog. -
Page 102: Statistics
User Manual of WDAP-C7200AC Figure 5-80 Status 5.5.2 Statistics Choose menu “Management Statistics” to show the packet counters for transmission and reception regarding wireless and Ethernet network. -93-... -
Page 103: Ntp Settings
User Manual of WDAP-C7200AC Figure 5-81 Statistics The page includes the following fields: Object Description It shows the statistic count of sent packets on the wireless LAN interface. Wireless LAN Sent Packets It shows the statistic count of received packets on the wireless LAN interface. - Page 104 User Manual of WDAP-C7200AC Figure 5-82 Time Zone Settings The page includes the following fields: Object Description Current Time Input current time manually. You can click “Copy Computer Time” button to copy the PC’s current time to the AP. Time Zone Select Select the time zone of the country you are currently in.
-
Page 105: Schedule Reboot
User Manual of WDAP-C7200AC If the AP loses power for any reason, it cannot keep its clock running, and will not have the correct time when it is started again. To maintain correct time for schedules and logs, either you must enter the correct time after you restart the AP, or you must enable the NTP Server option. - Page 106 User Manual of WDAP-C7200AC Check one or more days to let the device auto reboot on schedule. Weekday When choosing “Every day” as your reboot plan, the “Weekday” will be grayed out (disabled), which means Every day will auto reboot at the time that you scheduled.
-
Page 107: Log
User Manual of WDAP-C7200AC 5.5.5 LOG Choose menu “Management LOG” to configure the settings of system log. You can check the box of the items you want to record it in the log. After the configuration, please click the “Apply” button to save the settings. -
Page 108: Upgrade Firmware
Choose menu “Management Upgrade Firmware” to upgrade the firmware of the WDAP-C7200AC. Select the new firmware file downloaded from the PLANET website and then click “Upload” button to upgrade it. Figure 5-86 Upgrade Firmware... - Page 109 “Upload” button reload configuration back into WDAP-C7200AC. Reset Settings to Click the “Reset” button to reset all settings of the WDAP-C7200AC to Default factory default. Factory Default Settings: User Name: admin Password: admin IP Address: 192.168.1.253 Subnet Mask: 255.255.255.0 Default Gateway: 192.168.1.254...
-
Page 110: Password
Web-based Utility. The default user name and password are “admin”. This page will allow you to add or modify the user name and password. Choose menu “Management User Management” to change the user name and password which is inputted to access the web UI of the WDAP-C7200AC. Figure 5-88 Password Setup The page includes the following fields:... -
Page 111: Led Control
1) Position LED on: the position LED is on. 2) Position LED blink: the position LED blinks continuously. 2) Position LED off: the position LED is off. 5.5.10 Logout To logout the WDAP-C7200AC, please select “Logout” from the left-side menu. Figure 5-90 Logout -102-... -
Page 112: Chapter 6. Quick Connection To A Wireless Network
User Manual of WDAP-C7200AC Chapter 6. Quick Connection to a Wireless Network In the following sections, the default SSID of the WDAP-C7200AC is configured to “default”. 6.1 Windows XP (Wireless Zero Configuration) Step 1: Right-click on the wireless network icon displayed in the system tray Figure 6-1 System Tray –... - Page 113 User Manual of WDAP-C7200AC Step 4: Enter the encryption key of the Wireless AP (1) The Wireless Network Connection box will appear (2) Enter the encryption key that is configured in section 5.3.3 (3) Click the [Connect] button Figure 6-3 Enter the network key Step 5: Check if “Connected”...
-
Page 114: Windows 7 (Wlan Autoconfig)
User Manual of WDAP-C7200AC Some laptops are equipped with a “Wireless ON/OFF” switch for the internal wireless LAN. Make sure the hardware wireless switch is switched to “ON” position. 6.2 Windows 7 (WLAN AutoConfig) WLAN AutoConfig service is built-in in Windows 7 that can be used to detect and connect to wireless network. - Page 115 User Manual of WDAP-C7200AC If you will be connecting to this Wireless AP in the future, check [Connect automatically]. Step 4: Enter the encryption key of the Wireless AP (1) The Connect to a Network box will appear (2) Enter the encryption key that is configured in section 5.3.3...
- Page 116 User Manual of WDAP-C7200AC Figure 6-9 Connected to a Network -107-...
-
Page 117: Mac Os X 10.X
6.3 Mac OS X 10.x .3 Mac OS X 10.x In the following sections, the default SSID of the WDAP-C7200AC is configured to “default”. In the following sections, the default SSID of the WDAP-C7200AC is configured to “default”. Step 1: Right-click on the network icon displayed in the system tray The AirPort Network Connection menu will appear Figure 6-10 Mac OS –... - Page 118 User Manual of WDAP-C7200AC Figure 6-12 Enter the Password If you will be connecting to this Wireless AP in the future, check [Remember this network]. Step 5: Check if the AirPort is connected to the selected wireless network. If “Yes”, then there will be a “check” symbol in the front of the SSID.
- Page 119 User Manual of WDAP-C7200AC There is another way to configure the MAC OS X Wireless settings: Step 1: Click and open the [System Preferences] by going to Apple > System Preference or Applications Figure 6-14 System Preferences Step 2: Open Network Preference by clicking on the [Network] icon...
- Page 120 User Manual of WDAP-C7200AC Step 3: Check Wi-Fi setting and select the available wireless network (1) Choose the AirPort on the left-menu (make sure it is ON) (2) Select Network Name [default] here If this is the first time to connect to the Wireless AP, it should show “Not network selected”.
-
Page 121: Iphone / Ipod Touch / Ipad
6.4 iPhone / iPod Touch / iPad .4 iPhone / iPod Touch / iPad In the following sections, the default SSID of the WDAP-C7200AC is configured to “default”. In the following sections, the default SSID of the WDAP-C7200AC is configured to “default”. - Page 122 User Manual of WDAP-C7200AC Figure 6-19 Wi-Fi Setting – Not Connected Step 3: Tap the target wireless network (SSID) in “Choose a Network…” (1) Turn on Wi-Fi by tapping “Wi-Fi” (2) Select SSID [default] Figure 6-20 Turn on Wi-Fi Step 4: Enter the encryption key of the Wireless AP...
- Page 123 User Manual of WDAP-C7200AC Figure 6-21 iPhone -- Enter the Password Step 5: Check if the device is connected to the selected wireless network. If “Yes”, then there will be a “check” symbol in the front of the SSID. Figure 6-22 iPhone -- Connected to the Network...
-
Page 124: Appendix A: Planet Smart Discovery Utility
User Manual of WDAP-C7200AC Appendix A: Planet Smart Discovery Utility To easily list the WDAP-C7200AC in your Ethernet environment, the Planet Smart Discovery Utility from user’s manual CD-ROM is an ideal solution. The following installation instructions guide you to running the Planet Smart Discovery Utility. -
Page 125: Appendix B: Troubleshooting
User Manual of WDAP-C7200AC Appendix B: Troubleshooting If you find the AP is working improperly or stop responding to you, please read this troubleshooting first before contacting the dealer for help. Some problems can be solved by yourself within a very short time. - Page 126 User Manual of WDAP-C7200AC Try to use IP address instead of host name. If you can use IP address to communicate with a remote server, but can’t use host name, please check DNS setting. a. ‘Broadcast ESSID’ set to off? I can’t locate my AP by my...
-
Page 127: Appendix C: Glossary
User Manual of WDAP-C7200AC Appendix C: Glossary 802.11ac wireless networking 802.11 under the - 802.11ac is a standard in the family (which is marketed brand name Wi-Fi), developed in the IEEE Standards Association process, providing high-throughput wireless local area networks... - Page 128 User Manual of WDAP-C7200AC MTU (Maximum Transmission Unit) - The size in bytes of the largest packet that can be transmitted. NAT (Network Address Translation) - NAT technology translates IP addresses of a local area network to a different IP address for the Internet.
- Page 129 APΣΥΜΜΟΡΦΩΝΕΤΑΙ ΠΡΟΣ ΤΙΣ ΟΥΣΙΩΔΕΙΣ essenciais e outras disposições da Directiva ΑΠΑΙΤΗΣΕΙΣ ΚΑΙ ΤΙΣ ΛΟΙΠΕΣ 1999/5/CE. ΣΧΕΤΙΚΕΣ ΔΙΑΤΑΞΕΙΣ ΤΗΣ ΟΔΗΓΙΑΣ 1999/5/ΕΚ Por medio de la presente, PLANET Technology Español Slovensky Corporation, declara que 11ac Wireless AP Výrobca PLANET Technology Corporation, týmto cumple con los requisitos esenciales y deklaruje, že táto 11ac Wireless AP je v súlade so...