
Related Manuals for Miele DA5000D


Summary of Contents for Miele DA5000D
- Page 1 Operating and Installation Instructions Ventilation System DA 5000 D en - US, CA To prevent accidents and machine damage, read these instructions before installation or use. M.-Nr. 07 197 930...
-
Page 3: Table Of Contents
Contents IMPORTANT SAFETY INSTRUCTIONS....... . . 4 Guide to the appliance ..........8 Functional description . -
Page 4: Important Safety Instructions
IMPORTANT SAFETY INSTRUCTIONS Read these Operating Instructions carefully before installing or using the Ventilation System. This appliance is intended for residential use only. Use the appliance only for its intended purpose. The manufacturer cannot be held responsible for damages caused by improper use of the hood. - Page 5 However, under certain conditions it may be possible for an installation in these applications. Please contact the nearest Miele dealer or the Miele Technical Service Department with specific requirements. Before servicing or cleaning the unit,...
- Page 6 IMPORTANT SAFETY INSTRUCTIONS , WARNING - TO REDUCE THE RISK OF A COOKTOP GREASE FIRE: Never leave surface units unattended at high settings. Boil-overs cause smoking and greasy spillovers may ignite. Heat oils slowly on low or medium settings. Always turn the hood on when cooking at high heat.
- Page 7 Installation , WARNING To reduce the risk of fire only use metal duct work. Any fittings, sealant, or materials used to install the duct work must be made of approved non-flammable materials. Provided a larger distance is not given by the manufacturer of the cooktop, follow the minimum safety distances between a cooktop and the bottom of the hood:...
-
Page 8: Guide To The Appliance
Guide to the appliance... -
Page 9: Guide To The Appliance
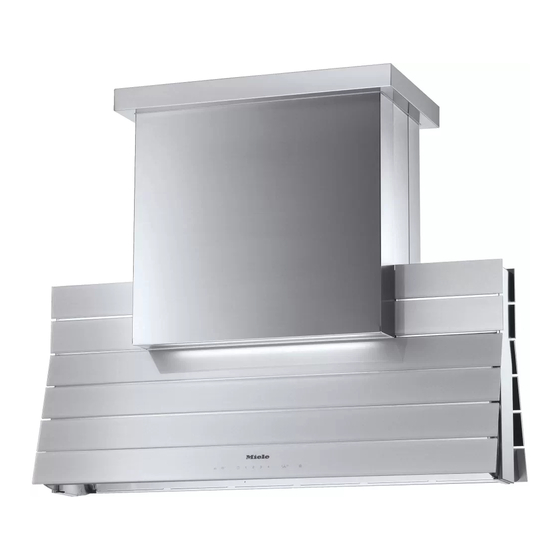
a Covering frame b Chimney c Canopy The canopy opens as soon as the fan is turned on. d Indirect lighting e Control panel The symbols serve as sensor buttons. To select a function, touch the sensor button. A brief tone is heard as confirmation. -
Page 10: Functional Description
Functional description The ventilation hood works by air extraction. The air is drawn in and cleaned by the grease filter and directed outside. The hood comes equipped with a non-return flap. This flap automatically closes when the hood is turned off so that no exchange of outside air and room air can occur. -
Page 11: Operation
Turning on the fan s ^ Touch the "s" sensor button. The fan switches on to level "2". The sensor buttons "s" and "2" light. The canopy now opens. Selecting the performance level Typically, levels "1" to "3" are sufficient for regular cooking needs. -
Page 12: Delayed Shut Down "5M15
Operation Delayed shut down "5m15" If odors or smoke remain in the kitchen after cooking has been completed, the Delayed Shut Down feature can be selected to allow the hood to continue running for either 5 or 15 minutes. ^ While the fan is still running, touch the "5m15"... -
Page 13: Indirect Lighting
Indirect lighting Touch the " " sensor button to turn the indirect lighting On/Off. Safety cut-off If the exhaust hood is left unattended for more than 10 hours, the fan automatically turns off. The lighting remains on. ^ Touch the "s" sensor button to turn the fan back on again. -
Page 14: Sensor Button Tone
Operation Reprogramming the grease filter timer The grease filter timer is preset to 30 hours. This time can be lengthened or shortened to 20, 30, 40, or 50 hours depending on your cooking habits. – A time of 20 hours should be programmed in kitchens with frequent pan or deep frying. -
Page 15: Cleaning And Care
Stainless steel surfaces can be cleaned using a non-abrasive stainless steel cleaner. To help prevent resoiling, a conditioner for stainless steel can be applied. Cleaners are available from Miele. Glass surfaces Glass surfaces can be cleaned using a glass cleaner. -
Page 16: Grease Filter
Cleaning and care Grease filter The reusable metal grease filters remove solid particles from the vented kitchen air (grease, dust, etc) and help keep the exhaust hood clean. At the latest, clean the grease filter when the "l" sensor button lights up. The grease filters should be cleaned every 3 - 4 weeks or when the grease filter indicator lights. -
Page 17: Re-Setting The Grease Filter Timer
Depending on the detergent, cleaning the grease filters in a dishwasher may cause permanent discoloration of the filter surface. Performance of the filter is not affected by this discoloration. ^ After cleaning, the filters can be placed on a towel to air dry. ^ While the filters are removed, clean any dirt or grease from the filter casing. -
Page 18: Changing The Halogen Light Bulbs
Cleaning and care Changing the halogen light bulbs To change the halogen bulbs, first open the canopy. ^ Touch the "s" sensor button. The fan turns on to level "2". The canopy opens. ^ Press and hold the "2" sensor button for approx. -
Page 19: Changing The Fluorescent Light Bulb
Changing the fluorescent light bulb Disconnect the exhaust hood from the power supply by either removing the fuse, unplugging it, or manually "tripping" the circuit breaker. To prevent damage to the glass cover and the cooking surface, be sure to securely handle the glass cover. -
Page 20: After Sales Service
Miele’s Service department, Extended Service Contracts offered by other providers for Miele products will not be recognized by Miele. Our goal is to prevent unauthorized (and untrained) service personnel from working on your Miele products, possibly doing further damage to them, you and/or your home. -
Page 21: Installation Instructions
Installation Instructions... -
Page 23: Caring For The Environment
Disposal of packing material The cardboard box and packing materials protect the appliance during shipping. They have been designed to be biodegradable and recyclable. Please recycle. To prevent suffocation of children, ensure that any plastic wrappings, bags, etc. are disposed of safely and kept out of their reach. -
Page 24: Installation
Installation Installation instructions ^ See the enclosed Installation Instruction sheet. ^ Please read the "Important Safety Instructions" and Installation instructions before installing the hood. Installation accessories 8 screws 8 x 60 mm with 8 washers to secure the ceiling plate to the ceiling. -
Page 25: Structural Support
Structural support The ceiling mounting plate will support the weight of the hood. This ceiling plate must be attached to rigid structural framing that is supported in its entirety by the ceiling joists, or to the ceiling joists directly. Do not attach the plate directly to the ceiling with anchors, toggle bolts, etc. -
Page 26: Electrical Data
If there is any question concerning the electrical connection of this appliance to your power supply, please consult a licensed electrician or call Miele’s Technical Service Department. See back cover for contact information. WARNING: THIS APPLIANCE MUST BE... -
Page 27: Technical Data
Technical data Total connected load..772 W – fan motor....640 W – canopy drive....4 W –... -
Page 28: Appliance Dimensions
Appliance dimensions 1) Feed-though for the duct work and the power cord Exhaust connection C 7 The exhaust connection is adjustable. This makes installation possible if the exhaust opening in the ceiling is not centered directly above the cooking surface. A maximum variance of 1 (40 mm) in each direction is possible. -
Page 29: Air Extraction
WARNING Danger of toxic fumes. Gas cooking appliances release carbon monoxide that can be harmful or fatal if inhaled. The exhaust gases extracted by the hood should be vented outside of the building only. Do not vent exhaust air into spaces within walls or ceilings, or in attics, crawl spaces or garages. - Page 30 Air extraction – If the exhaust is ducted into an inactive flue, the air must be expelled parallel to the flow direction of the flue. Important If the duct work runs through rooms, ceilings, garages, etc. where temperature variations exist, it may need to be insulated to reduce condensation.
- Page 32 Alteration rights reserved / 0208 M.-Nr. 07 197 930 / 00 For the most updated manual see the Miele web site.