Miele CVA 4075 Operating And Installation Instructions
Coffee system with convertible water connection
Hide thumbs
Also See for CVA 4075:
- Technical information (131 pages) ,
- Product dimensions (3 pages) ,
- Operating and installation instructions (64 pages)

Related Manuals for Miele CVA 4075


Summary of Contents for Miele CVA 4075
- Page 1 Operating and Installation Instructions Coffee System with convertible water connection CVA 4075 en - US, CA To prevent accidents and machine damage read these instructions before installation or use. M.-Nr. 07 194 220...
-
Page 2: Table Of Contents
Contents IMPORTANT SAFETY INSTRUCTIONS....... . . 4 Guide to the machine ..........8 First steps to use . - Page 3 Contents Cleaning and Care ..........35 Descaling the appliance .
-
Page 4: Important Safety Instructions
IMPORTANT SAFETY INSTRUCTIONS When using electrical appliances basic safety precautions should always be followed, including the following: Read all instructions before installation or use of the coffee system. Please read these instructions carefully to prevent accidents and machine damage. This appliance complies with current safety requirements. - Page 5 Repairs and other work by unauthorized persons could be dangerous and may void the warranty. Only use Miele original spare parts. Only then can the manufacturer guarantee the safety of this machine. Never open the outer casing of the appliance.
- Page 6 IMPORTANT SAFETY INSTRUCTIONS The coffee system must be maintained daily to prevent the growth of harmful bacteria and mold. Please read the “Cleaning and care” section of this booklet. All parts are dishwasher safe except the brew unit and bean container. Caution! Do not look directly or with an optical instrument into the lighting - laser radiation.
- Page 7 Only use the descaling tablets provided by Miele. Take care to use the correct mixture of water and descaler, otherwise it may cause damage. Depending on the fat content of the coffee, the brew unit may clog.
-
Page 8: Guide To The Machine
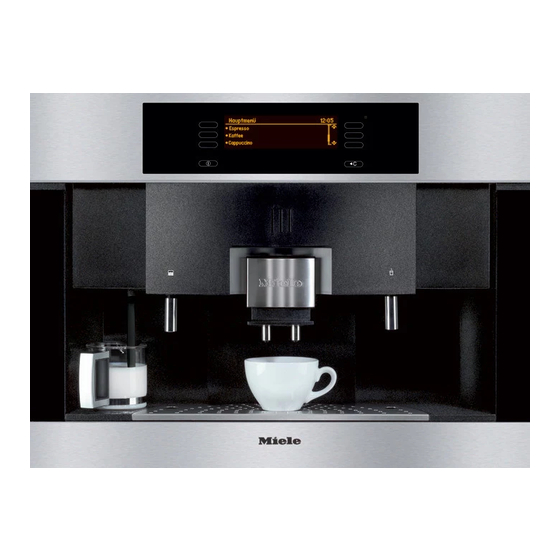
Guide to the machine Front view a Touch controls (lowest control "On/Off" button) b Display c Touch controls (lowest control "Clear" button) d Top lighting e Door grip f Hot water spout g Bottom lighting h Plastic drip tray i Metal drip tray j Coffee dispenser (height adjustable) k Froth dispenser... - Page 9 Guide to the machine Interior view a Main switch b Cover for ground coffee funnel c Funnel for ground coffee d Grind control lever e Coffee bean container f Drip tray with no-spill grid for transport g Water tank (with water inlet valve) h Brew unit i Waste unit...
-
Page 10: First Steps To Use
First steps to use Touch controls Select a touch control with your fingertip to use the machine. Display To select a menu, select the touch control next to the respective menu point. If more features can be selected under one menu point, the menu has three dots (e.g. -
Page 11: Filling Water, Beans Or Ground Coffee
Before using the coffee system for the first time, clean the appliance. See "Cleaning and Care". Filling the water tank The beans and the water quality is important for a good espresso or coffee. If the machine is plumbed to a water line and turned on, the water tank is automatically filled. -
Page 12: Filling The Beans Container
Filling water, beans or ground coffee Filling the beans container Only fill espresso or coffee beans in the beans container. Anything else - including ground coffee - will damage the grinding unit. Caramelized or otherwise pre-treated beans or sugar containing beverages must not be filled into the appliance. -
Page 13: Making Coffee
The lines must be rinsed daily before the first use. This will happen automatically if "Rinse automatic" is set to "On" (see "Settings - Rinse Automatic") and the machine is cold. After heating, hot water runs out of the two spouts into the drip tray. If "Rinse automatic"... -
Page 14: Pre-Warming Cups
Making coffee Pre-warming cups All beverages should be made in a warm cup, to develop the aroma. The smaller the amount of coffee or espresso and the thicker the cups, the more important it is to pre-warm the cups. ^ Set the cup under the hot water spout. -
Page 15: Espresso And Coffee Made From Coffee Beans
Espresso and coffee made from coffee beans ^ Set a cup under the coffee dispenser. The drink is dispensed through both dispensers at the same time. ^ Select "Espresso" or "Coffee". The machine grinds the beans and pre-brews the coffee (if "On" is selected under "Pre-brewing"). -
Page 16: Espresso And Coffee Made From Ground Coffee
Making coffee Espresso and coffee made from ground coffee After filling the funnel with ground coffee (see "Filling water, beans or ground coffee - Filling ground coffee"), the display shows: Did you fill ground coffee and do you want to prepare it? + No ^ Select "Yes". -
Page 17: Cappuccino And Milk Froth
Cappuccino and milk froth When using for the first time or using after descaling The lines were completely drained before the unit left the factory. They will also be drained when the machine is descaled. Before preparing cappuccino or froth, the lines must be filled with water. - Page 18 Making coffee Cappuccino To prepare a cappuccino you need a large ceramic or porcelain cup and a small mug (supplied) of milk. The best milk froth is achieved with cold milk. Only one cup of cappuccino can be prepared at a time because of the milk frothing process.
-
Page 19: Adjusting The Coffee Grinder
The amount of ground coffee determines the strength of the coffee and the quality of the crema. The amount of ground coffee can be adjusted in the main menu. See "Settings - Grind amount". To prevent machine damage adjust the coffee grinder one notch at a time and let the beans grind before adjusting another notch. -
Page 20: Settings
Settings The coffee system can be customized to suit individual preferences. Language To show the displays in the desired language, select the language before the first use. Preheating + DESCALING + USER PROFILES: STANDARD + SETTINGS F ... ^ Select "Settings" from the main menu during the pre-heating phase or, + back + CARE ... -
Page 21: Clock
Clock + back + CARE ... + USER PROFILES ^ Select "Settings". SETTINGS + LANGUAGE F ... GRIND AMOUNT ... ~ + CLOCK + TIMER ... ^ Select "Clock". Setting the time of day ^ Select "Enter Time". ^ Select "+" or "-" with the right touch controls to select the hours. -
Page 22: Timer
Settings Timer Setting a timer + back + CARE ... + USER PROFILES ^ Select "Settings". SETTINGS + LANGUAGE F ... GRIND AMOUNT ... ~ + CLOCK + TIMER ... ^ Select "Timer". ^ Select "Setting". Turn on at A specific time of day can be set to turn the machine on, e.g. - Page 23 Turn off after The machine will turn off automatically to save energy after a programmed period of time. Time periods between 15 minutes and 6 hours can be selected. If the machine is not used after dispensing beverages, it will turn off after the selected time.
- Page 24 Settings Activating a timer + back + CARE ... + USER PROFILES ^ Select "Settings". SETTINGS + LANGUAGE F ... GRIND AMOUNT ... ~ + CLOCK + TIMER ... ^ Select "Timer". The timer function "Turning on at" or "Turning off at" can be activated or deactivated.
-
Page 25: Grind Amount
Grind amount The grind amount can be set, depending on the coffee type, between 0.2 ounces and 0.5 ounces (6 - 14 grams). The more the coffee is ground the stronger the espresso, coffee or cappuccino will be. The crema is also influenced by the grind amount. -
Page 26: Temperature
Settings Temperature Five temperatures are available for each beverage, three for hot water. Maximum is the highest temperature, minimum the lowest. Not every coffee type allows high temperatures. Some types react so sensitively that the crema cannot be properly built. ^ Select the User profile, for which you would like to set the temperature. -
Page 27: Steam System
Steam system The appliance has two heating systems. They allow for independent preparation of froth/cappuccino or espresso/coffee. The second heating system can be turned off to save energy during the heating phase e.g. if froth is not prepared very often. When the steam system is turned off and froth or cappuccino is selected, the unit must heat up first to produce... -
Page 28: Total No. Coffees
Settings Total no. coffees ^ Select "Total no. coffees" to check the number of previously dispensed espresso, coffee and cappuccino. After a few seconds the display switches back to the "Settings" menu or touch "OK". System Lock The coffee system can be locked so that it cannot be used by children or those not familiar with the operating instructions. -
Page 29: Water Hardness
Water hardness The hardness of the water used in the coffee system must be determined and programmed into the appliance. The water hardness will determine how frequently the unit must be descaled to maintain the coffee system properly. The machine monitors the volume of water passing through it in conjunction with the hardness of the water and will indicate when descaling is necessary. -
Page 30: User Profiles
Settings User profiles Up to 10 different user profiles can be entered to accommodate different tastes i.e. different grind amounts, temperature, pre-brewing, portion sizes. Creating a user profile ^ Select "Settings" and then "more" twice. ^ Select "User profiles". The upper display line shows which user profile is currently set, if different profiles were already created. -
Page 31: Selecting A User Profile
Change name ^ If you would like to change a name, touch "Change name" and then the touch control next to the name to be changed. ^ Type in the name as described in "Creating a user profile" and select "OK". -
Page 32: Display
Settings Display The display contrast and brightness can be adjusted. ^ Select "Settings" and then select "more" three times. SETTINGS + back + DISPLAY + TONE OPTIONS ^ Select "Display". ^ Select "Brightness" or "Contrast" and then the setting. The higher the number the higher the contrast or brightness. -
Page 33: Plumbed
Plumbed This unit is designed for operation with a permanent tap water connection but can be converted from water line to water tank use. To do that the plumbed water line connection can be turned on or off. When the unit is set to on, it uses the water line. -
Page 34: Setting The Serving Sizes
Setting the serving sizes The flavor of the coffee depends on the coffee and quantity of water used. To ensure the machine uses exactly the amount of water to suit your taste and your cups, there is a choice of two serving sizes for espresso/coffee. -
Page 35: Cleaning And Care
Allow the coffee system to cool before cleaning. Danger of burns! Do not clean the unit with a steam cleaner. Never use cleaners containing chlorides, sand, soda or scouring agents. These will damage the surface. To avoid mold of coffee waste, clean the unit regularly. -
Page 36: Water Tank
Cleaning and Care Water tank If the unit is not plumbed, empty the water tank daily and refill before preparing the first drink with fresh, cold tap water. Check if the valve is clean. If the valve has residues on it, the water tank will not connect properly and might leak. -
Page 37: Drip Tray
Drip tray The trip tray contains a sensor which causes the display to show when the tray is full and needs to be emptied. Clean the drip tray daily. Remove the drip tray after the final rinse when no more water runs from the lines. - Page 38 Cleaning and Care Drip catch with metal insert ^ Take out and clean the drip catch and metal plate. Bean container The bean container must be cleaned by hand with hot water and liquid dish soap. ^ Pull the bean container out and push the lid back.
- Page 39 Coffee dispenser connector A connector between the brew unit and coffee dispenser is located on the inner door. ^ Gently clean the connector regularly with a damp cloth without removing the lubricant for the gasket. ^ Lubricate the gasket once a month with the supplied silicone grease.
-
Page 40: Brew Unit
Cleaning and Care Brew unit Manually clean the brew unit monthly. The movable parts are lubricated and the gaskets will get damaged in the dishwasher. ^ Take out the water tank, waste unit and the cover for the ground coffee funnel. - Page 41 They are specially developed for the coffee maker to optimize the degreasing. The cleaning tablets can be purchased from Miele. As a reminder the display shows "Cleaning must be started" after 200 cups and then until the machine is cleaned.
- Page 42 Cleaning and Care Froth dispenser/Intake hose Clean the froth dispenser after each use, otherwise they may become blocked with dried milk and hard to clean. Rinsing does not replace cleaning in the dishwasher. ^ Select "Care". ^ Select "System rinse". ^ Set a glass with water under the intake hose and select "OK".
- Page 43 ^ Reassemble the parts as shown. Take care that the raised parts (see arrow) point downwards and, ^ that the marks are lined up. Cleaning and Care ^ Push the froth dispenser into the machine from underneath, a, and turn the cover above the spout to the right, b.
- Page 44 Wipe any spills from descaling immediately! Stainless steel surfaces Stainless steel surfaces can be cleaned using a non-abrasive stainless steel cleaner (available from Miele). To help prevent soiling, a conditioner for stainless steel can also be used. Apply sparingly and with even pressure.
-
Page 45: Descaling The Appliance
They are specially developed for the coffee system to optimize the descaling. The descaling tablets can be purchased from Miele. Other agents may damage the machine and affect the taste of coffee and hot water. The machine could also be damaged. - Page 46 Descaling the appliance ^ The display will prompt you through the next steps: – to fill the descaling agent into the water tank – take the water tank out – fill the water tank with fresh lukewarm tap water to the mark k. If not filled to the mark, the descaling will be canceled prematurely and incomplete...
-
Page 47: Frequently Asked Questions
The unit has no power. Frequently asked questions – See "Settings - Lighting". If not, the light bulb has burnt out. Contact Miele's Technical Service Department. Keep the door closed during the heating phase. Adjust the display contrast / brightness. - Page 48 See "Settings - Timer - Turning off after". – The unit is locked until the water has cooled. – Call Miele's Technical Service Department. – Plug in the machine. – Change the gasket with a new one (supplied).
- Page 49 – Clean the froth dispenser as described in "Cleaning and Care - Froth dispenser/Intake hose". Turn off the unit immediately. Contact the Miele's Tech. Service. Wait until no sound is heard and refill the coffee bean container. Set the grind control to a finer grind.
- Page 50 Frequently asked questions The steam heating system is turned off but steam can still dispensed. Steam can be dispensed as long as the steam heating system is heated. Once it has cooled, steam can only be dispensed once the steam system has heated. The coffee dispensing is interrupted.
- Page 51 The machine does not rinse when turned on although the automatic rinse feature is set to "On". When the machine is still at a temperature of about 140°F (60°C). The machine will not rinse when it's too hot. The water dispensing stops when programming the serving size. –...
- Page 52 Frequently asked questions The brew unit or waste unit could not be pulled from the machine. – The brew unit is not in the basic position. – The door was opened during grinding or brewing. No crema has formed or it is "different". –...
-
Page 53: Quot;F" Messages
"F" messages F 10 or F 17 No water is dispensed. F 73 or "Check brew unit" The brew unit is clogged and cannot reset to the correct position. F 94 The plumbed water intake is faulty. The message "Too much ground coffee" appears in the display. If too much ground coffee passes through the coffee chute the machine is unable to process it so it can be... -
Page 54: After Sales Service
Miele’s Service department, Extended Service Contracts offered by other providers for Miele products will not be recognized by Miele. Our goal is to prevent unauthorized (and untrained) service personnel from working on your Miele products, possibly doing further damage to them, you and/or your home. -
Page 55: Installation Instructions
Installation instructions... -
Page 56: Caring For The Environment
Caring for the environment Disposal of packing material The cardboard box and packing materials protect the appliance during shipping. They have been designed to be biodegradable and recyclable. Please recycle. Ensure that any plastic wrappings, bags, etc. are disposed of safely and kept out of the reach of children. -
Page 57: Plumbing
The machine must be connected to the water supply in accordance with local and national regulations. The water being used should have the drinking water standards of the respective country where the machine is used. – All units and systems used to deliver the water to the coffee system must conform with the requirements of the respective country. -
Page 58: Electrical Connection
If there is any question concerning the electrical connection of this appliance to your power supply, please consult a licensed electrician or contact Miele’s Technical Service Department. See back page for contact information. WARNING: THIS APPLIANCE MUST BE... -
Page 59: Installation
Installation options The coffee system is designed to be built into cabinetry. A combination with other Miele built in appliances is possible. If the machine is installed in combination with other appliances, it should be installed with a protective base between the appliance and the unit (exception: installation with a built-in plate warmer). - Page 60 Installation Installation Make sure power is not supplied to the appliance while installation or maintenance work is performed. Disconnect the power supply to the work area by unplugging the unit, tripping the circuit breaker or removing the fuse. The coffee system must be installed into cabinetry before being used.
-
Page 61: Adjusting The Door Hinges
Adjusting the door hinges The door hinges can be adjusted if the door cannot be opened easily. ^ To adjust the door sideways, a, turn screw a. ^ To adjust the door to the front or back, b, turn screw b. Installation... - Page 64 Alteration rights reserved / 4507 M.-Nr. 07 194 220 / 01 with convertible water connection CVA 4075 For the most updated manual see the Miele web site.