Samsung RC090MHXEA Installation And Maintenance Manual
Hide thumbs
Also See for RC090MHXEA:
- Installation manual (60 pages) ,
- Service manual (53 pages) ,
- Installation and maintenance manual (22 pages)

Related Manuals for Samsung RC090MHXEA


Summary of Contents for Samsung RC090MHXEA
- Page 1 Air Source Heat Pump Installation and Maintenance Manual Model Numbers: RC090MHXEA RC160MHXEA June 2013 www.samsungehs.co.uk Hendra – June 2013...
-
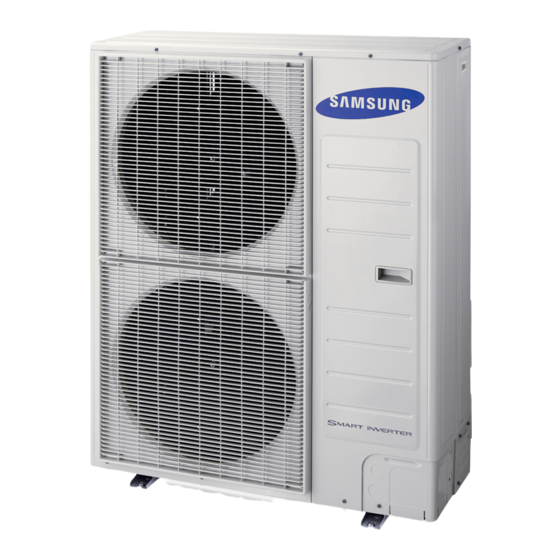
Page 2: The Outdoor Unit (Boiler)
The outdoor unit (boiler) Deciding on Where to Install the Outdoor Unit The outdoor unit must not be placed on its side or upside down, as the compressor lubrication oil will run into the cooling circuit and seriously damage the unit. Choose a location where the noise of the Air to Water Heat Pump when running and the discharged air do not disturb any neighbours. - Page 3 The 9kW unit has 1 inch BSP male connections; these should be connected to flexi hoses. To maintain flow rate we recommend 28mm pipework is used with this machine. NEVER use 22mm plastic tube, if you insist on using plastic use 28mm throughout All Pipework including the flexis need to be insulated with 23mm...
- Page 4 The 16 kW unit has 1 inch BSP male connections, these should be connected to flexi hoses (supplied). To maintain flow rate we recommend 28mm pipework is used with this machine. NEVER use 22mm plastic tube, if you insist on using plastic use 28mm throughout All Pipework including the flexis need to be insulated with 23mm...
- Page 5 Buffer vessels We don’t normally use buffer vessels on Samsung EHS systems; as long as the water volume circulating is over 20 Litre. The inbuilt variable speed compressor means the unit can operate without a buffer.
- Page 6 2 port valve and tank stat. The valve can be installed in the flow as per the diagram. However as the refrigerant used in the Samsung EHS is R410A it is not able to physically heat above its critical temperature of 72.8C.
- Page 7 www.samsungehs.co.uk Hendra – June 2013...
-
Page 8: Wiring And Power Supply Information
Wiring and Power Supply Information Power The EHS system needs 2 power supplies: One connects into the outdoor unit, 20 Amp for the 9kW and 32 Amp for the size 16 The one for the control box is 16 Amp and wires into the top of the breaker (mcb) in the box Immersion Heater The immersion heater is connected into the control box terminals... -
Page 9: Start-Up Procedure
Start Up Procedure Disable the cooling function, with the power OFF, remove the front of the remote controller, slide it upwards, turn it over and flick dip switch 1 and 5 to on. Cooling will no longer be available On the outdoor unit remove the front cover, there are 2 screws at the top and one at the bottom, slide the cover down. -
Page 10: Electrically Testing The Unit
Electrically testing the unit It is possible to test each component one after another using a service function. You can use this to make sure you have wired everything correctly. To access service mode press blue set button test button together for 5 seconds. The controller will display TEST. - Page 11 Starting it up in heating mode If you have two port valves you should find the heating valves are open and the hot water valve closed. If you have a 3 port valve it should be open to heating mode. Check that the correct (heating valve is open and the hot water is closed, if its wrong check your wiring) Start the unit my Pressing heating on off button (top left...
- Page 12 What the symbols mean: Setting the correct time www.samsungehs.co.uk Hendra – June 2013...
- Page 13 Telling the unit it has a tank. When the unit is delivered it doesn’t think there is a hot water cylinder tank installed. You have to tell the unit about the cylinder. Press test button for 3 seconds The screen will start to flash, Press up twice, 30 will appear Press set (grey) 3011 will appear Press set (grey), 0 will appear Press up once 1 will appear...
-
Page 14: Performance Testing
Run test in hot water mode In hot water mode check that the 3 port valve or the 2 x 2 ports are sending water into the hot water cylinder, if not check the wiring. Using the check button (blue) on the remote controller check the hot water cylinder temperature and note it down, the hot water temperature is displayed when the tap symbol shows. -
Page 15: Field Settings
PCB until you finish setting and exit. Field settings to set see user manual for a full list 1061 length of time backlight is on in the Samsung rc 2011 low ambient setting for optimisation set to -5 in Scotland... - Page 16 When you make a run signal a sun will appear in the screen of the RC, the pump will also start. When an external stat or run signal is used most of the functions of the Samsung remote are disabled. A waging finger shows at the bottom to show this.
-
Page 17: Maintenance Procedure
Test the concentration of the Anti-freeze (glycol) in the system using a Glycol tester the level should be 25%. If you don’t have a glycol tester a Samsung glycol tester can be bought from your heat pump supplier or online. -
Page 18: Hot Water
Leave this with the Homeowner Your Samsung heat pump heats the house and hot water cylinder much like a normal fossil fuel boiler however there are a couple of differences which you should notice. The radiator temperatures are lower than normal and will alter as the outdoor temperature changes. - Page 19 Samsung EHS Warranty Unit 2 Warrior Park Eagle Close Chandlers Ford SO534NF Web site www.samsungehs.co.uk Email sales@samsungehs.co.uk Warranty Registration Card Please complete both sides of this warranty card and return it to activate the warranty Installer Name and Address Installation Address telephone number &...
- Page 20 The Samsung EHS warranty covers parts with a pre-set labour allowance only. The standard warranty is valid for 12 months from date of commissioning as entered on this card. If the unit is installed by a Samsung approved installer the warranty is automatically extended to 36 months.