
Related Manuals for Moffat G32


Summary of Contents for Moffat G32
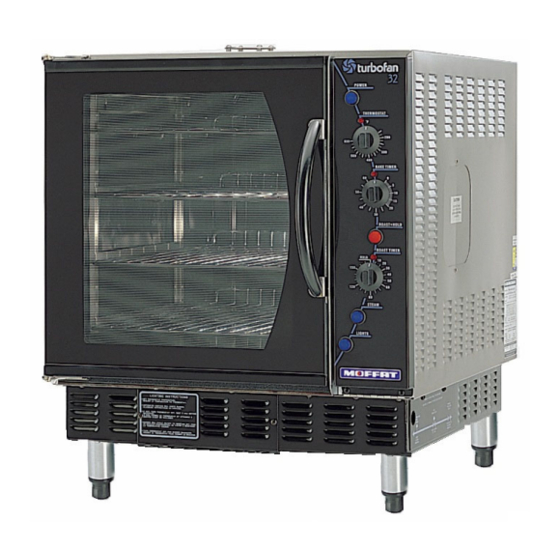
- Page 1 G32 CONVECTION OVEN Applies to units from S/N 40256 SERVICE MANUAL Manual P/N M0MG32 Revision 5/F3528 January, 2004...
-
Page 2: Table Of Contents
CONTENTS This manual is designed to take a more in depth look at the G32 convection oven for the purpose of making the unit more understandable to service people. There are settings explained in this manual that should never require to be adjusted, but for com- pleteness and those special cases where these settings are required to change, this manual gives a full explanation as to how, and what effects will result. - Page 3 ACCESSORIES / OPTIONS ..................57 PARTS DIAGRAM......................58 11.1 Main Assembly 11.2 Control Panel Assembly 11.3 Ignition Electrode Assembly 11.4 Gas Piping Assembly SERVICE CONTACTS ....................69 APPENDIX A. Ignition Box Replacement Kits ..............71 APPENDIX B. Ignition Box Specifications ................. 75 Revision 5/F3528...
-
Page 4: Specifications
1. SPECIFICATIONS MODEL: G32 (28.0) (31.5) WATER ENTRY ELECTRICAL ENTRY (2.0) GAS ENTRY (2.75) FRONT SIDE (4.33) PLAN LEGEND - Electrical connection entry point - Water entry - ¾” BSP hose connection - Gas connection entry point - ½” BSP female (not USA / Canada) - ½”... - Page 5 LOCATION ELECTRICAL SUPPLY SPECIFICATION OPTIONS This oven must be installed in an area of adequate air supply. The following minimum 110-120 V AC, 60 Hz, 2.0 A, 1 Phase clearances openings, servicing, 220-240 V AC, 50 Hz, 0.7 A, 1 Phase operation and installation are to be adhered to: 230-240 V AC, 50 Hz, 0.55A, 1 Phase 220-240 V AC, 60 Hz, 0.7 A, 1 Phase...
-
Page 6: Installation
Fit door ELECTRICAL CONNECTION handle to oven door. Check that the available G32 convection ovens are supplied with power supply is correct to that shown on the pre-fitted cords. Ensure unit is fitted with the... - Page 7 WATER CONNECTION Ground A cold water supply should be fitted to the Phase Neutral water inlet (¾” BSP hose connection) which is BLACK GREEN located on the rear of the right hand side of BROWN BLUE GREEN/YELLOW BLACK WHITE the unit. Alternately, a connection elbow and sealing WARNING: THIS APPLIANCE MUST...
- Page 8 DOUBLE STACKING UNITS When it is desired to mount a G32 Turbofan Stacking the Ovens oven on an E87 prover, a double stacking kit 1.
- Page 9 6. Screw the chimney to the rear of the top unit with these so that the bottom of the The rating plate for the G32 convection oven chimney mates up with the flue duct of the is located at the bottom right corner of the RH bottom unit.
-
Page 10: Operation
3. OPERATION NOTE: A full user’s operation manual is supplied with the product and can be used for further referencing of installation, operation and service. 3.1 DESCRIPTION OF CONTROLS 1. POWER Depress to switch power on or off (switch illuminates when power is on). 2. -
Page 11: Explanation Of Control System
The buzzer air openings on the right hand side of the G32 and time-up indicator provide indication that base assembly. - Page 12 The ignition control will then power The G32 Turbofan convection oven features a the gas control valve to open the solenoids Roast-and-Hold system which can be used to and provide gas to the burner. At the same...
- Page 13 cancel the hold circuit the Roast-and-Hold switch is turned Off. This turns off the relay which removes power from the 3 hour timer and closes the pole on the relay that feeds the main oven thermostat. The Hold indicator light above the 3 Hour timer will illuminate whenever the oven is operating in hold mode (Roast ‘n Hold selected,...
-
Page 14: Maintenance
4. MAINTENANCE WARNING: ALL INSTALLATION AND SERVICE REPAIR WORK MUST BE CARRIED OUT BY QUALIFIED PERSONS ONLY. 4.1 CLEANING LAMP GLASS To remove glasses, unscrew anti-clockwise. To replace, screw in clockwise. WARNING: ALWAYS TURN THE POWER SUPPLY OFF BEFORE IMPORTANT: DO NOT OVER CLEANING. -
Page 15: Routine Procedures
4.2 ROUTINE PROCEDURES PROCEDURE INTERVAL DOOR SEALS Check for deterioration. 12 months DOOR PIVOT BUSHES Check for wear. 12 months DOOR CATCH Ensure that catch is adjusted such that the door closes 12 months properly. WATER NOZZLE Check for liming in water nozzle. 12 months HT LEAD / ELECTRODE Check for deterioration. -
Page 16: Trouble Shooting Guide
5. TROUBLE SHOOTING WARNING: ALL INSTALLATION AND SERVICE REPAIR WORK MUST BE CARRIED OUT BY QUALIFIED PERSONS ONLY. FAULT POSSIBLE CAUSE REMEDY THE OVEN DOES NOT The mains isolating switch on Turn on. OPERATE / START the wall, circuit breaker or fuses are “off”... - Page 17 FAULT POSSIBLE CAUSE REMEDY BURNER INCORRECT Incorrect gas type. Check appliance gas type. COLOUR (Refer installation section) (Refer installation section— Gas Connection and Incorrect burner orifice size Ensure orifice is correct. Adjustment for correct fitted. (Refer specification section) colour) Incorrect burner pressure Check gas pressure.
- Page 18 FAULT POSSIBLE CAUSE REMEDY FAN DOESN’T OPERATE Thermostat not on. Turn thermostat on. (Fan only operates when the thermostat is on). Thermostat fan switch faulty. Replace thermostat. (Refer fault diagnosis 6.1.4) (Refer service section 6.3.9) Fan motor faulty. Replace. (Refer fault diagnosis 6.1.4) (Refer service section 6.3.15) Wiring.
- Page 19 FAULT POSSIBLE CAUSE REMEDY 60 MINUTE TIMER NO TIME Timer not switching on buzzer. Replace. UP INDICATOR (Refer fault diagnosis 6.1.9) (Refer service section 6.3.7) Indicator faulty. Replace. (Refer fault diagnosis 6.1.10) (Refer service section 6.3.3) NO TEMPERATURE Thermostat faulty. Replace.
- Page 20 FAULT POSSIBLE CAUSE REMEDY DOOR DOES NOT CLOSE Tray in way of door. Correctly position tray in rack. Door seal obstruction. Correctly install door seal. (Refer service section 6.3.25) Door handle installed Fit correctly. incorrectly. (Refer installation section) Door catch setting incorrect. Adjust.
-
Page 21: Service Procedures
6. SERVICE PROCEDURES WARNING: ENSURE POWER SUPPLY IS SWITCHED OFF BEFORE SERVICING. WARNING: ALL INSTALLATION AND SERVICE REPAIR WORK MUST BE CARRIED OUT BY QUALIFIED PERSONS ONLY. SECTION PAGE NO. FAULT DIAGNOSIS ......................24 6.1.1 Oven Does Not Operate / Start ................24 6.1.2 No Heat / Burner Not Working................24 6.1.3... - Page 22 6.3.17 24 Volt Transformer (USA/Canada Units Only)...........36 6.3.18 Ignition Box......................37 6.3.19 Ignition Electrodes ....................37 6.3.20 Gas Control Valve ....................37 6.3.21 Burner Injector .....................38 6.3.22 Burner........................38 6.3.23 Outer Glass ......................38 6.3.24 Inner Glass ......................39 6.3.25 Door Seals......................39 6.3.26 Door Pivot Bushes....................39 6.3.27 Stainless Steel Door Outer Glass................39 6.3.28...
-
Page 23: Fault Diagnosis
problem is in the flame sensing, not spark 6.1 FAULT DIAGNOSIS ignition. Refer “Burner flame not being sensed” (following). 6.1.1 OVEN DOES NOT OPERATE / START Firstly determine if spark is being generated. Incorrect electrical supply Remove the front service panel and turn the Check that the voltage across phase and thermostat on to initiate a heating cycle. - Page 24 Also, Ignition box faulty - 110V models only an incorrectly earthed/grounded appliance will The direct spark ignition control boxes used cause faults with the flame sensing system. on 110V models G32’s are 24Vac type. Always ensure correct earth/ground...
- Page 25 - 3 Flashes Indicates LOCK-OUT condition. only Possible flame rectification rod The direct spark ignition control boxes used short to earth. Refer to fault on 220-240 volt model G32’s are operated diagnosis 6.1.2 - Burner Flame from direct voltage supply from Not Being Sensed.
- Page 26 number 203926, using SIT ignition boxes, To determine if valve solenoids are operating check correct supply voltage across terminal correctly, attach a pressure gauge to the T10 (red phase wire), and terminal T12 (black burner pressure test point after the gas valve, neutral wire) on ignition box.
-
Page 27: Burner Noisy (Burner Blowback / Backfire)
these terminals when ‘Roast ‘n Hold’ is not If there is no voltage, open oven door and selected. manually depress door microswitch actuator at bottom right of oven. If this activates the Thermostat faulty lights, then the microswitch actuator arm behind the control panel requires adjustment. -
Page 28: Continuous Water Out Of Oven Water Nozzle
solenoid coil with the steam switch depressed. Timer not switching on buzzer If there is no power supply then check the With timer in zero position, check voltage to control panel steam switch. top connection (terminal one) and bottom Check voltage to the bottom terminal of the connection (terminal two) of timer. -
Page 29: Roast Timer (180 Minute) Will Not Time Down
6.1.14 ROAST TIMER (180 MINUTE) WILL 6.1.15 NO HOLD INDICATOR NOT TIME DOWN Indicator faulty No power to timer Check the voltage across the indicator termi- nals. If the voltage is correct then the indica- Check the voltage at terminal 5 on underside tor is faulty—replace. -
Page 30: Access
6.2 ACCESS 6.2.1 CONTROL PANEL 1) Undo the two screws on top of control panel. Six Screws Two Screws Figure 6.2.3 6.2.4 BURNER ACCESS PANEL 1) Undo two screws holding the panel. Figure 6.2.1 2) Remove panel. 2) Panel is now free to hinge at bottom. When closing the panel ensure wires and capillary tube are clear of metal or other terminals. -
Page 31: Replacement
6.3 REPLACEMENT 6.2.6 CONTROL PANEL—REAR Power Switch 6.3.1 LAMP BULB / GLASS Heating Indicator 1) Unscrew lamp cover(s). Thermostat Lamp Covers Buzzer Bake Time Up Indicator Bake Timer Hold Thermostat Figure 6.3.1 Roast‘n Hold Switch 2) Unscrew bulb out of fitting. Roast ‘n Hold Time 3) Screw in replacement bulb. -
Page 32: Power / Roast / Lights / Water Switches
3) Withdraw and remove two screws holding Neon buzzer to bracket. Wires Screws Figure 6.3.3 2) From back push neon through front of panel rotating clockwise. 3) Push new neon in from front of panel, and Figure 6.3.6 reconnect wires. 4) Transfer wires to new buzzer. -
Page 33: Roast Timer
3) Transfer wires to new timer. 4) Withdraw old timer and insert new timer, securing with screws. 5) Replace knob. Two Screws 6.3.8 ROAST TIMER Figure 6.3.11 1) Remove roast timer knob by pulling it firmly away from control panel. 5) Withdraw old thermostat phial through 2) Open control panel (refer 6.2.1) and undo side of oven. -
Page 34: Hold Thermostat
4) Remove water solenoid from oven by 6.3.10 HOLD THERMOSTAT removing two screws securing the water solenoid bracket electrical supply 1) Open control panel (refer 6.2.1) and undo junction box. two screws securing hold thermostat bracket. Two Screws Two Screws Figure 6.3.14 Figure 6.3.16 2) Transfer wires to new thermostat. -
Page 35: Fan
5) Ensure wire connections are correct to the voltage supply—60 Hz / 50 Hz (fig 6.3.20) 6.3.16 OVERTEMP THERMOSTAT (UK UNITS ONLY) 1) Open control panel (refer 6.2.1) Spray Nozzle 2) To reset, firmly press reset button. Figure 6.3.18 WARNING: OVERTEMP BUTTON IS 2) Clean or replace as required, ensuring LIVE. -
Page 36: Ignition Box
3) Remove the two screws securing the 3) Disconnect wires (earth at sensor, flame transformer to the oven. sensor and spark electrode at lead connections) from electrodes requiring replacement. 4) Unscrew screws/nuts securing electrodes and remove from bracket. Two Screws Electrode Nuts Figure 6.3.23... -
Page 37: Burner Injector
5) Remove the two screws securing the gas 3) Clean or replace injector as required. valve mounting bracket to the burner box Re-assemble in reverse order. panels. 6.3.22 BURNER 1) Remove burner access panel (refer 6.2.4). Screws 2) Remove ignition electrode assembly (refer 6.3.17) 3) Remove injector (refer 6.3.21). -
Page 38: Inner Glass
Four Screws Four Screws Figure 6.3.35 5) Lift outer glass away from door. Door Seals 6) To replace, ensure that the two silicone Figure 6.3.37 rubber seals are in place on the left hand and right hand side of the door frame. 6.3.26 DOOR PIVOT BUSHES Clean the inside of the glass and refit it, ensuring that the silicone rubber seals... -
Page 39: Adjustment / Calibration
Pivot (Two 6.4 ADJUSTMENT / CALIBRATION Screws) 6.4.1 REGULATOR ADJUSTMENT The appliance regulator is incorporated in the gas valve on these units. The regulator should adjusted burner Screws pressure with the main burner running. adjust: 1) Fit pressure gauge to pressure test point. 2) Remove screw cap on regulator of valve. -
Page 40: Confirming Overtemp Thermostat Calibration (Uk Units Only)
Thermostat Shaft 6) Adjust the calibration nut located at the Calibration base of the thermostat shaft. Fan Switch increase oven temperature, turn calibration nut anticlockwise. To decrease oven temperature, turn calibration nut clockwise. Adjustment of the calibration nut by 1° angular will alter oven temperature by approximately 2°C (3.6°F). -
Page 41: Door Catch Adjustment
6.4.7 HOLD TEMPERATURE ADJUSTMENT 1) Open control panel (refer 6.2.1) 2) The hold temperature of the oven can be Actuator Arm adjusted by turning the hold thermostat dial to the desired hold temperature. Hold Thermostat Figure 6.4.7 Dial 6.4.5 DOOR CATCH ADJUSTMENT 1) Open the control panel (refer 6.2.1). -
Page 42: Circuit Schematics
7. CIRCUIT SCHEMATICS 7.1.1 220-240V 50Hz (UK ONLY) - FROM SERIAL NO 203927 For units pre serial number 203926 refer section 7.1.2 Revision 5/F3528 -43-... - Page 43 7.1.2 220-240V 50Hz (UK ONLY) - TO SERIAL NO 203926 For units after serial number 203927 refer section 7.1.1 Revision 5/F3528 -44-...
-
Page 44: 100-120V 60Hz (Usa, Canada)
7.2.1 100-120V 60Hz (USA, CANADA) - FROM SERIAL NO 203927 For units pre serial number 203926 refer section 7.2.2. Revision 5/F3528 -45-... - Page 45 7.2.2 100-120V 60Hz (USA, CANADA) - TO SERIAL NO 203926 For units after serial number 203927 refer section 7.2.1 Revision 5/F3528 -46-...
- Page 46 7.3.1 220-240V 50Hz (NOT UK) - FROM SERIAL NO 203927 For units pre serial number 203926 refer section 7.3.2 ELECTRICAL WATER Revision 5/F3528 -47-...
- Page 47 7.3.2 220-240V 50Hz (NOT UK) - TO SERIAL NO 203926 For units after serial number 203927 refer section 7.3.1 Revision 5/F3528 -48-...
-
Page 48: Electrical Wiring Diagrams
8. ELECTRICAL WIRING DIAGRAMS 8.1.1 220-240V 50Hz (UK ONLY) - FROM SERIAL NO 203927 For units pre serial number 203926 refer section 8.1.2 Revision 5/F3528 -49-... -
Page 49: 220-240V 50Hz (Not United Kingdom)
8.1.2 220-240V 50Hz (UK ONLY) - TO SERIAL NO 203926 For units after serial number 203927 refer section 8.1.1 Revision 5/F3528 -50-... - Page 50 8.2.1 100-120V 60Hz (USA, CANADA) - FROM SERIAL NO 203927 For units pre serial number 203926 refer section 8.2.2 Revision 5/F3528 -51-...
- Page 51 8.2.2 100-120V 60Hz (USA, CANADA) - TO SERIAL NO 203926 For units after serial number 203927 refer section 8.2.1 Revision 5/F3528 -52-...
- Page 52 8.3.1 220-240V 50Hz (NOT UK) - FROM SERIAL NO 203927 For units pre serial number 203926 refer section 8.3.2 Revision 5/F3528 -53-...
- Page 53 8.3.2 220-240V 50Hz (NOT UK) - TO SERIAL NO 203926 For units after serial number 203927 refer section 8.3.1 Revision 5/F3528 -54-...
-
Page 54: Spare Parts
9. SPARE PARTS PART NO DESCRIPTION CONTROLS 021473 Switch - Power (220-240V) 021514 Switch - Power (110V) 011987 Thermostat 020823 Knob - Thermostat / Bake Timer 020849 Neon Indicator (220-240V) 023857 Neon Indicator (110V) 011760 Bake Timer 011794 Buzzer (220-240V) 015822 Buzzer (110V) 021476... - Page 55 IGNITION SYSTEM 023025 Ignition Box (220-240V - SIT) - From Serial Number 203927 014983 Ignition Box (220-240V, Not UK - Scarico) - Up To Serial Number 203926 018730 Obsolete Ignition Box - (220-240V UK Only - Teknigas) - Up To S/N 203926 Use replacement kit 023962 023024 Ignition Box (110V, USA/Canada - Fenwall) - From Serial Number 203927...
- Page 56 10. ACCESSORIES OVEN RACKS (PART NO 015168) DOUBLE STACKING KIT (PART NO 021545) COOKIE KIT—SIX TRAY OPTION (PART NOS 017156 & 017157) A25 STAINLESS STEEL STAND STAINLESS STEEL DOOR OPTION (PART NO SA1060) Revision 5/F3528 -57-...
-
Page 57: Parts Diagram
11. PARTS DIAGRAMS 11.1 MAIN ASSEMBLY Revision 5/F3528 -58-... - Page 58 Part No. Description 016241 VENT HOOD PLATE 016245 HOOD SPACER 021449 WRAPPER 017872 INSPECTION PANEL 021173 FRONT VERTICAL 014983 IGNITION BOX - SCARICO (ALL MARKETS EXCEPT USA / CANADA / UK) (TO S/N 203926) 018730 IGNITION BOX - TEKNIGAS (UK ONLY) (TO S/N 203926) 023025 IGNITION BOX - SIT (ALL MARKETS EXCEPT USA/CANADA) (FROM S/N 203927)
- Page 59 015324 GAS VALVE BRACKET 014889 HEAT BOX REAR 015327 BURNER SUPPORT BRACKET 014890 HEAT BOX L.H SIDE 015537 INSULATION KEEP CHANNEL REAR 014728 BURNER BOX DEFLECTOR SA1530 IGNITION ELECTRODE ASSEMBLY (FROM S/N 218596) (SEE SECTION 11.3.1) 015115 IGNITION ELECTRODE ASSEMBLY (TO S/N B47875) (SEE SECTION 11.3.3) - OBSOLETE: UPGRADE WITH SA1530 018760 IGNITION ELECTRODE ASSEMBLY (UK ONLY TO S/N B47875) (SEE SEC-...
-
Page 60: 11.2 Control Panel Assembly
11.2 CONTROL PANEL ASSEMBLY Mounted on item ‘6’ Main assembly Revision 5/F3528 -61-... - Page 61 Part No. Description 004723 CONTROL PANEL ºC (except UK) 004730 CONTROL PANEL ºF 004804 CONTROL PANEL ºC (UK only) 011987 THERMOSTAT 50-320 ºC 011794 BUZZER (240V) 015822 BUZZER (110V USA/CANADA ONLY) 021537 BUZZER MOUNTING BRACKET 011760 TIMER - 1 Hr 018224 HOLD THERMOSTAT KNOB 021538...
- Page 62 11.3.1 IGNITION ELECTRODE ASSEMBLY - FROM SERIAL NO 218596 For units pre serial no 218596 refer section 11.3.2. Part No. Description SA 1530 IGNITION ELECTRODE ASSEMBLY (COMPLETE) 024105 IGNITION ELECTRODE BRACKET 024106 ELECTRODE MOUNTING BRACKET 024127 SPARK ELECTRODE 022902 FLAME ELECTRODE 041022 SCREW 045011...
- Page 63 11.3.2 IGNITION ELECTRODE ASSEMBLY - FROM S/N 47875 TO 218595 For units pre serial no 47875 refer section 11.3.3 / 11.3.4. For units after serial number 218595 refer section 11.3.1 Part No. Description SA 1021 IGNITION ELECTRODE ASSEMBLY (COMPLETE) - OBSOLETE - REPLACE WITH 022909 ELECTRODE ASSEMBLY UPGRADE KIT 022903 IGNITION ELECTRODE BRACKET...
- Page 64 11.3.3 IGNITION ELECTRODE ASSEMBLY (NOT UK) - TO SERIAL NO 47875 For units after serial number 47875 refer section 11.3.2 Part No. Description 015115 IGNITION ELECTRODE ASSEMBLY (COMPLETE) - OBSOLETE - REPLACE WITH 022909 ELECTRODE ASSEMBLY UPGRADE KIT 015316 IGNITION SPARK ROD 016051 ELECTRODE EXTENSION 015315...
- Page 65 11.3.4 IGNITION ELECTRODE ASSEMBLY (UK ONLY) - TO SERIAL NO 47875 For units after serial number 47875 refer section 11.3.2 Part No. Description Part No. Description 018760 IGNITION ELECTRODE ASSEMBLY (COMPLETE) - OBSOLETE 018760 IGNITION ELECTRODE ASSEMBLY (COMPLETE) - OBSOLETE - REPLACE WITH 022909 ELECTRODE ASSEMBLY UPGRADE KIT - REPLACE WITH 022909 ELECTRODE ASSEMBLY UPGRADE KIT 015315...
-
Page 66: 11.4 Gas Piping Assembly
11.4 GAS PIPING ASSEMBLY Revision 5/F3528 -67-... - Page 67 Part No. Description 019370 GAS CONTROL VALVE (240V ONLY) 015626 GAS CONTROL VALVE (110V USA/CANADA ONLY) 015541 GAS CONTROL VALVE KIT (240V - REPLACES VALVE TYPE 25M02 WITH 19370 - GAS VALVE TYPE 25M42) 019338 ELECTRICAL CONNECTOR (NOT ILLUSTRATED) 015542 CONNECTOR 3/8”...
-
Page 68: Service Contacts
Mulgrave VIC 3170 Fax (03) 9518 3838 Spare Parts Department Free Call 1800 337 963 Fax (03) 9518 3895 NEW SOUTH WALES - MOFFAT PTY Unit 8/142 James Ruse Drive Rosehill NSW 2142 Spare Parts Free Call 1800 337 963... - Page 69 Units 6-7 Mount St Tel 0121-327 5575 Business Park Fax 0121-327 9711 Birmingham B7 5QU England UNITED STATES OF AMERICA MOFFAT INC. 3765 Champion Blvd Winston-Salem Tel 1-800-551 8795 NC27115 Fax 336 661 9546 NATIONAL COVERAGE FOR SERVICE OR MAINTENANCE DIAL...
-
Page 70: Appendix A. Ignition Box Replacement Kits
APPENDIX A. IGNITION BOX REPLACEMENT KITS A.1 TEKNIGAS TO SIT IGNITION BOX REPLACEMENT KIT For G32 gas convection ovens G32H (UK) From serial number 23020 to serial number 203926 Turn off power and disconnect from electrical supply. Open control panel. - Page 71 Revision 5/F3528 -72-...
- Page 72 A.2 WHITE RODGERS TO FENWAL IGNITION BOX REPLACEMENT KIT For G32 gas convection oven models G32W (USA/Canada) For serial number up to 203926 Turn power off and disconnect from supply. Open control panel. Remove ignition box mounting panel assembly (2 screws).
- Page 73 Revision 5/F3528 -74-...
-
Page 74: Appendix B. Ignition Box Specifications
APPENDIX B. IGNITION BOX SPECIFICATIONS B.1 110 VOLT G32 MODELS, USA / CANADA Up to serial number 203926 Make White Rodgers Type 50D20-150 or 50D20-152 Case Colour White Voltage 24Vac (18-30Vac), 50Hz Ignition Trial Period 7 Seconds Pre-purge 0 seconds... - Page 75 B.2 220-240 VOLT G32 MODELS Up to serial number 203926 UK Models Only Make Black Teknigas Type 703-05-10 Case Colour Black Voltage 230-240 Vac Ignition Trial Period 10 Seconds Pre-purge 5 seconds Ignition Retries None Re-ignition Attempts Spark Rate Spark Voltage...