
Related Manuals for American Audio Versadeck


Summary of Contents for American Audio Versadeck
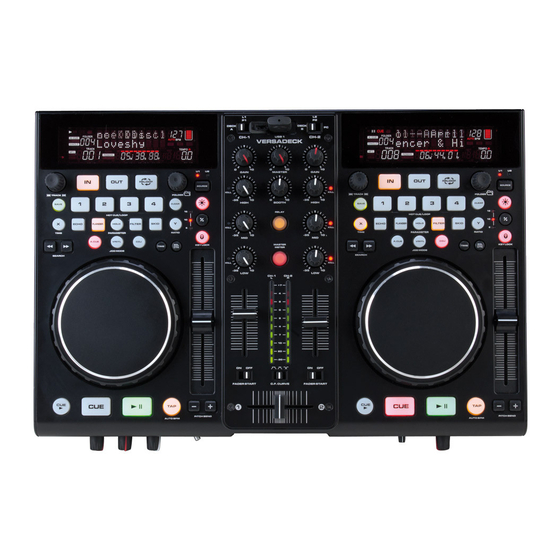
- Page 1 E A T U R I N G ©American Audio® - www.americanaudio.eu Versadeck™ User Manual Page 1...
- Page 2 ©American Audio® - www.americanaudio.eu Versadeck™ User Manual Page 2...
- Page 3 Please Note: All specifications and improvements to and in the design of this unit and this manual are subject to change at any time without any prior written or published noticed. ©American Audio® - www.americanaudio.eu Versadeck™ User Manual Page 3...
- Page 4 6122 S. Eastern Ave Los Angeles Ca. 90040 www.americanaudio.eu ©American Audio® - www.americanaudio.eu Versadeck™ User Manual Page 4...
-
Page 5: Table Of Contents
10.4 Rear Panel ........................31 10.5 VFD Display ........................33 Internal Menu ........................ 35 Basic Operations ......................37 12.1 Loading/Ejecting an USB Device ................... 37 12.2 Selecting Tracks ......................37 12.3 Starting Playback ......................38 ©American Audio® - www.americanaudio.eu Versadeck™ User Manual Page 5... - Page 6 15.4 Flanger Effect ........................ 53 15.5 Parameters ........................54 15.6 Hold Button ........................54 Playlist Operation ......................55 Relay Mode (Flip-Flop™) ....................56 17.1 Relay single tracks ......................56 17.2 Flip-Flop™ entire Folders ....................56 ©American Audio® - www.americanaudio.eu Versadeck™ User Manual Page 6...
- Page 7 ROHS – A Contribution to the Conservation of Environment ........70 WEEE – Waste of Electrical and Electronic Equipment ..........71 Specifications ......................... 72 25.1 General ......................... 72 25.2 USB Player Section ....................... 72 25.3 MP3 Format ........................73 ©American Audio® - www.americanaudio.eu Versadeck™ User Manual Page 7...
-
Page 8: Electrical Safety Precautions
To avoid electric shock, do not open the top cover when the unit is plugged in. If problems occur with the unit, call your local American Audio® dealer. Do not place metal objects or spill liquid inside the unit. Electric shock or malfunction may occur. - Page 9 41˚- 95˚F or 5˚C - 35˚C. WARNING: TO PREVENT FIRE OR SHOCK HAZARD, DO NOT EXPOSE THIS DEVICE TO WATER OR MOISTURE! ©American Audio® - www.americanaudio.eu Versadeck™ User Manual Page 9...
-
Page 10: Important Safety Precautions
Power Sources – This product should be operated only from the type of power source indicated on the marking label. If you are not sure of the type of power supply to your home, consult your product dealer or local power company. ©American Audio® - www.americanaudio.eu Versadeck™ User Manual Page 10... - Page 11 Power Lines – An outside antenna system should not be located in the vicinity of overhead power lines or other electric light or power circuits, or where it can fall into such power lines ©American Audio® - www.americanaudio.eu Versadeck™ User Manual Page 11...
- Page 12 Wall or Ceiling Mounting – The product should not be mounted to a wall or ceiling. Heat – The product should be situated away from heat sources such as radiators, heat registers, stoves, or other products (including amplifiers) that produce heat. ©American Audio® - www.americanaudio.eu Versadeck™ User Manual Page 12...
-
Page 13: Further Safety Instructions
Objects have fallen, or liquid has been spilled into the unit. The unit has been exposed to rain or water. The unit does not appear to operate normally or exhibits a marked change in performance. ©American Audio® - www.americanaudio.eu Versadeck™ User Manual Page 13... - Page 14 Model No. ____________________________________________________________ Serial No. ____________________________________________________________ Purchase Notes ____________________________________________________________ Date of Purchase ____________________________________________________________ Dealer Name ____________________________________________________________ Dealer Address _____________________________________________________________ ___________________________________________________________________________ ___________________________________________________________________________ Dealer Phone ______________________________________________________________ ©American Audio® - www.americanaudio.eu Versadeck™ User Manual Page 14...
-
Page 15: Unpacking
5. U NPACKING Every Versadeck™ has been thoroughly tested and has been shipped in perfect operating condition. Carefully check the shipping carton for damage that may have occurred during shipping. If the carton appears to be damaged, carefully inspect your system for any damage and be sure all equipment necessary to operate the system has arrived intact. -
Page 16: Introduction
USTOMER UPPORT American Audio® provides a toll free customer support line to provide set up help and to answer any questions, should you encounter problems during your initial set-up or operation. You may also visit us on the web at www.AmericanAudio.us for any comments or suggestions. -
Page 17: Set-Up Precautions
Keep the unit out of direct sunlight and away from heaters. Operate the device only after becoming familiar with its functions. Do not permit operation by persons not qualified for operating the unit. Most damages are the result of unprofessional operation! ©American Audio® - www.americanaudio.eu Versadeck™ User Manual Page 17... -
Page 18: Main Features
Adjustable Pitch Percentages: +/-6%, +/-10%, or +/-16% (a) FADER “Q” START CONTROL: Set up your Versadeck™ as described in chapter 9 (Set-Up) and 20 (Mixer Setup) of this manual. After set up is completed load your players. By moving the mixer’s crossfader from left to right you can start and pause each player’s playback functions. - Page 19 New cue points can be easily selected on the Versadeck™ player, please see chapter 12.8 Setting a Cue Point. “Q” Start control is easy to use and mastering this feature will help you create amazing effects with your music.
-
Page 20: Set-Up
NOTE: For higher quality MP3 files (more than 128 kbps) American Audio® recommends "High Speed" SD Cards. Using high speed cards will ensure the best performance with your American Audio® Player. NOTE: If the Versadeck™ cannot read your USB device, please make sure that it FAT formatted. 9.2 C... - Page 21 DEVICE Turn ON the amp, mixer, speakers, or any external device first. Next, turn ON the Versadeck™. CAUTION: The VFD is designed to be clearly visible within the angles shown in Figure 1. Mount the unit so that the visual angle is within this range.
-
Page 22: General Functions And Controls
Pause mode. (3) Clear Button – Use this button to clear the Bank Buttons (19). Press this button and then press the Bank Button (19) you would like to clear. ©American Audio® - www.americanaudio.eu Versadeck™ User Manual Page 22... - Page 23 In Pause Mode – When the player is paused, you can use the jog wheel to frame search. ©American Audio® - www.americanaudio.eu Versadeck™ User Manual Page 23...
- Page 24 When you release the CUE button, it instantly returns to the Cue Point. (15) CUE PLAY Button – Press this button to instantly start playback from the last Cue Point. ©American Audio® - www.americanaudio.eu Versadeck™ User Manual Page 24...
- Page 25 System Lock Button – If you press and hold the button for 3 seconds you will activate the System Lock. The button LED will flash when the Hold function is active. To unlock the Hold function, press and hold the button for 3 seconds. ©American Audio® - www.americanaudio.eu Versadeck™ User Manual Page 25...
- Page 26 IN Button – “Cue On The Fly” - This function allows you to set a Cue Point without music interruption (“on the fly”), see chapter 12.8 Setting a Cue Point. This button also ©American Audio® - www.americanaudio.eu Versadeck™ User Manual Page 26...
-
Page 27: Top Unit Mixer Controls
(23) VFD Display – This high quality VFD display indicates all the various functions, as they are occurring. This display is viewable at several comfortable angles, see chapter 9 (Set-Up). The display icons will be explained in chapter 10.5 VFD Display. 10.2 T IXER ONTROLS ©American Audio® - www.americanaudio.eu Versadeck™ User Manual Page 27... - Page 28 Bass Control – This knob is used to adjust the low frequency levels of a channel allowing for a maximum bass gain of +10dB or maximum signal decrease of -35dB. Turning the knob in a counter-clockwise direction will decrease the amount of bass ©American Audio® - www.americanaudio.eu Versadeck™ User Manual Page 28...
- Page 29 (36) Master Volume Control – This rotary knob is used to control the master output level (volume). To avoid distorted output, try to maintain an average output signal level +4 dB. Be sure this volume control is always set to zero before turning the unit on. ©American Audio® - www.americanaudio.eu Versadeck™ User Manual Page 29...
-
Page 30: Front Panel
Use headphones only rated at 8 ohms to 32 ohm. Most DJ headphones are rated at 16 ohm, these are highly recommended. Always be sure the Cue Level Volume (43) is set to minimum before you put the headphones on. ©American Audio® - www.americanaudio.eu Versadeck™ User Manual Page 30... -
Page 31: Rear Panel
Phono as described in the section above. The red colored RCA jack represents the right channel input and the white represents the left channel input. Input volume will be controlled by channel 2 fader. The channel Source Selector Switch (24) must be in the Line ©American Audio® - www.americanaudio.eu Versadeck™ User Manual Page 31... - Page 32 CD players and any other line level instruments are connected to these jacks, to monitor any source connected to these jacks. (50) Booth Output Jacks – The Versadeck™ offers a secondary output usually used to monitor your mix or to route to an outboard recording device. This output volume is controlled by the Booth Level Knob (35).
-
Page 33: Vfd Display
When the Elapsed indicator is displayed in the VFD Display (23), the time defined will refer to a single track's elapsed time. When Remain is indicated in the VFD DISPLAY (23), the Time ©American Audio® - www.americanaudio.eu Versadeck™ User Manual Page 33... - Page 34 (74) Auto CUE – This will indicate if the Auto Cue is on or off. Press and hold the SGL/CTN (7) for 1 second, to turn the Auto Cue function on and off. ©American Audio® - www.americanaudio.eu Versadeck™ User Manual Page 34...
-
Page 35: Internal Menu
F. LOAD DEFAULTS – Press the Track Knob (21) to change all settings back to default. G. EXIT & SAVE – Exit & Save your custom settings until you power down. Press the Track Knob (21) to exit & save. ©American Audio® - www.americanaudio.eu Versadeck™ User Manual Page 35... - Page 36 REPEAT MODE (ALL), MIDI CHANNEL (1-2-3), MIDI SETUP (TAP=HOLD, I/O=HIDE), CROSSFADER (UNLOCK) CROSSFADER REVERSE (OFF), DISPLAY TIME (3sec.), SCROLL SPEED (400ms), SENSITIVITY (0), INTENSITY (4), A.CUE LEVEL (-48dB), BIT RATE DISPLAY (ON) ©American Audio® - www.americanaudio.eu Versadeck™ User Manual Page 36...
-
Page 37: Basic Operations
10 tracks forward or 10 tracks backward. Turning the Track Button counter- Turning the Track Button clockwise clockwise will jump back to the will skip forward to the next track. previous track. ©American Audio® - www.americanaudio.eu Versadeck™ User Manual Page 37... -
Page 38: Starting Playback
This will pause playback at the exact same point the Play/Pause Button (13) was pressed. Press the CUE Button (14) during playback. This will pause playback and return the track to the last set cue point. ©American Audio® - www.americanaudio.eu Versadeck™ User Manual Page 38... -
Page 39: Frame Search
This will set a cue point without music interruption. Pressing the CUE Button (14) will now return you to the same point that you pressed the IN Button (22). ©American Audio® - www.americanaudio.eu Versadeck™ User Manual Page 39... -
Page 40: Creating And Playing A Seamless Loop
This loop has no time limit and you could actually loop the entire length of disc. You create a seamless loop between two continuous points of a disc. ©American Audio® - www.americanaudio.eu Versadeck™ User Manual Page 40... - Page 41 VFD Loop Indicators – During a loop, the Reloop Indicators (73) will turn on in the VFD Display (23) indicating a loop is active. ©American Audio® - www.americanaudio.eu Versadeck™ User Manual Page 41...
- Page 42 If you haven’t created a seamless loop, follow the instructions above to create a loop. If a seamless loop has already been created, press the Reloop Button (22) to activate your seamless loop if it is not already activated. ©American Audio® - www.americanaudio.eu Versadeck™ User Manual Page 42...
-
Page 43: Changing The Time Display (66) / Time Bar (67)
If the unit is not in playback mode, pressing and holding any of the Bank Buttons (19) that stores a loop or cue point, will immediately begin to playback from that point until that Bank Button (19) is released. ©American Audio® - www.americanaudio.eu Versadeck™ User Manual Page 43... - Page 44 (22) is pressed. Your cue point or loop can now be recalled at any time even when the unit is in pause mode. To recall, press the corresponding Bank Button (19). ©American Audio® - www.americanaudio.eu Versadeck™ User Manual Page 44...
-
Page 45: Pitch Adjustments
Press the Pitch On/Off Button (4) to activate the pitch adjustment. The On/Off Button (4) LED will glow when the function is activated. If the pitch function is not activated the Pitch Slider will not function. ©American Audio® - www.americanaudio.eu Versadeck™ User Manual Page 45... -
Page 46: Pitch Bending
For example, if the Pitch Slider (10) is set to a 2% pitch gain the pitch bending process will begin at 2% and will continue to the maximum of +/- 16%. ©American Audio® - www.americanaudio.eu Versadeck™ User Manual Page 46... - Page 47 16% speed gain. When you release the (+) Pitch Bend Button (11) the audio speed will automatically return to its previous set speed. ©American Audio® - www.americanaudio.eu Versadeck™ User Manual Page 47...
-
Page 48: Jog Wheel (16)
-100% and playback stops entirely. When you stop turning the Jog Wheel the disc speed will automatically return to its previous set speed. Figure 33 ©American Audio® - www.americanaudio.eu Versadeck™ User Manual Page 48... -
Page 49: Jog Wheel Functions
Wheel (16) can be used to return the unit to last cue point. Simply touch the Jog Wheel (16) and the unit will immediately return to the last set cue point and playback without music interruption. ©American Audio® - www.americanaudio.eu Versadeck™ User Manual Page 49... -
Page 50: Vinyl Mode And Cdj Mode
The CDJ Mode is used for pitch bending and frame search. INYL Before you can use the Jog Wheel (16) to simulate real time turntable scratching you must activate the Vinyl Mode. To activate press the Vinyl Button (9). ©American Audio® - www.americanaudio.eu Versadeck™ User Manual Page 50... - Page 51 100%, while rotating counter-clockwise will slow it down. Remember, this is a momentary function. When you stop rotating the wheel, the BPM will automatically return to the Pitch Slider’s (10) selected pitch. ©American Audio® - www.americanaudio.eu Versadeck™ User Manual Page 51...
-
Page 52: Built-In Effects
UILT FFECTS The Versadeck™ comes with four built-in effects. These effects can be used one at a time or you may choose to overlap the effects and use up to four at a time. The built-in effects include Echo, Filter, Skid, and Flanger. You can choose to use the effects with their default parameters or you may choose to customize each effect by changing the parameters. -
Page 53: Echo Effect
The Flanger Effect has two adjustable parameters, Parameter Time (PT) and Parameter Ratio (PR). The PT will adjust the Time Range and the PR will adjust the Frequency Range, read more about it in chapter 15.5 Parameters. ©American Audio® - www.americanaudio.eu Versadeck™ User Manual Page 53... -
Page 54: Parameters
VFD, and the Hold Button (18) LED will flash. To unlock the player press the Hold Button (18) for at least 3 seconds or until Unlock is displayed in the VFD. ©American Audio® - www.americanaudio.eu Versadeck™ User Manual Page 54... -
Page 55: Playlist Operation
(16) to jump to the next artist. You can skip through tracks by turning the Track Knob (21), or by pressing the Track Knob (21) and turning the Jog Wheel (16) as well. ©American Audio® - www.americanaudio.eu Versadeck™ User Manual Page 55... -
Page 56: Relay Mode (Flip-Flop™)
™) ELAY This feature is a kind of “auto pilot”. When you are using the Versadeck™ system, you can have one player begin playback when the other ends. You can Relay single tracks, the entire folder, or a combination of the two. -
Page 57: Database Builder
Title, Artist, Album, and Genre. 18.2 I NSTALLATION Refer to the following figures for installing database management software on your computer: Step 2: Click Next > Step 1: Click Next > ©American Audio® - www.americanaudio.eu Versadeck™ User Manual Page 57... -
Page 58: Scan And Create
Step 5: Click Finish 18.3 S CAN AND REATE Refer to the following figures to process scanning and creating a database. ©American Audio® - www.americanaudio.eu Versadeck™ User Manual Page 58... -
Page 59: American Audio® - Www.americanaudio.eu Versadeck™ User Manual
Select your desired USB hard drive and click "Build". Processing Complete Note: Please re-create the database builder whenever you change the contents of your USB device. ©American Audio® - www.americanaudio.eu Versadeck™ User Manual Page 59... -
Page 60: Possible Errors
This is due to MP3 file not have an identified ID3 tag. Windows 7/Vista may warn you according to your security settings. Select Allow if you wish to install the database builder program. ©American Audio® - www.americanaudio.eu Versadeck™ User Manual Page 60... -
Page 61: Midi Map
09/09 1~ 31: LED (RED) 32:BLINK 00H_OFF 09/09 09/09 33~63: LED (GREEN) 64:BLINK 00H_OFF SW/LED 0A/0A A#-1 0A/0A A#-1 1~ 31: LED (RED) 32:BLINK 00H_OFF 0A/0A A#-1 0A/0A A#-1 33~63: LED ©American Audio® - www.americanaudio.eu Versadeck™ User Manual Page 61... - Page 62 15/15 7FH_ON 00H_OFF 7FH_ON 00H_OFF 7FH_ON 00H_OFF A.Cue SW/LED 18/18 18/18 7FH_ON scratch 00H_OFF Vinyl SW/LED 19/19 19/19 7FH_ON 00H_OFF SW/LED 1A/1A 1A/1A 7FH_ON 00H_OFF Time 7FH_ON 00H_OFF SGL/CTN 7FH_ON 00H_OFF ©American Audio® - www.americanaudio.eu Versadeck™ User Manual Page 62...
- Page 63 53/65/ 24/26/2B 63/65/ VR:00~7F CENTER/ Channel VR:00~7F Fader 7FH_ON 00H_OFF 7FH_ON 00H_OFF 7FH_ON 00H_OFF Level Level 00H~7FH_ Meter LED Meter Relay SW/LED 37/37 7FH_ON 00H_OFF Master SW/LED 38/38 7FH_ON Meter 00H_OFF ©American Audio® - www.americanaudio.eu Versadeck™ User Manual Page 63...
-
Page 64: Midi Types
The value ranges from 0x00 to 0x7F, directly related to the location of the controller. EVEL ETER 00~0B => ALL LEDS OFF 0C~17 => LED (-30) ON 18~23 => LED (-30, -20) ON 24~2F => LED (-30, -20, -10) ON ©American Audio® - www.americanaudio.eu Versadeck™ User Manual Page 64... - Page 65 LED ON/OFF (LED T These messages are used for LEDs. Control Change messages are sent with status 0x9n, LED On and Off values are 0x7F and 0x00, where n is the channel.* ©American Audio® - www.americanaudio.eu Versadeck™ User Manual Page 65...
-
Page 66: Mixer Setup
USB storage device, and speakers. When connecting and using a turntable be sure the Channel Line Level Selector Switch (47) that corresponds with turntable connection is in the Phono position. ©American Audio® - www.americanaudio.eu Versadeck™ User Manual Page 66... -
Page 67: Typical Balanced Output Set-Up
Always use the balanced output jacks whenever possible. The balanced output jacks should always be used for cable runs in excess of 15 feet. Using the balanced jacks will ensure a clean signal throughout the entire audio system. ©American Audio® - www.americanaudio.eu Versadeck™ User Manual Page 67... -
Page 68: Crossfader Replacement
5. Connect the new crossfader to the ribbon cable and replace in reverse order. Note: All other areas of the Versadeck™ are not to be opened or replaced by user, dealer, or un-authorized service centers. These actions will result in a voided warranty. -
Page 69: Troubleshooting
5 volt power consumption. If your hard drive resets itself when plugged into the USB ports on the Versadeck™ you may need an external power supply. Contact your device manufacturer for accessory information. -
Page 70: Rohs - A Contribution To The Conservation Of Environment
As manufacturers of products of the brands of AMERICAN AUDIO®, AMERICAN DJ®, ELATION Professional and ACCLAIM Lighting, we are obligated to comply with the ROHS directive. -
Page 71: Weee - Waste Of Electrical And Electronic Equipment
(Registration in Germany: DE41027552) That means that products of AMERICAN DJ® and AMERICAN AUDIO® can be left in the collection points free of charge and they will be used in the recycling program. Products of ELATION Professional, which are used only by professionals, shall be handled by us. Please send Elation products directly to us at the end of their lifetime so that we can professionally dispose of them. -
Page 72: Specifications
More than 70dB (TCD782 TRK2,8, Set Gain to 0dBV Out, EQ Flat, W/20KHz LPF, A-Weighted) L/R Separation More than 63dB @ 1KHz (TCD782 TRK2,9,11, Set Gain to 0dBV Out, EQ Flat, W/20KHz LPF, A-Weighted) ©American Audio® - www.americanaudio.eu Versadeck™ User Manual Page 72... -
Page 73: Mp3 Format
16, 22.05 and 24 kHz. MPEG 2.5 Layer 3 standard, which 32/40/48/56/64/80/96/112/1 provides for similar coding at sampling 44/160 KbpsXing/VBRI VBR rates of 8, 11.025 and 12 kHz. ©American Audio® - www.americanaudio.eu Versadeck™ User Manual Page 73... - Page 74 Note: Specifications and improvements in the design of this unit and this manual are subject to change without any prior written notice. ©American Audio® - www.americanaudio.eu Versadeck™ User Manual Page 74...
- Page 75 Follow us on: facebook.com/americandj twitter.com/americandj youtube.com/adjlighting ©American Audio® - www.americanaudio.eu Versadeck™ User Manual Page 75...
- Page 76 ©American Audio® World Headquarters 6122 S. Eastern Ave. Los Angeles, CA 90040 USA Tel: 323-582-3322 Fax: 323-582-3311 Web: www.AmericanAudio.us E-mail: info@americanaudio.us American DJ Europe Junostraat 2 6468 EW Kerkrade Netherlands service@adjgroup.eu www.americandj.eu Tel: +31 45 546 85 00 Fax: +31 45 546 85 99 ©American Audio®...