
Related Manuals for Memorex MC2864


Summary of Contents for Memorex MC2864
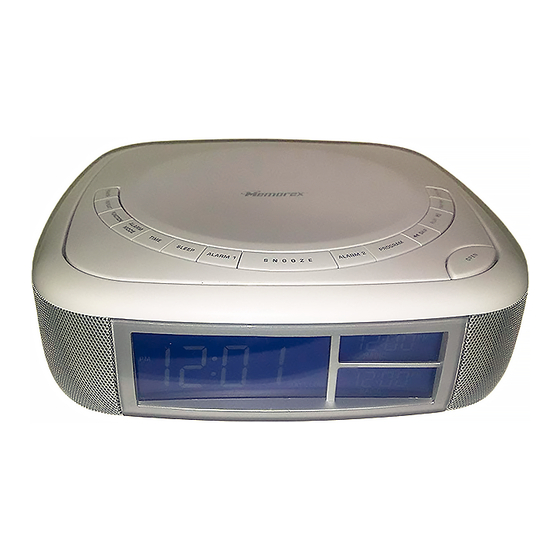
- Page 1 MC2864 User’s Guide CD PLAYER, DUAL ALARM CLOCK, STEREO AM/FM RADIO WITH DIGITAL READOUT AND CALENDAR Before operating this product, please read these instructions completely.
-
Page 2: Safety Precautions
CAUTION: TO REDUCE THE RISK OF ELECTRIC SHOCK, DO NOT REMOVE COVER (OR BACK). NO USER-SERVICEABLE PARTS INSIDE. REFER SERVICING TO QUALIFIED SERVICE PERSONNEL. This Caution Marking and Rating Label are located at the bottom enclosure of the unit. The lightning flash with arrowhead symbol within an equilateral triangle is intended to alert the user to the presence of uninsulated dangerous voltage within the product’s enclosure that may be of sufficient magnitude to... -
Page 3: Important Safety Instructions
INFORMATION: This equipment has been tested and found to comply with the limits for a Class B digital device, pursuant to Part 15 of the FCC Rules. These limits are designed to provide reasonable protection against harmful interference in a residential installation. This equipment generates, uses and can radiate radio frequency energy and, if not installed and used in accordance with instructions, may cause harmful interference to radio communications. - Page 4 manufacturer's instructions have been adhered to. 10. POWER SOURCES This product should be operated only from the type of power source indicated on the marking label. If you are not sure of the type of power supply to your home, consult your appliance dealer or local power company.
- Page 5 Selecting fine audio equipment such as the unit you’ve just purchased is only the start of your musical enjoyment. Now it’s time to consider how you can maximize the fun and excitement your equipment offers. This manufacturer and the Electronic Industries Association’s Consumer Electronics Group want you to get the most out of your equipment by playing it at a safe level.
-
Page 6: Location Of Controls
LOCATION OF CONTROLS FRONT-LEFT 10 11 12 13 14 15 REAR-RIGHT 5 6 7 8 9 20 21 22 28 29 FUNCTION Button TIME Button CD Compartment ALARM 1 Button STOP ( ) Button SKIP/SEARCH l Button Play/Pause ( ®p) Button SKIP/SEARCH m Button OPEN Button 10. -
Page 7: Installation
AC CONNECTION CAUTION: TO PREVENT ELECTRIC SHOCK, MATCH WIDE BLADE OF PLUG TO WIDE SLOT, FULLY INSERT. Unravel the AC cord and connect it to a conveniently located AC outlet having 120V and 60Hz only. “12:00” will appear in the display. NOTE: If the AC plug does not fit into a nonpolarized outlet, do not file or cut the wide blade. -
Page 8: Operation
TO LISTEN TO THE RADIO Press the POWER button 1 to turn the unit Repeatedly FUNCTION button 2 to select the radio; RADIO will appear in the display. The time will appear on the display when listening to the radio. To view the station, press the TIME button;... - Page 9 TO LISTEN TO THE NATURE SOUNDS Press the POWER button 1 to turn the unit Repeatedly FUNCTION button 2 to select nature sounds; “NS” will appear in the display. Adjust the volume using the VOLUME control. Note : A good use of this feature is to use it in conjunction with the Sleep feature on page 20.
- Page 10 TO PLAY A CD Press the OPEN button 1 and gently insert a CD onto the spindle (label side facing up) until it clicks. Close the CD door. Press the POWER button 2 to turn the unit on. Press the Play/Pause ( ®p) button to start playback;...
- Page 11 To skip to the beginning of the current track/previous or next track on the disc, press the Skip/ Search l 1 or m 2 button. To search forward or backward through the tracks on the disc, press and hold the Skip/Search l 1 or m 2 button.
- Page 12 TO REPEATEDLY PLAY BACK ONE TRACK With a CD inserted, press the POWER button 1 to turn Repeatedly press the FUNCTION button 2 to select CD; “CD” will appear in the display; the total number of tracks will appear in the display. Press the REPEAT button 1 once;...
- Page 13 TO PROGRAM THE MEMORY (UP TO 32 TRACKS) With a CD inserted, press the POWER button 1 to turn Repeatedly press the FUNCTION button 2 to select CD; “CD” will appear in the display; the total number of tracks will appear in the display. Press the PLAY/PAUSE (®p) button to begin playback.
- Page 14 TO LISTEN TO AN EXTERNAL UNIT Press the POWER button 1 to turn the unit Repeatedly FUNCTION button 2 to select the radio; RADIO will appear in the display. The sound will be heard through this unit’s speakers. Adjust the volume using the VOLUME control.
- Page 15 TO SET OR RESET THE ACTUAL TIME, YEAR AND DATE With the power off, press and hold the TIME button; the hour digits will blink. Release the TIME button. Within five seconds, press the SKIP/SEARCH l 1 or m 2 button to set the present minute.
- Page 16 Within five seconds, press the SKIP/SEARCH l 1 or m 2 button to set the present month. When done, press the TIME button 3 again; the date will blink. TIME BUTTON While the unit is off, press the TIME button to view the year, month and date in the Alarm 1 and 2 displays.
- Page 17 TO SET OR RESET THE ALARM TIME With the power off, press the desired ALARM 1 1 or ALARM 2 2 button; the hour and “AL1”/“AL2” will blink for five seconds. "PM" will also blink if the time is in the p.m. Within five seconds,...
- Page 18 TO SET TO RADIO: Within five seconds, SKIP/SEARCH l 1 or m 2 button to select RADIO. Make sure the desired band and station are set, and the volume is set as desired. Continue to Step 5. TO SET TO BUZZER: Within five seconds,...
- Page 19 Press the SKIP/SEARCH l 1 or m 2 button to select the desired Wake Day indicator (i.e., to set the alarm to go off only from Monday to Friday, select “MON to FRI”.) NOTES: • When the actual time matches the selected preset alarm time(s), if set to Radio, Nature Sounds or Buzzer, the unit will automatically turn on for 60 minutes and then shut off.
- Page 20 TO SHUT THE ALARM OFF SNOOZE DIMMER BUTTON To shut the alarm off, press the POWER button 1 and the alarm time will be reset for the next day. Press the ALARM MODE button 2 repeatedly until the ALARM 1 or ALARM 2 indicator disappears from the display to turn off the alarm and not set it for the next day.
- Page 21 TO ACTIVATE THE SLEEP FUNCTION Press the POWER button to turn the unit on. Tune the desired radio station, select a nature sound or insert a CD as previously instructed. Select a desired sleep time (1 to 99 minutes) using the SKIP/SEARCH l 1 or m 2 button.
-
Page 22: Care And Maintenance
Caring for Compact Discs • Treat the disc carefully. Handle the disc only by its edges. Never allow your fingers to come in contact with the shiny, unprinted side of the disc. • Do not attach adhesive tape, stickers, etc. to the disc label. -
Page 23: Troubleshooting Guide
TROUBLESHOOTING GUIDE If you experience a problem with this unit, check the chart below before calling for service. SYMPTOM Unit will not turn on. Disc will not play. No sound. Erratic playback. Time reset to “12:00”. Batteries connected Alarm does not turn on. -
Page 24: Specifications
PLEASE KEEP ALL PACKAGING MATERIAL FOR AT LEAST 90 DAYS IN CASE YOU NEED TO RETURN THIS PRODUCT TO YOUR PLACE OF PURCHASE OR TO MEMOREX. FOR CONSUMER REPLACEABLE PART(S), SEE PART NUMBER(S) ON THE LOCATION OF CONTROLS, PAGE 5, AND THEN CONTACT FOX INTERNATIONAL AT 1-800-321-6993. - Page 25 Memcorp, Inc. Weston, FL Printed in Hong Kong Visit our website at www.memorexelectronics.com 0570-0286400-0001...