Cuisinart RTO-20 - Retro Toaster Oven Broiler Manual
- Instruction and recipe booklet (21 pages)
Advertisement
- 1 IMPORTANT SAFEGUARDS
- 2 SPECIAL CORD SET INSTRUCTIONS
- 3 INTRODUCTION
- 4 FEATURES AND BENEFITS
- 5 BEFORE THE FIRST USE
- 6 GENERAL GUIDELINES
- 7 USE AND CARE
- 8 CLEANING AND MAINTENANCE
-
9
RECIPES
- 9.1 Jammy Muffins
- 9.2 Applesauce Cranberry Nut Bread
- 9.3 Sausage Stuffed Mushrooms
- 9.4 Toasted Asparagus Roll-Ups
- 9.5 MELTED CHEESE SANDWICHES
- 9.6 Fruit & Pecan Stuffed Pork Chops
- 9.7 Elegant but Easy Baked Salmon for Two
- 9.8 Oven Baked Chicken Fingers/Nuggets with Honey Mustard Sauce
- 9.9 Tarragon Dijon Baked Chicken Thighs
- 9.10 Meatloaf
- 9.11 Broiled Hamburgers or Cheeseburgers
- 9.12 Oven Baked Tortellini
- 10 Documents / Resources
IMPORTANT SAFEGUARDS
When using an electrical appliance, basic safety precautions should always be followed, including the following:
- Read all instructions.
- Do not touch hot surfaces. Use handles.
- To protect against electrical shock, do not place any part of the toaster oven broiler in water or other liquid. See instructions for cleaning.
- This appliance should not be used by or near children.
- UNPLUG FROM OUTLET WHEN NOT IN USE AND BEFORE CLEANING. Allow to cool before cleaning or handling.
- Do not operate any appliance with a damaged cord or plug or after the appliance has malfunctioned or has been dropped or damaged in any way or is not operating properly. Return the toaster oven broiler to the nearest Cuisinart Repair Center for examination, repair or mechanical or electrical adjustment.
- The use of accessory attachments not recommended by Cuisinart may cause injury.
- Do not use outdoors.
- Do not let cord hang over the edge of the table or countertop where it could be pulled on inadvertently by children or pets, or touch hot surfaces, which could damage the cord.
- Do not place toaster oven broiler on or near a hot gas or electric burner orin a heated oven.
- Do not use this toaster oven broiler for anything other than its intended purpose.
- Extreme caution should be exercised when using containers constructed of materials other than metal or glass in the toaster oven broiler.
- To avoid burns, use extreme caution when removing tray or disposing of hot grease.
- When not in use, always unplug the unit. Do not store any materials other than manufacturer's recommended accessories in this oven.
- Do not place any of the following materials in the oven: paper, cardboard, plastic and similar products.
- Do not cover crumb tray or any part of the oven with metal foil. This will cause overheating of the oven.
- Oversize foods, metal foil packages and utensils must not be inserted in the toaster oven broiler, as they may involve a risk of fire or electric shock.
- A fire may occur if the toaster oven broiler is covered or touching flammable materials such as curtains, draperies, and walls, when in operation. Do not store any items on top of the appliance when in operation. Do not operate under wall cabinets.
- Do not clean with metal scouring pads. Pieces can break off the pad and touch electrical parts, involving a risk of electric shock.
- Do not attempt to dislodge food when the toaster oven broiler is plugged into electrical outlet.
- Warning: To avoid possibility of fire, NEVER leave toaster oven broiler unattended during use.
- Use recommended temperature settings for baking and roasting.
- Do not rest cooking utensils or baking dishes on glass door.
- Slide the function dial to the off position to turn off toaster oven broiler.
SAVE THESE INSTRUCTIONS
Please read and keep these instructions handy. These instructions will help you to use your Cuisinart® Toaster Oven Broiler to its fullest so that you will achieve consistent, professional results.
SPECIAL CORD SET INSTRUCTIONS
A short power supply cord is provided to reduce the risks resulting from becoming entangled in or tripping over a longer cord.
Longer extension cords are available and may be used if care is exercised in their use.
If a long extension cord is used, the marked electrical rating of the extension cord must be at least as great as the electrical rating of the appliance, and the longer cord should be arranged so that it will not drape over the countertop or tabletop where it can be tripped over or pulled on by children.
NOTICE
This appliance has a polarized plug (one blade is wider than the other). As a safety feature, this plug will fit in a polarized outlet only one way. If the plug does not fit fully in the outlet, reverse the plug. If it still does not fit, contact a qualified electrician. Do not attempt to defeat this safety feature.
FOR HOUSEHOLD USE ONLY
NOT INTENDED FOR COMMERCIAL USE
INTRODUCTION
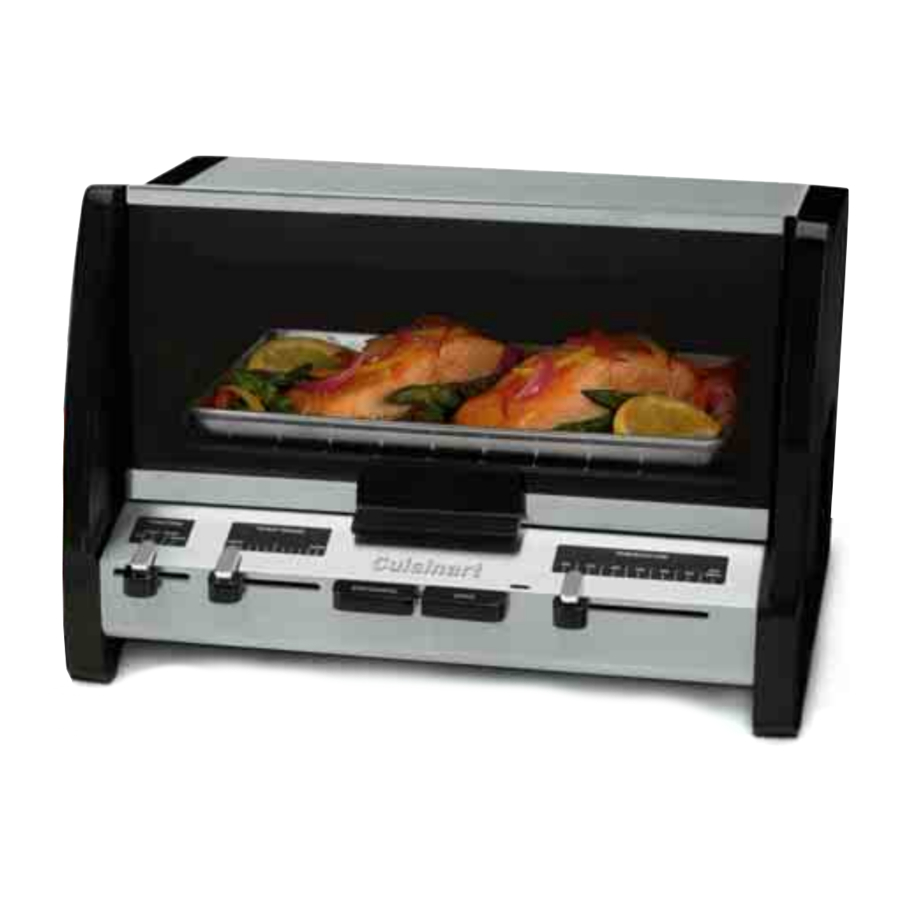
You'll wonder how you ever did without your new Cuisinart® Retro Toaster Oven Broiler. This compact countertop oven takes up minimum space, but is big enough to handle a variety of everyday toasting and "oven" tasks. Simple slide controls and a lift-up door make this toaster oven so simple to work with, you may find yourself using it more often than you ever thought you would!
FEATURES AND BENEFITS

- Temperature Slide
Select desired temperature for the "Baking" or "Broiling" function. - Function Slide
Select cooking method – Bake, Broil or Toast. - Toast Shade Slide
Select the desired toast shade – Light, Medium or Dark. - Toasting Start/Cancel Paddle
Push the "Start/Cancel" paddle to start toasting function.
Push paddle to stop toasting in mid-cycle and shut off oven. - Open Paddle
Push to open door and advance rack. Door will remain in open position when lifted slightly. - Close Bar
Push down to close. - Oven On Indicator
Indicator light will remain lit when oven is in use. - Oven Rack (not shown)
Has one position with automatic rack advance. Rack will come out slightly when door is open. - Slide-out Crumb Tray (not shown)
Slides out from bottom of the toaster oven broiler for easy cleaning. - Cord Storage (not shown)
Takes up excess cord and keeps countertop neat. - Easy-Clean Interior
The sides of the oven are coated, providing an easy-to-clean surface. - Baking/Broiling Pan
A baking/broiling pan is included for your convenience. The broiling pan's drip tray has two positions to accommodate a variety of meats, poultry, and fish for broiling.
BEFORE THE FIRST USE
Place your oven on a flat surface.
Before using your oven, move it two to four inches away from the wall or from any objects on the countertop. Do not use on heat-sensitive surface. DO NOT STORE OBJECTS ON THE TOP OF THE OVEN. IF YOU DO, REMOVE ALL OBJECTS BEFORE YOU TURN ON YOUR OVEN. THE EXTERIOR WALLS GET VERY HOT WHEN IN USE. KEEP OUT OF REACH OF CHILDREN.
GENERAL GUIDELINES
Baking: Baking function can be used as you would normally use your kitchen oven for roasting meats including chicken, or baking cakes, cookies and more.
Broiling: Broiling function can be used for beef, chicken, pork, fish and more.

Aluminum foil is not recommended for covering the drip tray. Foil is extremely dangerous when broiling fatty foods. Grease will accumulate and may catch fire. The use of foil is not recommended, but if foil is used to cover broiling pan, be sure foil is tucked neatly around the pan and does not touch the walls or heating rods. Never cover crumb tray.
Turning off the toaster oven broiler: Slide the function dial to off. The indicator will turn off.
USE AND CARE
Unwind the power cord. Check that the crumb tray is in place and that there is nothing in the oven. Plug power cord into the wall outlet.
Broil
Note: When broiling, add approximately 1⁄4 cup water to the bottom of the broiling pan to reduce sizzling and splattering. Place the drip tray in the broiling pan.
To broil, set temperature and function slides to broil. Preheat oven for five minutes with door closed. After the five-minute preheat period, place the broiling pan in the oven.
Note: Never use glass oven dishes to broil.
To stop broil operation, slide the function dial to off position.
Bake
To bake, set temperature slide to the desired temperature and move function slide to bake position. The oven indicator light will turn on. Preheat oven for five to ten minutes (time will vary depending on desired temperature); then begin to bake.
Toast
If toasting two items, center them in the middle of the rack. Four items should be evenly spaced – two in front, two in back.
Browning Selection
Set function slide to toast. Move toast shade slide to desired browning setting. Press "Start/Cancel" paddle to begin toasting.
Stop Toasting
When the toasting cycle is finished, the oven will beep 5 times and turn off. If you wish to stop the toasting cycle before it is finished, simply press the "Start/Cancel" paddle. The toaster oven broiler will cancel your toast cycle.
CLEANING AND MAINTENANCE
Always allow the oven to cool completely before cleaning.
- Always unplug the oven from the electrical outlet.
- Do not use abrasive cleansers, as they will damage the finish. Simply wipet he exterior with a clean damp cloth and dry thoroughly. Apply the cleansing agent to a cloth, not to the toaster oven, before cleaning.
- To clean interior walls, use a damp cloth and a mild liquid soap solution or a spray solution on a sponge. Never use harsh abrasives or corrosive products. These could damage the oven surface. Never use Brillo pads, etc. on interior of oven.
- To remove crumbs, slide out the crumb tray and discard crumbs. Wipe clean and replace. Crumb tray is dishwasher-safe. To remove baked-on grease, soak the tray in hot sudsy water or use nonabrasive cleaners. Never operate the oven without the crumb tray in place.
- Wire rack, broiling pan and drip tray are dishwasher-safe. If heavily soiled, soak in hot sudsy water or use a nylon scouring pad or nylon brush.
- Never wrap the cord around the outside of the oven. Use the cord storage cleats on the back of the oven.

After cooking greasy foods and after your oven has cooled, always clean top interior of oven. If this is done on a regular basis, your oven will perform like new. Removing the grease will help to keep toasting consistent, cycle after cycle.
All of our recipes have been tested in our kitchen and specially developed to work in the Cuisinart® Retro Toaster Oven Broiler. These mouth-watering recipes are just a sampling of what the Cuisinart® Retro Toaster Oven Broiler can do.
RECIPES
Jammy Muffins
Get your ingredients all ready to mix the night before – combine dry ingredients and cover; combine egg, milk, yogurt and vanilla; cover and refrigerate. In the morning mix and bake for fresh warm muffins.
Makes 6 regular muffins
1 ½ teaspoons + 3 tablespoons granulated sugar
½ teaspoon ground cinnamon
cooking spray
1 cup unbleached all-purpose flour
1 ¼ teaspoons baking powder
¼ teaspoon baking soda
⅛ teaspoon salt
1 large egg
¼ cup lowfat milk
2 tablespoons plain lowfat yogurt
¼ teaspoon vanilla extract
4 teaspoons jam or marmalade (not jelly)
Preheat toaster oven to 375°F. Combine 11⁄2 teaspoons granulated sugar with cinnamon and reserve. Coat a 6-cup regular muffin tin with cooking spray.
Place flour, 3 tablespoons granulated sugar, baking powder, baking soda, and salt in a medium bowl. Stir to blend. Place egg in a small bowl and stir until smooth. Add milk and yogurt to beaten egg and stir until smooth, then stir in vanilla. Add the liquid mixture to the dry ingredients and whisk until just smooth – do not overmix – the muffins could become tough and rubbery. Divide the batter evenly among the prepared muffin cups. Top each in the center with about 3⁄4 teaspoon jam or marmalade. Sprinkle muffins with the sugar/cinnamon mixture.
Bake in toaster oven for 18 to 20 minutes, rotating the muffin tin after about 9 minutes of baking.
Turn out onto a rack and cool for 5 to 10 minutes (the jam will be hot enough to burn) or completely before serving.
Nutritional information per muffin:
Calories 138 (9% from fat) • carb.28g • pro.4g • fat 1g • sat.fat 0g • chol.36mg • sod.196mg • calc.46mg • fiber 1g
Applesauce Cranberry Nut Bread
Makes one loaf, 71⁄2x33⁄4x21⁄4 inches
cooking spray
1 cup unbleached all-purpose flour
1 teaspoon baking soda
1⁄2 teaspoon ground cinnamon
1⁄4 teaspoon ground ginger
pinch freshly grated nutmeg
1⁄8 teaspoon salt
1⁄3 cup dried cranberries
1⁄3 cup chopped walnuts or pecans
1⁄4 cup unsalted butter, at room temperature
2 tablespoons firmly packed brown sugar
2 tablespoons granulated sugar
1 large egg
3⁄4 cup unsweetened applesauce
1⁄2 teaspoon vanilla extract
Preheat toaster oven to 350°F. Coat a 71⁄2x33⁄4x21⁄4-inch loaf pan (3 cups) with cooking spray. Place flour, baking soda, cinnamon, ginger, nutmeg, salt, dried cranberries, and nuts in a medium bowl and stir; reserve.
Place butter and both sugars in a medium bowl and beat until light and well-creamed (using a hand mixer or whisk). Add the egg and beat until smooth. Add applesauce and vanilla and beat until smooth. Add dry mixture and stir until completely blended. Pour batter into prepared loaf pan. Bake for 35 to 40 minutes, until bread is deep golden and cake tester comes out clean when inserted in center of loaf.
Loosen sides of bread if necessary and turn out onto a wire rack to cool. Bread is best when allowed to cool completely before slicing. Wrap tightly in plastic wrap when cool.
Nutritional information per serving:
Calories 114 (45% from fat) • carb.13g • pro.2g • fat 5g • sat.fat 2g • chol.24mg • sod.104mg • calc.9mg • fiber 1g
Sausage Stuffed Mushrooms
Makes about 12 stuffed mushrooms (each about 11⁄4 to 11⁄2 inches)
8 ounces white or cremini mushrooms (about 12, 11⁄4 to 11⁄2 inches each)
2 teaspoons extra virgin olive oil, divided
1 tablespoon shallots, peeled and finely chopped
1 clove garlic, peeled and finely chopped
1⁄2 teaspoon Italian herb blend or herbes de Provence
1⁄3 cup fresh dry bread crumbs
4 ounces sweet or hot Italian sausage, casings removed
1 tablespoon freshly grated Asiago cheese
If you are baking mushrooms immediately, preheat toaster oven to 425°F. Line the baking pan with foil, brush with 1 teaspoon olive oil.
Clean and dry mushrooms. Remove stems, reserving caps and chop stems finely.
Heat 1 teaspoon olive oil in a 10-inch nonstick skillet. Add chopped mushrooms, shallot, garlic, and herbs to the pan and cook over medium heat until all liquid is given up, about 5 minutes. Stir in bread crumbs and cook for 2 to 3 minutes. Transfer to a bowl and cool. When completely cooled, stir in sausage and cheese. Stuff each mushroom with a portion of the sausage mixture, mounding and pressing down. Mushrooms may be done ahead to this point – cover and refrigerate until ready to bake.
Arrange mushrooms evenly spaced in prepared pan.
Bake until sausage is well browned and completely cooked through (175°F when tested with an instant-read thermometer) and mushrooms are tender, about 20 to 25 minutes. Transfer to a warm platter and serve hot.
Nutritional information per mushroom:
Calories 61 (62% from fat) • carb.3g • pro.2g • fat 4g • sat.fat 1g • chol.8mg • sod.109mg • calc.21mg • fiber 0g
Toasted Asparagus Roll-Ups
These are great to serve with a hearty "meal"-type soup, a seafood stew or main dish salad.
Makes 6 pieces – 3 servings with soup, stew or salad, or 6 appetizer servings
6 asparagus spears, about 1⁄2 inch thick
1 tablespoon unsalted butter, melted
1 tablespoon extra virgin olive oil
6 slices good quality sandwich-type bread, white or whole wheat
3 teaspoons freshly grated Parmesan or Asiago cheese
Trim asparagus to 51⁄2-inch lengths, and peel if desired. Bring 2 inches of water to a boil in a 10-inch skillet. Place asparagus in boiling water for 30 seconds to blanch, and remove immediately to a bowl of ice water to stop cooking. When cool, dry completely. Combine the melted butter and olive oil. Preheat toaster oven to 375°F and line the baking pan with foil.
Remove crusts from sliced bread. Use a rolling pin to flatten the bread as thin as possible. Sprinkle each with 1⁄2 teaspoon grated cheese. Place an asparagus spear to one edge of the bread and roll as a jelly roll. Repeat until all are rolled. Brush lightly with butter/olive oil mixture. Arrange evenly spaced on the prepared pan, with all tips to one side. Place the pan in the oven, asparagus tips to the front of the oven and bake for 8 minutes. Brush again lightly with more of the butter/olive oil mixture and bake for another 7 to 8 minutes. Serve hot or warm.
Nutritional information per serving:
Calories 72 (60% from fat) • carb.6g • pro.2g • fat 5g • sat.fat 2g • chol.6mg • sod.66mg • calc.24mg • fiber 1g
MELTED CHEESE SANDWICHES
The next two sandwiches are classic toaster-oven fare, quick and easy hot sandwiches for any time of day or night.
Toasted Tuna Melts
A classic "Retro" sandwich. Personalize the sandwich by adding your own favorites to the tuna salad such as sliced olives, chopped dill or sweet pickle, or chopped hard-cooked egg.
Makes 2 open-faced sandwiches
2 slices good quality sandwich bread – white, wheat, rye, pumpernickel or a sandwich-size English muffin, split
6 ounces white tuna, drained well
1⁄4 cup finely chopped celery
1⁄4 cup finely chopped green or red bell pepper
2 tablespoons finely chopped red onion
1⁄4 cup lowfat mayonnaise
3 ounces cheese – Swiss, Cheddar, Muenster, fontina, provolone (2 slices, can use lowfat cheese)
Toast bread on light setting; let cool completely. Line the baking pan with foil. Slide indicator switch to broil position.
Drain tuna and place in a medium bowl. Break up clumps with a fork. Add celery, bell pepper, onion, and mayonnaise. Stir to combine.
Divide tuna mixture evenly between the two slices of toasted bread and spread evenly. Top each with half the cheese. Arrange the sandwiches on the prepared baking tray. Broil sandwiches until golden and toasty and cheese is melted, about 3 to 4 minutes.
Nutritional information per serving:
Calories 482 (45% from fat) • carb.26g • pro.39g • fat 24g • sat.fat 9g • chol.87mg • sod.365mg • calc.434mg • fiber 1g
Hot Smoked Turkey, Tomato & Cheese Sandwiches with Avocado
Makes 2 servings
2 slices good quality whole wheat or pumpernickel bread (about 5x31⁄2x1⁄2 inches)
3 tablespoons lowfat mayonnaise
11⁄2 teaspoons Dijon-style mustard
1 teaspoon tarragon
4 ounces thinly sliced smoked turkey
8-12 thin slices Italian tomato (slice, then place on layered paper towels to drain)
3 ounces sliced Havarti cheese (may also use Cheddar, Swiss, provolone, or Gouda)
1⁄2 avocado, (ripe but firm) peeled and sliced
Toast bread on medium setting (or to taste). Reserve.
Place mayonnaise, mustard, and tarragon in a small bowl and stir to blend.
Preheat toaster oven to 400°F. Line baking pan with foil.
Spread mayonnaise mixture on one side of each slice of toasted bread. Top each evenly with half the smoked turkey, half the sliced tomatoes, and half the cheese. Arrange evenly spaced on foil-lined baking pan. Place in toaster oven and broil until cheese is bubbly and browned, about 3 to 5 minutes. Garnish with sliced avocado and serve hot.
Nutritional information per serving:
Calories 466 (58% from fat) • carb.24g • pro.25g • fat 31g • sat.fat 13g • chol.79mg • sod.1198mg • calc.261mg • fiber 5g
Fruit & Pecan Stuffed Pork Chops
Makes 2 servings
2 1-inch thick boneless pork loin chops (about 7-8 ounces each)
11⁄2 tablespoons finely chopped shallot or green onion
3 tablespoons chopped dried, pitted apricots
3 tablespoons chopped dried, pitted plums
1⁄4 cup lightly toasted chopped pecans
1 tablespoon medium dry sherry
1⁄2 tablespoon grainy Dijon-style mustard
1 teaspoon soy sauce, divided
1⁄2 teaspoon dried thyme
1⁄4 teaspoon freshly ground black pepper
1 teaspoon unsalted butter, melted kosher salt and freshly ground pepper to taste (optional)
Preheat toaster oven to 400°F. Use a sharp, pointed knife such as a boning knife to cut a deep, wide pocket in each pork chop horizontally, leaving the back and sides uncut. Reserve. Lightly coat the broiling rack of the oven with cooking spray (or line the tray with aluminum foil).
Place shallot, chopped apricots and plums, pecans, sherry, mustard, 1⁄2 teaspoon of the soy sauce, thyme, and pepper in a bowl and stir to combine.
Divide the fruit-pecan mixture evenly and stuff each pork chop. Skewer pockets closed with toothpicks or skewers if necessary. Combine remaining soy sauce with melted butter and brush on chops. Season chops lightly with kosher salt and freshly ground pepper to taste if desired. Arrange chops on rack or lined tray and bake for 17 to 20 minutes. Use tongs to turn chops over. Continue to bake until pork is cooked through (will measure 155-160°F when tested with an instant-read thermometer and juices run clear), about 5 to 10 minutes longer if necessary. Let pork chops rest, loosely covered, for 5 minutes before serving.
Nutritional information per serving:
Calories 615 (40% from fat) • carb.29g • pro.63g • fat 28g • sat.fat 7g • chol.169mg • sod.395mg • calc.35mg • fiber 3g
Elegant but Easy Baked Salmon for Two
Quick and easy to prepare, but good enough for a special occasion.
cooking spray
2 salmon fillets, 6-8 ounces each
1 slice good quality white bread, processed to fine crumbs
1 teaspoon unsalted butter, melted
1⁄2 teaspoon thyme
3 teaspoons raspberry vinegar
1 tablespoon Dijon-style mustard
2 teaspoons granulated sugar
3⁄4 teaspoon dry mustard
1⁄8 teaspoon kosher salt
pinch freshly ground pepper, to taste
1 tablespoon extra virgin olive oil
Preheat toaster oven to 450°F. Line baking dish with foil; coat lightly with cooking spray. Arrange salmon in prepared dish, skin side down.
Combine breadcrumbs, melted butter and thyme. Stir to combine; reserve.
Place vinegar, Dijon mustard, sugar, dry mustard, salt and pepper in a small bowl and whisk to blend. While whisking, add olive oil in a steady stream and whisk until emulsified. Spread 1 tablespoon of the mustard sauce over each fillet, covering completely. Sprinkle breadcrumbs onto fish.
Bake salmon until cooked through and crumb topping is browned and crispy, about 10 to 12 minutes (10 minutes per inch of thickness). Transfer to warmed plates and drizzle with remaining mustard sauce to serve.
Nutritional information per serving:
Calories 352 (39% from fat) • carb.17g • pro.36g • fat 15g • sat.fat 3g • chol.94mg • sod.375mg • calc.33mg • fiber 0g
Oven Baked Chicken Fingers/Nuggets with Honey Mustard Sauce
Makes 2 to 3 servings
cooking spray
10 ounces boneless, skinless chicken breast (about 2 chicken breast halves)
1⁄2 cup buttermilk or plain fat-free yogurt
1 teaspoon soy sauce
1 teaspoon dry minced onion
1⁄2 teaspoon granulated garlic
3⁄4 cup fine bread crumbs
1⁄4 cup freshly grated Parmesan or Asiago cheese
1⁄2 teaspoon paprika (sweet or hot, to taste)
1⁄4 cup Dijon-style mustard
1⁄4 cup honey
Trim chicken of any excess fat and cut into "finger"-sized pieces or nuggets (about 11⁄2 inches square). Place in a medium bowl with buttermilk or yogurt, soy sauce, dry minced onion, and granulated garlic. Stir to combine and let rest for 30 minutes. After 30 minutes, preheat toaster oven to 425°F. Line the baking sheet with aluminum foil and coat with cooking spray.
Drain the chicken fingers. In a shallow dish combine the breadcrumbs, cheese and paprika. Dip the chicken fingers in the breadcrumb mixture and coat well. Arrange on the prepared baking sheet. Lightly spray chicken fingers with cooking spray, turn and spray second side. Bake in toaster oven for 15 minutes. You can prepare the sauce while chicken is baking. After 15 minutes, turn and bake for an additional 12 to 15 minutes, until chicken is completely cooked, crisply browned and juices run clear (not pink).
For the sauce, place the mustard and honey in a small bowl and stir to blend. Chicken fingers may also be served with other prepared sauces or condiments such as BBQ sauce, ketchup or warm marinara sauce.
Nutritional information per serving:
Calories 390 (10% from fat) • carb.56g • pro.32g • fat 4g • sat.fat 2g • chol.62mg • sod.542mg • calc.229mg • fiber 0g
Tarragon Dijon Baked Chicken Thighs
This meatloaf makes out-of-this-world sandwiches the next day (if there are any leftovers!).
Makes 4 chicken thighs, 2 servings
cooking spray
3 tablespoons Dijon-style mustard
11⁄2 tablespoons honey
1⁄2 teaspoon tarragon
1⁄2 teaspoon Worcestershire sauce
4 skinless, bone-in, chicken thighs
Preheat toaster oven to 450°F. Line baking pan with foil, arrange chicken on rack and place in prepared baking pan. Lightly coat rack with cooking spray.
Place mustard, honey, tarragon, and Worcestershire sauce in a small bowl and stir to blend. Spread evenly on chicken. Arrange chicken on prepared rack, "skin" side down, bake for 10 minutes. Rotate baking tray and turn the thighs to skin side up. Bake for an additional 10 to 15 minutes, until juices run clear and chicken reads 180°F when tested with an instant-read thermometer. Serve hot or chilled.
Nutritional information per serving:
Calories 469 (56% from fat) • carb.19g • pro.33g • fat 29g • sat.fat 8g • chol.158mg • sod.699mg • calc.25mg • fiber 0g
Meatloaf
Makes 3 to 4 servings
2⁄3 cup uncooked oatmeal (regular or quick)
1⁄3 cup ketchup
1 large egg
2 teaspoons Worcestershire sauce
1 teaspoon Dijon-style mustard
1 pound ground meatloaf mix (1⁄2 beef, 1⁄4 pork, 1⁄4 veal) or ground turkey
1⁄2 cup finely chopped onion
1 small clove garlic, finely minced
1⁄2 teaspoon kosher salt
1⁄4 teaspoon freshly ground black pepper
For glaze (optional):
1⁄4 cup ketchup
1 tablespoon brown sugar
1⁄2 teaspoon Dijon-style mustard
Combine glaze ingredients and stir until smooth.
Place oatmeal, ketchup, egg, Worcestershire sauce, and mustard in a medium bowl and stir to blend. Let stand for 5 minutes to soften oatmeal. Preheat the toaster oven to 375°F.
Add ground meat, onion, garlic, salt, and pepper. Mix to combine well (use a spoon or clean hands). Pack into a 3-cup loaf pan (71⁄2x33⁄4x21⁄4 inch). Bake in toaster oven for approximately 60 minutes*, until top is well browned and meat registers 175°F when tested – juices will run clear, not pink. Let stand 5 to 10 minutes in loaf pan, drain excess fat if necessary, loosen sides if necessary and turn out to slice. Cover and refrigerate leftovers.
*If you are using glaze, spread evenly over meatloaf after it has baked for 45 minutes.
Nutritional information per serving:
Calories 373 (36% from fat) • carb.17g • pro.40g • fat 14g • sat.fat 6g • chol.146mg • sod.678mg • calc.24mg • fiber 1g
Broiled Hamburgers or Cheeseburgers
Makes 2 burgers
cooking spray
12 ounces lean ground sirloin or ground round kosher salt and freshly ground pepper to taste
2 slices cheese (Cheddar, Swiss)
Slide indicator switch of toaster oven to broil position. Line the baking pan with aluminum foil, and insert baking/broiling rack. Lightly coat the rack with cooking spray.
Divide meat into two 6-ounce portions and shape into 4-inch burgers. Lightly season with kosher salt and freshly ground pepper on both sides. Arrange the burgers, evenly spaced, on the rack. Broil to taste*, about 4 to 8 minutes per side. For cheeseburgers, top with sliced cheese one minute before second side is done. Serve hot on toasted bun, roll, or English muffin with desired condiments and accompaniments such as lettuce, sliced tomato, onion, etc.
*Times will be dependent on temperature and thickness of meat. Test with an instant-read thermometer.
Rare: 120°F-125°F (red center)
Medium-Rare: 125°F-140°F (pink center)
Medium: 145°F-155°F (gray-barely pink center)
Well-Done: 160°F (gray)
Nutritional information per burger:
Calories 373 (36% from fat) • carb.17g • pro.40g • fat 14g • sat.fat 6g • chol.146mg • sod.678mg • calc.24mg • fiber 1g
Oven Baked Tortellini
Makes 3 to 4 servings
cooking spray or olive oil
1 package (9-ounce) fresh tortellini (cheese, mushroom or meat), cooked al dente
2 cups prepared marinara sauce
1⁄2 cup shredded cheese (mozzarella, provolone, fontina, Parmesan – any one or a mixture)
Preheat toaster oven to 400°F. Lightly coat a 3- or 4-cup ovenproof shallow dish (oval gratin or similar dish) with cooking spray or olive oil. Place tortellini and 11⁄2 cups of the marinara sauce in a medium bowl and stir to combine. Transfer to the prepared dish and top with remaining marinara sauce.
Loosely cover with a sheet of foil sprayed with cooking spray, or lightly oiled, and place in toaster oven. Bake for 25 to 30 minutes until bubbly. Raise oven temperature to 450°F. Remove foil, sprinkle evenly with cheese and bake for another 10 to 12 minutes, until cheese is melted, bubbly and lightly golden.
Serve hot.
Nutritional information per serving:
Calories 339 (37% from fat) • carb.36g • pro.17g • fat 14g • sat.fat 8g • chol.52mg • sod.705mg • calc.290mg • fiber 0g

Documents / ResourcesDownload manual
Here you can download full pdf version of manual, it may contain additional safety instructions, warranty information, FCC rules, etc.
Download Cuisinart RTO-20 - Retro Toaster Oven Broiler Manual
Advertisement
Thank you! Your question has been received!


Need Assistance?
Do you have a question about the RTO-20 that isn't answered in the manual? Leave your question here.