Cuisinart TOB-260 Chef's Convection Toaster Oven Manual
- Instruction and recipe booklet (40 pages) ,
- Instruction manual (80 pages) ,
- Quick start manual (4 pages)
Advertisement
IMPORTANT SAFEGUARDS
When using an electrical appliance, basic safety precautions should always be followed, including the following:
- Read all instructions.
- UNPLUG FROM OUTLET WHEN NOT IN USE, before putting on or taking off parts and before cleaning. Allow to cool before cleaning or handling.
- Do not touch hot surfaces. Use handles or knobs.
- To protect against electrical shock, do not immerse cord or plug, or place any part of the oven in water or other liquids.
- Close supervision is necessary when any appliance is used by or near children.
- Do not operate any appliance with a damaged cord or plug or after the appliance has malfunctioned or has been dropped or damaged in any way or is not operating properly. Return the oven to the nearest Cuisinart Repair Center for examination, repair or mechanical or electrical adjustment.
- The use of accessory attachments not recommended by Cuisinart and may cause injury.
- Do not use outdoors.
- Do not let cord hang over the edge of the table or countertop where it could be pulled on inadvertently by children or pets. Do not let cord touch hot surfaces, which could damage it.
- Do not place oven on or near a hot gas or electric burner or in a heated oven.
- Do not use this oven for anything other than its intended purpose.
- Do not place sealed or airtight containers in the oven.
- Extreme caution should be exercised when using containers constructed of materials other than metal, glass or ceramic in the oven.
- To avoid burns, use extreme caution when removing trays, pans, racks, or disposing of hot grease.
- When not in use, always unplug the unit. Do not store any materials other than manufacturer's recommended accessories in this oven.
- Do not place paper, cardboard, plastic or similar products in the oven.
- Do not cover crumb tray or any part of the oven except the baking pan with metal foil. This will cause overheating of the oven.
- Do not block the top of the oven, steam vents, or any other openings while in use.
- Oversize foods, metal foil packages and utensils must not be inserted in the oven, as they may involve a risk of fire or electric shock.
- A fire may occur if the oven is covered or touching flammable materials such as curtains, draperies, walls and the like when in operation. Do not store any items on top of the appliance when in operation. Do not operate under wall cabinets.
- Do not clean with metal scouring pads. Pieces can break off the pad and touch electrical parts, involving a risk of electric shock.
- Do not attempt to dislodge food when the oven is plugged into an electrical outlet.
![]()
To avoid possibility of fire, never leave oven unattended during use.- Do not rest cooking utensils or baking dishes on glass door.
- Where applicable, always attach plug to appliance and check that the cooking cycle is stopped before plugging cord into wall outlet. To disconnect, press the Start/Stop button to stop the cooking cycle, then remove plug from wall outlet.
- Do not operate your appliance in an appliance garage or under a wall cabinet. When storing in an appliance garage always unplug the unit from the electrical outlet. Not doing so could create a risk of fire, especially if the appliance touches the walls of the garage or the door touches the unit as it closes.
- Extreme caution must be used when moving an appliance containing hot oil or other hot liquids.
- Press the Start/Stop button to begin or stop cooking function.

SPECIAL CORDSET INSTRUCTIONS
A short power supply cord is provided to reduce the risks resulting from becoming entangled in or tripping over a longer cord.
Extension cords may be used if care is exercised in their use.
If an extension cord is used, the marked electrical rating of the extension cord must be at least as great as the electrical rating of the appliance, and the longer cord should be arranged so that it will not drape over the countertop or tabletop where it can be tripped over unintentionally or pulled on by children.
NOTICE
This appliance has a polarized plug (one blade is wider than the other). As a safety feature, this plug will fit in a polarized outlet only one way. If the plug does not fit fully in the outlet, reverse the plug. If it still does not fit, contact a qualified electrician. Do not attempt to defeat this safety feature.
UNPACKING INSTRUCTIONS
- Place the box on a large, sturdy, flat surface.
- Open the box and remove the instruction book and any other literature.
- Lift the packing materials, oven and accessories out of the box.
- Remove all other parts packed in pulp mold and remove packing materials surrounding those parts. Be sure to check all packing materials for all parts before discarding.
- Remove any protective or promotional labels from your oven and other parts.
FOR HOUSEHOLD USE ONLY SAVE THESE INSTRUCTIONS
BEFORE THE FIRST USE
Before using your Cuisinart® Chef's Convection Toaster Oven for the first time, remove any dust from shipping by wiping the base, cover and controls with a damp cloth. Be sure to thoroughly clean all accessories before first use. The oven rack, baking pan, broiling pan and crumb tray should be hand washed in hot sudsy water. Be sure to thoroughly clean all accessories before each use. Clean the pizza stone before using by rinsing with hot water. Do not use any soap or detergent on the stone.
Before using your Cuisinart® Chef's Convection Toaster Oven, make sure it is two to four inches away from the wall or from any items on the countertop. Do not use on heat-sensitive surfaces. DO NOT STORE ITEMS ON TOP OF THE OVEN. IF YOU DO, REMOVE THEM BEFORE YOU TURN YOUR OVEN ON. THE EXTERIOR WALLS GET VERY HOT WHEN IN USE. KEEP OUT OF REACH OF CHILDREN.
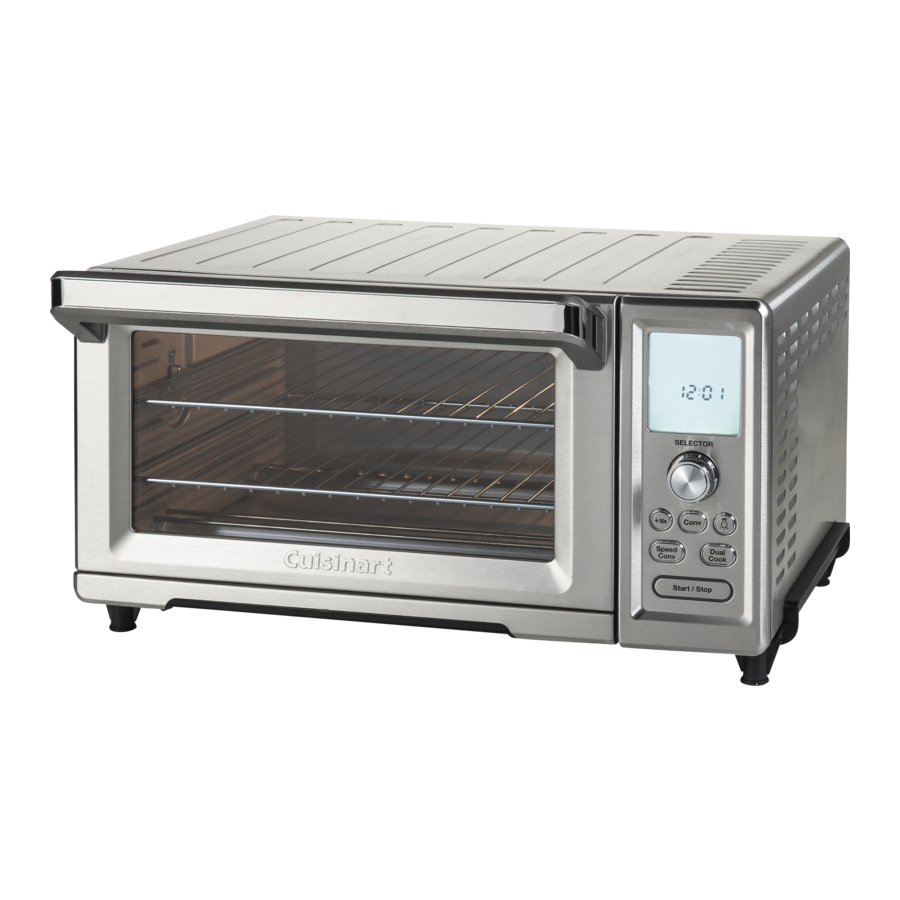
FEATURES AND BENEFITS

- Blue Backlit LCD Digital Display
Shows selected function, shade setting, temperature, and cooking time. Includes PREHEATING and READY readouts. - Selector Dial/Button
Lets you choose cooking functions and set baking time, clock, temperature, and toast shade. - +30 Second Button (+30s)
Lets you add 30 seconds of cooking time to any function. - Oven Light Button
Illuminates interior for 2 minutes so you can better monitor cooking progress. - Convection Button (Conv)
Starts convection fan for most cooking functions. - Start/Stop Button
Starts or stops a cooking function. It also activates the oven when it is in the dormant mode (plugged in but not lit). - Speed Convection Button (Speed Conv) – Eliminates preheating.
- Dual Cook Button – Combines 2 cooking functions or 2 temperatures to create more cooking options and flexibility.
- Front Pull-Out Crumb Tray
The crumb tray slides out from the front of the Chef's Convection Toaster Oven for easy cleaning. - Easy-Clean Interior
The sides of the oven are specially coated, making it easier to wipe and clean the interior of the oven. - Oven Racks
Your oven includes two cooking racks. There are four positions to insert the racks into the oven. The upper positions have a stop feature so the rack stops halfway out of the oven. Racks can be removed by lifting the front of the rack and sliding out. - Baking/Drip Pan
A baking/drip pan is included for your convenience. Use with the broiling pan when broiling. Use alone when baking or roasting. - Broiling Pan
Fits into the baking/drip pan to use when broiling. - Pizza Stone
Your oven includes a 13-inch pizza stone to use when baking pizza, pastry or breads. - Cord Storage (not shown)
Takes up excess cord and keeps countertop neat. - BPA Free (not shown)
All materials that come in contact with food are BPA free.
Getting to Know Your Control Panel

LCD Display
The large blue-backlit LCD screen is easy to read, and clearly displays the function, time, temperature, and toast shade you have selected. When oven is plugged in and not in use, clock will be displayed.
Selector Dial/Button
Use to select cook function, change preset time or temperature, and choose toast shade. Turn selector dial to scroll through functions, time and temperature. Press the dial to select desired option.
+ 30s – Press to add 30 seconds to any function during toasting or cooking.
Convection
The Convection button can be pressed at any time to add convection technology to any of the cooking functions. Convection provides faster and more even baking and cooking.
Oven Light
When you open the oven door the interior oven light will automatically turn on for two minutes. When the light is off, press the Light button to turn the light on for two minutes. When the light is on, press the button to turn it off.
Dual Cook
By selecting Dual Cook, you can combine two different cooking functions or two different temperatures within one cooking function, providing maximum flexibility in toaster oven cooking.
Speed Convection
Faster convection technology provides cooking without preheating.
Start/Stop
Press to start oven after selecting function, temperature and time. Press to stop any cooking function.
Set Your Clock
Plug the oven into a 120 volt AC outlet. The LCD display will be illuminated white. Clock will read 12:00. To set clock, press and hold the selector button until the time starts flashing. Turn the selector dial to set hour and then press it to select. To select "PM" scroll through past "11" until "PM" displays. Turn the dial for minutes and then press to set.
Oven Sounds
You have the option of turning off the beeping sounds or making the beeps louder. To change the beep setting, press the +30s button and the Conv button simultaneously for two seconds. The number "1" (default setting) will display. To deactivate all beeps, turn the selector dial to 0 (zero), then press selector button to hold this setting. To change the beeps to a louder sound, turn the dial to "2", then press the button to hold this setting. If you unplug the oven, all beeps will go back to the default "1" setting.
OVEN RACK POSITION GUIDE
All our recipes give you step-by-step directions and indicate where to position the oven rack for best results. Please refer to the diagrams below. You will find the rack position numbers 1, 2, 3 and 4 printed on the oven when you open the door.
Toasting: Toasting should always be done in position 3.

Placing the rack in position 1 or 4 while toasting may result in a fire. Baking and roasting: Use rack in position 1 or 2 or 3.
Pizza: When using pizza stone, rack should always be in position 1. When not using pizza stone, rack should be in position 2.
Broiling: Use rack in position 3 or 4.
MULTI-RACK BAKING: Two baking racks are included for baking two different items at once. When not using both racks, one rack may be stored either under or on top of oven. The extra rack can also be used as a cooling rack when fitted inside a sheet tray. Ideal for weeknight meals, with one rack for meats and the other for vegetables or roasting 2 vegetables at a time or baking layer cakes and cookies. When baking, remember to rotate from top to bottom halfway through baking time depending on weight of item being cooked.

Crumb Tray
The crumb tray is located in the front of the toaster oven. It can easily be removed for cleaning with its built in pull out handle. The crumb tray should never be covered with foil.
OVEN FUNCTIONS
Toasting functions – All toasting functions offer a built-in defrost option. Turn the Selector dial to select the snowflake for toasting frozen items.
| Toasting Function | Rack Position | Preset Shade | Shade Range | Preset Slices | Possible slices |
| Toast | 3 | 4 | 1 to 7 | 3 - 4 | 1-2, 3-4, 5-6, 7-9 |
| Bagel | 3 | 4 | 1 to 7 | 3 - 4 | 1-2, 3-4, 5-6, 7-9 |
| Waffle | 3 | 4 | 1 to 7 | 3 - 4 | 1-2, 3-4, 5-6 |
Cooking functions – Below is a guide to the cooking functions.
| Cooking Function | Rack Position | Default Temp | Temp Range | Preset Time | Convection/Speed Convection option | Recommended Foods |
| Bake | 1, 2, 3 | 350°F | 150°F to 450°F | 30 minutes | Yes | Baked goods, casseroles, bread |
| Broil | 3, 4 | 500°F | Fixed temp | 10 minutes | Yes | Steaks, chops, burgers, fish, seafood, top-browning |
| Roast | 1, 2, 3 | 400°F | 150°F to 450°F | 30 minutes | Yes | Larger cuts of meat, vegetables, chicken |
| Pizza | 1, 2 | 450°F | 350°F to 450°F | 15 minutes ( : OFF) = 12 inch fresh pizza : OFF) = 12 inch fresh pizza | Yes | Pizza – both fresh and frozen |
| Sandwich | 2 | 400°F | 150°F to 450°F | 15 minutes | Yes | Open faced sandwiches |
| Keep Warm | 1, 2, 3 | 175°F | 150°F to 300°F | 30 minutes | Yes | Holds food at serving temperature |
| Leftover | 1, 2, 3 | 325°F | 150°F to 450°F | 20 minutes | Yes | Reheats leftovers to serving temperature |
OPERATION
TOAST

Adjust rack to position 3.
Put bread in the toaster oven.
Turn Selector dial to toast and press. "Toast shade" will flash – scroll and press to select desired shade from 1 to 7.
"Slices" will begin to flash – scroll and press to select number of slices.
Snowflake will flash – turn selector dial to select this if using frozen bread.
Otherwise just press Start/Stop to begin toasting.
Toasting tips
If toast is too light for your liking you can add 30 seconds to the toasting time by pressing the +30s button before toasting is complete. Up to one minute total can be added to toast.
Toasting times vary based on thickness and temperature of bread. For thinly sliced bread, a lighter setting might be needed, as it will toast more quickly. Refrigerated bread will take longer to toast than room temperature bread.
Shade guide
Light - Setting 1 or 2
Medium - Setting 3, 4, or 5
Dark - Setting 6 or 7
BAGEL

Adjust rack to position 3.
Put bagels in the toaster oven with cut sides facing up.
Turn Selector dial to bagel and press. "Toast shade" will flash – scroll and press to select.
"Slices" will begin to flash – scroll and press to select number of bagel halves.
Snowflake will flash – turn selector dial to select this if using frozen bagels.
Otherwise just press Start/Stop to begin toasting.
Bagel tip
This function provides full heat on the top and half heat on the bottom. For best results, put your bagels on the rack with the cut sides facing up. If bagels are too light you can add 30 seconds to the toasting time by pressing the +30s button before toasting is complete. Up to one minute total can be added to bagel.
WAFFLE

Adjust rack to position 3.
Put waffles in the toaster oven.
Turn Selector dial to waffle and press. "Toast shade" will flash – scroll and press to select.
"Slices" will begin to flash – scroll and press to select number of waffles.
The snowflake will automatically be on. Press Start/Stop to begin toasting.
Waffle tip
If waffles are too light for your liking you can add 30 seconds to the toasting time by pressing the +30s button before toasting is complete. Up to one minute total can be added to waffle.
BAKE

Adjust rack to desired position (either 1, 2 or 3).
Turn Selector dial to Bake and press. Baking temperature will flash.
Turn Selector dial to select the temperature and press.
Time will flash. Turn the dial to adjust time and press.
Convection or Speed Convection can be selected at any time before or after you press Start/Stop.
If Speed Convection is selected: put food in the oven and press Start/Stop to begin cooking.
If Bake or Convection Bake is selected: press Start/Stop to allow the oven to preheat (display will read PREHEATING). When oven reaches set temperature the oven will beep and display will read READY. Put food in the oven. The timer will begin counting down. It will beep again when cooking time has expired. The oven will shut off and the display will go from blue to white.
Bake tips
Select Bake for more delicate baked goods like custards, cakes and eggs. Select Convection Bake for most baked goods that require even browning like muffins, scones, cookies, pastry and bread, and when using multi-rack baking. When using Convection, cooking times may need to be reduced – start checking foods about 5 to 10 minutes before the recommended conventional cooking time. Foods that contain orange, lemon or other fruit with citric acid may damage the enamel finish of the baking and broiling pans. So when cooking such foods, we suggest that you line the pans with baking parchment paper or aluminum foil.
BROIL

Adjust rack to desired position (either 3 or 4).
Turn Selector dial to Broil and press.
Broil temperature is fixed. It cannot be changed.
Time will flash. Turn the selector dial to adjust time and press.
Convection or Speed Convection can be selected at any time before or after you press Start/Stop.
Put food in oven and press Start/Stop to begin broiling.
The timer will begin counting down. It will beep again when cooking time has expired. The oven will turn off and the display will go from blue to white.
Broil tips
For best results, use the provided broiling pan nested in the baking pan. Foods that contain orange, lemon or other fruit with citric acid may damage the enamel finish of the baking and broiling pans. So when cooking such foods, we suggest that you line the pans with baking parchment paper or aluminum foil.
For proper draining do not cover the entire pan with foil.
Be sure to keep an eye on food – items can get dark quickly while broiling.
ROAST

Adjust rack to desired position (either 1, 2 or 3).
Turn Selector dial to Roast and press.
Roast temperature will flash. Turn the dial to select the temperature and press.
Time will flash. Turn the Selector dial to adjust time and press.
Convection or Speed Convection can be selected at any time before or after you press Start/Stop.
If Speed Convection is selected, put food in the oven and press Start/Stop to begin cooking.
If Convection Roast is selected, press Start/Stop to allow the oven to preheat (display will read PREHEATING). When oven reaches set temperature the oven will beep and display will read READY. Put food in the oven. The timer will begin counting down. It will beep again when cooking time has expired. The oven will shut off and the display will go from blue to white.
Roast tips
Speed convection works well with Roast – roasting time is cut significantly and results in meat and poultry that have browned with juicy insides.
Dress up vegetables by roasting them. As they caramelize they become sweet and delicious. Foods that contain orange, lemon or other fruit with citric acid may damage the enamel finish of the baking and broiling pans. So when cooking such foods, we suggest that you line the pans with baking parchment paper or aluminum foil.
Because foods are roasting faster, begin checking foods at least 5 to 10 minutes before the recommended conventional cooking time.
PIZZA

Fit pizza stone in rack position 1.
If not using the pizza stone adjust rack to position 2. Turn Selector dial to Pizza and press.
Pizza temperature will flash. Turn the dial to select the temperature and press.
Pizza size will begin to flash. Turn the dial to select size and then press. If cooking fresh pizza, turn the dial to hide the snowflake and press; otherwise turn the dial to display the snowflake for frozen pizza.
Time will flash. Turn the dial to adjust time and press. Press Start/Stop to begin preheating.
When fresh pizza is selected (snowflake not displayed) the oven will automatically preheat for additional time to ensure that the stone is properly heated.
If preparing fresh pizza, make sure pizza is ready to bake on a pizza peel or on an inverted sheet tray that is well dusted with cornmeal so that the dough will easily slide onto preheated stone in oven when ready.
Once oven indicates it is ready, put the pizza directly on the pizza stone to bake in the oven. The timer will begin counting down. It will beep again when cooking time has expired.
The oven will shut off and the display will go from blue to white.
Pizza Tips
For fresh pizza, dust either a pizza peel or the surface of an inverted sheet tray with cornmeal to help slide the pizza directly on to the preheated pizza stone. Dusting with the cornmeal ensures the dough will not stick to the peel or tray. Pizza is most easily removed from the oven with a pizza peel. If a pizza peel is not available, carefully remove pizza from the oven with tongs or a large spatula. Place pizza on a large cutting surface to cut and serve. All pizza times correspond with size and are suggestions – they can be adjusted according to personal preference. If using frozen pizza, use package instructions as a guideline, as times can vary based on pizza thickness.
The pizza stone can be used for other baked goods where a crisp bottom is desired. Bake bread or rolls directly on the preheated stone – it is also recommended for pastry like pies and tarts.
When baking fresh pizza, it is important to preheat the pizza stone. So if you opt to combine Speed Convection with the pizza function, it is recommended that you preheat the stone before putting the pizza in the oven.
SANDWICH

Adjust rack to position 2.
Turn Selector dial to Sandwich and press.
Sandwich temperature will flash. Turn the Selector dial to select the temperature and press.
Time will flash. Turn the dial to adjust time and press.
Put sandwich on broiling pan fitted inside the baking pan and place in the oven and press Start/Stop to begin.
The timer will begin counting down. It will beep again when cooking time has expired. The oven will shut off and the display will go from blue to white.
Sandwich tips
The sandwich function gives you the perfect open-faced sandwich every time with evenly melted cheese and crispy bread. The top element is on half-power to melt the cheese while the bottom elements are all on to crisp the bread.
KEEP WARM

Adjust rack to desired position (either 1,2 or 3). Turn Selector dial to Keep Warm and press.
Keep warm temperature will flash. Turn the selector dial to select the temperature and press.
Time will flash. Turn the dial to adjust time and press.
Put food in oven and press Start/Stop to begin warming.
The timer will begin counting down. It will beep again when cooking time has expired. The oven will shut off and the display will go from blue to white.
Keep warm tips
One great way to use the Dual Cook feature is to add Keep Warm to the end of a cooking function so any dish can be held at the proper serving temperature – perfect for the holidays and entertaining.
LEFTOVER

Adjust rack to desired position (either 1, 2 or 3). Turn Selector dial to Leftover and press.
Leftover temperature will flash. Turn the Selector dial to select the temperature and press.
Time will flash. Turn the dial to adjust time and press.
Put food in oven and press Start/Stop to begin heating.
The timer will begin counting down. It will beep again when cooking time has expired. The oven will shut off and the display will go from blue to white.
CONVECTION ![]()
Convection uses a fan to circulate heated air around food as it cooks. Convection cooking cooks food faster and more evenly. Most recipes recommend reducing temperatures by 25ºF or reducing cooking time using convection.
You may select convection with any cooking function: Bake, Broil, Roast, Pizza, Sandwich, Keep Warm or Leftover. First select the function and set the oven temperature and time. Then press the Conv button to activate the convection fan. The oven will display the convection icon. You may turn on convection at any time as you are setting the function – during preheating or during cooking. You may turn off convection at any time by pressing the Conv button again. If Speed Convection is already turned on, you may change from Speed Convection to regular Convection by simply pressing the Conv button. If you do this before the oven is at the set temperature in the Bake or Pizza function, the display will switch from Ready to Preheating and the timer will stop counting down. When the oven finishes preheating and reaches the set temperature, the timer will count down.
SPEED CONVECTION ![]()
Speed Convection is a special feature developed to cook your food even faster. It is recommended especially for frozen entrees and roasting vegetables and meats. Like regular Convection, Speed Convection uses a fan to circulate heated air around food as it cooks. Speed Convection circulates air at a faster rate than regular Convection.
Speed Convection may be selected with most cooking functions: Bake, Broil, Roast, Pizza, Sandwich, Keep Warm or Leftover.
Speed Convection does not require any preheating before cooking foods – rather the timer will begin to count down as soon as you press Start/Stop. Speed Convection can be selected or turned off at any time as you are setting the function – during preheating (to eliminate the preheat) or during cooking.
When baking fresh pizza, it is important to preheat the pizza stone, so if you opt to combine Speed Convection with the Pizza function, it is recommended that you preheat the stone before putting the pizza in the oven to bake.
When using Speed Convection, reduce cooking temperatures by 25ºF. When using Convection shorten cooking times.
First select the function and set the oven temperature and time. Add food to be cooked directly in the oven and then press the Speed Conv button to activate the convection fan. The oven will display the Speed Convection icon. Press Start/Stop to begin cooking.
If regular convection is already turned on, you may change from regular convection to Speed Convection by simply pressing the Speed Conv button. If you do this while the oven is preheating in the Bake or Pizza function, the display will immediately switch from Preheating to Ready and the timer will start counting down.
DUAL COOK
Dual Cook is a special feature that enables you to combine any two cooking function or two temperatures and run them consecutively. With Dual Cook you program separate times and temperatures for each of the two different functions or program two different temperatures and times within the same function. This is ideal for those recipes that require multiple cooking steps.
The functions that you may program using Dual Cook are Bake, Broil, Roast, Pizza, Sandwich and Keep Warm.
Dual Cook is the also the ideal setting for dishes like casseroles that benefit from top-browning or for tougher cuts of meats. Some examples of how you might use Dual Cook include Bake and then Broil (to top brown your food for a minute or two), Bake at a high temperature for a period of time and then at a lower temperature to achieve fork-tender meats with crisp exteriors, or any baking function plus Keep Warm to ensure that casseroles are at serving temperature after they are baked. Here are a few examples:
| FOOD | First function/temp/time | Second function/temp/ time |
| Slow cooked ribs | Bake/375°F/45 minutes | Bake/250°F/1 hour 30 minutes |
| Casserole | Bake/375°F/50 minutes | Keep Warm/150°F/3 to 30 minutes |
| Roasting meats | Roast/400°F/30 minutes | Roast/300°F/30 minutes |
| Nachos | Bake/350°F/5 minutes | Broil/500°F/5 minutes |
To program this feature press the Dual Cook button. The oven will display the functions you may select for the first cooking cycle. Turn and press the dial to select the first function: Bake, Broil, Roast, Pizza, Sandwich or Keep Warm. Select the temperature and time for this function. When you press the dial, the oven will again display only those functions that you can select for the second function. For example, when you select Bake for the first function, Bake, Broil and Keep Warm will be the options for the second function. Turn and press the dial to select the second function. Then select the temperature and time for this function. Put the food in the oven (if your first function is Bake, wait until the oven preheats and the display changes from Preheating to Ready). Press Start/Stop to start heating the oven.
The display will turn blue and it will run through the first cooking function for your set time. When the first cycle is finished, the oven will beep and automatically switch to the second cooking function for your set time. When the time reaches zero for the second function, the oven will beep, the display will turn white, and the heating elements will turn off. You may stop cooking and turn off the heating elements at any time by pressing the Start/Stop button.
When the oven is running in the first function, you may check your settings for the second function by pushing the Dual Cook button. The display will show the second function settings for a few seconds and then revert to display the first function.
To change functions, time or temperature mid-cycle during cooking
To change temperature: During the cooking process, the LCD screen will display the countdown timer. Press and hold the Selector button until a beep sounds and the LCD screen displays the previously selected temperature flashing. Turn the Selector dial to desired temperature. Press to set new temperature. A beep will sound.
To change time: Press and hold the Selector button until set temperature starts flashing. Press button again. The countdown timer will begin flashing and the current remaining time will be displayed. Turn the Selector dial to select new time and press it to set that time. The new countdown time will be displayed, and cooking process will continue.
To add 30 seconds: Press + 30s button to add 30 seconds to cooking time.
Can be selected at any time during cooking process, using any function. For Toast, Bagel and Waffle you can add a maximum of 1 minute using the + 30s button.
To change function: You must press Start/Stop to stop the current program. Then turn the Selector dial to select another function.
Heaters
Please note that the oven's five heaters are programmed to turn on and off and run at different powers for each of the functions. So you may not always see all of the heaters glowing red. For some functions the heaters are programmed to run at a lower power and they will not glow as bright red as the other heaters. For example, the Bagel function uses full power on the top heaters and half power on the bottom heaters. Also note that the top center heater will be turned on for the Broil function only; it is not activated for the other functions.
CLEANING AND MAINTENANCE
Always allow the oven to cool completely before cleaning.
- Always unplug the oven from the electrical outlet.
- Do not use abrasive cleaners, as they will damage the finish. Simply wipe the exterior with a clean damp cloth and dry thoroughly. Apply the cleaning agent to a cloth, not to the toaster oven, before cleaning.
- To clean interior walls, use a damp cloth and a mild liquid soap solution or a spray solution on a sponge. Never use harsh abrasives or corrosive products. These could damage the oven surface. Never use Brillo pads, etc. on interior of oven.
- To remove crumbs, slide out the crumb tray and discard crumbs. Wipe clean and replace. To remove baked-on grease, soak the tray in hot sudsy water with nonabrasive cleaners. Never operate the oven without the crumb tray in place.
- Wire rack, baking/drip pan, broiling pan and crumb tray should be hand-washed in hot sudsy water or use a nylon scouring pad or nylon brush. To extend the life of your accessories, we do not recommend that these be placed in the dishwasher.
- Pizza stone should be cleaned by rinsing with hot water. Do not use any soap or detergent on the stone.
- Never wrap the cord around the outside of the oven. Use the cord storage cleats on the back of the oven.
- Any other servicing should be performed by an authorized service representative.
![]()
After cooking greasy foods and after your oven has cooled, always clean top interior of oven. If this is done on a regular basis, your oven will perform like new and help to keep toasting consistent, cycle after cycle.
WARRANTY
Limited Three-Year Warranty
This warranty is available to consumers only. You are a consumer if you own a Cuisinart® Chef's Convection Toaster Oven that was purchased at retail for personal, family or household use. Except as otherwise required under applicable law, this warranty is not available to retailers or other commercial purchasers or owners. We warrant that your Cuisinart® Chef's Convection Toaster Oven will be free of defects in materials and workmanship under normal home use for 3 years from the date of original purchase.
We recommend that you visit our website, www.cuisinart.com for a fast, efficient way to complete your product registration. However, product registration does not eliminate the need for the consumer to maintain the original proof of purchase in order to obtain the warranty benefits. In the event that you do not have proof of purchase date, the purchase date for purposes of this warranty will be the date of manufacture.
BEFORE RETURNING YOUR CUISINART PRODUCT
If your Cuisinart® Chef's Convection Toaster Oven should prove to be defective within the warranty period, we will repair or, if we think necessary, replace it. To obtain warranty service, please call our Consumer Service Center toll-free at 1-800-726-0190 or write to: Cuisinart, 7475 North Glen Harbor Blvd, Glendale, AZ 85307.

If the nonconforming product is to be serviced by someone other than Cuisinart's Authorized Service Center, please remind the servicer to call our Consumer Service Center at 1-800-726-0190 to ensure that the problem is properly diagnosed, the product is serviced with the correct parts, and to ensure that the product is still under warranty.

Documents / Resources
References
Download manual
Here you can download full pdf version of manual, it may contain additional safety instructions, warranty information, FCC rules, etc.
Download Cuisinart TOB-260 Chef's Convection Toaster Oven Manual
Advertisement
Thank you! Your question has been received!


Need Assistance?
Do you have a question about the TOB-260 that isn't answered in the manual? Leave your question here.