Table of Contents
Advertisement
Available languages
Available languages
Quick Links
Advertisement
Table of Contents

Related Manuals for GE VE1016 Series


Summary of Contents for GE VE1016 Series
- Page 1 1. Form: 17 x 12 cm double sided printing, stapled booklet. 2. Fold twice to fit in box. White paper: 75 gr/m, progresso; overprint black. 1 7 - 1 1 - 2 0 0 8 2 1 5 5 8 4 0 2 0 - 0 7 - 2 0 1 0 MANUAL VE1016 and VE1016AM 146278999-...
- Page 2 © 2010 UTC Fire & Security. All rights reserved. 1 / 20 P/N 146278999-2 • REV 2.0 • ISS 20JUL10 GE and the GE monogram are trademarks of the General Electric Company and are under license to UTC Fire & Security, 9 Farm Springs Road, Farmington, CT 06034-4065...
- Page 3 VE1016(AM) 16 m range (52 ft. 6 in.) 12 m (39 ft. 4 in.) 10 m (32 ft. 9 in.) 8 m (26 ft. 2 in.) 6 m (19 ft. 8 in.) 4 m (13 ft. 1 in.) 2 m (6 ft. 6 in.) 2 m (6 ft.
-
Page 4: En: Installation Sheet
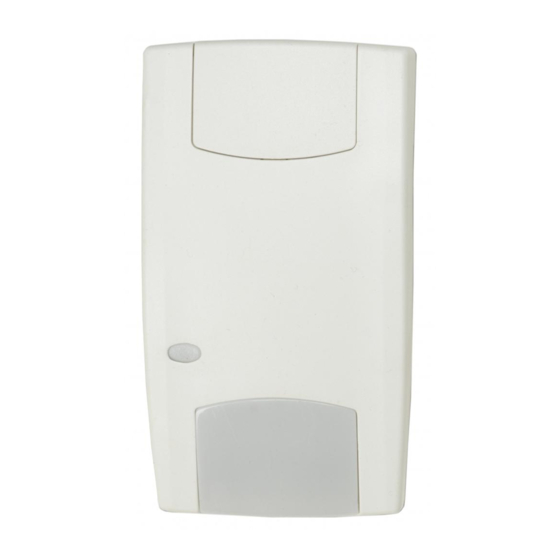
Figure 7 legend Item Description Introduction Standard connection (factory default) The VE1016 series consists of models VE1016 and Dual loop connection VE1016AM. These detectors use PIR or PIR-AM sensors. They have a patented mirror, pyro, and signal processing Control panel technology. -
Page 5: Jumper Settings
Use this jumper to set terminal 8 to either D/N or Rtest. alarm (Alarm) after 3 s GE Security recommends that you use D/N to manage the AM/TF activation when required. Use Rtest to test the detector PIR/AM Yellow Alarm... -
Page 6: Regulatory Information
• Starke auf den Melder gerichtete Zugluft VE1016 VE1016AM • Hitzequellen innerhalb des Erfassungsbereichs Peak-to-peak ripple 2 V (at 12 VDC) • Große Tiere innerhalb des Erfassungsbereichs des Detector start-up time 25 s 60 s Melders • Verdecken des Erfassungsbereichs des Melders durch Normal current 5.5 mA 10 mA... -
Page 7: Dip-Schaltereinstellung
Aus: Beide LEDs werden durch den Eingang für Gehtest und Verwenden Sie diese Steckbrücke, um Anschlussklemme 8 durch die Einstellung für Scharf/Unscharf gesteuert. Dies entweder auf D/N oder Rtest einzustellen. GE Security aktiviert die Speicherfunktion des Melders. empfiehlt für die erforderliche Verwaltung der AM/TF- Aktivierung die Einstellung D/N. -
Page 8: Es: Instrucciones De Instalación
Instrucciones para la instalación VE1016-D VE1016AM-D Normale Stromaufnahme 5,5 mA 10 mA La tecnología utilizada en estos detectores resiste riesgos de falsas alarmas. Sin embargo, debe evitar posibles causas de Stromaufnahme bei Alarm 1,1 mA 3,8 mA inestabilidad, como por ejemplo (consulte la figura 1): Maximale Stromaufnahme 11 mA 24 mA... -
Page 9: Indicación Led
Prueba de paseo y Día/Noche. Esto activa la Utilice este puente para configurar la terminal 8 como D/N o función de memoria del detector. Rtest. GE Security recomienda utilizar D/N para administrar la activación de AM/FT cuando sea necesario. Utilice Rtest para Indicación LED realizar una prueba del detector desde el panel de control. -
Page 10: Fr: Manuel D'installation
conseillé d’éviter les causes d'instabilité potentielles, telles que VE1016 VE1016AM (voir fig. 1) : Consumo de corriente en 5.5 mA 10 mA estado normal • L’exposition du détecteur à la lumière directe du soleil • Les courants d’air puissants sur le détecteur Consumo de corriente en 1.1 mA 3.8 mA... -
Page 11: Spécifications Techniques
IRP/AM Activé : Logique active haute. « Sortie active » fournit la logique GE Security standard avec une sortie active pour activer les entrées test de marche et jour/nuit (sortie d’usine). Désactivé : Actif Bas. « Sortie non active » fournit une sortie Démarrage... -
Page 12: It: Istruzioni Per L'installazione
Utilizzare questo ponticello per impostare il terminale 8 su D/N • Presenza di oggetti nel raggio di 50 cm dal rivelatore o Rtest. GE Security consiglia di utilizzare D/N per gestire antimascheramento (AM) l'attivazione AM/TF quando necessario. Utilizzare Rtest per •... -
Page 13: Indicatori Led
Bassa Aperto Applicazione della (CV) tensione (allarme) tensione corretta Chiuso: “Attiva alta” fornisce la logica standard GE Security Allarme anti Aperto Automatico dopo 3 s attiva alta che abilita gli ingressi test di copertura (WT) e intrusione (allarme) giorno/notte (D/N) (Impostazione di fabbrica). -
Page 14: Nl: Installatie-Instructies
Het kijkveld van de detector afschermen met grote Met deze jumper kunt u aansluiting 8 op D/N of Rtest instellen. objecten, zoals meubels GE Security raadt aan dat u D/N gebruikt voor het controleren • Objecten binnen 50 cm van de AM-detector (anti- van de AM/TF-activering, indien nodig. -
Page 15: Led-Indicatie
Gele Alarm- Opnieuw relais relais instellen Aan: “Actieve hoge” biedt de standaard GE Security-logica met “Actieve hoge”-logica om de ingangen Looptest (WT) en Opstarten Gesloten Gesloten Automatisch na Dag/Nacht (D/N) in te schakelen. 60 sec Uit: “Actieve lage” biedt “Actieve lage”-logica om de ingangen... -
Page 16: Pl: Instrukcja Instalacji
Zworka pozwala ustawić zasick 8 do sterowania trybem D/N • Obiekty w odległości do 50 cm (20 cali) od czujki z lub Rtest. Firma GE Security zaleca korzystanie z trybu D/N do układem AM sterowania pracą układu AM/TF (w razie potrzeby). Tryb Rtest •... - Page 17 Wył.: Ustawienie standardowej czułości AM. Wyjście AM działa PIR/AM w czasie 12 sekund (ustawienie fabryczne). SW 3: Zerowanie wyjścia AM/TF System wyzeruje alarm AM wyłącznie w sytuacji, kiedy otrzyma potwierdzenie o usunięciu alarmu AM. Jeśli obwód Usterka Rozwarty Przeprowadź pra- AM nie może powrócić...
-
Page 18: Informacje Kontaktowe
Utilize este jumper para definir o terminal 8 para D/N ou Rtest. • Objectos a uma distância de 50 cm do detector anti- A GE Security recomenda que utilize D/N para gerir a máscara (AM) activação AM/TF, se necessário. Utilize Rtest para testar o •... -
Page 19: Especificações Técnicas
SW 3: Repor a saída AM/TF Especificações técnicas O sistema repõe apenas um alarme AM depois de garantir que VE1016 VE1016AM a causa do alarme AM foi removida. Se não for possível repor Detector PIR + AM o circuito AM para os níveis originais de referência, o detector continua com máscara ou provavelmente está... - Page 20 För plan montering använd minst två skruvar (DIN utgången 7998), minst en skruv i position A och en i läge B. För På: Aktivera AM eller TF endast då systemet är i dagläge. hörnmontering använd skruvar i positionerna B eller C SSF1014 kompatibel (Fabriksinställning).
-
Page 21: Tekniska Specifikationer
AM/TF-larm Återställning av AM eller TF-larm sker efter en Avkänning av 30 cm/s till 3 m/s 20 cm/s till 3 m/s aktivering av PIR när detektorn är i Dag och Gångtest läge och rörelsehastighet den gula lampan kommer att släckas och detektorn är Larm (NC) / Sabotage relä...