Sign In
Upload
Manuals
Brands
URAL Motorcycles Manuals
Motorcycle
750cc Series
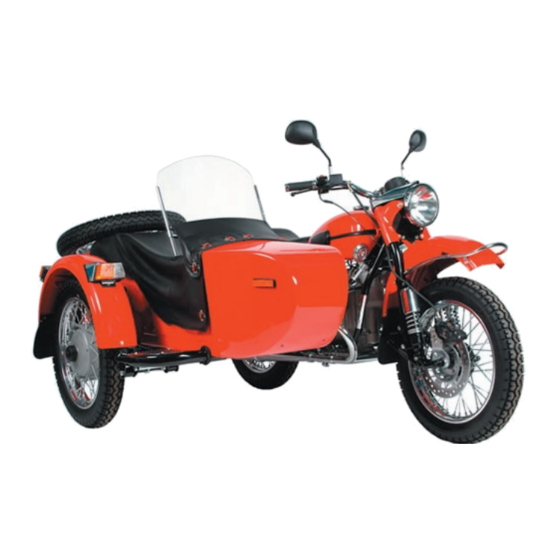
URAL Motorcycles 750cc Series Manuals
Manuals and User Guides for URAL Motorcycles 750cc Series. We have
1
URAL Motorcycles 750cc Series manual available for free PDF download: Repair Manual
URAL Motorcycles 750cc Series Repair Manual (100 pages)
Brand:
URAL Motorcycles
| Category:
Motorcycle
| Size: 23 MB
Table of Contents
Table of Contents
3
Introduction
4
Preparing the Motorcycle for Repairs
5
Determining the Technical Condition of the Motorcycle
5
Determining the Technical Condition of Engine by Major Noises and Knocks
8
Trouble Shooting and Remedy
10
Removing and Reinstalling the Engine with Gearbox
21
Disassembly and Reassembly
21
Removing and Reinstalling the Gearbox
22
Detaching and Attaching the Sidecar
22
Removing and Reinstalling the Wheels
23
Removing and Reinstalling the Intake and Exhaust Systems
23
Removing and Reinstalling the Fuel System
23
Removing and Reinstalling the Final Drive
24
Removing and Reinstalling the Handlebar with Control Cables and Switches
24
Removing and Reinstalling the Front Fork
25
Removing and Reinstalling the Swing of Rear Suspension
25
Removing and Reinstalling Axle Lever of the Wheel Suspension
25
Removing and Reinstalling of the Starter
26
Removing and Reinstalling Electrical Equipment Units
26
Removing and Reinstalling the Cylinder Head
27
Disassembly and Reassembling
27
Removing and Reinstalling the Cylinder
28
Removing and Reinstalling the Piston and Piston Rings
28
Removing and Reinstalling the Tappets with Guides
30
Removing and Reinstalling the Oil Filter
30
Removing and Reinstalling the Distributor Box Cover
30
Removing and Reinstalling the Camshaft
31
Measuring the Backlash in Timing Gears
32
Measuring the Runout of Timing Gears
32
Removing the Camshaft
32
Reinstalling the Camshaft
32
Removing and Reinstalling the Clutch
33
Removing and Reinstalling the Flywheel
33
Removing and Reinstalling the Oil Pump
34
Removing and Reinstalling the Crankshaft
35
Removing the Rear Housing
36
Device to Press out the Crankshaft
36
Position of the Crankshaft While Removing
36
Removing and Reinstalling of the Crankshaft
36
Replacing Engine Units and Parts
39
Repairing the Crank Mechanism
39
Color Marking of the Piston Pin, the Connecting Rod Small
39
Rated Sizes, Positive and Negative Allowances between the Principal Mating Members of the Engine and Clutch, MM
40
Measuring the Radial Play of the Connecting Rod
46
Measuring the Runout of the Connecting Rod
46
Measuring the Runout of Crankshaft Necks
46
Checking the Turning of the Crankshaft
47
Repairing the Valve Timing Mechanism
49
Cylinder Head. Required Tools and Fixtures Are
49
Removing the Valve Springs
50
Measuring the Side Play between the Valve and Bush Guide
50
Substitute the Bushing Proceeding as Follows
51
Sizes of Valve Springs
52
Valve Drive Rocking Arms
52
Pressing the Valve Seat out
52
Left Hand and Right Hand Rocking Arms Assemblies
53
Gear Set Selection
54
Repairing the Lubrication System
54
Repairing the Engine Crankcase and Covers
55
Repairing the Clutch Mechanism
55
Adjustment and Running-In of the Engine after Repairs
56
Running-In Schedule
56
Removing the Clutch Release Mechanism
58
Removing and Reinstalling the Speedometer Drive
58
Dismantling and Reassembling the Gearbox
58
Removing and Reinstalling the Clutch Release Mechanism
58
Service and Repair of the Gearbox
58
Removing the Gear Shift Mechanism
59
Reassembly of the Gear Case Cover
60
To Reassemble the Gear Shift Mechanism
60
To Reinstall the Gearbox Shafts
60
Shafts Mounting
60
Mounting the Intermediate Gear
61
Mounting the Kick-Starter Gear
61
Reassembly of Cover with Gear Case
61
Mounting the Kick-Starter Shaft
61
Mounting the Driven Gear of the Speedometer Drive
62
Setting the Thrust Bushing
62
Repairing the Gearbox Assembly Units and Parts
63
To Adjust Proceed as Follows
63
Nominal Sizes, Positive and Negative Allowances between the Principal Mating Members of the Gearbox, MM
64
Maximum Tolerated Limits of Clearances and Wear between the Principal Mating Members of Gearbox, MM
66
Repairing the Clutch Release Mechanism
66
Repairing the Speedometer Drive
66
Repairing the Gear Shift Mechanism
66
Repairing the Gearbox Shafts
67
Repairing the Gear, Case
68
Repairing the Final Drive and the Driveshaft
69
Dismantling and Reassembling the Final Drive and the Drive Shaft
69
Removing and Reinstalling the Drive Shaft
69
Repairing the Assembly Units and Parts of the Final Drive
70
Dismantling and Reassembling the Final Drive
70
Rated Sizes, Positive and Negative Allowances between the Principal Mating Members of the Final Drive and the Propeller Shaft, MM
72
Repairing the Drive Shaft
73
Maximum Tolerated Limits of Clearances and Wear between the Principal Mating Members of the Final Drive and the Drive Shaft, MM
73
Repairing the Final Drive
73
Disassembly and Reassembly of the Final Drive and Sidecar Drive
74
Final Drive with Disengageable Sidecar Drive
75
Assembly of the Final Drive with the Sidecar Drive
76
Pressing the Hub Bearing Cage
76
Mounting the Driving Gear
76
Pressing the Collar in
76
Pressing the Hub into the Bearing
77
Installing the Lock Ring
77
Installing the Shift Sleeve
77
Pressing the Bearing in
78
Setting the Distance Bushing
78
Installing the Stop
78
Installing the Drive Shift Shaft
78
Setting the Adjustment Ring and the Distance Ring
79
Setting the Rollers
79
Setting the Shims
79
Setting the Final Drive Cover
79
Dissembling the Sidecar Wheel Drive Shaft
80
Sidecar Drive Shaft
80
Dismantling and Reassembling the Wheel
81
To Remount the Tire and the Inner Tube
81
Repairing the Wheels
81
Dismantling and Reassembling the Wheel Hub
82
Repairing the Wheel Assembly Units and Parts
83
Repairing the Tire
83
Repairing the Wheel Hub
83
Repairing the Wheel Brake Disc
83
Repairing the Wheel Rim and Changing the Spokes
84
Dismantling and Reassembling the Front Fork
85
Removing and Reinstalling the Front Fork Leg
85
Dismantling and Reassembling the Fork Leg
85
Repairing the Front Forks
85
Dismantling and Reassembling the Shock Absorber
86
Rear Suspension and the Side-Car Wheel Suspension
86
Repairing the Suspension
86
Repairing the Motorcycle Frame
86
Inspection and Repair of the Motorcycle Frame
86
Suspension Service and Repair
86
Handlebars and Controls Cables
87
Dismantling and Reassembling the Throttle Control Twist-Grip
87
Reassemble the Twist-Grip in the Following Order
87
Fuel System
87
Wiring and Fuses
88
Repairing the Side-Car
88
Repairing the Intake and the Exhaust Systems
88
Sidecar Repair
88
Electrical Equipment
88
Storage Battery
89
Checking the Storage Battery Condition
89
Battery Discharge, Estimation by Density
89
Correction to Densimeter Readings
89
Alternator
90
Testing the Alternator Performance
90
Testing the Alternator on the Motorcycle
90
Changing the Brush Holder
90
Removing the Alternator Gear
91
Disassembly and Assembly of the Alternator Drive
91
Alternator with Drive, General View
91
Pressing the Bearings in
92
Installing the Flange
92
Installing the Seal
92
Pressing the Key in
92
Starter
93
Starter General View
93
Faults, Diagnostics and Remedy
94
Mounting of the System Onto Engine
95
Spark Plug
95
Double-Terminal Ignition Coil
95
Ignition System Devices
95
List of Lighting and Light-Signal Equipment
96
Horn
97
Wiring
97
Bearings Used on Motorcycle
97
Bearing List
97
119 Wiring Diagram
98
Seals and Rings Used with URAL Motorcycle
99
Seal and O-Ring List
99
Advertisement
Advertisement
Related Products
URAL Motorcycles 2000 -10 series
URAL Motorcycles 2000 SOLO
URAL Motorcycles 2000 SPORTSMAN
URAL Motorcycles 2000 TOURIST
URAL Motorcycles 2000 UTILITY
URAL Motorcycles 2003 Retro Solo
URAL Motorcycles 2007 RETRO
URAL Motorcycles 2011 models
URAL Motorcycles 2012 All Models
URAL Motorcycles 2014 Gear up
URAL Motorcycles Categories
Motorcycle
Trucks
Car Receiver
Motocycles
More URAL Motorcycles Manuals
Login
Sign In
OR
Sign in with Facebook
Sign in with Google
Upload manual
Upload from disk
Upload from URL