Sign In
Upload
Manuals
Brands
Ultimaker Manuals
3D Printers
Revision 4
Ultimaker Revision 4 Manuals
Manuals and User Guides for Ultimaker Revision 4. We have
1
Ultimaker Revision 4 manual available for free PDF download: Assembly Instructions Manual
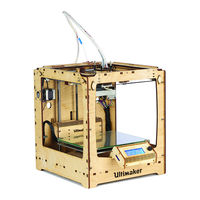
Ultimaker Revision 4 Assembly Instructions Manual (109 pages)
The fast, easy to use, Open-source 3D printer
Brand:
Ultimaker
| Category:
3D Printers
| Size: 9 MB
Table of Contents
Table of Contents
3
1 Introduction
5
Product Description
5
Used Symbols
5
2 Technical Specifications
6
General Product Specifications
6
Environmental Conditions
6
3 Precautions and Safety Instructions
7
4 Preparation before Assembling
8
Engraving
8
Sanding
8
5 What to Expect Reading the Assembly Instructions
8
Structure of the Assembly Instructions
8
Different Sides of the Ultimaker Original
9
6 Assembling the Ultimaker Original
10
Assembling the Frame
10
Step 1: Inserting the Ball Bearings
11
Step 2: Mounting the Limit Switches
12
Step 3: Assembling the X and y Motor
16
Step 4: Preparing the BOTTOM Panel
19
Step 5: Assembling the 'Cube'-Shaped Frame
22
Step 6: Attaching Various Parts
27
Assembling the X/Y Axes
30
Step 1: Assembling the FRONT, BACK, RIGHT, LEFT Slider Blocks
31
Step 2: Attaching the Claws
32
Step 3: Mounting the Caps
34
Step 4: Mounting the Axes
38
Assembling the Extrusion Head
44
Step 1: Assemble the Extrusion Head Housing
45
Step 2: Cooling Fan Assembly
54
Step 3: Attaching the Housing on the XY Frame
56
Assembling the Z Stage
60
Step 1: Assembling the Drive Nut Assembly
61
Step 3: LEFT and RIGHT Arm Assembly
62
Step 2: Inserting the Adjustable Level Screws
64
Step 4: Finishing the Z Stage Assembly
66
Step 5: Applying Tape to the Bed
68
Step 6: Installing the Z Stage in the Machine
70
Step 7: Greas It up
72
Assembling the Material Feeder
73
Step 1: Drive Mechanism Main Body Assembly
74
Step 2: Drive Bolt Assembly
76
Step 3: Clamp Assembly
78
Step 4: Attaching the Feeder to the Machine
82
Step 5: Assemble the Filament Holder
83
Mounting the Electronics Circuit Board
85
Step 1: Mounting the Electronic Circuit Board
86
Step 1: Preparing the Electronic Cooling System
87
Step 3: Connecting the Heater
91
Step 4: Connecting the Print Head Electronics
92
Step 5: Connecting the Limit Switches
93
Step 5: Connecting the Motors
93
Step 7: Mounting the Electronics Cooling System
94
Step 7: Strain Relief
94
Step 9: Checking and Aligning the Top-Z Limit Switch
95
Assembling and Connecting the Ulticontroller
97
Step 1: Assembling the Ulticontroller
98
Step 2: Connecting the Controller
100
7 Usage of the Ultimaker Original
101
Using the Ultimaker Original for the First Time
101
Slicer Software
102
Bijlage Ieg Verklaring Van Overeenstemming
105
Advertisement
Advertisement
Related Products
Ultimaker 2 Extended
Ultimaker 2 Go
Ultimaker 2+ Connect
Ultimaker 2+ EXT
Ultimaker 3 Extended
Ultimaker EXTRUSION UPGRADE
Ultimaker Factor 4
Ultimaker Heated Bed Upgrade Kit
Ultimaker METHOD XL
Ultimaker Categories
3D Printers
Printer Accessories
Fan
Motherboard
Control Unit
More Ultimaker Manuals
Login
Sign In
OR
Sign in with Facebook
Sign in with Google
Upload manual
Upload from disk
Upload from URL