Sign In
Upload
Manuals
Brands
Trinnov Audio Manuals
Home Theater System
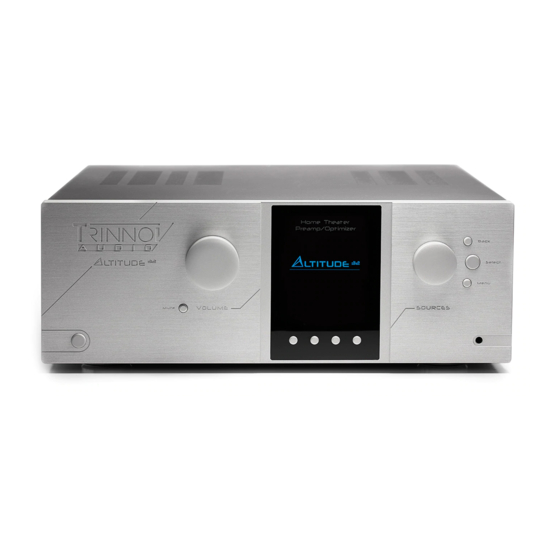
Altitude 32
Trinnov Audio Altitude 32 Sound Processor Manuals
Manuals and User Guides for Trinnov Audio Altitude 32 Sound Processor. We have
1
Trinnov Audio Altitude 32 Sound Processor manual available for free PDF download: User Manual
Trinnov Audio Altitude 32 User Manual (167 pages)
Brand:
Trinnov Audio
| Category:
Home Theater System
| Size: 12 MB
Table of Contents
Notices
5
Important Safety Instructions
8
Table of Contents
10
1 Introduction
15
About this Guide
16
Product Information
18
System Integration
19
Trinnov Certified Installers
19
Unpacking the Altitude 32
20
The Hardware
21
Front Panel Layout
21
Front Panel Display
21
Rear Panel Layout
22
IR Remote Control
23
The Software
24
Available Options to Access the Graphical User Interface
24
Important Note about the Web-Based Interface
25
Using a Display, Mouse and Keyboard Connected to the Altitude
25
The Top Menu Bar
26
The Main User Interface
27
The Lateral Menu Bar
27
Folded Lateral Menu
28
Unfolded Lateral Menu
29
The Speakers/Room Setup Tool
30
The Fine Tuning Panel
30
The Advanced Settings Interface
31
Product Information
31
Software Updates
32
2 Network Setup
33
Choosing a Network Configuration
33
Connecting to the Altitude 32
34
Overview of the Network Connection Procedure
34
Step 1: Download and Install a VNC Client on Your Device
35
Step 2: Put the Altitude 32 and Your Device on the same Network
36
Step 3: Connect to the Altitude 32 from Your Device
40
Using a Mac os X Computer with Screen Sharing
41
Using a Mac os X Computer with Chicken of the VNC
42
Using a Windows Computer with Tight VNC
43
Changing the Network Settings through the Front Panel
46
Checking the Wi-Fi Settings
46
Checking the Ethernet Settings
47
Connecting the Altitude to a Wi-Fi Network
47
Changing the Wi-Fi Settings through the Gui
48
About the Wi-Fi Information
48
Checking the Wi-Fi Settings
48
Connecting the Altitude to a Wi-Fi Network
49
Changing the Wi-Fi Status Mode of the Altitude
50
Changing the Ethernet Settings through the Gui
51
About the Ethernet Information
51
Checking the Ethernet Settings
51
Changing the Ethernet Settings
52
About Vnc and Zero-Conf Networking
53
About VNC (Virtual Network Computing)
53
About Zero-Configuration Networking
53
3 Network Streaming
54
The Upnp Protocole
54
Upnp Network Architecture
54
Recommended Upnp Softwares
55
4 Daily Operations
57
Available User Interfaces
57
Using the Front Panel
58
Power On-Off Sequence
58
Volume Control
59
Source Selection
59
Preset Selection
59
Checking the Format of Incoming Audio
60
Using the Ir Remote Control
61
Volume Control
61
Source Selection
61
Listening Format Selection
61
Presets Selection
62
Access to the Front Panel Menu
62
Ligh Button
62
Optimizer Bypass
62
Using the Graphical Interface
63
Volume Control
63
Source Selection
63
Preset Selection
64
Checking the Format of Incoming Audio
64
5 Basic Settings
65
Naming Your Sources
65
Configuring Your Sources
66
Default Source Configuration
68
Optimization Options
69
Remapping Options
70
Naming, Saving and Loading Presets
70
Default Preset
72
Set a Maximum Volume
72
Set the DIM Level
73
Backup/Restore of Presets
73
6 Overview of the Setup Procedure
75
7 Essential Tools and Settings
76
Audio Clock Settings
76
Audio Clock Status Information
76
Audio Clock Setup
77
Metering the Inputs and Outputs
78
Playing Pink Noise on the Speakers
79
Solo/Mute an Input or an Output
80
Switching Optimization On/Off
81
Viewing the Acoustical Graphs
82
Important Notes
83
Graphs Display Options
83
Chose the Display Options According to Your Requirements
84
8 Specify the Speaker Layout
86
Overview of the Speakers Setup Procedure
86
Introducing the Speaker/Room Setup Tool
86
An Example of a Specific Speaker Layout
88
Available Initial Layouts
89
Select an Initial Speaker Layout
90
Adding Speakers
91
Adding Regular Speakers
91
Adding Dolby Enabled Upfiring Speakers
92
Removing Speakers
93
Configure the Settings of each Speaker
93
Configure the Crossover Settings (Optional)
95
Mapping the Channels of Different Formats
95
Send Pink Noise to Verify the Routing of the Speakers
97
Add a Parametric Equalizer
98
What Is a Parametric EQUALIZER
98
Open the Parametric Equalizers Editor
99
Add a PEQ
100
Delete a PEQ
100
Save a New PEQ Group
101
Load a PEQ Group
102
Delete a PEQ Group
103
Save a PEQ Group on an Existing One
105
Generate Pink Noise
106
Save the Preset
106
9 Specify an Array of Speakers
107
Setting up an Array of Speakers
107
Example of an Array of Speakers
108
Adjust the Gain
108
Save the Preset
109
10 Decoder / Upmixer Settings
110
Supported Decoders/Upmixers
110
Listening Formats
111
Using the Front Panel
114
Listening Format Selection
114
Decoders Configuration
114
Using the Graphical Interface
115
Listening Formats Selection
115
Decoders Configuration
115
Decoders Settings
116
General Settings
116
Dolby Decoder Settings
117
DTS Decoder Settings
118
Auro-3D Decoder Settings
119
11 Getting Ready for Calibration
120
Very Important Tips
120
Checklist before You Start
120
Important Recommendations for Microphone Placement
121
Requirements for the Measurement Environment
121
Reference Measurement Point
121
Position and Orientation of the Microphone for the Reference Point
121
12 Calibrate the Active Crossovers (Optional)
123
Overview of the Crossover Setup Procedure
123
Configure the Advanced Settings (Optional)
124
Adjust the Master Output Level
126
Calibrate the Active Crossovers
127
Verify the Sound of the Calibrated Crossovers
128
Visualize the Acoustical Graphs for each Speaker
128
Listen to each Speaker Connected to the Crossover
130
Save the Preset
130
13 Calibrate the Speakers in the Room
131
Overview of the Calibration Procedure
131
Adjust the Master Output Level
131
Normal Calibration Sequence
132
Common Problems During Calibration
133
Calibration Status
133
Checking the Speaker Positions During/After Calibration
134
Multi-Point Measurements (Optional)
137
Compute the Optimization Filters
137
Save the Preset
138
14 Setup Bass Management
139
Overview of the Bass Management Setup Procedure
139
Fully Customizable Bass Management
140
Bass Management Mode
141
Quick Setup Menu
142
Set Filters
143
Apply to Selected Speakers
143
Bass Management Settings for Individual Speaker
144
Lfe & Misc
145
Low Frequency Effect Setup
145
Db on LFE
145
Stacked Sub Correction
146
15 Setup Target Curves
147
Overview of this Procedure
147
Setting up One or more Target Curves
147
16 Verify the Sound of Your Optimized Speaker System
149
Visualize the Acoustical Graphs for All Speakers
149
Listen to the System
149
17 Tuning the Optimization Settings
150
Main Optimization Settings
150
Speaker Position Remapping
152
Target Curve
152
Limiter Curve
152
Advanced Optimization Settings
153
Display
153
Front & Surround Speaker Settings
153
Acoustics Correction
154
Calibration Settings
154
Optimize According to L&R Speakers Settings
154
FIR and IIR Settings
154
Level Alignment Settings
155
Subwoofer Low-Pass Filter Settings
155
Decimation Settings & Advanced FIR Settings
155
Advanced FIR Settings
155
18 Performing Multi-Point Measurements
156
Relevant Measurement Positions
157
Multi-Point Calibration Procedure
158
Weighting Multiple Measurements
158
19 Appendix
159
Insert an External Stereo Dac
159
Remote Start and Stop
159
Automation
160
Signal Flow of the Altitude 32
160
Signal Flow of the Altitude
160
Setup Process and Filters Calculation
160
Speaker Placement Recommendations
161
Db25 Connector: Analog Pinout
161
Db25 Connector : Aes Pinout
162
Measurement Microphone
162
Microphone Specifications
163
Power Supply
163
Individual Compensation File
163
Connection Order
165
Advertisement
Advertisement
Related Products
Trinnov Audio ALTITUDE 16
Trinnov Audio Altitude16
Trinnov Audio Altitude32
Trinnov Audio Altitude32-88
Trinnov Audio Categories
Amplifier
Recording Equipment
Computer Hardware
Home Theater System
Remote Control
More Trinnov Audio Manuals
Login
Sign In
OR
Sign in with Facebook
Sign in with Google
Upload manual
Upload from disk
Upload from URL