Sign In
Upload
Manuals
Brands
SPXFLOW Manuals
Water Pump
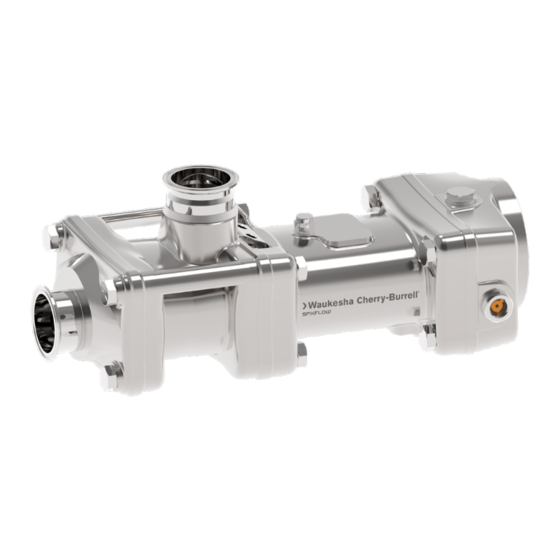
Waukesha Cherry-Burrell WTS
SPXFLOW Waukesha Cherry-Burrell WTS Manuals
Manuals and User Guides for SPXFLOW Waukesha Cherry-Burrell WTS. We have
1
SPXFLOW Waukesha Cherry-Burrell WTS manual available for free PDF download: Instruction Manual
SPXFLOW Waukesha Cherry-Burrell WTS Instruction Manual (120 pages)
Rotary positive displacement Twin screw pump
Brand:
SPXFLOW
| Category:
Water Pump
| Size: 14 MB
Table of Contents
Table of Contents
4
Warranty
8
Shipping Damage or Loss
8
Warranty Claim
8
General Information
9
Symbols and Indicators
9
Warnings
9
Abbreviations
10
Reference Documents
10
Safety Instructions
11
Foreseeable Misuse
11
Intended Use
11
Noise Emissions
11
Basic Requirements
12
Conversions, Modifications and Spare Parts
12
Personal Protective Equipment
12
Personnel Qualifications and Operating Phases
12
Special Requirements
12
Pressurized Hot/Dangerous Liquids
13
Pressurized Pump
13
Residual Risks
13
Rotating and Moving Machine Parts
13
Danger of Being Crushed
14
Hot Surfaces
14
Live Electrical Parts
14
Manipulating the Safety Devices
14
Slippery Surfaces Caused by Leaks
14
Suspended Loads During Transport
14
Acidic and Alkaline Cleaning Agents
15
Aggressive Materials
15
Danger to Equipment
15
Dangerous Substances
15
Fat
15
High Temperatures During the Cleaning Process
15
Pumps with a Heating Jacket: Exceeding the Nominal Pressure
15
Sharp-Edged Components and Foreign Objects
15
Avoiding Damage During Assembly/Mounting/Installation
16
Mechanical Risks
16
Unsuitable Lubricants
16
Avoiding Damage During Assembly/Dismantling
17
Avoiding Damage During Operation
17
Non-Permitted Electrical Parameters
17
Danger of Hygiene Risks
18
Defective Elastomer (O-Rings)
18
Description
20
Thermal Risks
18
WTS 104/130 Main Components
20
General Description
21
Pump Operating Principle
22
Transport, Packaging and Storage
23
Packaging
24
Storage
24
Positioning/Securing and Integrating General Information
25
Space Needed for Operating and Servicing
25
WTS Connection in a 3-A/EHEDG Certified System
25
Pipelines
26
Pressure Conditions in the Pump Housing
26
Pump Housing with Heating Jacket
26
Electrical Connection
27
Installing and Securing the Pumps
27
Assembling the Drive and Coupling Components
28
Drive
28
Fitting the Coupling Components
28
Assembling the Pump (Coupling Components) and Drive
29
Contact or Coupling Guard
30
Mechanical Seal Cartridge - Double-Acting
30
Mechanical Seal Cartridge - Single-Acting
30
Shaft Seal
30
Leaks
31
Loss and Circulation Flushing
31
Requirements When Tap Water Is Used as the Quench Medium
32
Shaft Seal Quench Medium
32
Medium's Flow Direction
34
Rotational Direction of the Screw Spindle Pump Drive
34
Nozzle Orientation on the Pump Housing
34
Position Pin Arrangement on the Pump Housing
34
WTS 70 Spindle Orientation
36
WTS 104/130 Spindle Orientations
37
Starting and Stopping
39
Starting
39
Preparing the Pump for Its Initial Start-Up
39
Starting the Pump
40
Stopping the Pump
40
Depressurizing the Pump
40
Emptying the Pump
40
Disconnecting the Pump
40
Cleaning Process for Screw Spindle Pumps
42
Before Carrying out the Cleaning Work
42
Cleaning the External Surfaces
42
Cleaning/Sterilizing the Internal Surfaces
43
Cleaning Specific Components after Dismantling
43
Cleaning Special Components
44
Cleaning the Storage/Sealing Pressure Tank
45
Cleaning the Outside
45
Cleaning the Internal Surfaces/Lines
45
Service and Repairs
46
Preliminary Activities
46
Requirements
46
General Requirements
46
Gear Oil
46
Drive Bearing Lubricant
46
Thread Locking Paste
46
Preventing Premature Elastomer Wear
47
Inspection Intervals
48
Service Intervals
49
Service Intervals for Elastomers that Are in Contact with the Product
50
Servicing the Spindle Screw and O-Rings
50
Drain or Replace the Gear Oil
50
Refilling with Gear Oil
50
Servicing the Mechanical Seal
51
Sending a Pump for Repair
52
Trouble Shooting
53
Possible Causes of Shaft Seal Leaks
53
Electrical Faults
53
Pump Malfunctions
54
Ordering Spare Parts
56
Assembling and Dismantling
57
Preliminary Activities
57
Tools Needed
57
Handling Elastomers
58
Drive and "Motor Adapter" Coupling Guard
58
Dismantling
58
Assembling
59
Drive and Standard Coupling Guard
60
Dismantling
60
Assembling
61
Gearbox Housing
61
Dismantling
61
Assembling
62
Cover and Pump Housing
63
Dismantling
64
Assembling
64
Solid Pump Housing
65
Screw Spindles
65
Dismantling
65
Assembling
66
Synchronizing the Screw Spindles
67
Pump Housing Arrangement
68
Mechanical Seal Cartridge / Seal Retainer
68
Preparing a New Mechanical Seal Cartridge
68
Dismantling the Mechanical Seal Cartridge / Seal Retainer
69
Assembling the Mechanical Seal Cartridge / Seal Retainer
71
Dismantling a Single-Acting Mechanical Seal Cartridge
72
Dismantling
72
Assembling
73
Dismantling a Double-Acting Mechanical Seal Cartridge
74
Dismantling
74
Assembling
76
Gearing
77
Dismantling
77
Assembling
78
Bearing, Input and Output Shafts
78
Dismantling
79
Assembling
80
Disposal
84
Pump Dimensions
85
Part List
86
Base Plate - Standard Version
86
Drive
86
Coupling and Motor Adapter Coupling Guard
87
Coupling and Standard Coupling Guard
88
Gearbox Housing
89
Gearing
90
Bearing Housing
92
Pump Housing
93
Pump Housing with Heating / Cooling Jacket
94
Pump Set
94
Seal Retainer
96
Pump Mounting Foot
99
Mechanical Seal Cartridge - Single-Acting
100
Mechanical Seal Cartridge - Double-Acting
101
Mechanical Seal Cartridge Options
102
WTS Pump Seal Kits
102
Cleaning / Sterilization Processes
104
General Information
104
COP Cleaning Process
104
CIP Cleaning Process
104
Cleaning-Relevant Parameters
104
Mechanical Cleaning Effects
104
Chemical Cleaning Effects
105
Thermal Cleaning Effects
105
Time
105
SIP Sterilization Process
105
General Sterilization Information
105
SIP Sterilization Specifications
106
A Pressure Drop During a SIP Sterilization Process
107
COP Cleaning Process Sequence
107
Conditions
107
COP Cleaning Process
107
CIP Cleaning / SIP Sterilization Process Sequences
108
Conditions
108
CIP Cleaning Process
108
SIP Sterilization Process
109
Tool List and Tightening Torques
110
WTS 70, 104 and 130 Tool Table
110
Tightening Torques
112
Tightening Torques for Specified Components
112
Tightening Torques for Screw Connections in Concrete
112
Tightening Torques for General Screw Connections
113
Assembly Aid for a Mechanical Seal Cartridge
114
Tools T0114 / T0120 / T0121
114
Mechanical Seal Cartridge Inside the Tool
114
View of the Tool
115
Handling the Assembly Aid
115
Accessories (Optionally Available) Pump Accessories
117
Marking/ Labels on the Pump
118
Advertisement
Advertisement
Related Products
SPXFLOW Waukesha Cherry-Burrell W75RS PMO
SPXFLOW APV DW+ Series
SPXFLOW APV DW+1/003 Series
SPXFLOW APV DW+1/004 Series
SPXFLOW APV DW+1/007 Series
SPXFLOW APV DW+2/006 Series
SPXFLOW APV DW+2/007 Series
SPXFLOW APV DW+2/013 Series
SPXFLOW APV DW+3/014 Series
SPXFLOW Categories
Control Unit
Water Pump
Water Filtration Systems
Dehumidifier
Switch
More SPXFLOW Manuals
Login
Sign In
OR
Sign in with Facebook
Sign in with Google
Upload manual
Upload from disk
Upload from URL