Sign In
Upload
Manuals
Brands
Shimadzu Manuals
Measuring Instruments
AA-7000 Series
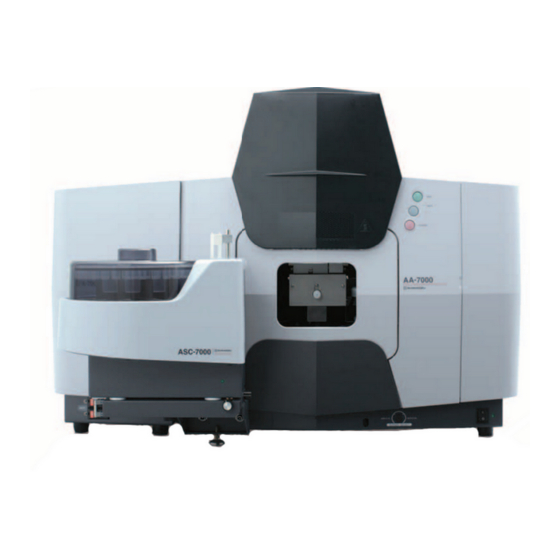
Shimadzu AA-7000 Series Manuals
Manuals and User Guides for Shimadzu AA-7000 Series. We have
2
Shimadzu AA-7000 Series manuals available for free PDF download: Instruction Manual, Manual
Shimadzu AA-7000 Series Instruction Manual (404 pages)
Atomic Absorption Spectroscopy
Brand:
Shimadzu
| Category:
Laboratory Equipment
| Size: 9 MB
Table of Contents
Safety Instructions
4
Precautions on Use
16
Emergency Action
18
Warning Labels on the Instrument
22
Warranty and After-Sales Service
29
Software License Agreement
30
Disposal Precautions
33
Electromagnetic Compatibility
34
Table of Contents
35
Overview
43
Overview of AA-7000 Series
44
Parts Information
45
AA-7000F and AA-7000F/AAC Parts Information
45
AA-7000G Parts Information
46
Installation
47
Installation of AA-7000 Series
47
Installation of PC Software
47
Name and Function of each Part
48
Operation Switches/Connectors
48
Burner Compartment
49
Burner
51
Hollow Cathode Lamp Turret
52
Deuterium Lamp
54
Support Gas Flow Meter (When Option Equipped)
55
Optical System
56
Photometric System
57
Analog Output
59
Specification
59
Wizaard] Launcher
60
Safety Devices
61
Basic Operation
63
Basic Operation 2.1 Power ON/OFF
64
Activation
64
2.1 Power ON/OFF
65
Quitting
66
Initialization of the Instrument
67
Mounting a Hollow Cathode Lamp (Optional)
68
Removing and Mounting the Front Panel
70
Removing the Front Panel
70
Mounting the Front Panel
71
Removing and Mounting the Chimney (AA-7000F, AA-7000F/AAC)
73
Removing the Chimney
73
Mounting the Chimney
73
Using "Help
75
Calling up the Help Screen
75
Explanation of the Help Screen
76
Checking the Gas Controller Status (AA-7000F, AA-7000F/AAC)
78
Supplying Water to the Drain Tank (AA-7000F, AA-7000F/AAC)
80
Software Operation Flow and Basic Operation 3.1 Software Basic Operation (Flame Continuous Method)
82
Operation Flowchart (Flame Continuous Method)
82
Logging in Wizaard
82
Software Basic Operation (Flame Continuous Method)
82
Wizard Selection
83
Element Selection
84
Lamp Setting Procedure
86
Preparation Parameters
88
Calibration Curve Setup
89
Sample Group Setup
91
Connect to Instrument/Send Parameters
94
Initializing the Instrument
95
Instrument Check List for Flame Analysis
101
Optics Parameters
102
Atomizer/Gas Flow Rate Setup
104
Software Basic Operation (Flame Micro Sampling Method)
107
Operation Flowchart (Flame Micro Sampling Method)
107
Logging in Wizaard
107
Wizard Selection
108
Element Selection
109
Lamp Setting Procedure
111
Preparation Parameters
113
Calibration Curve Setup
114
Sample Group Setup
118
Connect to Instrument/Send Parameters
121
Initializing the Instrument
122
Instrument Check List for Flame Analysis
128
Optics Parameters
129
Atomizer/Gas Flow Rate Setup
131
Software Basic Operation (Furnace Method)
134
Operation Flowchart (Furnace Method)
134
Logging in Wizaard
134
Wizard Selection
135
Element Selection
136
Lamp Setting Procedure
138
Preparation Parameters
140
Calibration Curve Setup
141
Sample Group Setup
146
Connect to [Instrument/Send Parameters] Page
149
Initializing the Instrument
150
Bypass the Instrument Check List for Flame Analysis
151
Optics Parameters
152
Furnace Program
154
Furnace Program Setup
155
Saving the Template
157
Explanation of Main Window
158
Menu Bar
159
Standard Tool Bar
159
Measurement Element Tool Bar
160
Absorbance Digital Display
160
Real Time Graph (and Furnace Program Graph)
161
Peak Profile (Latest Four Measurements and Overlay Display)
163
Calibration Curve Display
165
MRT Work Sheet
167
Function Buttons
168
Operation
168
Status Bar
169
Operating the MRT Work Sheet
170
Fields of MRT Work Sheet
170
Drop-Down List of [Action]
173
Right Mouse Button Menu
175
Right Mouse Button on Summary Table
179
Inserting and Deleting the Measurement Row
179
Active Cell Movement by Shortcut Key and Cell Selection
179
Moving an Active Cell
179
Selecting Cells
180
Copy and Paste
180
Copy
180
Paste
180
Changing Column Width and Column Header Height of MRT Worksheet
181
Measurement Procedures
183
Measurement Procedures 4.1 Measurement Operation (for Flame Method)
184
Manual Measurement
184
Measurement Operation (for Flame Method)
184
Using the ASC
185
Measurement Operation (for Furnace Method)
187
Preparation and Manual Measurement
187
Using the ASC
187
Completing the Measurement
188
Saving and Printing the Data
189
Saving the Data
189
Printing the Data
190
Igniting and Extinguishing the Flame
192
Operation Locations
192
Safety Precautions Prior to Ignition
192
Igniting and Extinguishing Air-C
193
Flame
193
Igniting and Extinguishing N 2 O-C 2 H 2 Flame
195
Flame Conditions When Analyzing Organic Solvent Samples
198
Residual Gas Combustion
198
Standard Addition Method and Simple Standard Addition Method
201
Setting the [Preparation Parameters] Page
202
Measurement Procedures on MRT Work Sheet
206
Conditions and Operation for Flame Emission Analysis
208
Optics Parameters] Page
208
Atomizer/Gas Flow Rate Setup] Page
210
Line Search and Beam Balance
212
Wavelength Shift
213
Specifying Optimal Conditions for Flame
214
Setting the Optimum Condition of Burner Height
214
Setting the Optimum Condition of Fuel Gas Flow Rate
215
Chapter 5 User Administration
217
Gxp Support Functions
218
Overview of Gxp Support Functions
218
What Is GLP/GMP
218
What Is FDA 21 CFR Part 11
219
Gxp Support Functions
219
System Administration
220
Reviewing System Administration
220
What Is System Administration
220
System Administration Application
223
System Administration Flow
224
Designing a System Administration Policy
225
Using the System Administration Tools to Set Available Items
226
Starting the System Operation
228
Setting User Administration Policies
228
Registering (Changing/Deleting) Rights Groups
231
Registering (Changing/Deleting) Users
234
Short Time after System Operation Has Been Started
236
Viewing the History of System Administration
236
Changing Passwords
237
Using the Security Support Functions
239
Login Authentication
239
Current User Display
240
Restricting the Operations According to User Rights
240
Protecting an Analytical Task by Locking the Screen
241
Audit Trail
242
Referencing a Record in a Data File
243
Viewing the History of System Changes
243
Performing Software Validation
245
Performing Program Checks
245
Performing the Function Check
247
Data Administration
248
Reviewing the Long-Term Storage of Data
248
Managing the Print Images
248
Storing a Data File for a Long Period of Time
248
Devising a Data Storage Method
249
Using a Print Image
249
Other System Management Tools
250
Performing the Maintenance of System Management Database
250
Using the Database Maintenance Tool
250
Managing the System on the Network
251
Using Shimadzu User Authentication Tool on the Network
251
Using the Maintenance of Instrument Information Tool
252
What Is QA/QC
256
Overview of QA/QC
256
QA/QC Check Items and Their Settings
257
Calibrating the Instrument (Creating a Calibration Curve)
258
ICV and ICB
261
CCV and CCB
262
CRA (CRDL for AA)
263
PB (Preparation Blank)
264
LCS (Laboratory Control Samples)
266
S (Spike: Spike Test)
267
D (Duplicate Sample Analysis)
269
IDL (Instrument Detection Limit Determination)
270
Abbreviation of QA/QC
270
Hardware Validation 7.1 What Is Hardware Validation
274
What Is Hardware Validation
274
Necessary Items
275
Outline of Standard Test Item
276
Wavelength Accuracy
276
Baseline Drift
276
Noise Level
276
Absorbance and Repeatability (in the Case of Flame Analysis)
277
Detection Limit (in the Case of Flame Analysis)
277
Stability (in the Case of Flame Analysis)
277
Absorbance and Repeatability (in the Case of Furnace Analysis)
278
Detection Limit (in the Case of Furnace Analysis)
278
Basic Operation Procedures
279
Preparation
279
Preparation of Hollow Cathode Lamp
279
Sample Preparation
279
Selecting the Test Items
280
Setting the ASC Parameters
283
Setting the Warm-Up Time of Lamps and Stabilization Time for Flame
284
Starting the Test
285
Items with Sample Measurement
287
Stop the Test
288
Print the Check Result
289
Saving and Loading the Data
290
Saving the Data
290
Loading the Data
290
Parameter Change
291
Entering the Parameter Change Screen
291
Setting the Test Parameters
292
Setting the Scale for Graph Display/Output of each Data
294
Saving/Loading the Parameters
295
When Saved as the Individual Validation File
295
Loading the Individual Validation File
295
When Saved as the Auto Load Validation File
296
Functions of Operation Menu
297
Main Screen
297
File
298
Print Setup] Dialog Box
299
Tests
300
Configuration
300
Perform
301
Graph
301
Maintenance
303
Chapter 8 Maintenance
304
Routine Inspections and Periodic Inspections
304
Routine Inspections
304
Common to All AA-7000 Series Models
304
Aa-7000F, Aa-7000F/Aac
304
Monthly Inspection
305
Common to All AA-7000 Series Models
305
Aa-7000F, Aa-7000F/Aac
305
Equipment and Options
306
Burner Maintenance (AA-7000F, AA-7000F/AAC)
307
Burner Head Maintenance
308
Nebulizer Maintenance
309
Removing and Mounting the Sampling Tube
310
Removing and Mounting the Shield Cover
310
Cleaning the Capillary
310
Inspecting and Replacing the Polyethylene Tube
311
Inspecting and Cleaning the Tip of the Spray Unit
311
Cleaning the Disperser
312
Chamber Maintenance
313
Cleaning the Chamber
313
Replacing O-Rings
314
Cleaning the Drain Tank and U-Tube
315
Atomizer Positioning Adjustment
318
Burner Positioning Adjustment
318
Aa-7000F
318
Aa-7000F/Aac
318
Furnace Position Adjustment
320
Aa-7000G
320
Aa-7000F/Aac
321
Checking the Pilot Flame Unit (AA-7000F, AA-7000F/AAC)
321
Inspection Procedure
321
Checking for Gas Leaks (AA-7000F, AA-7000F/AAC)
322
Checking for Leaks of Pressure Regulators (Optional)
323
Replacing the Drain Tube (AA-7000F, AA-7000F/AAC)
325
Replacing the Deuterium Lamp
326
Specifications of Deuterium Lamp
326
Replacing Procedures of Deuterium Lamp
326
Replacing Deuterium Lamp
327
Adjusting Position of Deuterium Lamp
329
Method for Replacing the Hollow Cathode Lamp
330
Maintenance Parts
334
Parts Relating to Safety of Product
334
Parts Relating to Performance of Product
335
8.10 Maintenance Parts
335
Repair Parts
336
Chapter 9 Troubleshooting
337
Failure to Ignite
338
Responding to Trouble
339
Common to All AA-7000 Series Instruments
339
Aa-7000F, Aa-7000F/Aac
342
When the Buzzer Sounds
344
When the Buzzer Sounds Continuously (Beep, Beep)
344
When the Buzzer Sounds Continuously (Pippip, Pippip)
345
When the Buzzer Sounds Four Times (Beep, Beep, Beep, Beep)
345
Error Messages
348
Chapter 10 Technical Data
373
Specifications
374
Basic Specifications
374
Flame Specifications
376
10.1.2.1 Chemicals that Can be Used
377
Furnace Specifications
378
Performance Specifications
379
Software Operation Minimum Requirements
380
10.1.5.1 Operating System
380
Measurement Conditions Table for Flame Atomic Absorption Analysis
381
Analysis Line Wavelength Table for Flame Emission Analysis
383
Optional Parts
384
For Flame Analysis
384
For Furnace Analysis
385
Autosampler
385
Dual Atomizer System
385
10.4 Optional Parts
385
Hollow Cathode Lamps (Single Element Lamps)
386
Hollow Cathode Lamps (Single Element Lamps, Usable for SR Method)
388
Hollow Cathode Lamp (Multi-Element Lamps)
389
Other Parts
390
Instrument Placement and Site Requirements
391
Equipment Requirements
393
Power Requirements
393
Cooling Water Supply Requirement (GFA Only)
393
Gas Requirements
394
Ventilation System
397
Advertisement
Shimadzu AA-7000 Series Manual (29 pages)
Atomic Absorption Spectrophotometer
Brand:
Shimadzu
| Category:
Measuring Instruments
| Size: 4 MB
Table of Contents
System Configuration Can Evolve with Your Needs
4
Major Fields of Application
4
Analysis Sensitivities
4
Flame Selection
5
Product View
6
Advantages of the Double-Beam System
7
Support for Developing Analytical Conditions
7
Optional Autosampler Reduces Analysis Workload
7
Trace Sample Analysis Using Micro Sampling
7
High-Performance Autosampler
9
High-Sensitivity Application Data (Analysis of Selenium (Se))
9
Selecting the Graphite Tube
9
New Atomizer Design Permits Easy Switching between Flame and Furnace Measurements
11
Slim, Easy-To-Use Design
11
Safety Functions for Flame-Specification Instruments
13
Safety Functions for Furnace-Specification Instruments
13
Safety-Conscious Design
13
Dual-Background Correction Functions
14
High-Speed Self-Reversal Method (SR Method) and Deuterium Lamp Method
14
SR (High-Speed Self-Reversal) Method –– Accurate Background Correction over a Wide Range
14
D (Deuterium Lamp) Method – Highly Sensitive Background Correction
15
Clear, Easy-To-Use Software
16
Features of the Wizaard Software
16
Measurement Screen Layout Shows Measurement Status at a Glance
16
Lamp History Function Assists with Lamp Management
16
Software Provides Comprehensive Information Displays and Flexible Settings
17
Identical Software Operation for Flame and Furnace Measurements
17
Combining a High-Performance Autosampler Simplifies Advanced Settings
17
Supports System Management and Accuracy
18
FDA 21 CFR Part 11 Compliance
18
Comprehensive Data Management Functions
18
Management
19
Accuracy Management (A/QC) Functions Permit User Level Management Audit Trail, and Electronic Signatures
19
Standard Parts / PC / Software
20
Common to All AA-7000 Series Models
20
AA-7000F, AA-7000F/AAC Standard Parts List
20
AA-7000G Standard Parts List
20
Optional Accessories
21
For Flame Analysis
21
For Furnace Analysis
21
Autosampler
21
Optional Accessories / Related Products
22
For High-Sensitivity As, Se, Sb Analysis
22
For Higher Sensitivity with the Hydride Generation Method
22
For High-Sensitivity Hg Analysis
23
ICP Emission Spectrometers
23
Specifications
24
Main Unit
24
Flame
24
Furnace (GFA-7000A)
24
Furnace Method / Flame Micro Sampling Method
25
Required Software Operation Environment
25
Common Specifications
25
Flame Continuous Method
25
Installation Conditions
26
Dimensions
26
Advertisement
Related Products
Shimadzu AA-6800F
Shimadzu AA-6800G
Shimadzu AA-6650F
Shimadzu AA-6650G
Shimadzu AGS-5kNX
Shimadzu AGS-1kNX
Shimadzu AGS-100NX
Shimadzu AGS-50NX
Shimadzu AGS-5NX
Shimadzu AGS-1NX
Shimadzu Categories
Laboratory Equipment
Measuring Instruments
Scales
Security Sensors
Medical Equipment
More Shimadzu Manuals
Login
Sign In
OR
Sign in with Facebook
Sign in with Google
Upload manual
Upload from disk
Upload from URL