Sign In
Upload
Manuals
Brands
Renkforce Manuals
DJ Equipment
DL-PAR101
Renkforce DL-PAR101 Manuals
Manuals and User Guides for Renkforce DL-PAR101. We have
1
Renkforce DL-PAR101 manual available for free PDF download: Operating Instructions Manual
Renkforce DL-PAR101 Operating Instructions Manual (112 pages)
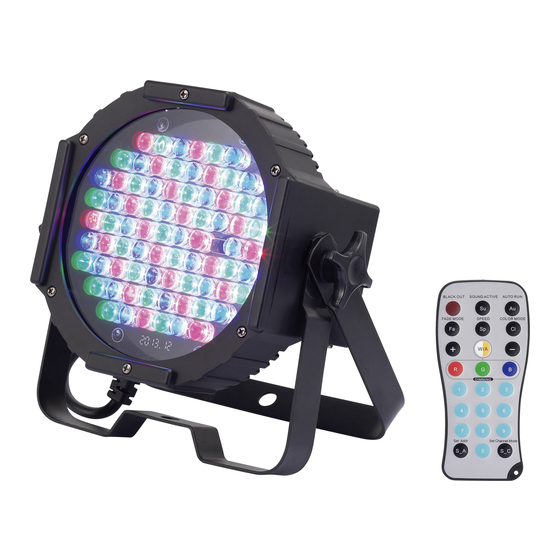
LED spot with 77 LEDs
Brand:
Renkforce
| Category:
DJ Equipment
| Size: 4 MB
Table of Contents
Deutsch
2
Table of Contents
2
1 Einführung
3
2 Bestimmungsgemäße Verwendung
4
3 Lieferumfang
4
4 Symbol-Erklärung
5
5 Merkmale und Funktionen
5
6 Sicherheitshinweise
6
7 Akku- und Batteriehinweise
9
A) LED-Spot
9
B) Fernbedienung
9
8 Bedienelemente
10
9 Aufstellen und Montage
11
10 Batterie der Fernbedienung
12
11 DMX 512-Anschluss
12
A) Anschluss eines DMX-Controllers
13
B) Aufbau einer Master-Slave-Kette
13
12 Spannungsversorgung
14
A) Einzelanschluss am Netz
14
B) Anschluss Mehrerer LED-Spots in einer Spannungskette
14
C) Akkubetrieb - Akkustand Überprüfen
15
D) Akkubetrieb - Akku Aufladen
15
13 Bedienung
16
A) Tastenbelegung am LED-Spot
16
B) Beschreibung der Betriebsarten
17
C) Einstellung der Bedienoptionen
18
D) Einstellung der Betriebsarten
19
E) Betrieb mit Externem DMX-Controller
20
14 Steuerung mit der IR-Fernbedienung
23
15 Problembehebung
26
16 Wartung und Reinigung
27
A) Reinigung
27
B) Sicherungswechsel
28
17 Entsorgung
28
A) Produkt
28
B) Batterien
28
18 Technische Daten
29
A) LED-Spot
29
B) Fernbedienung
29
English
30
1 Introduction
31
2 Intended Use
32
3 Delivery Content
32
4 Explanation of Symbols
33
5 Features and Functions
33
6 Safety Instructions
34
7 Rechargeable) Battery Information
36
A) LED Spot
36
B) Remote Control
36
8 Operating Elements
37
9 Setting up and Mounting
38
10 Remote Control Battery
39
11 DMX 512 Connection
39
A) Connecting a DMX Controller
39
B) Setting up a Master-Slave Chain
40
12 Power Supply
40
A) Connecting a Single Device to the Mains Supply
41
B) Connecting Multiple LED Spots in a Circuit
41
C) Rechargeable Battery - Checking the Battery Level
41
D) Rechargeable Battery - Charging the Battery
42
13 Operation
42
A) Button Configuration On The Led Spot
42
B) Description of Operating Modes
44
C) Setting the Menu Options
45
D) Setting the Operating Modes
45
E) Operating with an External DMX Controller
47
14 Controlling with the IR Remote Control
50
15 Troubleshooting
53
16 Maintenance and Cleaning
53
A) Cleaning
54
B) Fuse Replacement
54
17 Disposal
54
A) Product
54
B) Batteries
55
18 Technical Data
55
A) LED Spot
55
B) Remote Control
55
Français
56
1 Introduction
57
2 Utilisation Prévue
58
3 Contenu D'emballage
58
4 Explication des Symboles
59
5 Caractéristiques Et Fonctions
59
6 Consignes de Sécurité
60
7 Consignes Relatives Aux Piles Et Aux Accumulateurs
63
A) Spot À LED
63
B) Télécommande
63
8 Eléments de Fonctionnement
64
9 Installation Et Montage
65
10 Pile de la Télécommande
66
11 Prise DMX 512
66
A) Raccordement D'un Contrôleur DMX
67
B) Structure D'une Chaîne Maître-Esclave
67
12 Alimentation en Courant
68
A) Raccordement Au Réseau
68
B) Raccordement de Plusieurs Spots LED Dans Une Chaîne de Tension
68
C) Mode Batterie - Vérifier Le Niveau De Charge
69
D) Mode Batterie - Recharger la Batterie
69
13 Utilisation
69
A) Affectation Des Touches Du Spot Led
69
B) Description des Modes de Fonctionnement
71
C) Paramétrage des Options
72
D) Réglage des Modes de Fonctionnement
73
E) Utilisation Avec Contrôleur DMX Externe
74
14 Utilisation de la Télécommande Infrarouge
77
15 Dépannage Rapide
80
16 Entretien Et Nettoyage
81
A) Nettoyage
81
B) Remplacement des Fusibles
82
17 Elimination des Déchets
82
A) Produit
82
B) Piles
82
18 Caractéristiques Techniques
83
A) Spot À LED
83
B) Télécommande
83
Dutch
84
1 Inleiding
85
2 Bedoeld Gebruik
86
3 Leveringsomvang
86
4 Verklaring Van Pictogrammen
87
5 Eigenschappen en Functies
87
6 Veiligheidsinstructies
88
7 Instructies Voor Accu's En Batterijen
91
A) LED-Spot
91
B) Afstandsbediening
91
8 Bedieningselementen
92
9 Installatie en Montage
93
10 Batterij Van De Afstandsbediening
94
11 DMX 512-Aansluiting
94
A) Aansluiten Van Een DMX-Controller
95
B) Opbouw Van Een Master-Slave Serie
95
12 Voedingsspanning
96
A) Afzonderlijke Aansluiting Aan Het Stroomnet
96
B) Aansluiting Van Meerdere LED-Spots in Een Stroomserie
96
C) Gebruik Met Accu - Accustand Controleren
97
D) Gebruik Met Accu - Accustand Opladen
97
13 Bediening
97
A) Programmeren Van de Knoppen Van de LED-Spot
97
B) Beschrijving Van De Gebruiksmodi
99
C) Instelling Van de Besturingsopties
100
D) Instelling Van de Gebruiksmodi
101
E) Gebruik Met Externe DMX-Controller
102
14 Bediening Met de IR-Afstandsbediening
105
15 Verhelpen Van Storingen
108
16 Onderhoud en Reiniging
109
A) Reiniging
109
B) Vervangen Van Zekeringen
110
17 Verwijdering
110
A) Product
110
B) Batterijen
110
18 Technische Gegevens
111
A) LED-Spot
111
B) Afstandsbediening
111
Advertisement
Advertisement
Related Products
Renkforce DJ-10
Renkforce DL-LED162
Renkforce DL-PAR105 SMD LED Spot 1292337
Renkforce DL-PAR106
Renkforce DL-PAR103 LED-Spot
Renkforce DL-LED107S
Renkforce DL-LED107S-UV
Renkforce DL-1115
Renkforce DL-LED163
Renkforce DA-7361
Renkforce Categories
Switch
Adapter
Card Reader
Lighting Equipment
Speakers
More Renkforce Manuals
Login
Sign In
OR
Sign in with Facebook
Sign in with Google
Upload manual
Upload from disk
Upload from URL