Sign In
Upload
Manuals
Brands
Rasilient Manuals
Storage
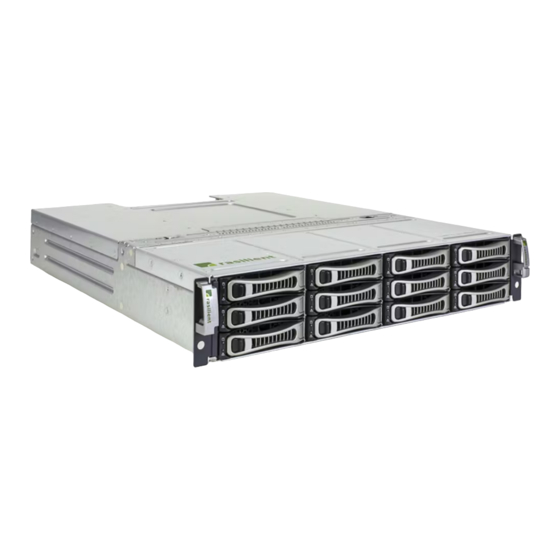
PixelStor 5000
Rasilient PixelStor 5000 Manuals
Manuals and User Guides for Rasilient PixelStor 5000. We have
1
Rasilient PixelStor 5000 manual available for free PDF download: User Manual
Rasilient PixelStor 5000 User Manual (161 pages)
High Performance and Reliable MegaPixel IP Storage Array
Brand:
Rasilient
| Category:
Storage
| Size: 4 MB
Table of Contents
Copyright Notice
2
Table of Contents
3
List of Tables
9
About this Manual
10
About this Manual 關於本手冊
11
Conventions 符號規範
11
Safety Symbols 安全性符號
12
Safety Precautions 安全注意事項
13
Regulatory and Integration Information
17
Regulatory Compliance Identification Numbers
17
Product Regulatory Compliance
17
Table I Product Safety Requirements
17
Table II European Union Safety Requirements
18
Power Cords
19
1 Introduction
20
Audience Assumptions
20
About this Guide
20
System Description
21
Table 1-1 Manual Organization
21
System Features
22
Figure 1-1 Pixelstor 5000
22
Table 1-2 Product Features
26
System Overview
27
System Layout
27
Figure 1-2 Chassis Layout
27
Module Locations - Front
28
Figure 1-3 Front View - Hot -Plug Modules
28
Module Locations - Back
29
Figure 1-4 Rear Panel
29
Figure 1-5 Rear Panel
29
LED Location and Information
31
Figure 1-6 Front Panel
31
Figure 1-7 HDD LED Status
31
Figure 1-8 PS 5000
32
Figure 1-9 LED Status
32
Figure 1-10 -PS 100E/312E/324E
32
Figure 1-11 Back View Leds
32
System Specifications
33
Table 1-3 Pixelstor 5000 Specifications
33
2 Before You Begin
34
Packing Checklist
34
Table 2-1 Packing Checklist
35
Rules for Adding Storage
36
Table 2-2 Disk Group Parameters
36
Hardware Installation
37
3 Hardware Preparation and Installation
38
Make Sure Power Is off
38
Installing in a Rack
39
Rack Preparation
39
Figure 3-1 Shut down Power Supply
39
Figure 3-2 Installing the Mounting Brackets in the Rack
40
Figure 3-3 Secure the Mounting Brackets
40
Installing Hardware Modules
41
Controller Modules
41
Figure 3-4 Location of Controller Modules
42
Figure 3-5 Inserting the Controller Module
42
Controller Fan Board
43
Figure 3-6 Release the Controller Module
43
Hard Drive Modules
44
Figure 3-7 Inserting the Controller Fan Board
44
Figure 3-8 Pressing the Locking Button
44
Figure 3-9 Hard Drive Module Location
45
Figure 3-10 Hard Drive Module Assembly
45
MID-Plane
46
Figure 3-11 HDD Assembly Installed in Chassis
46
Figure 3-12 MID-Plane Location
47
Figure 3-13 Installing the MID-Plane
47
Adding Expansion Enclosures (Pixelstor 100E/312/324E)
48
Figure 3-14 Removing the MID-Plane
48
Figure 3-15 - PS 5000
49
Figure 3-16 100E/312E/324E SAS Connectors
49
Powering on the System
51
Figure 3-17 Turn on Power Supply
51
4 System Configuration
52
Initialize the System
52
Option 1 - Use Pre-Configured IP Address to Connect to System
53
System Configuration
53
Option 2 - Configure Private IP Address to Connect to System
54
Figure 4-1 CLI Setup Wizard
56
Configure the System
57
Storage Manager Overview
57
Figure 4-2 Storage Manager Login
58
Figure 4-3 Management Console Layout
58
Figure 4-4 Console Banner
59
Figure 4-5 Navigation Tabs
59
Figure 4-6 Setup Wizard
61
Figure 4-7 Navigation Tree
62
Figure 4-8 Work Area
63
Using the Setup Wizard
64
Figure 4-9 System Status Icon
64
Figure 4-10 Network Setup - Top of Page
65
Figure 4-11 Network Setup - Bottom of Page
65
Step 1 - Network Setup
66
Step 2 - System Initialization
66
Figure 4-12 System Initialization – Step 1
67
Step 3 - Disk Group Setup
68
Figure 4-14 Disk Group Setup - Properties
69
Figure 4-15 Create Disk Group
69
Table 4-1 Disk Group Parameters
70
Figure 4-16 Disk Name, RAID & Controller Selections
71
Figure 4-17 Create Disk Group - Advanced Features
72
Figure 4-18 Create Disk Group - Progress Page
72
Figure 4-19 Disk Group Properties
73
Figure 4-20 RAID Build Progress
73
Figure 4-21 Disk Group Discovery
76
Figure 4-22 Convert Orphan Disk to Spare
77
Table 4-1 Disk Group Parameters
77
Figure 4-23 Disk Group Properties - Expand
78
Figure 4-24 Expand a Disk Group
78
Step 4 - Virtual Disk Setup
79
Figure 4-25 Virtual Disk Setup
79
Figure 4-26 Initial Create VD Page
80
Figure 4-27 Create VD - Enter Parameters
81
Figure 4-28 Virtual Disk Properties
82
Step 5 - Host Setup
83
Figure 4-29 Extending VD Capacity
83
Figure 4-30 Host Properties Page
84
Figure 4-33 Host Properties
85
Figure 4-32 Adding a Host - Step 3 & 4
85
Step 6 - Present Virtual Disks
86
Figure 4-34 Choose a VD/DG to Present
87
Figure 4-35 VD Presentation
87
Figure 4-36 Present Virtual Disk Page
88
Figure 4-37 Current Presentations
88
Additional Configuration Options
89
Figure 4-38 Options Top of Page
90
Figure 4-39 Options Tab Top of Page
91
Change Storage System Password
92
Change the Display Refresh Options
92
Figure 4-40 Change Storage System Password
92
Change System Health Alert Options
93
Figure 4-41 Display Refresh Options
93
Configuring the Isns Client
94
Figure 4-42 System Health Alert Options
94
Figure 4-43 Isns Configuration
95
System Upgrade Options
95
Figure 4-44 Upgrade Manager
96
Inspection Read Options
96
Table 4-2 Inspection Read Action Table
97
Figure 4-45 Options Tab
98
Figure 4-46 Inspection Read Interface
99
Figure 4-47 Inspection Read Progress
100
Language Options
100
Drive Write Cache Options
101
Figure 4-48 Language Options
101
Figure 4-49 Drive Write Cache Options
102
System Beacon LED Options
102
Figure 4-50 Drive Write Cache Options
103
Performance Data
103
Figure 4-51 Recording Data
104
Figure 4-52 Start Recording Data
104
Disk Power Management Status
105
Figure 4-53 Start Recording Data
106
Figure 4-54 Advanced Logging Mode
107
Firmware Upgrade Manager
107
Figure 4-55 Firmware Upgrade Manager
108
SSD Cache Drive Configuration (EXPERIMENTAL)
108
Figure 4-56 SSD Cache Drive Configuration
109
Figure 4-57 Email Notification
110
Figure 4-58 Adding Email Addresses
110
5 Using and Maintaining the System
112
System Status
112
Properties Page
112
Hardware Status Page
113
Figure 5-1 Storage System Properties
113
System Log
114
Figure 5-2 Hardware Status
114
Support Menu
115
Figure 5-3 System Logs
115
Performance Data
116
Figure 5-4 Support Menu
116
System Health Alert
117
Figure 5-5 Iscsi Statistics Page
117
Figure 5-6 Iscsi Bandwidth Display
117
Figure 5-7 System Health Alert Page
118
Failure Conditions and Corrective Action
119
Degraded System Availability
119
Turning the System Health Alert off
119
RAID Controller Failure
120
SAS IO Expander Failure (Lost Connection to Expansion Enclosure)
120
SAS Cable Disconnect (Lost Connection to Expansion Enclosure)
121
Drive Failure
121
Unhealthy RAID Disk Group
121
ECC Memory Error
122
Faulty Cache Battery/Charger
122
Network Connection Lost
122
Temperature Threshold Exceeded
122
Voltage Threshold Exceeded
123
Fan Failure
123
List of Health Alert Notifications
123
Controller Modules
124
Storage
125
6 Appendix A - RAID Concepts & Cache Configurations
126
RAID Levels Defined
126
Cache Settings Defined
128
7 Appendix B - Using the Command Line Interface (CLI)
128
Preparing to Use the CLI
128
Connecting a Terminal to Access the CLI
129
Accessing the CLI - Serial Port or Telnet Session
129
Dahelp Command
129
Local/Remote Option
130
Index of CLI Commands
131
The CLI Commands
132
Daacl
132
Daaddrbk
132
Figure 7-1 CLI Command List
132
Dacomment
133
Daconnstat
134
Dadate
134
Dadg
135
Dadiskcache
137
Dadiskload
138
Dadsktst
138
Dafwdwnld
139
Dapm
140
Dahelp
141
Dahost
143
Dahostname
144
Dahwstat
144
Dainspread
145
Daisns
147
Dakem
148
Dalun
149
Dantpdate
150
Dapasswd
150
Daphyinfo
151
Dareboot
152
Dashutdown
152
Dasmartinfo
153
Daroute
153
Dasavelog
154
Daselblk
154
Dasetup
155
Dashutdown
156
Dasnmp
156
Dastat
157
Dastonith
157
Dasysalert
158
Daum
159
Davd
160
Daversion
161
Advertisement
Advertisement
Related Products
Rasilient PixelStor 300e
Rasilient ApplianceStor 50
Rasilient Categories
Server
Network Storage Server
Enclosure
Storage
Racks & Stands
More Rasilient Manuals
Login
Sign In
OR
Sign in with Facebook
Sign in with Google
Upload manual
Upload from disk
Upload from URL