Sign In
Upload
Manuals
Brands
Raritan Manuals
Network Hardware
DOMINION DSX-0N-E
Raritan DOMINION DSX-0N-E Manuals
Manuals and User Guides for Raritan DOMINION DSX-0N-E. We have
1
Raritan DOMINION DSX-0N-E manual available for free PDF download: User Manual
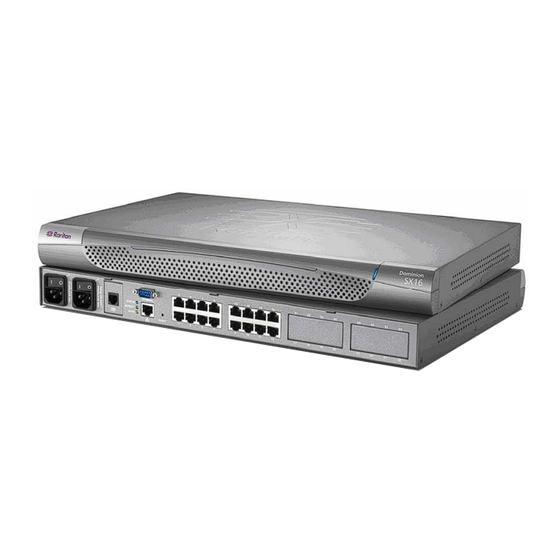
Raritan DOMINION DSX-0N-E User Manual (233 pages)
Serial over IP Console Servers
Brand:
Raritan
| Category:
Network Hardware
| Size: 3 MB
Table of Contents
User Guide
1
Copyright and Trademark Information
3
Fcc Information
3
Rack Mount Safety Guidelines
4
Table of Contents
5
Preface
16
Audience
16
Conventions
16
Acronyms
16
Notices
17
Chapter 1: Introduction
19
Dominion SX Overview
19
Figure 1 Dominion SX16 Unit
19
Product Features
20
Comprehensive Console Management
20
Strong Security and User-Authentication
20
Reliable Connectivity
20
Simplified User Experience
20
Package Contents
21
Chapter 2: Installation
23
Pre-Installation
23
Client Configuration
23
Table 1 Factory Default Network Settings
23
Hardware Installation
24
Physical Installation of Dominion SX for Initial Configuration
24
LED State
24
Figure 2 Rear Panel of the DSXA-32
24
Initial Configuration Using the Graphical User Interface (GUI)
25
Network Access
25
Figure 3 Certificate Information
25
Figure 4 DSX Login Screen
26
Figure 5 Restricted Service Agreement Screen
26
Figure 6 Change Password Screen
26
Initial Configuration Using the Command Line Interface
27
User Configuration
28
Chapter 3: Initial Software Configuration
29
Dominion SX Initial Software Configuration
29
Figure 7 Dominion SX Port Access Screen for Operators/ Observers
29
Figure 8 Dominion SX Port Access Screen for Administrators
29
Figure 9 Setup Screen
29
Date / Time Configuration
30
Figure 10 Date / Time Configuration Screen
30
Figure 11 Network Configuration Screen
31
Network Configuration
31
Deployment
32
LAN Connection
32
Modem Connection (Optional)
32
Chapter 4: Network Settings and Services
33
Configuring the Basic Network Settings
33
Give the DSX a Name
33
Configure the Dsx's Network Settings
33
Figure 12 Network Basic Settings and Ports Screen
33
Change the Discovery Ports
34
Configuring the Network Service Settings
34
To Change any of These Network Service Settings
35
Figure 13 Network Service Settings
35
Configuring Modem Access
36
Configuring IP Forwarding and Static Routes
36
Enable IP Forwarding
36
Figure 14 Modem Settings Screen
36
Figure 15 IP Forwarding Panel
36
Add a New Static Route
37
Figure 16 Static Routes List
37
Figure 17 Static Route Screen
37
Delete a Static Route
38
Chapter 5: User Profiles and Groups
39
Managing User Profiles
39
Display a List of User Profiles
39
Create a User Profile
39
Figure 18 User List Screen
39
Figure 19 New User Screen
40
Modify a User Profile
41
Delete a User Profile
41
Managing User Groups
41
Display a List of User Groups
42
Create a User Group
42
Figure 20 Group List Screen
42
Figure 21 New Group Screen
42
Modify a User Group
43
Delete a User Group
43
Chapter 6: Remote Authentication
45
Configuring RADIUS
45
Figure 22 RADIUS Panel
45
Configuring LDAP
46
Figure 23 LDAP Panel
46
Configuring TACACS
47
Figure 24 TACACS+ Panel
47
Ominion Sx User Uide
48
Chapter 7: Port Configuration and Port Access Application
49
Figure 25 Port Keywords Screen
49
Port Keywords
49
Figure 26 Port Configuration Screen
50
Port Configuration
50
Figure 27 Edit Port Screen
51
Direct Port Access
52
Figure 28 Direct Port Access Mode Field
52
Anonymous Port Access
53
Figure 29 Port Access Screen
53
Raritan Serial Console
53
Raritan Serial Client Requirements for Java
54
Java Runtime Environment (JRE)
54
Java Applets and Memory Considerations
54
Figure 30 Java Runtime Settings
54
Table 2 Java Runtime Parameters
55
Raritan Serial Client Interface
56
Figure 31 Raritan Serial Client Window
56
Emulator
57
Figure 32 Emulator Drop-Down Menu
57
Figure 33 Connection Terminated Warning
57
Figure 34 General Settings Window
58
Figure 35 Display Settings Window
59
Figure 36 Display Settings: GUI Font Properties
60
Clear History
61
Figure 37 Connected Users Window
62
Edit
63
Figure 38 Edit Commands - Copy, Paste, and Select All Text
63
Figure 39 Tools Menu
64
Tools
64
Figure 40 Start Logging Command Window
65
Stop Logging
65
Chat
66
Figure 41 Send Keystroke
66
Figure 42 Securechat Command and User Chat Window
67
Help
67
Help Topics
67
Standalone Raritan Serial Client Requirements
68
Figure 43 Sample of the about Raritan Serial Console Window
68
Figure 44 Windows OS: System Properties
69
Setting Windows os Variables
69
Figure 45 Windows OS: New System Variable
70
Figure 46 Windows OS: Edit System Variable
71
Figure 47 Windows OS: CLASSPATH Variable
71
Figure 48 Check JRE Version in Sun Solaris
72
Setting Linux os Variables
72
Setting UNIX os Variables
72
Standalone Raritan Serial Console Installation
68
Figure 49 RSC Windows Install Progress Screen
73
Installing Standalone RSC for Windows
73
Figure 50 RSC Windows Shortcut Screen
74
Figure 51 Standalone RSC Login Screen
74
Launching RSC on Windows Systems
74
Figure 52 Standalone RSC Connected to Port Window
75
Installing RSC for Sun Solaris
75
Launching RSC on Sun Solaris
76
Chapter 8: Security
77
Security Settings
77
Figure 53 Security Settings Screen
77
Login Settings
78
Local Authentication
78
Login Handling
78
Figure 54 Login Settings Screen
78
Strong Password Settings
79
Configure Kerberos
79
Certificates
79
Figure 55 Kerberos Settings
79
Figure 56 Certificate Signing Request
80
Generate a Certificate Signing Request
80
Figure 57 Install User Key
81
Figure 58 Install User Certificate
81
Install a User Certificate
81
Install a User Key
81
SSL Client Certificate
82
Figure 59 SSL Client Certificate Screen
83
Adding a New Certificate Revocation List to the DSX
84
Deleting a Certificate Revocation List from the DSX
84
Enabling Client Certificate Authentication
84
Installing a New Trusted Certificate Authority
84
Managing the Client Certificate Revocation List (CRL)
84
Removing a User-Added Certificate Authority
84
Viewing a Certificate Authority
84
Viewing a Certificate Revocation List
85
Banner
85
Figure 60 Banner Screen
85
Security Profiles
86
About Security Profiles
86
Select a Security Profile
86
Edit the Custom Profile
86
Figure 61 Security Profiles
86
Figure 62 Edit Custom Security Profile Screen
87
Firewall
88
Enable the Firewall
88
Add an Iptables Rule
88
Figure 63 Firewall Screen
88
Chapter 9: Logging
89
Configuring Local Event Logging
89
Enable the Event Log File
89
Enable System Logging
89
Figure 64 Event Log Panel
89
Figure 65 System Logging Panel
89
Enable Port Logging
90
Figure 66 Port Logging Panel
90
Figure 67 Sample Output File
91
Configure Input Port Logging
92
Configuring Encryption
92
Figure 68 Input Port Logging Panel
92
Figure 69 Encryption Panel
92
Configuring SMTP Logging
93
Enable SMTP Logging
93
Select a New SMTP Event
93
Figure 70 SMTP Settings Panel
93
Figure 71 New SMTP Event Panel
93
Test the SMTP Logging
94
Configuring NFS Logging
94
Figure 72 NFS Settings Screen
95
Configuring SNMP Logging
96
Enable SNMP Logging
96
Create a New SNMP Destination
96
Figure 73 SNMP Settings Panel
96
Figure 74 SNMP Destination Panel
96
Chapter 10: Maintenance
97
Managing the Local Event Log
97
Display the Local Event Log
97
Clear the Event Log
97
Figure 75 Event Log
97
Send the Event Log
98
Displaying a Configuration Report
98
Figure 76 Send Event Log Screen
98
Backing up and Restoring the DSX
99
Backing up the DSX
99
Figure 77 Backup Screen
99
Restoring the DSX
100
Upgrading the DSX Firmware
100
Figure 78 Restore Screen
100
Display the Current Firmware Version
101
Figure 79 Firmware Version
101
Upgrade the Firmware
101
Display a Firmware Upgrade History
102
Figure 80 Firmware Upgrade Screen
102
Figure 81 Firmware Upgrade History Screen
102
Performing a Factory Reset on the DSX
103
Rebooting the DSX
103
Chapter 11: Diagnostics
105
Network Infrastructure Tools
105
Status of Active Network Interfaces
105
Figure 82 Diagnostics Screen
105
Figure 83 Active Network Interface Status
105
Network Statistics
106
Figure 84 Network Statistics
106
Ping Host
107
Trace Route to Host
107
Figure 85 Ping Host
107
Figure 86 Trace Route to Host
107
Administrator Tools ─ Process Status
108
Figure 87 Process Status
108
Chapter 12: Command Line Interface
109
Command Line Interface Overview
109
Accessing the Dominion SX Using CLI
112
SSH Connection to the Dominion SX
112
SSH Access from a Windows PC
112
SSH Access from a UNIX Workstation
112
Telnet Connection to the Dominion SX
113
Enabling Telnet
113
Telnet Access from a Windows PC
113
Local Port Connection to the Dominion SX
114
Port Settings
114
Connection
114
To Change the Local Port Parameters
114
Login
114
Figure 88 Sample Administrator Login
115
Figure 89 Sample Operator or Observer Login
115
Navigation of the CLI
116
Completion of Command
116
CLI Syntax -Tips and Shortcuts
116
Common Commands for All Command Line Interface Levels
117
Show Command
117
Initial Configuration
117
Table 3 Commands Common to All CLI Levels
117
Date and Time Configuration
118
Setting Network Parameters
118
Setting Parameters
118
CLI Prompts
119
CLI Commands
119
Table 4 Available CLI Commands
119
Security Issues
120
Command Language Interface Permissions
121
Configuring Users and Groups
121
Target Connections and the CLI
121
Set Emulation on Target
121
Set Escape Sequence
122
Port Sharing Using CLI
122
Administering the Dominion SX Console Server
122
Configuration Commands
122
Configuring Authorization and Authentication (AA) Services
122
Ominion Sx User Uide
122
Remote Services
122
LDAP Configuration Menu
123
Table 5 Configuration: Authentication Commands: Ldap
123
Table 6 LDAP Command
123
RADIUS Command
124
TACACSPLUS Command
124
Configuring Events
124
Table 7 Configuration: Events Commands
124
Configuring Log
125
Cleareventlog Command
125
Eventlogfile Command
125
Eventsyslog Command
125
Table 8 Eventlogfile Command
125
Nfsgetkey Command
126
Nfssetkey Command
126
Table 9 Eventsyslog Command
126
Table 10 Nfsget Command
126
Table 11 Nfssetkey Command
126
NFS Encryption Enable Command
127
Portlog Command
127
Table 12 Portlog Command
127
Decrypting Encrypted Log on Linux-Based NFS Server
128
Sendeventlog Command
128
Table 13 Sendeventlog Command
128
Vieweventlog Command
129
Configuring Modem
129
Table 14 Configuration: Modem Commands
129
Configuring Network
131
Ethernetfailover Command
131
Table 15 Configuration: Network Commands
131
Interface Command
132
Ipforwarding Command
132
Name Command
132
Table 16 Interface Command
132
Table 17 Ipforwarding Command
132
Ports Command
133
Route Command
133
Routeadd Command
133
Table 18 Name Command
133
Table 19 Ports Command
133
Table 20 Route Command
133
Table 21 Routeadd Command
133
Routedelete Command
134
Configuring NFS
134
Table 22 Routedelete Command
134
Table 23 NFS Command
134
Configuring Ports
135
Ports Configuration Menu
135
Ports Config Command
135
Table 24 Port Configuration Command
135
Ports Keywordadd Command
137
Ports Keyworddelete Command
137
Table 25 Port Keywordadd Command
137
Table 26 Port Keyworddelete Command
137
Configuring Services
138
Dpa Command
138
Table 27 Dpa Command
138
Encryption Command
140
HTTP Command
140
Table 28 Encryption Command
140
Table 29 HTTP Command
141
HTTPS Command
142
Logout Command
142
LPA Command
142
Table 30 Lpa Command
142
SSH Command
143
Telnet Command
143
Configuring SNMP
143
SMNP Add Command
143
Table 31 SSH Command
143
Table 32 Telnet Command
143
SNMP Delete Command
144
SNMP Command
144
Configuring Time
144
Table 33 SNMP Add Command
144
Table 34 SNMP Delete Command
144
Table 35 SNMP Command
144
Clock Command
145
NTP Command
145
Table 36 Clock Command
145
Table 37 Ntp Command
145
Timezonelist Command
145
Configuring Users
146
Addgroup Command
146
Adduser Command
146
Table 38 Addgroup Command
146
Table 39 Adduser Command
146
Deletegroup Command
147
Deleteuser Command
147
Editgroup Command
147
Table 40 Deletegroup Command
147
Table 41 Deleteuser Command
147
Edituser Command
148
Groups Command
148
Table 42 Editgroup Command
148
Table 43 Edituser Command
148
Users Command
149
Connect Commands
149
Diagnostics Commands
149
IPMI Commands
149
Ipmidiscover
149
Table 44 Connect Commands
149
Table 45 Diagnostics Commands
149
Ipmitool
150
Table 46 Ipmidiscover Command
150
Table 47 Ipmitool Command
150
Listports Command
153
Maintenance Commands
153
Backup Command
153
Table 48 Listports Command
153
Cleareventlog Command
154
Factoryreset Command
154
Table 49 Backup Command
154
Firmware Command
155
Logoff Command
155
Password Command
155
Reboot Command
155
Table 50 Logoff Command
155
Table 51 Password Command
155
Restore Command
156
Sendeventlog Command
156
Table 52 Restore Command
156
Table 53 Sendeventlog Command
156
Upgrade Command
157
Upgradehistory Command
157
Userlist Command
157
Vieweventlog Command
157
Table 54 Upgrade Command
157
Security Commands
158
Banner Command
158
Ftpgetbanner Command
158
Table 55 Banner Command
158
Table 56 Ftpgetbanner Command
158
Certificate Command Menu
159
Table 57 Certificate Client Commands
159
Table 58 Certificate Server Commands
159
Firewall Command
160
Iptables Command
160
Table 59 Firewall Command
160
Table 60 Iptables Command
160
Kerberos Command
162
Table 61 Kerberos Commands
162
Loginsettings Commands
163
Idletimeout Command
163
Table 62 Loginsettings Commands
163
Inactiveloginexpiry Command
164
Invalidloginretries Command
164
Localauth Command
164
Lockoutperiod Command
164
Table 63 Inactiveloginexpiry Command
164
Table 64 Invalidloginretries Command
164
Singleloginperuser Command
165
Strongpassword Command
165
Table 65 Lockoutperiod Command
165
Table 66 Singleloginperuser Command
165
Unauthorizedportaccess Command
166
Table 67 Strongpassword Command
166
Table 68 Unauthorizedportaccess Command
166
Securityprofiles Commands
167
Profiledata Command
167
Table 69 Securityprofiles Commands
167
Table 70 Profiledata Command
167
Chapter 13: Intelligent Platform Management Interface
169
Discover IPMI Devices
169
Figure 90 IPMI Screen
169
Figure 91 Discover IPMI Devices Screen
169
IPMI Configuration
170
Figure 92 IPMI Configuration
170
Chapter 14: Power Control
173
Port Power Associations
173
Create a Port Power Association
173
Figure 93 Port Power Association Screen
173
Delete a Port Power Association
174
Power Strip Configuration
174
Figure 94 Power Strip Configuration Screen
174
Power Association Groups
175
Power Control
175
Figure 95 Power Association Group Screen
175
Figure 96 Power Control
175
Associations Power Control
176
Figure 97 Associations Power Control
176
Power Strip Power Control
177
Figure 98 Power Strip Power Control
177
Power Strip Status
178
CLI Command for Power Control
178
CLI Port Power Association
178
Figure 99 Power Strip Status
178
Remove Port Power Association
180
CLI Power Strip Configuration
180
CLI Power Association Group
181
CLI Power Strip Power Control
182
CLI Association Power Control - Port Association
183
CLI Association Power Control - Group Association
184
CLI Power Strip Status
186
Chapter 15: Top-10 Use Cases
189
Case 1. Upgrading DSX Firmware Via Web Browser
189
Case 2. Configuring and Using Direct Port Access Via SSH
189
Case 3. Using Exclusive Write Access Via RSC
189
Case 4. Configuring LDAP
190
Case 5. Creating Power Association Group
190
Case 6. Performing Factory Reset on DSX
190
Case 7. Managing User Profiles on DSX
191
Case 8. Accessing Port Access on DSX Via RSC
191
Case 9. Port Configuration
191
Case 10. CLI / SSH Connection to SX Port
192
Dominion Sx User Guide
192
Appendix A: Specifications
193
Dominion SX Models and Specifications
193
Table 71 Dominion SX Specifications
193
Table 72 Dominion SX Dimensions and Weight
194
Requirements
195
Browser Requirements - Supported
195
Table 73 Dominion SX Requirements
195
Table 74 Browser Requirements
195
Connectivity
196
Table 75 Connectivity
196
Dominion SX Serial RJ-45 Pinouts
197
DB9F Nulling Serial Adapter Pinouts
197
Table 76 Dominion SX RJ-45 Serial Pinouts and Signals
197
Table 77 DB9F Nulling Serial Adapter Pinouts
197
DB9M Nulling Serial Adapter Pinouts
198
DB25F Nulling Serial Adapter Pinouts
198
DB25M Nulling Serial Adapter Pinouts
198
Dominion SX Terminal Ports
198
Table 78 DB9M Nulling Serial Adapter Pinouts
198
Table 79 DB25F Nulling Serial Adapter Pinouts
198
Table 80 DB25M Nulling Serial Adapter Pinouts
198
Table 81 Dominion SX Terminal Port Pinouts-First Port
199
Table 82 Dominion SX Terminal Port Pinouts-Second Port
199
Dominion SX16 and SX32 Terminal Ports
200
Table 83 Dominion SX16 and SX32 Terminal Port Pinouts
200
Appendix B: System Defaults
201
Table 84 Dominion SX System Defaults
201
Table 85 Initiating Port Access
202
Appendix C: Certificates
203
Default SX Certificate Authority Settings
203
Install CA Root for IE Browsers
203
Accept a Certificate (Session-Based)
203
Install the Dominion SX Server Certificate in Internet Explorer
204
Remove an Accepted Certificate in Internet Explorer
205
Install Dominion SX Server Certificate for Netscape Navigator
205
Accept a Certificate (Session-Based)
206
Install the Dominion SX Server Certificate in Netscape Navigator
206
Remove an Accepted Certificate
206
Install a Third-Party Root Certificate
207
Installing a Third-Party Root Certificate to Internet Explorer
207
Installing a Third-Party Root Certificate to Netscape Navigator
208
Generate a CSR for a Third Party CA to Sign
208
Install Third Party Certificate to SX
208
Install Client Root Certificate into the SX
209
Install Client Certificate into Internet Explorer
209
Appendix D: Server Configuration
211
Microsoft IAS RADIUS Server
211
Configure the Dominion SX to Use an IAS RADIUS Server
211
Create an IAS Policy
212
Cisco ACS RADIUS Server
213
Configure the Dominion SX to Use a Cisco ACS Server
213
Configure the Cisco ACS Server
213
TACACS+ Server Configuration
215
Ciscosecure ACS
215
Figure 100 Cisco ACS AAA Client for TACACS
215
Figure 101 Cisco ACS Interface Configuration
216
Figure 102 TACACS+ Properties
216
Active Directory
217
Appendix E: Modem Configuration
219
Client Dial-Up Networking Configuration
219
Windows NT Dial-Up Networking Configuration
219
Figure 103 Dial-Up Networking Display
219
Figure 104 New Phone Entry Display
220
Windows 2000 Dial-Up Networking Configuration
221
Figure 105 Dial-Up Security Display
221
Figure 106 Windows 2000 Network and Dial-Up Connections
221
Figure 107 Network Connection Type
222
Figure 108 Device Selection
222
Figure 109 Phone Number to Dial
223
Figure 110 Connection Availability
223
Windows XP Dial-Up Networking Configuration
224
Figure 111 Network Connection Type
224
Figure 112 Device Selection
224
Figure 113 Internet Connection
225
Figure 114 Connection Name
225
Figure 115 Phone Number to Dial
226
Figure 116 Internet Account Information
226
Appendix F: Troubleshooting
227
Page Access
227
Table 86 Troubleshooting Page Access
227
Firewall
228
Table 87 Troubleshooting Firewall
228
Login
229
Port Access
229
Table 88 Troubleshooting Login
229
Table 89 Troubleshooting Port Access
229
Upgrade
230
Figure 117 Firmware Upgrade - Timeout
230
Table 90 Troubleshooting Upgrade
230
Modem
231
Figure 118 Firmware Upgrade - Connection Fail
231
Figure 119 Firmware Upgrade - Auto Logout
231
Table 91 Troubleshooting Modem
231
Ominion Dsx User Uide
232
Advertisement
Advertisement
Related Products
Raritan Dominion KX
Raritan Dominion SX Series
Raritan Dominion SX16
Raritan DKX2-116
Raritan DKX2-108
Raritan DKX2-432
Raritan Dominion Px
Raritan DPX3 Series
Raritan DPX-WSC Series
Raritan DX2-T1
Raritan Categories
Switch
Power distribution unit
Toilets
Network Hardware
Gateway
More Raritan Manuals
Login
Sign In
OR
Sign in with Facebook
Sign in with Google
Upload manual
Upload from disk
Upload from URL