Sign In
Upload
Manuals
Brands
Raleigh Manuals
Bicycle
Univega
Raleigh Univega Manuals
Manuals and User Guides for Raleigh Univega. We have
1
Raleigh Univega manual available for free PDF download: User Manual
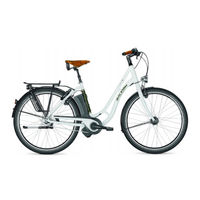
Raleigh Univega User Manual (514 pages)
Brand:
Raleigh
| Category:
Bicycle
| Size: 34 MB
Table of Contents
Table of Contents
5
2 Preface
4
Table of Contents
5
4 Safety Information
8
Basic Safety Information
8
For Your Own Safety
8
Information for Parents and Legal Guardians
8
Safety in Road Traffic
8
Bike Safety
9
5 Legal Provisions
9
Applicable Road Traffic Licensing Regulations
9
6 Intended Use
10
General Information
10
Trekking Bike / All-Terrain Bike (ATB), if Equipped in Accordance with the Applicable Road Traffic Licensing Regulations
10
City, Touring, Sports, Child's and Youngster's Bike, if Equipped in Accordance with the Applicable Road Traffic Licensing Regulations
10
Mountain Bike (MTB) / Cross Bike
11
Road Bike / Fitness Bike
11
Bmx
11
7 Before the First Ride
12
8 Before Every Ride
13
9 Setting up the Bike for the Rider
13
Fitting the Pedals
13
Adjusting the Seat Position
14
Adjusting the Bike Saddle
14
Operating the Quick-Release Device
14
4 I General User Manual
15
Determining the Correct Saddle Height
15
Adjusting the Saddle Angle
16
With a Seatpost Saddle Clamp
16
With a Two-Bolt Seatpost
16
With a Suspension Seatpost
17
Adjusting the Handlebar Position
17
Adjusting / Aligning the Handlebar Height with a Conventional Handlebar Stem
17
A-Head Systems
18
Adjusting the Handlebar Height with
18
Adjusting the Handlebar Position by Turning the Handlebar
18
Aligning Handlebars with A-Head Systems in Relation to the Front Wheel
18
Adjusting the Handlebar Height with an Adjustable Handlebar Stem
19
10 Frame
19
11 Headset
20
12 Fork
20
13 Suspension Frame and Suspension Elements
21
Frame with Rear Suspension
21
Care and Maintenance
21
14 Bottom Bracket and Cranks
22
15 Checking the Bottom Bracket
22
16 Wheels
22
Checking the Wheels
22
Checking the Hubs
22
Checking the Rims
23
17 Tyres and Inner Tubes
23
Tyres
23
Tubeless Tyres
24
Tubed Tyres
24
Inner Tubes
24
18 Repairing a Puncture
25
Opening the Brake
25
Opening the Cantilever or V-Brake
25
Removing the Hydraulic Rim Brake
25
Opening the Side-Pull Calliper Brake
26
Releasing the Hub Gears, Roller, Drum or Back-Pedal Brakes
26
Removing the Wheel
26
Removing the Front Wheel
26
Removing the Rear Wheel
26
Removing the Tyre and Inner Tube
27
Mending the Inner Tube
27
Fitting the Tyre and Inner Tube
28
Fitting the Wheel
28
Bikes with Derailleur Gears
28
Bikes with Hub Gears
28
Inserting the Front Wheel
28
Inserting the Rear Wheel
28
19 Bike Gears
31
Derailleur Gears
31
Operating the Shifting Lever
32
Shifting Lever on Road Bike
32
Shifting Lever on MTB, Trekking and Touring Bike
36
Hub Gears
39
Operating the Hub Gears
39
Shimano 7/8-Speed Shift Lever
39
Adjusting Gears with Shimano Hub Gears
40
Bike Chain
41
Maintenance of Bike Chains
41
Brake, Brake Levers and Brake Systems
42
Important Information and Precautionary Measures
42
Brake Lever
43
Standard Brake Lever
43
Hub Brakes
43
Drum and Roller Brakes
43
Back-Pedal Brake
44
Rim Brakes
45
Adjusting the Brake-Pad Clearance in Relation to the Rim
45
Readjusting the Brake
45
Wear of Brake Pad
46
Disc Brakes
46
Hydraulic Disc Brake
47
Cleaning the Brake System
48
Fitting/Removing the Wheel
48
Vapour Bubble Formation
48
22 Lighting System
49
Specifications for Lighting System
49
Special Regulations for Road Bikes
49
Generator / Dynamo
49
Sidewall Dynamo
49
Switching the Sidewall Dynamo on and off
49
Hub Dynamo
50
Failure of the Lighting System
50
23 Add-On Components
51
Pannier Rack
51
Front Pannier Rack
51
Rear Pannier Rack
51
Wheel Guards / Mudguards
52
Re-Engaging the Safety-Release Mechanism
52
24 Accessories and Equipment
53
Child Seat
53
Bike Stand
54
Bike Trailer
54
Bike Basket
54
Bar Ends
54
25 Bike Carriers for Mounting on Roof and Rear of Car
55
26 Carbon Components
55
Properties
55
Torques
55
Visual Inspection
56
Carbon Frame
56
Carbon Handlebar
56
Carbon Handlebar Stem
56
Carbon Wheels
57
Carbon Fork
57
Carbon Seatpost
57
Splinters
57
Fastening in Mounting Stand
57
Transportation by Car
57
27 Care and Maintenance of the Bike
58
Care
58
Wear Parts
58
Tyres
59
Rims in Conjunction with Rim Brakes
59
Brake Pads
59
Brake Discs
59
Bike Chains or Toothed Belts
59
Chainrings, Sprocket Wheels and Jockey Wheels
59
Lamps of Lighting Set
59
Handlebar Tapes and Handle Grips
60
Hydraulic Oils and Lubricants
60
Gear-Shift and Brake Cables
60
Paint Finishes
60
Bearings
60
Sliding Bearings and Bearings for Full-Suspension Frames, Suspension Forks or Other Suspension Elements
60
28 Regular Inspections
61
Inspection Schedule
61
Maintenance / Checks
61
29 Link List
62
30 Technical Data
63
Maximum Permitted Gross Weight of Bike
63
Maximum Permitted Loading of Pannier Rack
64
Tightening Torques for Screw Connections
64
General Tightening Torques for Screw Connections
66
Tyres and Tyre Pressure
66
Lighting Set
66
31 Warranty Conditions
67
Prerequisites for the Validity of Warranty Claims
67
Warranty Exclusions
67
Table of Contents
73
Quick Start
76
Fast Pedelec / Fundamental Legal Principles
77
Legal Principles
77
Fast Pedelecs and Cycle Paths
77
Meaning for the Rider
77
Travel Speed Switch
77
Charging the Battery
78
Charging Operation
78
Fitting the Battery
78
LCD Control Panel
79
Function of Control Panel
79
On / off Button
79
Selector Button for Display Panel
79
Changing the Assist Level
80
Deleting All Data
80
Resetting Recorded Data
80
Switching the Display on and off
80
Reprogramming the Language, Wheel Circumference and LCD Contrast
81
Automatic Switch-Off
82
Battery Charge State Indicator
82
Measurement and Display Ranges
82
Power Output Indicator
82
Switching the Light on and off
83
Assistance by the Electric Motor
83
Operating Principle of Assistance
83
Distance
84
Riding Your Pedelec Efficiently
85
Battery
86
Straightforward Charging
86
High Degree of Safety Due to Battery Management
86
Straightforward Storage
86
Battery Information System
87
Checking the Battery Capacity
87
Checking the Battery Charge State
87
Service Life and Warranty
88
Of Battery
88
Troubleshooting
89
Problems / Solutions: Flash Patterns and Their Meaning
90
Battery Charge State Indicator Flashing or Not Visible
90
Display "E1
90
No Display
90
Additional Possible Sources of Errors
91
Assistance Control Indicator Flashing
91
Display "E9
91
Charger
89
Cleaning
91
Warnings
92
Technical Data
93
Replacing Components of the Fast Pedelec
94
Components that Can Only be Replaced by Equivalent Parts or Approved Parts
94
Spare Tyres
95
Components that Do Not Require a
96
Components that Do Not Require a Certificate of Approval
96
Table of Contents
101
EC Declaration of Conformity
103
1 Quick Start
106
2 Pedelec / Fundamental Legal Principles
107
Meaning for the Rider
107
Pushing Assistance
107
3 Charging the Battery
108
Charging Operation
108
Fitting the Battery
108
4 Control Panel (Display)
109
LED Control Panel
109
Automatic Switch-Off
110
LCD Control Panel
110
Changing the Assist Level
111
Deleting All Data
111
Function of LCD Control Panel
111
On / off Button
111
Resetting Recorded Data
111
Selector Button for Display Panel
111
Switching the Display on and off
111
Reprogramming the Language, Wheel Circumference and LCD Contrast
112
Automatic Switch-Off
113
Battery Charge State Indicator
113
Measurement and Display Ranges
113
Power Output Indicator
113
5 Assistance by the Electric Motor
114
Operating Principle of Assistance
114
Distance
115
Riding Your Pedelec Efficiently
116
6 Battery
117
Straightforward Charging
117
High Degree of Safety Due to Battery Management
117
Straightforward Storage
117
Battery Information System
118
Checking the Battery Capacity
118
Checking the Battery Charge State
118
Service Life and Warranty
119
Of Battery
119
Of Drive
119
7 Charger
120
8 Troubleshooting
120
Problems / Solutions: Flash Patterns and Their Meaning
121
Pedelec with LED Control Panel
121
Battery Charge State Indicator Flashing or Not Visible
122
Display "E1
122
Display "E9
122
No Display
122
Pedelec with LCD Control Panel
122
Additional Possible Sources of Errors
123
Assistance Control Indicator Flashing
123
9 Cleaning
123
10 Warnings
123
11 Technical Data
124
Table of Contents
129
EC Declaration of Conformity
130
Quick Start
132
Pedelec / Fundamental Legal Principles
133
Meaning for the Rider
133
Pushing Assistance
133
Charging the Battery
134
Charging Operation
134
Fitting the Battery
134
LED Control Panel (Display)
135
Switching the Light on and off
136
Automatic Switch-Off
136
User Manual Pedelec with Front Motor
136
Assistance by the Electric Motor
137
Operating Principle of Assistance
137
Riding Your Pedelec Efficiently
138
Battery
139
Straightforward Charging
139
High Degree of Safety Due to Battery Management
139
Straightforward Storage
139
Battery Information System
140
Checking the Battery Capacity
140
Checking the Battery Charge State
140
Service Life and Warranty
141
The Battery
141
The Electric Drive
141
Charger
142
Troubleshooting
142
Problems / Solutions: Flash Patterns and Their Meaning
143
Additional Possible Sources of Errors
143
Removing the Front Wheel
144
Cleaning
145
Warnings
146
Technical Data
147
Table of Contents
153
EC Declaration of Conformity
155
Quick Start
158
Legal Principles
159
Meaning for the Rider
159
Pushing Assistance
159
Special Features of the Pedelec with Impulse Drive
159
Charging the Battery
161
Learning Cycle
161
Charging Operation
162
Fitting the Battery
162
Control Panels
163
LED Control Panel
163
Buttons for Power-Assist Level
163
On/Off Button
163
Display of the Power-Assist Mode
164
Battery Charge State Indicator
165
Troubleshooting
165
LCD Control Panel with Display
167
Battery Charge State Indicator
168
Buttons for Power-Assist Level
168
Display of the Power-Assist Mode
168
On/Off Button
168
Condensation Appearing on the LCD Display
169
Remaining Range Indicator
169
Troubleshooting
169
Setting and Programming the LCD Display
170
Brightness
170
Contrast
170
Delete Overall Data
170
Delete Trip Data
170
Device Settings
170
Language
170
Factory Settings
171
Name
171
Software
171
Unit
171
Wheel Circumference
171
Back
172
Cost Specifications
172
Electricity Costs
172
Fuel Consumption
172
Fuel Price
172
Fuel Type
172
Assistance by the Electric Motor
173
Operating Principle of Assistance
173
Distance
174
Riding Your Pedelec Efficiently
174
Battery
175
Straightforward Charging
175
Learning Cycle
175
High Degree of Safety Due to Battery Management
175
Straightforward Storage
175
Battery Information System
177
Checking the Battery Capacity
177
Checking the Battery Charge State
177
Service Life and Warranty
178
Of the Battery
178
Of the Drive
178
Charger
179
Warnings
180
Cleaning
180
Technical Data
181
Table of Contents
186
1 Quick Start
187
2 Legal Principles
188
Meaning for the Rider
188
Pushing Assistance
188
3 Special Features of Pedelec with Groove Drive
188
4 Charging the Battery
189
Charging Operation
190
Fitting the Battery
190
5 Control Panel
191
On/Off Button
191
Switches for Power-Assist Level
191
Display of Power-Assist Mode
192
Battery Charge State Indicator
192
6 Assistance by the Electric Motor
193
Operating Principle of Assistance
193
Distance
193
Riding Your Pedelec Efficiently
194
Battery
194
Straightforward Charging
194
High Degree of Safety Due to Battery Management
194
Straightforward Storage
194
Battery Information System
195
Battery Charge State
195
Service Life and Warranty
196
Of the Drive
196
8 Charger
196
Removing the Front Wheel
197
Warnings
198
Cleaning
198
Technical Data
199
Table of Contents
206
Quick Start
209
Legal Principles
210
Meaning for the Rider
210
Special Features of the Pedelec with Xion Drive
211
Charging the Battery
211
Removing the Battery
211
Learning Cycle
212
Charging Operation
212
Fitting the Battery
213
Control Panel and Display
213
Control Panel
213
Switching On/Off
213
Buttons for Power-Assist Level
214
Display
214
Display of the Power-Assist Mode and Energy Recovery
215
Mounting and Removal of the Display
215
Battery Charge State Indicator
216
Pushing Assistance
216
Remaining Range Indicator
216
Troubleshooting
216
Programming and Settings
217
Assist Mode
217
Tour Reset
217
Braking Assistance
218
Date
218
Language
218
Pushing Assistance
218
Settings
218
Time
218
Information
219
Assistance by the Electric Motor
220
Operating Principle of Assistance
220
Assist Modes
220
Braking Assistance
221
Energy Recovery
221
Range
221
Riding Your Pedelec Efficiently
222
Battery
223
Straightforward Charging
223
Learning Cycle
223
High Degree of Safety Due to Battery Management
223
Straightforward Storage
224
Battery Information System
225
Checking the Battery Capacity
225
Checking the Battery Charge State
225
Service Life and Warranty of the Battery
226
Transportation and Shipping of the Battery
227
Shipping
227
The E-Bike and Your Car
227
The E-Bike on Aeroplanes
227
The E-Bike on Trains
227
Transportation
227
Damaged Batteries
227
Disposal of Batteries
227
Charger
228
Removing and Installing the Rear Wheel
229
Removing the Rear Wheel
229
Installing the Rear Wheel
230
Cleaning
230
Cleaning the Battery
230
Cleaning the Motor
230
Cleaning the Display
231
Cleaning the Control Panel
231
Technical Data
231
Wartung und Service
246
Product Features
254
Checking the Speed Sensor
255
Maintenance and Service
259
Maintenance and Cleaning
259
Lithium Ion Battery Pack Powerpack
261
Initial Operation
263
Dati Tecnici
297
Tekniset Tiedot
363
Advertisement
Advertisement
Related Products
Raleigh 2008
Raleigh Bike
Raleigh BionX
Raleigh Bosch Active Line
Raleigh Bosch Cruise
Raleigh Bosch Performance
Raleigh Bosch Speed
Raleigh COMFORT BIKE
Raleigh Categories
Bicycle
Scooter
Outdoor Furnishing
Clock
More Raleigh Manuals
Login
Sign In
OR
Sign in with Facebook
Sign in with Google
Upload manual
Upload from disk
Upload from URL