Sign In
Upload
Manuals
Brands
Quasonix Manuals
Recording Equipment
HyperTrack
Quasonix HyperTrack Manuals
Manuals and User Guides for Quasonix HyperTrack. We have
1
Quasonix HyperTrack manual available for free PDF download: Software Instruction Manual
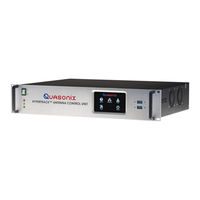
Quasonix HyperTrack Software Instruction Manual (128 pages)
Graphical User Interface
Brand:
Quasonix
| Category:
Recording Equipment
| Size: 6 MB
Table of Contents
Table of Contents
2
Introduction
10
1.1 Description
10
1.2 Nomenclature
11
Options
11
Figure 1: Hypertrack™ Part Number Construction
11
Detailed Option Descriptions
12
Auto Stow - as
12
Ethernet Camera - CA
12
Fiber Optic System Control - FC
12
Fiber Optic RF - FR
12
Differential GPS - GP
12
Table 1: Model Configuration Example
12
Gyroscope/Imu - GY
13
Pedestal Spacer - PS
13
Reinforced Backup Structure - RB
13
Tripod - TR
13
1.2.2.10 Uplink Transmitter - TX
13
Specifications
14
Safety
15
3.1 Warning and Caution Statements
15
Warning
15
Caution
15
Figure 2: Example Warning Statement
15
Figure 3: Example Caution Statement
15
3.2 Electromagnetic Radiation Hazards and Precautions
16
3.3 Operational Safety Summary
16
3.4 Maintenance Operations Safety Summary
16
3.5 Hazardous Components
16
3.6 Safety Summary
16
Software Overview
18
4.1 Hypertrack™ Antenna Control Unit
18
Figure 4: Windows 10 Pro System about Page
18
HTAC Touch Screen Display
19
Figure 5: Hypertrack™ Antenna Control Unit, Front Panel
19
Figure 6: Hypertrack™ Antenna Control Unit, Back Panel
19
HTAC Communications Architecture
20
Client Computer Graphical User Interface (GUI)
20
Figure 7: HTAC Communications Block Diagram
20
Figure 8: Windows Desktop, User Interface Icon
21
HTAC Security
22
Figure 9: Server Selection Screen
22
Figure 10: Login Screen
22
Figure 11: Login Screen, Used for General and Advanced Access
23
Graphical User Interface (GUI) Overview
24
Figure 12: Hypertrack™ Graphical User Interface (GUI), Main Screen
24
Table 2: GUI Main Screen, Function Overview
24
Graphical User Interface (GUI) Overview
26
Main Screen, Tool Bar
27
Hypertrack™ Client Version
27
HTAC Communications Status
27
Figure 13: GUI Main Screen, Tool Bar
27
HTAC Logging Function
28
Logging Enable
28
Figure 14: Server Selection Window
28
Figure 15: Tool Bar, Clipboard Icon
28
Log Settings
29
Figure 16: Start Logging Window
29
Figure 17: Tool Bar, Clipboard Icon, Settings Selection
29
Figure 18: Log Settings-Two Examples with Different Settings Selected
30
Figure 19: Log Settings-Three Channels Selected
31
Table 3: System General Fault Tags
31
Log File Management
32
Figure 20: Tool Bar, Clipboard Icon, File Management Selection
32
Table 4: Tracking Status Flags
32
Status and Indicator Window
33
Figure 21: Log File Management Window
33
Figure 22: Tool Bar, Status Icon
33
Figure 23: Status Window
34
Settings Window
35
Figure 24: Tool Bar, Settings Icon
35
Figure 25: Settings Window
36
Client Preferences
37
Figure 26: Mission Section, Track Parameter Selected and Settings Displayed
37
Figure 27: Client Preferences, Error Meter-Disabled/Enabled Button
38
Figure 28: Client Preferences, Error Meter Enabled
39
Figure 29: Error Meter, Green Grid Lines
39
Figure 30: Client Preferences, Hand Wheels
40
Mission
41
Figure 31: Client Preferences, Joystick Parameters
41
Figure 32: Mission, Azimuth
42
Figure 33: Mission, Elevation
43
Figure 34: Mission, Designates
44
Figure 35: Mission, Designate-Add Designate
44
Figure 36: Mission, Designate-Edit Designate
45
Figure 37: Mission, Designate-Remove Designate
45
Figure 38: Mode Control Selection and Designates Window
46
Figure 39: Mission, Location
47
Figure 40: Mission, Receivers-Add Receiver
48
Figure 41: Mission, Receivers-Channel Map
49
Figure 42: Channel Map, Receiver Channel Drop down Menu
50
Figure 43: Mission, Slaving-Add Slave Source
51
Figure 44: Mission, Status
52
Hardware
53
Figure 45: Mission, Track
53
Figure 46: Hardware, General
54
Figure 47: Hardware, Date and Time
55
Figure 48: Hardware, Network
56
Figure 49: Hardware, Azimuth
57
Figure 50: Hardware, Elevation
58
Figure 51: Hardware, Stow
59
Figure 52: Hardware, Feed 1
60
Figure 53: Hardware, Feed 2
61
Tools
62
Figure 54: Hardware, Dehydrator
62
Figure 55: Main Screen Tools Icon and Configurable Features List
62
True North
63
Figure 56: True North Wizard, Introduction
63
Figure 57: True North Wizard, Select Method
64
Figure 58: True North Wizard, System Settings
64
Figure 59: True North Wizard, Channel Configuration
65
Figure 60: True North Wizard, Enable Manual Mode
66
Figure 61: True North Wizard, Find Sun
66
Figure 62: True North Wizard, Track Sun
67
Handwheel Test
68
Figure 63: True North Wizard, Finished
68
Joystick Test
69
Figure 64: Hand Wheel Test Feedback Dial
69
Figure 65: Joystick Test, Red Dot in Center of Crosshairs
69
Scope Recorder
70
Figure 66: Tools, Scope Recorder
70
Change Password
71
Manage Users (Administrators Only)
71
Figure 67: Change Password
71
Figure 68: Manage User Accounts
72
Figure 69: Manage User Accounts, Add User
73
Figure 70: Manage User Accounts, Edit User
73
Restart HTAC
74
Shutdown HTAC
74
Figure 71: Manage User Accounts, Reset Password
74
Figure 72: Hypertrack™ Restart Window
74
Help Window
75
Contact
75
Figure 73: Hypertrack™ Shut down Window
75
Figure 74: Tool Bar, Status Icon
75
Version
76
Figure 75: Help, Contact Tab
76
Figure 76: Help, Version Tab
76
Firmware Update
77
Figure 77: Help, Firmware Update Tab
77
Figure 78: Windows Explorer with File Highlighted
78
Client Software (GUI) Update
79
View
79
Figure 79: Firmware Update Status
79
Standard
80
Figure 80: Main Screen, View Drop down Menu
80
Figure 81: Hypertrack™ Graphical User Interface (GUI), Main Screen
80
Tracking
81
Figure 82: Tracking History Charts
81
Motion Tuning
82
Scope
82
Figure 83: Motion Tuning Charts
82
Motion Test
83
Figure 84: Scope View
83
Figure 85: Motion Test
84
Figure 86: Motion Test Entry Parameters
84
Graphical User Interface (GUI), Front Panel Quick Open
85
Figure 87: GUI Quick Open Icon
85
Graphical User Interface (GUI), Front Panel Detail
86
Figure 88: GUI Quick Open Icon, Multiple Windows Open
86
Axis Status
87
Figure 89: Hypertrack™ Client GUI, Main Screen
87
Figure 90: Axes Analog / Digital Position Feedback Indicators
88
Figure 91: Axes Analog / Digital Position Feedback Indicators, Labeled
88
Tracking Error Meter
89
Figure 92: Multi-Path Clipping Limit in Yellow
89
Figure 93: Example Cartesian Coordinate System Antenna Tracking View
90
Figure 94: Tracking Error Meter
90
Rssi
91
Figure 95: Tracking Error Meter Feed Indicators
91
Figure 96: Main Screen, RSSI Window
91
RSSI A. Rx Threshold
92
RSSI Auto Rx off
92
Gain
92
RSSI Active Frequency
92
RSSI Receivers
92
Figure 97: Main Screen, RSSI-Active Frequency Parameter
92
Figure 98: Main Screen, RSSI-Signal Meter Channels
93
Figure 99: Main Screen, RSSI-Activated Auto Rx Channels
93
Figure 100: Main Screen, RSSI-Selected Tracking Channel/Signal Strength
94
Figure 101: Main Screen, RSSI-Settings Icons
94
Figure 102: Channel 1 Settings
95
Figure 103: Open Rx Control Button
97
Figure 104: Channel (X) Receiver Settings
97
Mode Control
98
Servo
98
Figure 105: Main Screen, Mode Control Window
98
Modes of Operation
99
Figure 106: Main Screen, Tool Bar-Red Status Icon
99
Figure 107: Mode Control Window
100
Figure 108: Track Window
100
Figure 109: Mode Control, Manual Acquire
101
Figure 110: RSSI, Channel 1 Received Signal, Acquire Orange
101
Figure 111: Mode Control Window
102
Figure 112: Search Window
102
Figure 113: Mode Control Window
103
Figure 114: Slave Window
103
Figure 115: Mode Control, Manual Enabled
103
Camera Icon
104
Figure 116: Mode Control, Standby
104
Figure 117: Mode Control, Camera Icon
104
Azimuth and Elevation Input Control Windows
105
HW (Handwheel) Position
105
HW (Handwheel) Velocity
105
JS (Joystick) Velocity
105
Lower Tool Bar
105
Figure 118: Azimuth and Elevation Input Control Windows
105
Figure 119: Lower Tool Bar
105
Time Synchronization Status
106
Figure 120: Time Synchronization Status, Tracking Tab
106
Figure 121: Time Synchronization Status, Source Statistics Tab
106
Optional Equipment-Auto Stow Assembly
107
Figure 122: Time Synchronization Status, Sources Tab
107
Figure 123: Settings, Hardware - Auto Stow Not Installed
107
Figure 124: Auto Stow Status Message, Enabling Servo Power
108
Figure 125: Auto Stow Status Message, Moving to Stow Position
109
Figure 126: Auto Stow Error Message
110
Maintenance Instructions
111
Product Warranty
112
6.1 Quasonix Limited Warranty Statement
112
Extended Warranties
113
Technical Support and RMA Requests
114
Appendix A - Hypertrack™ Control System
115
Figure 127: Functional Flow in Hypertrack™ Ground Station
115
8.1 Hypertrack™ Hardware
116
8.2 Hypertrack™ User Interface
116
Figure 128: 2U Hypertrack™ Antenna Controller (HTAC), Front Panel
116
Figure 129: 2U Hypertrack™ Antenna Controller (HTAC), Back Panel
116
8.3 Standard Controller Features
117
Figure 130: Hypertrack™ GUI Main Screen
117
8.4 Hypertrack™ Advanced Features
118
Interference Recognition
118
Intelligent Gain Control (IGC)
118
Incidental am Rejection
119
Prop Chop" Filtering
120
Figure 131: Prop-Chop Displayed on the Hypertrack™ Antenna Controller (HTAC)
120
Figure 132: Rotor-Rate Sidebands before HTAC Processing
121
Dynamic Tracking Loop Bandwidth Control
122
Figure 133: Rotor-Rate Sidebands after HTAC Processing
122
Automatic Setup
123
Ground Station Analyzer (GSA)
123
Figure 134: Dynamic Tracking Loop Bandwidth Surface
123
Figure 135: GSA Generates the Actual RF Signal with Correct am
124
Go/No-Go
125
Automatic G/T Measurement
125
Antenna Dynamic Response
125
Calibration
125
Figure 136: GSA-An Integral Part of each Hypertrack™ Ground Station
125
Auto-Phasing
126
End-To-End RF Verification
126
Interference Survey
126
Appendix B - Acronym List
127
Advertisement
Advertisement
Related Products
Quasonix Categories
Receiver
Transmitter
Data Loggers
Controller
Recording Equipment
More Quasonix Manuals
Login
Sign In
OR
Sign in with Facebook
Sign in with Google
Upload manual
Upload from disk
Upload from URL