Sign In
Upload
Manuals
Brands
Paradise Datacom Manuals
Amplifier
HPAC2140AC Series
Paradise Datacom HPAC2140AC Series Manuals
Manuals and User Guides for Paradise Datacom HPAC2140AC Series. We have
1
Paradise Datacom HPAC2140AC Series manual available for free PDF download: Operation Manual
Paradise Datacom HPAC2140AC Series Operation Manual (144 pages)
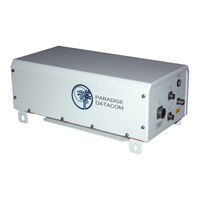
Compact Outdoor Solid State Power Amplifier
Brand:
Paradise Datacom
| Category:
Amplifier
| Size: 3 MB
Table of Contents
Table of Contents
3
Section 1: General Information
11
Specifications
11
High Voltage Hazards
12
RF Transmission Hazards
12
Safety Considerations
12
1 Introduction
11
Description
11
Equipment Supplied
11
Section 2: Installation
13
2 Introduction
13
Inspection
13
Prime Power Connection [MS3102E20-3P]
13
Table 2-1: AC Line Input Connector
13
Table 2-2: Compact Outdoor Amplifier Prime Power Summary
14
Cable Connections
15
DC Input Option [MS3102E-20-29P]
15
Figure 2-1: Outline, Compact Outdoor Solid State Amplifier
15
Summary Alarm Indicator
15
Table 2-3: DC Input Connector, MS3102E-20-29P
15
Figure 2-2: Input Side, Compact Outdoor Amplifier
16
Link Port (J5) [MS3112E10-6S]
16
Monitor & Control Connector (J4) [MS3112E18-32S]
16
RF Input (J1) [N-Type (F)]
16
Table 2-4: Link Port (J5) Pin-Outs
16
Figure 2-3: RF Output Side of C Band Compact Outdoor SSPA
17
RF Output (J2)
17
Switch Port (J6) [MS3112E10-6S]
17
Table 2-5 Switch Port (J6) Pin-Outs
17
AC Input (J7)
18
Chassis Ground Terminal
18
Figure 2-4: Bottom View, Compact Outdoor Amplifier
18
RF Output Sample Port (J3) [N-Type (F)]
18
Table 2-6: +15 VDC Output Port (J8) Pin-Outs
18
VDC Output Port (J8) [MS3112E10-6S]
18
Airflow
19
Figure 2-5: Improper Mounting
19
Unit Weights
19
Table 2-7: Compact Outdoor SSPA Weights
20
Compact Outdoor Mounting Kit Installation
21
Inspection
21
Installation
21
Safety Considerations
21
Table 2-8: Mounting Kit Parts List
21
Figure 2-6: Bolt Mounting Bracket to Unit
22
Figure 2-7: Unit Ready for Boom Installation
22
Figure 2-8: CO Mount Completed
23
Section 3: Quick Start & Operation
25
3 Introduction
25
Figure 3-1: J4 Connections for Ethernet Communications
25
Remote Communications Connections
25
Figure 3-2: J4 Connections for RS-485 Communications
26
Figure 3-3: J4 Connections for RS-232 Communications
26
Figure 3-4: J4 Connections for RS-485 Communications for S/N <300,000
26
Legacy Compact Outdoor Sspas
26
Compact Outdoor Sspas in Legacy Systems
27
Figure 3-5: J4 Connections for RS-232 Communications for S/N <300,000
27
Figure 3-6: J4 Connections for RS-485 Comms Using Older M&C Cables
27
Port J4 Pin-Outs
28
Table 3-1: Monitor & Control Connector (J4) Pin-Out (Ethernet Capable)
28
Table 3-2: Monitor & Control Connector (J4) Pin-Out (Non-Ethernet)
29
Figure 3-7: Ethernet Quick Start Cable, 207755
30
Figure 3-8: RS-232 Quick Start Cable, 207998
30
Quick Start Cables
30
Quick Start Connections
31
Quick Start Ethernet Connection
31
Set PC Configuration
31
Quick Start RS-232 Connection
32
Figure 3-10: Add Compact Outdoor SSPA Window, Via Serial or Internet
33
Figure 3-9: Universal M&C Add Unit Menu
33
Universal M&C Operation
33
Figure 3-11: Universal M&C Status Window
34
Signal Indicators
34
Universal M&C Status Window
34
Fault Status Indicators
35
Figure 3-12: Fault Indicators
35
Gain Adjustment
36
RF Power Indicator
36
Voltage, Current and Temperature Display
36
Figure 3-13: Universal M&C, Settings
37
Power up Settings
37
Universal M&C Settings Window
37
Figure 3-14: Spare Fault Wizard
38
Figure 3-15: Universal M&C, IP Setup
39
IP Setup Window
39
Figure 3-16: Preferences Window
40
Figure 3-17: Example, Log Entry
40
Universal M&C Preferences
40
Figure 3-18: Enter IP Address for Compact Outdoor SSPA (Default Is 192.168.0.9)
41
Figure 3-19: M&C Applet Loading into Browser Window
41
Web-Based M&C
41
Figure 3-20: Enter Password (Default Is "Paradise")
42
Figure 3-21: Status and Faults Window Descriptions
42
Navigating the Web M&C
42
Figure 3-22: Communication Settings Window Descriptions
43
Figure 3-23: General Settings Window Descriptions
44
Figure 3-24: Fault Settings Window Descriptions
45
Section 4: Operation
47
4 Introduction
47
Figure 4-1: Block Diagram, Compact Outdoor Amplifier
47
AC / DC Converter
48
DC / DC Converter
48
RF Input (J1)
48
Solid State Power Amplifier Module
48
Alarms (J4)
49
Amplifier Enable (Mute/Unmute) (J4)
49
Auxiliary Alarm (J4) Form C Contacts
49
RF Output (J2)
49
Summary Alarm (J4) Form C Contacts
49
Gain Adjust Input (J4)
50
Open Collector Alarm Outputs (J4)
50
RF Output Sample (J3)
50
RF Power Detector (J4)
50
Cooling System
51
Fan Boost Converter
51
Serial I/O Control (J4)
51
Figure 4-2: Schematic, Non-Ethernet Compact Outdoor SSPA
52
Figure 4-3: Schematic, Ethernet Capable Compact Outdoor SSPA
53
Figure 4-4: Schematic, 48 VDC Ethernet Compact Outdoor SSPA
54
Section 5: L Band Operation
55
5 Block up Converter Overview
55
Figure 5-1: Configuration Matrix, Compact Outdoor SSPA, BUC Options
55
Figure 5-2: Compact Outdoor Block Diagram of BUC / SSPA System
56
Table 5-1: ZBUC Converter Frequency Specifications
56
ZBUC Features
56
Smart Reference Technology
57
Table 5-2: ZBUC RF Output Phase Noise Specification
57
ZBUC Converter Theory of Operation
57
ZBUC FSK Monitor and Control
58
Figure 5-3: Compact Outdoor SSPB with PD25 Evolution Modem
59
IFL Cable Considerations
59
Table 5-3: Common Coaxial Cable Characteristics
59
Typical System Configuration
59
Section 6: Fiber-Optic Option
61
6 Fiber-Optic Option
61
Figure 6-1: RCPF-1000 Front, Rear Panels
61
RCPF-1000 Fiber Optic Controller
61
External L-Band to Fiber Interface
62
Figure 6-2: Outline Drawing, External L-Band to Fiber Interface
62
Figure 6-3: Block Diagram, Compact Outdoor with External Fiber Transceiver
63
Figure 6-4: System Example, SSPA with External Fiber to L-Band Converter
63
Section 7: Performance Tests
65
7 Introduction
65
Figure 7-1: Spurious and Gain Data
65
Standard Tests
65
Swept Gain
65
Figure 7-2: Return Loss, Intermodulation and Phase Noise Data
66
Input Return Loss
66
Output Return Loss
66
Spurious
66
Figure 7-3: M&C, Output Power, Ground, Phase Lock and Misc. Data
67
Intermodulation Distortion
67
Power Requirements
67
Earth Ground
68
Ethernet (if Equipped)
68
I/O Test
68
P1Db and Psat
68
Sample Port
68
Fsk
69
Microphonics
69
Phase Noise
69
Reference Lock
69
Tests for Units with Integrated Zbuc
69
Am/Pm
70
Group Delay
70
Harmonics
70
Noise Figure
70
Noise Power
70
Optional Tests
70
Section 8: Maintenance & Troubleshooting
71
8 Introduction
71
Cooling System Maintenance
71
Fan Removal and Heatsink Cleaning
71
Figure 8-1: Fan Removal from Amplifier Assembly
71
Fan Replacement
72
Troubleshooting Guide
72
Unit Doesn't Power up
72
Unit Powers On, LED Lamp Glows Red
72
Cannot Connect to SSPA through Remote Control Interface
73
SSPA Unit Powers Up, LED Lamp Glows Green, but no RF Output Is Present
73
The FSK Link between a Modem and the SSPB Unit Is Not Working
74
Figure 9-1: Standard 1:1 Redundant System with Coaxial and Waveguide Switches
75
Figure 9-2: 1:1 Redundant System with Input Splitter Substituted for Input Switch
75
Section 9: Redundant System Operation
75
Figure 9-3: 1:1 Redundant System with L Band Input
76
Compact Outdoor Amplifier in 1:1 Redundancy
77
Figure 9-4: Typical 1:1 Redundant System Outline
77
Hardware Setup
78
Figure 9-5: 1:1 Redundant System with Link Cable and Switch Cable Installed
78
Software Setup
79
Stand-Alone 1:1 Redundant System
79
Figure 9-6: 1:1 System with RS-232 Communication to each Amplifier
79
Figure 9-7: M&C Program "SSPA Settings" Window
80
PC Control Using RS232 and Paradise M&C Software
82
Figure 9-8: Adding a SSPA Monitor and Control Window
82
Figure 9-9: Add New Compact Outdoor SSPA Window
83
Figure 9-10: Individual SSPA Operation Window
83
Figure 9-11: Paradise Datacom Universal M&C, Add Unit Menu Tree
84
Figure 9-12: Add 1:1 Redundant System Window
84
Figure 9-13: Redundant Control Panel Showing Configured 1:1 Redundant System
85
Figure 9-14: Dialog Window, Affirm Mute of On-Line Amplifier
85
Figure 9-15: Control Panel Showing Unit 1 Faulted and Signal Routed to Unit 2
86
Figure 9-16: Unit1 Status Panel Showing Summary and Temperature Faults
86
PC Control Using RS-485 and Paradise M&C Software
87
Figure 9-17: 1:1 Redundant System with RS-485 Full Duplex Communication
87
Figure 9-18: 1:1 Redundant System with RS-485 Half Duplex Communication
88
1:2 Redundant Systems
89
Figure 9-19: 1:2 Redundant System
89
Figure 9-20: 1:2 Redundant System Block Diagram
89
Figure 9-21: Outline, 1:2 Redundant System
90
Figure 9-22: Schematic, 1:2 Redundant System
91
1:2 Redundant Systems with L-Band Input
92
Figure 9-23: 1:2 System with L Band Input and Internal Reference Bucs
92
Figure 9-24: 1:2 System Showing Absence of Reference to Stand-By BUC
93
Step Action
95
Figure 9-25: 1:2 Redundant System with (3) 10Mhz Inputs through Input Switches . 94 Figure 9-26: 1:2 Redundant System with Reference Combiner Assembly
95
Table 9-1: Returning Amp 2 to Stand-By Mode after Fault on Thread 1 or 3
95
9 Redundant System Concepts
75
Section 9: Redundant System
75
Section 10: Fixed Phase Combined Redundant Systems
97
10 Phase Combining Overview
97
Figure 10-1: Phase Combined Amplifier System
97
Figure 10-2: 1:1 Fixed Phase Combined System with FPRC-1100 Controller
98
1:1 Fixed Phase Combined System Components
99
Signal Box Assembly
99
Figure 10-3: Outline, 1:1 Fixed Phase Combined System
100
1:1 Fixed Phase Combined System Operation with the FPRC-1100
101
Figure 10-4: FPRC-1100 Phase Combined System Controller
101
1:1 Fixed Phase Combined System with L-Band Input
102
Figure 10-5: 1:1 Phase Combined System with HPA Control of BUC Redundancy
102
1:1 Fixed Phase Combined System with L-Band Input Components
103
Adjusting the Phase Combining
103
Figure 10-6: Connect to Coupler
103
Redundant BUC Operation
103
Signal Box Assembly
103
Figure 10-7: Outline, 1:1 Fixed Phase Combined System with L-Band Input
104
1:2 Fixed Phase Combined Systems
105
Figure 10-8: Phase Adjuster
105
Figure 10-9: Block Diagram, 1:2 Fixed Phase Combined System
105
1:2 Fixed Phase Combined System Components
106
Signal Box Assembly
106
Figure 10-10: Outline, 1:2 Fixed Phase Combined System, C-Band
107
1:2 Fixed Phase Combined System Operation with FPRC-1200
108
Figure 10-11: FPRC-1200 1:2 Phase Combined Redundant Controller
108
Figure 10-12: HPA #1 & HPA #3 on Line with HPA #2 on Standby
108
Phase Adjustment
109
Section 11: Remote Control Interface
111
11 Serial Protocol Overview
111
Figure 11-1: Compact Outdoor Remote Control Interface Stack
111
Table 11-1: Interface Selection
112
Destination Address
113
Figure 11-2: Basic Communication Packet
113
Figure 11-3: Header Sub-Packet
113
Frame Sync Word
113
Header Packet
113
Serial Communication
113
Command
114
Data Packet
114
Figure 11-4: Data Sub-Packet
114
Protocol ID
114
Request ID
114
Source Address
114
Data Tag
115
Table 11-2: Command Byte Values
115
Table 11-3: Data Tag Byte Values
115
Data Address / Error Status / Local Port Frame Length
116
Data Field
116
Data Length
116
Table 11-4: Error Status Bytes
116
Figure 11-5: Trailer Sub-Packet
117
Frame Check
117
Timing Issues
117
Trailer Packet
117
Serial Communications Protocol
118
Table 11-5: Request Frame Structure
118
Table 11-6: Response Frame Structure
118
Table 11-7: System Settings Data Values
119
Table 11-8: System Threshold Data Values
120
Table 11-9: System Condition Addressing
121
Serial Communication Examples
122
Ethernet Interface
127
General Concept
127
Ipnet Interface
127
Overview
127
Figure 11-6: UDP Redirect Frame Example
128
Table 11-10: OSI Model for Compact Outdoor SSPA Ethernet IP Interface
128
Setting Ipnet Interface
129
Troubleshooting IP Connectivity
129
SNMP Interface
130
SNMP MIB Tree
131
Description of MIB Entities
132
Table 11-11: Detailed Settings for CO SSPA Mode (Device Type=2)
133
Table 11-12: Detailed Thresholds
135
Table 11-13: Detailed Conditions
135
M&C Via SNMP
136
Universal M&C, IP Setup Tab Figure 11-8: Universal M&C, Settings Tab
136
Connecting to a MIB Browser
137
Figure 11-10: Getif Mbrowser Window, with Update Data in Output Data Box
137
Figure 11-9: Getif Application Parameters Tab
137
Appendix A: Quick Start Cable
139
Figure A-1: Ethernet Quick Start Cable
139
Table A-1: Wiring Chart, Ethernet Quick Start Cable
139
Figure A-2: RS-232 Quick Start Cable, 207998
140
Table A-2: Wiring Chart, RS-232 Quick Start Cable
140
Appendix B: Alternate System
141
Appendix B: Alternate System Configurations
141
Figure B-1: Mixed Redundant System Using New and Old CO Amplifiers
141
Figure B-2: Redundant System Using RCP2-1100 Controller
142
Appendix C: Documentation
143
Advertisement
Advertisement
Related Products
Paradise Datacom HPAC2030AC Series
Paradise Datacom HPAC2040AC Series
Paradise Datacom HPAC2050AC Series
Paradise Datacom HPAC2075AC Series
Paradise Datacom HPAC2100AC Series
Paradise Datacom HPAC2200AC Series
Paradise Datacom HPAC2250AC Series
Paradise Datacom HPAC2300AC Series
Paradise Datacom HPAC-200-RM
Paradise Datacom HPAC-250-RM
Paradise Datacom Categories
Outdoor Light
Landscape Lighting
Light Fixture
Modem
Amplifier
More Paradise Datacom Manuals
Login
Sign In
OR
Sign in with Facebook
Sign in with Google
Upload manual
Upload from disk
Upload from URL