Sign In
Upload
Manuals
Brands
PANASONIC Manuals
Blu-ray Player
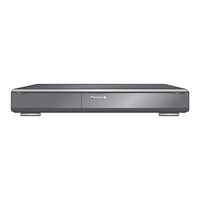
Diga DMR-BS850EB
PANASONIC Diga DMR-BS850EB Manuals
Manuals and User Guides for PANASONIC Diga DMR-BS850EB. We have
1
PANASONIC Diga DMR-BS850EB manual available for free PDF download: Operating Instructions Manual
PANASONIC Diga DMR-BS850EB Operating Instructions Manual (144 pages)
Blu-ray Disc Recorder
Brand:
PANASONIC
| Category:
Blu-ray Player
| Size: 5.29 MB
Table of Contents
Dear Customer
1
Operating Instructions
1
Features
2
Accessories
3
Sales and Support Information
3
Caution for AC Mains Lead
3
Table of Contents
4
HDD (Hard Disk Drive) Handling Care
6
Remote Control Information/Unit Care
7
Remote Control Information
7
Unit Care
7
Location of Parts/Controls
8
Remote Control
8
The Unit's Display
9
Main Unit
9
Rear Panel
9
Basic Connection
10
When Your Television Has an HDMI Input Terminal
10
When Your Television Does Not Have an HDMI Input Terminal
12
Auto Set up (Freesat)
13
Signal Condition
15
Tuning in Other Satellite Services
16
Auto Setup
17
HDD and Disc Information
18
Regarding Blu-Ray Disc
18
Recording and Copying Programmes
19
HDD and Disc Handling
20
HDD and Discs You Can Use for Recording and Play
20
Play-Only Discs
22
Discs that Cannot be Played
22
Types of Disc for the Type of Connected TV
22
USB Memory and Card Handling
23
USB Memories You Can Use on this Unit
23
Cards Usable on this Unit
23
Watching Television (Freesat)
24
Selecting a Channel with TV Guide
24
Watching Television of the Other Satellite Service
25
Selecting a Channel with the Channel List
25
Playback
26
Recording Television Programmes HDD
27
Pausing Recording
27
(Freesat) HDD
28
Timer Recording Using the TV Guide
28
Recording the ITV HD, Etc. Programme
29
Copying Titles
30
Deleting Titles
32
DELETE Navigator
32
Delete Titles During Playback
32
Title
32
Recording
32
Important Notes for Recording
33
Advanced Recording
35
Recording Modes
35
Programmes Simultaneous Recording
36
Specifying the Recording Time
37
Direct TV Recording
37
Playing While You Are Recording
37
Operation During Recording
38
Advanced Timer Recording HDD
39
Manual Timer Recordings
39
Series Recording
40
To Cancel a Timer Recording in Progress
41
Auto Renewal Recording
41
If the "Overlapped Timer Recording" Screen Appears
41
Check, Change, Delete Programmes, or Resolve Overlapping
41
To Deactivate Timer Programme (E.g. to Interrupt a Daily or Weekly Timer Programming)
42
Notes on Timer Recording
42
TV Guide System (Freesat)
43
Using the TV Guide List
43
Selecting the Programme from the Desired Channel Genre or Programme Type
44
Advanced Playback
45
Selecting Titles to Play
45
Search
46
Skip
46
Quick View (Play X1.3)
46
Direct Play
46
Slow-Motion Play
46
Frame-By-Frame Viewing
47
Time Slip
47
Manual Skip
47
Create Chapters
47
Display the Subtitle During Play
47
Playback of the High Defi Nition Video (AVCHD) and Playlists
48
Playback of the High Defi Nition Video (AVCHD)
48
Playback of the Playlists Created on Other Equipment
48
To Enjoy the BD Video Which Supports BONUSVIEW or BD-Live
49
Playing Secondary Video (Picture-In-Picture) and Secondary Audio
49
Enjoying BD-Live Discs with Internet
49
To Enjoy High Bit Rate Audio and Video
50
Enjoying High Bit Rate Audio with 7.1Ch Speaker
50
Regarding 24P Output
50
Playing DIVX
51
Playing DIVX Video Contents
51
Regarding DIVX Vod Content
52
Titles−Editing
53
Accessing the Title View
53
Title Operations
53
Change Thumbnail
54
Divide Title
54
Create/Playback/Edit of the Chapter
56
Create Chapter Mark
56
Editing and Playing Chapters
56
Chapter Operations
56
Copying Titles
57
Copy Direction
57
Copy Speed
58
Copying Speed When Copying from the HDD to BD-R in High Speed Copy
58
Copy Restrictions
58
Copying List Icons and Functions
58
Frequently Asked Questions
59
Copy Title Playing
60
Copying Using the Copying List-Copy
61
Copying a Fi Nalised DVD-R, DVD-R DL, DVD-RW (DVD-Video Format), +R and +R DL
63
Recording from a Satellite or Cable Receiver
64
Manual Recording
64
Linked Timer Recordings with External Equipment (SKY Digital STB, Satellite/Cable Receiver)-EXT LINK
64
Recording from an External Device
65
Recording from a VCR, Etc
65
Recording from a DV Camcorder
66
Recording Via AV3 Input
67
Flexible Recording Via AV Input
67
Copying HD Video (AVCHD Format)
68
From an SD Card or Discs
68
From a Video Equipment
68
Copying SD Video (MPEG2 Format)
69
From an SD Card
69
From a Video Equipment
69
Still Pictures
70
Still Picture
70
Playing Still Pictures
70
Useful Functions During Still Picture Play
71
Editing Still Pictures
72
Editing Still Pictures (JPEG)
72
Still Pictures Operation
73
Copying Still Pictures
74
Copying All the Still Pictures on the USB Memory
74
Copy All Pictures
74
Copying New Still Pictures on the SD Card-Copy New Pictures
74
Copying Using the Copying List
74
Deleting Still Pictures
76
Music
76
Playing Music
77
Playing MP3 Fi Les
77
Playing Music CD
77
Playing Music Recorded on HDD
78
Useful Functions During Music Play
79
Editing Music/Playlist
80
Editing Music
80
Album and Track Operation
80
Register Track to Playlist
81
Editing Playlist
81
Playlist Operation
81
Copying Music to HDD
82
About the Gracenote ® Database
82
Copying Music from a Disc or a USB Memory
82
Deleting Music
83
Entering Text
84
Enjoying VIERA CAST
85
Linked Operations with the TV (VIERA Link "HDAVI Control™"/Q Link)
86
Easy Control Only with VIERA Remote Control
87
Setting On-Screen Display
88
Accessing the On-Screen Display
88
Play Menu
89
Sound Menu
89
Picture Menu
89
Other Menu
89
Information Messages
90
Digital Satellite Channel Information
90
Status Messages
91
Convenient Functions
92
FUNCTION MENU Display
92
Switch the Aspect Ratio of the Screen
92
To Pause the TV Programme You Are Watching-Pause Live TV
93
Disc and Card Management
94
Accessing the Management Menus
94
Setup Menu
97
Accessing the Setup Menu
97
Channel Settings
97
Channel Settings
98
Manual Tuning
98
Child Lock
99
Hdd/Disc Settings
100
Hdd Management
101
Format Hdd
101
Picture and Sound Settings
102
Digital Audio Output
103
Pcm down Conversion
103
Display and Connection Settings
104
Av1 Output
105
Hdmi Connection
105
Av2 Input
105
Ext Link
105
Viera Link
105
Network Settings
106
System Settings
107
Other Settings
108
HOLD Function
108
Using the Unit's Remote Control to Operate the TV
108
Network Settings
109
Testing the Connection
109
Setting the IP Address
109
Setting the DNS-IP
109
Setting the Connection Speed
109
Setting the Proxy Server
110
Setting the Network Service (VIERA CAST)
110
Software Update
111
If a Software Update Is Available, a Notifi Cation Is Displayed
111
The Unit's Display During the Update
111
Additional Connections
112
Adding a VCR: Connecting to a Television and a Video Cassette Recorder
112
Adding a Digital Satellite or Cable Receiver: Connecting to a Television and a Digital Satellite or Cable Receiver
112
Using an Audio/Video Cable (Not Included)
113
Using an S Video Cable (Not Included)
113
Using Component Video Cables (Not Included)
113
Using an Audio Cable (Not Included) for Better Sound
114
Using a Optical Digital Audio Cable (Not Included) for Better Sound
114
Connecting with an HDMI (High Defi Nition Multimedia Interface) Terminal
114
Network Connection
115
Operations that Can be Performed Simultaneously
116
Operations that Can be Performed While Recording or Copying a Title
116
Starting of the Timer Recording While Executing Other Operation
116
Media (Disc/Usb Memory/Sd Card) Handling
117
Frequently Asked Questions
118
Messages
120
When Removing a Recorded Disc
121
Troubleshooting Guide
122
Specifi Cations
134
Structure of Folders Displayed by this Unit
136
Copyright, Etc
137
Glossary
138
Safety Precautions
140
Index
142
Advertisement
Share and save
Advertisement
Related Products
Panasonic DMRBS850 - BLU-RAY DISC RECORDER
Panasonic DMR-BS885EG
Panasonic DMR-BS850EG
Panasonic DMR-BS880EB
Panasonic DMRBS750 - BLU-RAY DISC RECORDER
PANASONIC Diga DMR-BS750EB
Panasonic DMR-BST835
Panasonic DMR-BST940
Panasonic DMR-BST845
Panasonic DMR-BS785EG
PANASONIC Categories
Camcorder
Air Conditioner
TV
Digital Camera
Cordless Telephone
More PANASONIC Manuals
Login
Sign In
OR
Sign in with Facebook
Sign in with Google
Upload manual
Upload from disk
Upload from URL