Sign In
Upload
Manuals
Brands
omisa Manuals
Welding System
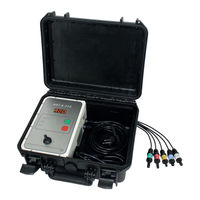
HST-S-315 2.0
omisa HST-S-315 2.0 Manuals
Manuals and User Guides for omisa HST-S-315 2.0. We have
1
omisa HST-S-315 2.0 manual available for free PDF download: User Manual
omisa HST-S-315 2.0 User Manual (44 pages)
Brand:
omisa
| Category:
Welding System
| Size: 3 MB
Table of Contents
Italiano
3
Table of Contents
3
Protezione del Raccordo E del Giunto
5
Pulizia del Prodotto
5
Introduzione
5
Uso Improprio Dei Cavi DI Saldatura E DI Alimentazione
5
Messaggi DI Sicurezza
5
Manutenzione
6
Trasporto, Conservazione, Spedizione
6
Assistenza E Riparazione
6
Alimentazione DI Rete
6
Controllo del Prodotto Per Danni
6
Apertura Dell'unità
6
Funzionamento
7
Accensione Dell'unità DI Saldatura
7
Collegamento del Raccordo
7
Principio DI Funzionamento
7
Processo DI Saldatura
8
Fine Della Saldatura
8
Panoramica Delle Funzioni DI Automonitoraggio
9
Erogazione Rete Rotta
9
Errore DI Sistema
9
Ritorno All'inizio del Processo
9
Utilizzo del Adattatore Multiplo
9
Processo DI Saldatura Interrotto
9
Tempo DI Raffreddamento
9
Corrente Molto Bassa
10
Corrente Molto Alta
10
Tempo DI Saldatura Irregolare con Connessione A02
10
Saldatura Ripetuta
10
Blocco Emergenza
10
Errore Frequenza
10
Errore Temperatura O la Sua Rilevazione Difettosa
10
Sovvratensione
10
Sottotensione
10
Contatto Interrotto
10
Errore DI Resistenza con Connessione A04
11
Errore Interno DI Comando All'inizio Saldare
11
Errore Interno DI Comando Durante la Saldatura
11
Guasto del Relè Protettivo
11
Specifiche Tecniche
11
Contatti Per L'assistenza E la Riparazione
12
Accessori/Pezzi Per Il Prodotto
12
English
13
Cleaning the Welding Unit
15
Improper Use of the Welding and Power Supply Cables
15
Introduction
15
Safety Messages
15
Securing the Fitting and the Joint
15
Checking for Damage
16
Mains Power Supply
16
Maintenance and Repair
16
Opening the Unit
16
Service
16
Transport, Storage, Shipment
16
Connecting the Electrofusion Fitting
17
Operation
17
Principle of Operation
17
Turning the Welding Unit on
17
End of Welding
18
Welding Process
18
Aborted Welding
19
Cooling Time
19
Power Supply Failure
19
Returning to the Start of Welding
19
Self-Monitoring Functions Overview
19
System Error
19
Using the Optional Multi-Adapter
19
Emergency off
20
Excess Current
20
Frequency Error
20
Low Current
20
Low Voltage
20
No Contact
20
Overvoltage
20
Temperature Error or Temperature Sensor Defective
20
Used Fitting Error
20
Welding Time Mismatch for A02 Type Fittings
20
Internal Operating Error at Start of Welding
21
Internal Operating Error During Welding
21
Resistance Error for A04 Type Fittings
21
Safety Relay Malfunction
21
Technical Specifications of the Product
21
Accessories for the Product
22
Service and Repair Contact
22
Deutsch
23
Einleitung
25
Reinigung des Schweißautomaten
25
Sicherheitshinweise
25
Sicherung des Fittings und der Verbindungsstelle
25
Zweckentfremdung des Schweiß- oder Netzkabels
25
Anschluss am Netz
26
Kontrolle auf Beschädigungen
26
Pflege
26
Transport, Lagerung, Versand
26
Wartung und Reparatur
26
Öffnen des Gehäuses
26
Anschließen der Schweißmuffe
27
Bedienung
27
Einschalten des Schweißautomaten
27
Funktionsprinzip
27
Ende des Schweißprozesses
28
Schweißprozess
28
Abbruch des Schweißprozesses
29
Abkühlzeit
29
Auflistung der Überwachungsfunktionen
29
Netzunterbrechung
29
Rückkehr zum Beginn
29
Systemfehler
29
Verwendung des Optionalen Multiadapters
29
Fitting Bereits Geschweißt
30
Frequenzfehler
30
Kein Kontakt
30
Not-Aus
30
Schweißzeitfehler bei Anschlusstyp A02
30
Strom zu Hoch
30
Strom zu Niedrig
30
Temperaturfehler Bzw. Temperaturmessung Defekt
30
Unterspannung
30
Überspannung
30
Datenblatt des Produkts
31
Interner Schweißfehler während der Schweißung
31
Interner Schweißfehler zu Beginn der Schweißung
31
Schutzrelaisstörung
31
Widerstandsfehler bei Anschlusstyp A04
31
Anschrift für Wartung und Reparatur
32
Zubehör des Produkts
32
Français
33
Consignes de Sécurité
35
Introduction
35
Mauvais Usage des Câbles D'alimentation Et de Soudage
35
Nettoyage du Poste de Soudage
35
Serrage du Raccord Et des Pièces À Assembler
35
Alimentation Secteur
36
Entretien
36
Maintenance Et Remise en État
36
Ouverture de L'appareil ; Enlèvement du Capot
36
Transport, Stockage, Expédition
36
Vérification de L'état
36
Connexion du Raccord Électrosoudable
37
Fonctionnement
37
Mise en Marche du Poste de Soudage
37
Principe de Fonctionnement
37
Fin du Soudage
38
Procédure de Soudage
38
Coupure Secteur
39
Erreur Système
39
Interruption du Soudage
39
L'adaptateur Multisoudage Disponible en Option
39
Liste des Fonctions D'auto-Contrôle
39
Retour Au Début du Soudage
39
Temps de Refroidissement
39
Arrêt D'urgence
40
Courant Bas
40
Courant Excessif
40
Double Soudage Défendu
40
Erreur Fréquence
40
Erreur Température/Capteur de Température en Panne
40
Pas de Contact
40
Surtension
40
Temps de Soudage Fautif Avec un Raccord de Type A02
40
Tension Insuffisante
40
Erreur de Résistance Avec un Raccord de Type A04
41
Erreur Interne Au Lancement du Soudage
41
Erreur Interne Pendant Le Soudage
41
Fiche Technique du Produit
41
Relais de Sécurité en Panne
41
Accessoires du Produit
42
Contact Pour Le Service Et L'entretien
42
Advertisement
Advertisement
Related Products
omisa HST-S-160
omisa HST 300 2.0
omisa HST 300 Print 450
omisa HST300P450
omisa HST 300 Smart
omisa HST300S
omisa 6160/LI
omisa 7125/LI
omisa WeldControl 630
omisa WHITELINE SPG 2.0
omisa Categories
Welding System
Soldering Gun
More omisa Manuals
Login
Sign In
OR
Sign in with Facebook
Sign in with Google
Upload manual
Upload from disk
Upload from URL