Sign In
Upload
Manuals
Brands
NETGEAR Manuals
Network Router
XR450
NETGEAR XR450 Manuals
Manuals and User Guides for NETGEAR XR450. We have
2
NETGEAR XR450 manuals available for free PDF download: User Manual, Quick Start
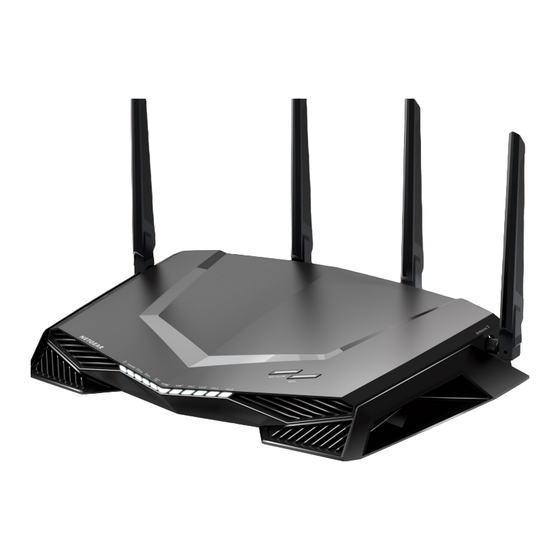
NETGEAR XR450 User Manual (215 pages)
Nighthawk Pro Gaming Router
Brand:
NETGEAR
| Category:
Network Router
| Size: 2.79 MB
Table of Contents
Table of Contents
3
Chapter 1 Hardware Setup
10
Unpack Your Router
11
Leds, Buttons, and Ports on the Front Panel, Top Panel, and Left Side Panel
12
Rear Panel
14
Attach the Antennas
15
Router Label
16
Position Your Router
16
Cable Your Router
18
Turn the Leds on or off Using the LED On/Off Switch
18
Chapter 2 Connect to the Network and Access the Router
20
Connect to the Network
21
Wired Connection
21
Wifi Connection
21
Wifi Connection Using WPS
21
Types of Logins
22
Use a Web Browser to Access the Router
22
Automatic Internet Setup
22
Log in to the Router
24
Change the Language
25
Manage Your Router with the NETGEAR Nighthawk App
25
Chapter 3 Specify Your Internet Settings
27
Use the Internet Setup Wizard
28
Manually Set up the Internet Connection
28
Specify an Internet Connection Without a Login
28
Specify an Internet Connection that Uses a Login
30
Specify Ipv6 Internet Connections
31
Requirements for Entering Ipv6 Addresses
32
Use Auto Detect for an Ipv6 Internet Connection
33
Use Auto Config for an Ipv6 Internet Connection
34
Set up an Ipv6 6To4 Tunnel Internet Connection
35
Set up an Ipv6 6Rd Internet Connection
37
Set up an Ipv6 Pass through Internet Connection
39
Set up an Ipv6 Fixed Internet Connection
39
Set up an Ipv6 DHCP Internet Connection
41
Set up an Ipv6 Pppoe Internet Connection
42
Change the MTU Size
44
Chapter 4 Customize Quality of Service Settings and Optimize Gaming
47
Improve Response Time by Using the Geo Filter
48
Configure and Use the Geo Filter
48
Ping a Device and Allow or Deny the Device a Connection
50
Add a Device to the Geo Filter
51
Remove a Device from the Geo Filter
52
Manage the General Geo Filter Map Settings
53
Manage Bandwidth Allocation
54
Prevent Network Congestion with Anti-Bufferbloat
54
Disable Anti-Bufferbloat
55
Allocate Bandwidth to Devices
56
Reset the Bandwidth Distribution
58
Manage Traffic Prioritization
59
Prioritize Traffic for a Device and View Prioritization Information
59
Add a Device for Traffic Prioritization
61
Stop Traffic Prioritization for a Device
62
Disable Automatic Traffic Prioritization
62
Chapter 5 Monitor Devices and the Network and View Router Information
64
View and Manage Devices Currently on the Network
65
View Network Usage Information
66
View Router System Information
68
Customize the Dashboard
69
Chapter 6 Control Access to the Internet
71
Block Access to Internet Sites
72
Add Keywords and Block Access to Specific Internet Sites
72
Delete Keywords from the Blocked List
73
Avoid Blocking on a Trusted Computer
73
Block Services and Applications with Simple Outbound Firewall Rules
74
Block a Service or Application from Accessing the Internet
75
Change an Outbound Firewall Rule for a Service or Application
76
Remove an Outbound Firewall Rule for a Service or Application
77
Set up a Schedule for Keyword Blocking and Outbound Firewall Rules
77
Chapter 7 Manage the Router's Network Settings
81
View or Change WAN Settings
82
Set up a Default DMZ Server
83
Change the Router's Device Name
84
Change the Router's LAN IP Address and RIP Settings
85
Specify the IP Addresses that the Router Assigns
86
Disable the DHCP Server Feature in the Router
88
Manage Reserved LAN IP Addresses
88
Reserve a LAN IP Address
89
Change a Reserved IP Address
90
Delete a Reserved IP Address Entry
90
Set up a Bridge to Your Isp's Network Using a Port Group or VLAN Tag Group
91
Set up a Bridge to Your Isp's Network Using a Port Group
91
Set up a Bridge to Your Isp's Network Using a VLAN Tag Group
92
Set up an IPTV Port to Lease an Intranet Port
94
Manage Custom Static Routes
95
Set up a Static Route
96
Change a Static Route
97
Delete a Static Route
97
Improve Network Connections with Universal Plug and Play
98
Chapter 8 Manage the Router's Wifi Settings
100
Specify Basic Wifi Settings
101
Change the Wifi Password or Security Level
103
Change the Wifi Mbps Mode for Download and Upload Speeds.104
104
Set up a Guest Wifi Network
105
Configure WPA/WPA2 Enterprise Wifi Security
106
Configure WEP Legacy Wifi Security
108
Control the Wifi Radios
110
Use the Wifi On/Off Button
110
Enable or Disable the Wifi Radios
110
Use the WPS Wizard for Wifi Connections
111
Set up a Wifi Schedule
112
Specify WPS Settings
113
Manage Implicit Beamforming
114
Manage MU-MIMO
114
Manage HT160 for 160 Mhz Wifi Support
115
Disable Wi-Fi Multimedia Quality of Service
116
Use the Router as a Wifi Access Point Only
117
Chapter 9 Maintain the Router
119
Update the Router Firmware
120
Check for New Firmware and Update the Router
120
Manually Upload Firmware to the Router
121
Change the Admin Password
123
Enable Admin Password Recovery
123
Recover the Admin Password
124
Manage the Router Configuration File
125
Back up the Configuration Settings
125
Restore the Configuration Settings
126
Erase the Current Configuration Settings
126
Manage Remote Access
127
Set up Remote Management
127
Use Remote Access
128
Remotely Access Your Router Using the Nighthawk App
128
Monitor and Meter Internet Traffic
129
Start the Traffic Meter Without Traffic Volume Restrictions
129
Restrict Internet Traffic by Volume
130
Restrict Internet Traffic by Connection Time
131
View the Internet Traffic Volume and Statistics
132
Unblock the Traffic Meter after the Traffic Limit Is Reached
133
View and Manage the Router Activity Log
133
Display Internet Port Statistics
135
Check the Internet Connection Status, View Details, and Release and Renew the Connection
136
Restart the Router from Its Web Interface
137
View Router Notifications
138
Disable or Enable LED Blinking or Turn off Leds
139
Chapter 10 Share USB Storage Devices Attached to the Router
140
USB Device Requirements
141
Connect a USB Storage Device to the Router
141
Access a Storage Device Connected to the Router from a Windows-Based Computer
142
Map a USB Device to a Windows Network Drive
142
Access a Storage Device that Is Connected to the Router from a Mac
143
Back up Windows-Based Computers with Readyshare Vault
144
Back up Mac Computers with Time Machine
144
Set up a USB Hard Drive on a Mac
145
Prepare to Back up a Large Amount of Data
145
Use Time Machine to Back up Onto a USB Hard Disk
146
Manage Access to a USB Storage Device
147
Use FTP Within the Network
149
Manage Network Folders on a USB Storage Device
150
View Network Folders on a USB Storage Device
150
Add a Network Folder on a USB Storage Device
151
Change a Network Folder on a USB Storage Device
152
Approve USB Devices
152
Safely Remove a USB Storage Device
153
Chapter 11 Use Dynamic DNS to Access USB Storage Devices
155
Set up Your Personal FTP Server
156
Set up and Manage Dynamic DNS
156
Set up a New Dynamic DNS Account
157
Specify a DNS Account that You Already Created
158
Change the Dynamic DNS Settings
159
Access USB Storage Devices through the Internet
159
Access USB Storage Devices from a Remote Computer
159
Set up FTP Access through the Internet
160
Use FTP to Access Storage Devices through the Internet
161
Chapter 12 Use the Router as a Media Server
162
Specify Readydlna Media Server Settings
163
Play Music from a Storage Device with Itunes Server
164
Set up the Router's Itunes Server with Itunes
164
Set up the Router's Itunes Server with the Remote App
165
Set up the Router to Work with Tivo
166
Chapter 13 Share a USB Printer
168
Install the Printer Driver and Cable the Printer
169
Download the Readyshare Printer Utility
169
Install the Readyshare Printer Utility
169
Print Using the NETGEAR USB Control Center
170
Chapter 14 Use VPN to Access Your Network
172
Set up a VPN Connection
173
Specify VPN Service in the Router
173
Install Openvpn Software
174
Install Openvpn Software on a Windows-Based Computer
174
Install Openvpn Software on Your Mac Computer
177
Install Openvpn Software on an Ios Device
178
Install Openvpn Software on an Android Device
179
Use a VPN Tunnel on a Windows-Based Computer
180
Use VPN to Access the Router's USB Storage Device and Media from a Windows-Based Computer
181
Use VPN to Access Your Internet Service at Home
181
Allow VPN Client Internet Access in the Router
181
Block VPN Client Internet Access in the Router
182
Use a VPN Tunnel to Access Your Internet Service at Home
183
Chapter 15 Use VPN to Access an External Network
185
Set up a VPN Client Connection
186
Enable the VPN Client in the Router and Connect to a VPN Server
186
Disconnect the Router from the VPN Server
188
Chapter 16 Manage and Customize Internet Traffic Rules for Ports
189
Manage Port Forwarding to a Local Server for Services and Applications
190
Set up Port Forwarding to a Local Server
190
Add a Custom Port Forwarding Service or Application
191
Change a Port Forwarding Service or Application
192
Remove a Port Forwarding Service or Application
193
Application Example: Make a Local Web Server Public
193
How the Router Implements a Port Forwarding Rule
194
Manage Port Triggering for Services and Applications
194
Add a Port Triggering Service or Application
195
Enable Port Triggering and Specify the Time-Out Value
196
Change a Port Triggering Service or Application
197
Remove a Port Triggering Service or Application
197
Disable Port Triggering
198
Application Example: Port Triggering for Internet Relay Chat.199
199
Chapter 17 Troubleshooting
200
Quick Tips
201
Sequence to Restart Your Network
201
Check the Power Adapter and Ethernet Cable Connections
201
Check the Network Settings
201
Check the Wifi Settings
201
Troubleshoot with the Leds
202
Standard LED Behavior When the Router Is Powered on
202
Power LED Is off or Blinking
202
Leds Never Turn off
202
Internet or Ethernet Port Leds Are off
203
Wifi Leds Are off
203
You Cannot Log in to the Router
204
You Cannot Access the Internet
204
Troubleshoot Internet Browsing
206
Changes Are Not Saved
207
Troubleshoot Wifi Connectivity
207
Troubleshoot Your Network Using the Ping Utility
208
Test the Path from a Windows-Based Computer to a Remote Device
208
Test the LAN Path to Your Router
209
Chapter 18 Supplemental Information
211
Factory Settings
212
Technical Specifications
214
Advertisement
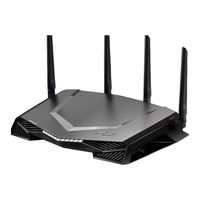
NETGEAR XR450 Quick Start (2 pages)
Gaming Router
Brand:
NETGEAR
| Category:
Wireless Router
| Size: 1.59 MB
Advertisement
Related Products
NETGEAR XR500 Nighthawk
netgear Nighthawk XR700
NETGEAR XE102 - Wall-Plugged EN Bridge
NETGEAR XE102G - Wall-Plugged EN Extender
NETGEAR XE102US - Network Bridge
Netgear XE104G - 85 Mbps Wall-Plugged EN Extender
NETGEAR Nighthawk X6 R7900
NETGEAR Nighthawk X4S AC2600
NETGEAR XE102v1
NETGEAR Nighthawk X6 AC3000 R7850
NETGEAR Categories
Wireless Router
Switch
Network Router
Adapter
Wireless Access Point
More NETGEAR Manuals
Login
Sign In
OR
Sign in with Facebook
Sign in with Google
Upload manual
Upload from disk
Upload from URL