Sign In
Upload
Manuals
Brands
Motorola solutions Manuals
Digital Camera
PELCO IDL502-FXI
Motorola solutions PELCO IDL502-FXI Manuals
Manuals and User Guides for Motorola solutions PELCO IDL502-FXI. We have
1
Motorola solutions PELCO IDL502-FXI manual available for free PDF download: Instruction Manual
Motorola solutions PELCO IDL502-FXI Instruction Manual (44 pages)
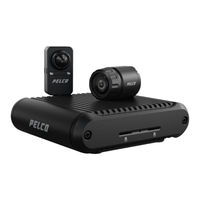
Sarix Modular Camera
Brand:
Motorola solutions
| Category:
Digital Camera
| Size: 1 MB
Table of Contents
Legal Notices
2
Disclaimer
2
Table of Contents
3
Important Safety Information
5
Regulatory Notices
5
FCC Notice
6
Disposal and Recycling Information
6
Overview Main Unit
7
Front View
7
Rear View
7
Bottom View
8
DIN Rail Mount View
9
Micro Bullet Imager
9
Micro Bullet Imager View
9
L-Bracket and Micro Bullet View
10
Right Angle Imager
11
Right Angle Imager View
11
Optional Accessory Flat Bracket View
11
Preparing the Installation
12
Modular Camera System Setup
12
Mounting and Aiming Video Analytics Cameras
12
Recommended Use of HD BNC Cables
12
Main Unit Installation
13
Required Tools and Materials
13
Main Unit Package Contents
13
Mounting on a Flat Surface or Table
13
Mounting the Unit to a Wall
14
Changing the Mounting Feet Position
14
Mounting to a Wall
15
Mounting the Unit on a DIN Rail
17
Cable Connections
19
Connecting the Ethernet and HD BNC Cables
19
Connecting External Power
19
Connecting to External Audio and I/O Devices
20
Micro Bullet Imager Installation
20
Required Tools and Materials
20
Imager Package Contents
21
Using the L-Bracket Mounting Adapter
21
Positioning the Micro Bullet Imager in the L-Bracket
21
Mounting the L-Bracket
22
Mounting through the Mounting Surface
24
Mounting to a Thin Metal Sheet
26
Right Angle Imager Installation
28
Required Tools and Materials
28
Imager Package Contents
28
Mounting through the Mounting Surface
28
Installing with Mounting Screws
28
Installing with the Adhesive Strip
30
Mounting the Imager Onto a Surface
31
Installing with Mounting Screws
31
Installing with the Adhesive Strip
32
Mounting through the Mounting Surface with the Bracket
33
Installing with Mounting Screws
33
Installing with the Adhesive Strip
35
Mounting the Imager and Bracket Onto a Surface
36
Installing with Mounting Screws
36
Installing with the Adhesive Strip
37
Connecting to the Camera
38
Connecting External Power
38
Non-Seamless Failover
39
Initializing a Camera Username and Password
39
Assigning an IP Address
39
Accessing the Live Video Stream
40
(Optional) Configuring Onboard Storage
40
Configuring the Camera
40
For more Information
40
Main Unit LED Indicators
40
Connection Status LED Indicator
40
Troubleshooting Network Connections and LED Behavior
41
Imager Connection LED Indicators
41
Troubleshooting Imager Connections and LED Behavior
42
Resetting to Factory Default Settings
42
Setting the IP Address Using the Arp/Ping Method
42
Cleaning
43
Micro Bullet Imager Lens Bubble
43
Imager and Main Unit Body
43
Pelco Troubleshooting Contact Information
43
Advertisement
Advertisement
Related Products
Motorola solutions PELCO IDL302-FXI
Motorola solutions PELCO Sarix Multi Pro
Motorola solutions PELCO ExSite Pro PTZ
Motorola solutions PELCO Sarix Enhanced Duo
Motorola solutions PELCO Spectra Enhanced 2 PTZ
Motorola solutions PELCO Spectra Enhanced PTZ
Motorola solutions IMPRES 2
Motorola solutions IndigoVision Specialized Series
Motorola solutions IndigoVision SP Series
Motorola solutions IndigoVision HD Interceptor
Motorola solutions Categories
Two-Way Radio
Battery Charger
Security Camera
Microphone
Radio
More Motorola solutions Manuals
Login
Sign In
OR
Sign in with Facebook
Sign in with Google
Upload manual
Upload from disk
Upload from URL