Sign In
Upload
Manuals
Brands
Motorola Manuals
Controller
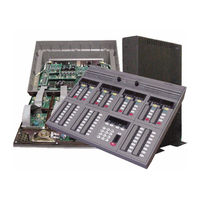
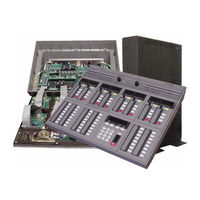
COMMANDSTAR LITE
Motorola COMMANDSTAR LITE Manuals
Manuals and User Guides for Motorola COMMANDSTAR LITE. We have
2
Motorola COMMANDSTAR LITE manuals available for free PDF download: Installation And Troubleshooting Manual, Operator's Manual
Motorola COMMANDSTAR LITE Installation And Troubleshooting Manual (240 pages)
Brand:
Motorola
| Category:
Network Hardware
| Size: 15 MB
Table of Contents
Table of Contents
3
List of Tables L T ist of Ables
13
About this Manual
17
Related Information
17
Updates
17
Safety Summary
18
General
19
For Canadian Users
20
Chapter 1: System Overview
23
The Commandstar Lite
23
Console Architecture
24
Reference Part Numbers
26
Optional Console Accessories
27
Table 1-2 Cptional Console Accessories
27
Field Replacement Kits
28
Table 1-3 Field Replacement Kits
28
Replacement Part Ordering
29
Commandstar Lite Specifications
30
Chapter 2: Site Preparation
33
Environmental Preparation
33
Power Supply
34
Grounding
35
Power Ground Wiring
35
Electrostatic Discharge (ESD)
36
Electromagnetic Interference (EMI) and Shielding
36
Interface Protection
37
Interface Wiring
37
Fire Protection
38
Lightning Protection
38
Chapter 3: Installing the Command Star Lite Console
39
Introduction
39
Desktop Installation
40
Module Installation
42
Equipment Adjustment
49
Operator Headset Microphone Sensitivity Adjustment
49
Supervisor Headset Microphone Adjustment
49
Call Director Audio Input Adjustment
50
Internal Microphone Adjustment
50
Gooseneck Microphone Sensitivity Adjusment
51
Deskmic Sensitivity Adjustment
51
Headset Jackbox Installation
52
Installing the Headset Jackbox (DDN6516)
53
Connecting to a Commandstar Lite Console
54
Chapter 4 4: Console - to -Csdm Lite Interconnection
58
Introduction
61
Chapter 5: Options and Upgrade Procedure
61
Opening the Desktop Assembly
62
Closing the Desktop Assembly
64
Releasing an Operator Control Module from the Console
65
Installing an Operator Control Module in the Console
67
Installing the Four-Channel Expansion Module
68
Installing an I/O Shelf or an I/O Box
69
I/O Shelf Description
70
I/O Shelf LED Indicators
71
Console Connector for I/O Shelf and I/O Box
72
Relay and Opto-Coupler Connector
74
Connecting One I/O Shelf to the Console
75
Setting I/O Module ID for the I/O Shelf
75
I/O Box Description (no Longer Available)
77
Connecting One I/O Box to the Console
79
Connecting Multiple I/O Boxes to the Console
79
Setting I/O Module ID for the I/O Box
80
Making I/O Module Inputs and Outputs Available on the Desktop
81
Table 5-6 I/O Box Dip Switch S10 Settings
81
Installing a Two-CO Line Module
82
Table 5-7: Two-CO Line Module DIP Switch Settings
83
Installing a Digital Radio Interface Module
84
Installing a Direct Current Option Module
86
Labelling the Digital Radio Control Module and Keypad
88
Chapter 6 Hapter Diagnostics Mode
94
Introduction
94
Viewing Internal Tests and Programs
94
Table 6-1 Keypad Features
94
Table 6-2 Quick Reference Table
94
Entering a Test Program
96
Method 1
97
Method 2
97
Exiting a Test Program
97
0-Time Mode
97
1-Set Time
98
2-Set Date
99
3-Disp Level
100
4-Led Level
100
11-Prog Page
101
12-Set Rad Vol
102
13-Set Dial up
103
50-Node ID
104
51-S/W Number
104
52-Dbase Rev
105
53-Led Test
105
54-Button Test
106
55-Volume Test
107
56-Sense Test
108
61-Tone Test
108
62-MIC Test
109
63-Ptt Test
110
64-Call dir Rx
111
65-Call dir Tx
112
68-Set Grant
112
69-Tone to I/F
113
70-Reset
114
71-Set MIC Agc
114
72-Paging Tone
115
73-Serial Port
116
74-MIC Input
116
75-Slv S/W Num
117
Chapter 7 7: Command Star Lite System Database Manager (Csdm Lite )
119
CSDM Lite Hardware Requirements
119
CSDM Lite Alarms and Messages
120
General
120
User Interface
120
Browsing the Log Files
121
Software on Back-Up Disks
122
Reloading the Factory Database
122
Reloading the Console Software
123
Vendor Software
123
Hardware Diagnostics
124
Software Upload
124
System Alarms
125
General
125
User Interface
125
Table 7-1 Various Alarm Conditions
125
Chapter T S P Roubleshooting Pecific Roblems
127
Chapter 8 Specific Problems
127
Quick Reference
127
Table 8-1: Troubleshooting Specific Problems: Quick Reference
127
Table 8-7: no Radio, Telephone Line, Intercom, or Control over External Devices
127
Radio Channels
128
Troubleshooting the Commandstar Lite
128
Headset Cannot Transmit or Receive Signal
128
Incorrect Display on CCM or Keypad
129
Internal Tests Cannot be Monitored
129
No Audio at Customer Equipment
129
Table 8-3 Incorrect Display on CCM or Keypad
129
Table 8-4 Internal Tests Cannot be Monitored
129
Table 8-5: no Audio at Customer Equipment
129
No Radio Communication
130
Non-Operational LED
130
Table 8-6: no Radio Communication
130
Table 8-8: Non-Operational LED
130
Select or Unselect Speaker Volume Control Does Not Work
131
The Console Is Not Working (no LED or no Display)
131
The Keypad Display Says "BOOTSTRAP
131
Table 8-9 Select or Unselect Speaker Volume Control Does Not Work
131
Table 8-10: the Console Is Not Working (no LED or no Display)
131
Table 8-11 the Keypad Display Shows "Bootstrap
131
The Keypad Display Says "NOT in DATABASE
132
Hardware Diagnostic Status Is Not "PASSED
132
Table 8-12 the Keypad Display Shows "Not in Database
132
Table 8-13 Hardware Diagnostic Status Is Not "Passed
132
Chapter 9: Preventive Maintenance
133
Monitoring the CSDM Lite
133
Monitoring Messages
133
Site Maintenance
133
Cleaning the Consoles, Modules
134
Outside Surface
134
Appendix
135
Settings
135
Connector Pin-Outs
135
Table A-5: Headset RJ45 Connector (HEADSET OPR
138
Table A-6: Supervisor Headset R45 Connector (Headset Supv
138
Jumper Settings
141
Main Board and Four-Channel Expansion Module
141
Dip Switch Settings
142
S2 Console ID
142
S1 Main Board - Console Radio Type
142
S1 Four-Channel Expansion Module - Console Radio Type
143
S1 Digital Radio Interface Module - Loading
143
S2 Digital Radio Interface Module - Channel Loading
144
SW1 Operator Control Module ID
145
Appendix
147
Four-Channel Expansion Module (DDN6127
147
Digital Radio Interface Module (DDN6137
147
Two-CO Line Module (CDN6275
147
Keypad Control Module (DDN6129
152
Digital Radio Control Module (DDN6138
156
Appendix B: Component Layouts
147
Component Layout Diagrams
147
Appendix S Chematics
159
I/O Box Assembly (2260328
159
I/O Module Microprocessor for I/O Box (2260354
159
I/O Shelf (3210868
159
I/O Shelf Controller (3210874
159
I/O Shelf Module (3210875
159
Digital Radio Interface Module (DDN6137)
186
Two-CO Line Module (CDN6275)
188
DC Control Module (TDN9897)
192
Keypad Control Module (DDN6129)
196
Dual Channel Control Module Without Display (DDN6130)
198
Dual Channel Control Module with Display (DDN6131)
202
Single Display Channel Control Module (DDN6696)
204
Auxiliary Control Module (DDN6132)
208
Digital Radio Control Module (DDN6138)
210
Advertisement
Motorola COMMANDSTAR LITE Operator's Manual (132 pages)
Brand:
Motorola
| Category:
Controller
| Size: 3 MB
Table of Contents
Table of Contents
3
Chapter 1: Introduction
15
About this Manual
15
Finding Information in this Manual
15
Other Manual
15
Chapter 2: Operator and Console Panel Equipment
17
Operator Equipment
17
Headset Jackbox
17
Headset
18
Microphones
18
PTT Foot-Switch
19
Console Panel
19
Auxiliary Control Module (ACM)
19
Figure 2-3: Dual Foot-Switch
19
CHAPTER 3 Channel Control Module (CCM)
20
Figure 2-4 Auxiliary Control Module (Acm)
20
Digital Radio Control Module (DRCM)
21
Keypad Module
22
Speakers and Internal Microphone
22
Figure 2-6 Digital Radio Control Module (Drcm)
22
Figure 2-8: Built-In Speakers, Volume Controls and Internal Microphone
23
Figure 2-7 Keypad
23
Layout
24
Control Module (CCM)
25
Buttons and Indicators
25
Parallel Status Updates
28
Function Buttons
28
Auxiliary Output 1 and 2
28
Frequency 1/2 Auxiliary
29
Instant Transmit for Radio Channels
29
Multi-Frequency Operation
30
Procedure 3-3 How to Initiate an Instant Transmission
30
Mute Radio Channels
31
Mute R2
31
Procedure 3-4 How to Mute a Radio Channel
31
Private Line Operation)
32
Procedure 3-5 How to Mute the Second Receiver
32
Procedure 3-6: How to Select a Private Line
32
Repeat
33
Secure
33
Procedure 3-7 How to Enable and Disable Repeat
33
Procedure 3-8 How to Enable and Disable Secure Radio Transmission
33
Select
34
Figure 3-2: Operator Busy Indicator on the Commandstar Lite Console
35
Procedure 3-9 How to Select and Transmit on a Radio Channel
35
Procedure 3-10 How to Answer an Incoming Call on a Selected Radio Channel
36
Procedure 3-11 How to Answer an Incoming Call on an Unselected Radio Channel
36
Station Selection Main/Stby
37
Procedure 3-12 How to Deselect a Radio Channel
37
Procedure 3-13 How to Activate the Standby Base Station
37
Takeover
38
Volume Controls
38
Procedure 3-14 How to Activate the Main Base Station
38
Procedure 3-15 How to Prevent and Allow a Parallel Unit to Transmit over Achannel
38
Wildcards Selection
39
Procedure 3-16 How to Activating and Deactivating Ancillary Equipment
39
Chapter 4: Digital Radio Control Module (Drcm)
41
Introduction
41
Standard Buttons and Indicators
42
Instant Transmit Button
43
Mute Button
44
Select Button
44
Procedure 4-1 How to Operate an Instant Transmission
44
Procedure 4-2 How to Mute a Digital Remote Control Radio
44
Procedure 4-4 How to Answer an Incoming Call on a Selected Digital Remote Control Radio
46
Procedure 4-5 How to Answer an Incoming Call on an Unselected Digital Remote Control Radio
46
Shift Button
47
Volume Control
47
Procedure 4-6 How to Deselect a Digital Remote Control Radio
47
Procedure 4-7 How to Activate Upper Features on Adrcm Function Button
47
Radio-Specific Features
48
Displays
48
Buttons
49
Incoming Emergency Calls
49
Procedure 4-8 How to Acknowledge an Emergency Call on Adrcm
50
Procedure 4-9 How to Clear an Incoming Emergency Call Alarm on Adrcm
50
Chapter 5: Auxiliary Control Module (Acm)
53
Introduction
53
Alarms
58
Alert Tones
59
Procedure 5-1 How to Acknowledge an External Alarm
59
Procedure 5-2 How to Activate an Alert Function
59
Alias Page
60
Table 5-2 Alias Page and Page Tx Button Indicator States
60
All Mute
61
Procedure 5-3 How to Transmit an Alias Page
61
Procedure 5-4 How to Activate the All Mute Function
61
Call Director
62
Basic Call Director Operation
62
Enhanced Call Director Operation
63
Procedure 5-5 How to Exit a Call Director Call
63
Procedure 5-6 How to Create a Patch with the Call Director Interface
64
Procedure 5-7 How to Initiate Communications with a Patched Call Director Call
64
Procedure 5-8 How to Remove a Call Director Call from a Patch
64
Clear
65
Digital Takeover
65
Emer Clear and Alarm
65
Incoming Emergency Call Indications
65
Frequency Selection
66
Procedure 5-9 How to Acknowledge an Emergency Call and Clear the Alarm at Your Console
66
Procedure 5-10 How to Cancel an Incoming Emergency Call Alarm at Your Console
66
Procedure 5-11 How to Change a Channel Frequency
66
Intercom
67
Procedure 5-12 How to an Intercom Call
67
I/O
68
Option A: I/O # Spare Switch
68
Procedure 5-13 How to Operate a Latching I/O (A)
68
Procedure 5-14: How to Operate a Non-Latching I/O (A)
68
Option B: I/O # Spare Button
69
Option C: I/O # Spare Button and Indicator
69
Procedure 5-15 How to Operate a Latching I/O # Button (B)
69
Procedure 5-16: How to Operate a Non-Latching I/O # Button (B)
69
Option D: I/O # Spare Button and Blinking Indicator
70
Procedure 5-17 How to Operate a Latching I/O # Button (C)
70
Procedure 5-18: How to Operate a Non-Latching I/O # Button (C)
70
Option E: I/O # with an External Input Indicator
71
Option F: I/O # with External Input and Two Indicators
71
Option G: I/O # with Two Inputs
71
Procedure 5-19 How to Operate a Latching I/O # Button (D)
71
Procedure 5-20: How to Operate a Non-Latching I/O # Button (D)
71
Marker
72
Procedure 5-21 How to Operate a Latching I/O # Button (H)
72
Procedure 5-22: How to Operate a Non-Latching I/O # Button (H)
72
Monitor
73
Procedure 5-23: How to Send a Priority Channel Marker Tone over a Channel(S)
73
Procedure 5-24 How to Operate the Channel
73
Multi-Sel Without Memory
74
Procedure 5-25: How to the Multi-Sel Function
74
Multi-Sel with Memory
75
Procedure 5-26: How to Activate the Multi-Sel with Memory Function
75
Procedure 5-27: How to Transmit over an Active Multi-Sel
75
Procedure 5-28: How to Transmit over an Inactive Mult-Sel
75
Procedure 5-29: How to Recall a Multi-Sel
76
Procedure 5-30: How to Clear a Multi-Sel
76
Table 5-3 Page # and Page Tx Indicator States
77
Procedure 5-31 How to Initiate a
77
Patch
78
Procedure 5-32 How to Exit a Page # Call During Transmission
78
Procedure 5-33 How to Create a Patch
79
Procedure 5-34 How to Initiate a Patch Transmission (1 of 2)
79
Patch with Memory
80
Procedure 5-35 How to Initiate a Patch Transmission (2 of 2)
80
Procedure 5-36 How to Exit and Clear a Patch (1 of 2)
80
Procedure 5-37 How to Create a Patch with Memory
81
Procedure 5-38 How to Restore a Stored Patch
81
Radio Assist and Phone Assist
82
Procedure 5-39 How to Initiate a Patch Transmission
82
Procedure 5-40 How to Clear a Patch with Memory
82
Radio Channel Controlled from ACM
83
Procedure 5-41: How to Activate and De-Activate Radio Assist
83
Procedure 5-42: How to Activate and De-Activate Phone Assist
83
Procedure 5-43 How to Select and Transmit on a Radio Channel on an Acm
86
Procedure 5-44 How to Answer an Incoming Call on a Selected Radio Channel on an Acm
86
Procedure 5-45 How to an Incoming Radio Call on an Unselected Radio Channel on an Acm
87
Procedure 5-46 How to Deselect a Radio Channel on an Acm
87
Safety
88
Procedure 5-47 How to Mute a Radio Channel on an Acm
88
Site Control
89
Incoming Radio Call
89
Procedure 5-48 How to Use the Safety Button
89
Speed Page
90
Procedure 5-49 How to Force Vote a Receiver
90
Procedure 5-50 How to Disable a Receiver
90
Table 5-5 Speed Page # and Page Tx Indicator States
91
Procedure 5-51 How to Transmit a Speed Page
91
Stat-Alert
92
Incoming Signaling
92
Procedure 5-52 How to Deselect a Queued Speed
92
Queue
93
Procedure 5-53 How to Examine the Queue
93
Enter RAC
94
Outgoing Signaling
94
Repeater Enable
94
Procedure 5-54 How to Enter the Rac
94
Repeater Disable
95
Manual RAC
95
Procedure 5-55: How to Enable the Stat-Alert Repeater Operation
95
Procedure 5-56: How to Disable the Stat-Alert Repeater Operation
95
Radio Check
96
Procedure 5-57 How to Send Arac
96
Procedure 5-58: How to Transmit a Stat-Alert Radio Check
96
Radio Disable
97
Radio Enable
97
Procedure 5-59: How to Transmit a Stat-Alert Radio Disable Command
97
Procedure 5-60: How to Transmit a Stat-Alert Radio Enable Command
97
Remote Monitor
98
Status Request
98
Procedure 5-61: How to Transmit a Stat-Alert Remote Monitor Command
98
Call Alert
99
Procedure 5-62: How to Transmit a Stat-Alert Status Request
99
Procedure 5-63: How to Transmit a Stat-Alert Call-Alert
99
Voice Alert
100
Telephone Operation
100
Procedure 5-64: How to Transmit a Stat-Alert Voice Alert
100
Procedure 5-65 How to Place a Telephone Call
101
Procedure 5-66 How to Tanswer a Direct Access Telephone Call
101
Phone Transmit Button Operation
102
Procedure 5-67 How to Use the Phone Tx Button
102
Procedure 5-68 How to Mute and Unmue the Ring of an Incoming Call
102
Ring Disable Operation
102
Call Release
103
Hold Function
103
Procedure 5-69 How to Release an Active Call
103
Procedure 5-70 How to Selectively Hang up a Telephone Line
103
Flash Function
104
Function Button Error Messages
104
Procedure 5-71 How to Put the Active Call on Hold and Take It off Hold
104
Procedure 5-72 How to Perform a Hook Flash
104
Table 5-6 List of Error Messages
105
Chapter 6: Keypad Module
109
Introduction
109
Buttons
109
Figure 6-1 Keypad Module Buttons
110
Table 6-1 Keypad Buttons Quick Reference
110
Caller ID on the Keypad Display
111
Console PTT Button
111
Programs
112
Procedure 6-1 How to Enter Tests and Programming Mode and Select a Program
113
Procedure 6-2 How to Exit Tests and Programming Mode
113
Procedure 6-3 How to Set the Time Mode in Use a T the Console
113
Procedure 6-4 How to Set Time at the Console
114
Procedure 6-5 How to Set the Date at the Console
114
Procedure 6-6 How to Change the Intensity of the Console Module Displays
115
Procedure 6-7 How to Change the Intensity of the Console Module Led Indicators
115
Procedure 6-8 How to Program a Page # Button
116
Procedure 6-9 How to Program a Speed
116
Procedure 6-10 How to Set the Volume of a Radio Channel Controlled on an Acm
117
Procedure 6-11 How to Initiate the Connection for the Digital Radio Using the Dial up Modem
118
Glossary
119
Index
125
Advertisement
Related Products
Motorola Command One
Motorola Personal Communicator
Motorola Communications Gateway
Motorola COMFORT75
Motorola COMFORT75-2
Motorola COMFORT60CONNECT-3
Motorola COMFORT45CONNECT
Motorola COMFORT45CONNECT-2
Motorola COMFORT45CONNECT-4
Motorola COMFORT40-3
Motorola Categories
Cell Phone
Two-Way Radio
Baby Monitor
Cordless Telephone
Radio
More Motorola Manuals
Login
Sign In
OR
Sign in with Facebook
Sign in with Google
Upload manual
Upload from disk
Upload from URL