Sign In
Upload
Manuals
Brands
MediSono Manuals
Medical Equipment
P25 EXP
MediSono P25 EXP Manuals
Manuals and User Guides for MediSono P25 EXP. We have
1
MediSono P25 EXP manual available for free PDF download: User Manual
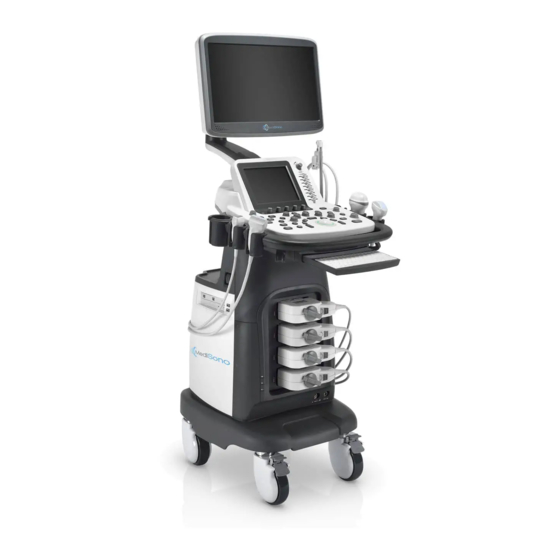
MediSono P25 EXP User Manual (215 pages)
Ultrasound System
Brand:
MediSono
| Category:
Medical Equipment
| Size: 4 MB
Table of Contents
Table of Contents
4
1 Safety
13
Intended Use
14
Safety Precautions
14
Electrical Safety
14
Mechanical Safety
16
Accessories Caring
16
Biohazard Considerations
17
Acoustic Power Principle
18
Biological Safety
18
Alara
18
Mechanical and Thermal Indices
19
MI/TI Explanation
19
Transducer Surface Temperature Limits
20
Imaging Functions that Change Acoustic Output
20
Safety Symbols
20
System Overview
23
System Configuration
24
Physical Specifications
24
System Components
25
Right View of the System
25
Left View of the System
26
Peripheral Device Panel
27
Control Panel
28
Basic Screen
32
Touch Screen
33
Application Mode Screen
34
Annotation Menu
35
Imaging Mode Menu
35
Key Panel of Touch Screen
36
Measurement Menu
36
Preparing the System
37
3 Preparing System 3.1 System Assembly
38
System Moving/Positioning
39
Connecting and Powering the System
39
Using the Mains Supply
39
Using the Battery
40
Indicators
41
Indicator Descriptions
41
Powering On/Off the System
42
System Standby
42
Adjusting the System
42
Adjusting the Monitor Arm
42
Adjusting the Display Monitor
43
To Swivel the LCD Monitor
43
Connecting the Probe
44
To Adjust the Brightness and Contrast
44
Connecting the Pencil Probe
45
Disconnecting the Probe
45
Connecting the Peripheral Device
45
Connecting the Footswitch
45
Connecting the Video Printer
46
Connecting the Network Printer
46
Connecting the USB Printer
47
Ultrasound System Setup
47
Customizing Your System
49
4 Customize
50
General System Settings
50
General Settings
50
Display Settings
52
Storage Settings
54
Defined-Key Settings
55
General Settings Menu - Key Configuration Tab
55
Peripheral Device Settings
56
Local Network Settings
57
Peripheral Device Settings Menu
57
Defining Annotation Library
58
Wireless Settings
58
Printer Settings
58
Annotation Settings Menu
59
Bodymark Settings
60
Measurement Settings
60
General Measurement Settings
61
General Measurement Items
61
Result Position
62
Application Settings
63
Auto/Man Trace
63
Shortcut Key
63
Small Parts Measurement Settings
63
Equation Setting
64
GA Table
65
Growth Table
65
List Settings
66
To Add a Collection or Measurement
66
To Delete a Collection or Measurement
66
Touch-Screen Settings
67
To Reorder the List of Collections or Measurements
67
Adding a Parameter
68
Modifying a Parameter
68
Deleting a Parameter
68
Report Settings
68
Configuring DICOM
69
Storage Service Settings
69
DICOM Settings Menu - Storage Service Tab
70
Commitment Settings
71
DICOM Worklist Settings
72
DICOM Settings Menu - Worklist Tab
73
MPPS Settings
74
Print Service Settings
75
DICOM Settings Menu - Print Service Tab
76
Defining System Defaults
78
To Load System Defaults
78
To Create System Defaults
79
To Export or Import System Defaults
79
Viewing System Information
79
General Information
80
Acoustic Output
80
Touch Screen Information
80
Calibrating the Touch Screen
80
Preparing for an Exam
81
5 Preparing for Scan
82
Acquiring Patient Information
82
Beginning a New Patient
82
Retrieving Archived Information
84
Exam Review Screen
84
Pausing/Resuming an Exam
85
Using DICOM Worklist
85
Resume an Exam
85
Completing an Exam
86
Discontinuing an Exam
86
Acquiring Images
87
6 Acquiring Imaging
88
Selecting a Probe and an Exam Type
88
Customizing a Preset
88
To Arrange the Presets Display
89
User Preset Menu
89
Acquiring B-Mode Images
90
Entering B Mode
90
Optimizing B-Mode Images
91
Gain
92
Tgc
92
Lgc
92
Focal Position/Number/Span
93
Depth
93
Chroma
94
Compound Imaging
94
Line Density
94
Persistence
94
Grayscale Curve
95
Adaptive Image Fusion
95
Sector Width/Angle
95
Sector Position
95
Tissue Acoustic Characteristics
96
Image Rotation
96
Μscan
96
Trapezoidal Imaging
96
Steer
97
Acquiring Color Flow Images
97
CFM Mode
97
PDI Mode
98
CFM-Mode Imaging Screen
98
TDI Mode
99
PDI-Mode Imaging Screen
99
TDI-Mode Imaging Screen
100
Optimizing CFM/PDI/TDI Mode Images
101
Color Flow-Mode Imaging Parameters Menu
101
Frequency
102
Wall Filter
102
Pulse Repetition Frequency
102
Color Map
103
Power
104
B Reject
104
Flow Invert
104
Acquiring M-Mode Images
105
M Mode
105
Inactivated B+M-Mode Imaging Screen
105
Anatomical M-Mode
106
M-Mode Imaging Screen
106
Optimizing M-Mode Images
107
Inactivated Anatomical M-Mode Imaging Screen
107
M Process
108
To Optimize an Image by Using Controls in the Following Instructions
108
M-Mode Imaging Parameters Menu
108
Sweep Speed
109
Display Format
109
Video Invert
109
Acquiring Spectral Doppler Images
110
PW Mode
110
Inactivated B+PW Mode 1 Imaging Screen
110
PW-Mode Imaging Screen
111
CW Mode
112
Inactivated B+PW Mode 2 Imaging Screen
112
Inactivated B+CW-Mode 1 Imaging Screen
112
CW-Mode Imaging Screen
113
Optimizing Spectral Doppler Images
114
Inactivated B+CW Mode 2 Imaging Screen
114
Spectral Doppler Mode Imaging Parameters Menu
115
High Pulse Repetition Frequency
116
Baseline
116
Acquiring Triplex-Mode Images
119
B+Cfm/Tdi +M
119
Inactivated B+CFM/TDI +M-Mode Imaging Screen
119
B+CFM/TDI +M-Mode Imaging Screen
120
Inactivated B+CFM/PDI/TDI+PW-Mode 1 Imaging Screen
120
B+CFM/PDI/TDI+PW-Mode Imaging Screen
121
Inactivated CFM/PDI/TDI+PW Mode 2 Imaging Screen
122
Elastography Imaging
123
Acquiring Elastography Images
124
Elastography Imaging Screen
124
Optimizing Elastography Images
125
Strain Map
126
Elastogrphy Imaging Parameters Menu
126
To Adjust the Strain Map
126
Strain Process
127
Transparency
127
Contrast
127
Working with Elastography Images
128
Contrast Imaging
129
Entering Contrast Imaging
130
Contrast Imaging Screen
130
Optimizing Contrast Images
131
Contrast Imaging Parameters Menu
131
Flash Power
132
Acquiring Contrast Images
132
Working with Contrast Images
133
TIC Analysis Screen
133
3D Imaging
135
Acquiring 3D Images
136
Inactivated 3D Imaging Screen
136
Working with 3D Images
138
Adjusting ROI
138
3D Imaging Parameters Menu
138
Setting Display Format
139
Cropping Review Screen
139
Using Auto Face
140
Setting Render Mode
140
Cropping Reviews
140
Cropping Reviews with Trace
140
Cropping Reviews by the Box
141
Cropping Reviews by the Eraser
142
To Select an Image
142
To Move Images
142
To Rotate Images
142
Optimizing 3D Image
143
To Zoom Out/In All Images
143
To Inverse Images
143
To Set the Contrast and Transparency
143
Observing Reference Image by the Plane
144
Observing Reviews by the Slice
144
Setting the Scan Modr
145
Multi-Slice Imaging Screen
145
Adjusting Zangle/Zscale
146
Restoring the Image
146
Customizing Presets
146
Performing Follicle Auto-Measurement
146
4D Imaging
147
Acquiring 4D Images
148
Entering the Real-Time 4D Imaging
148
Inactivated 4D Imaging Screen
148
D Imaging Screen
149
Acquiring Dynamic 3D Image
150
Working with 4D Images
150
Working with Images
151
Imaging Features
152
Imaging Reverse
152
Dual-Split Screen Display
152
Quad-Split Screen Display
153
Real Time CFM + Real Time B
153
Harmonic Imaging
154
Panoramic Imaging
154
Real-Time Panoramic Imaging
155
Real-Time Panoramic Imaging Screen
155
Frozen Panoramic Imaging
156
Frozen Panoramic Imaging Screen
156
Magnifying an Image
157
Freezing an Image
157
Using Cine
157
Reviewing Cine
158
To View Cine Manually
158
To Review Cine Automatically
158
Annotations and Body Marks
158
Annotating an Image
159
Annotating an Image with Typed Words
159
Annotating an Image with Arrows
159
Setting an Initial Position for an Annotation
159
Body Mark
160
Deleting Annotations and Body Marks
160
To Delete Annotations
160
To Delete Body Marks
160
Basic Procedures of ECG Operation
161
Optimizing Parameters
162
Reviewing ECG
162
Managing Images/Data
163
Storing an Image
164
Storing 2D Image
164
Storing 3D/4D Image
164
Viewing an Image
164
To View an Image on the View Image Screen
165
Retrieving an Image
165
Sharing Data
166
Backing up Data
166
Backing up Data to a USB Drive
166
Backing up Data to DVD
166
Importing Data to the System
167
W
169
Orking with DICOM
169
Verifying Connectivity
170
DICOM Storage
170
Storing the Current Image
170
Storing Patient Data
170
Print the Current Image
171
Print Patient Data
171
DICOM Worklist
171
Worklist Screen
172
Mpps
172
PPS Screen
173
Storage Commitment
174
DICOM Queue
174
DICOM Queue Screen
175
Probes and Biopsy
177
Probe
178
Available Probes
178
Probe Usage
179
Special Concerns before Probe Usage
179
Body Surface Probe Usages
180
Endocavitary Probe Usages
180
Intraoperative Probe Usages
180
Cleaning the Probe
181
Disinfecting and Sterilizing the Probe
182
Disinfection Levels
182
Immersion Requirements
183
To Disinfect the Body Surface Probe
183
Recommended Method for Medium-Level Disinfection
183
To Disinfect the Endocavitary Probe
184
To Sterilize the Probe
184
Recommended Method for High-Level Disinfection
184
Disinfecting and Sterilizing the Probe Cable
185
Recommended Method for Sterilization
185
Storage and Transportation
186
To Store the Probe
186
To Transport the Probe
186
Biopsy
187
Available Biopsy Brackets
187
Assembling the Biopsy Bracket
189
To Assemble the Endocavitary Biopsy Bracket
190
Preparing for a Biopsy
191
Verifying the Biopsy Bracket
191
Performing a Biopsy
192
Cleaning the Biopsy Bracket
193
Sterilizing the Biopsy Bracket
194
System Maintenance
195
Cleaning the System
196
To Clean the Dust Filter
196
To Clean the Trackball
196
Maintenance Checks
197
Electric Safety
197
Troubleshooting
198
Replacing the Fuse
198
Image Recording
198
Equipment Disposal
199
Customer Service
199
Specifications
201
Advertisement
Advertisement
Related Products
MediSono P12
MediSono P12 EXP
Medisono P11
MediSono P3V
MediSono P11 EXP
MediSono Categories
Medical Equipment
Diagnostic Equipment
More MediSono Manuals
Login
Sign In
OR
Sign in with Facebook
Sign in with Google
Upload manual
Upload from disk
Upload from URL