Sign In
Upload
Manuals
Brands
Krone Manuals
Farm Equipment
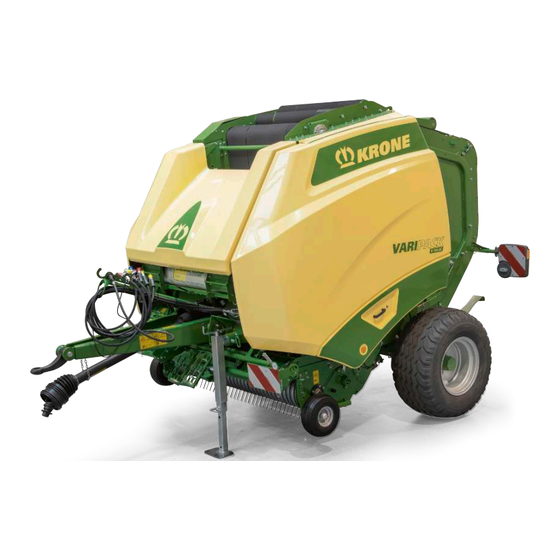
VariPack V 190
Krone VariPack V 190 Manuals
Manuals and User Guides for Krone VariPack V 190. We have
1
Krone VariPack V 190 manual available for free PDF download: Original Operating Instructions
Krone VariPack V 190 Original Operating Instructions (256 pages)
Round baler
Brand:
Krone
| Category:
Farm Equipment
| Size: 35 MB
Table of Contents
Table of Contents
4
Information on this Document
10
Validity
10
Significance of the Document
10
Re-Ordering
10
Applicable Documents
10
Target Group of this Document
10
Figures
11
Conversion Table
14
Safety
15
Intended Use
15
Reasonably Foreseeable Misuse
15
Service Life of the Machine
16
Basic Safety Instructions
16
Importance of Operating Instructions
16
Personnel Qualification of the Operating Personnel
16
Personnel Qualification of the Technicians
17
Children in Danger
17
Connecting the Machine
17
Structural Modifications on the Machine
17
Additional Equipment and Spare Parts
17
Jobs on the Machine
18
Operational Safety: Technically Sound Condition
18
Danger Zones
19
Ensuring Functionality of Safety Devices
21
Personal Protective Equipment
21
Safety Sign on the Machine
22
Road Safety
22
Parking the Machine Safely
23
Consumables
23
Dangers Arising from Environment
24
Sources of Danger on the Machine
25
Dangers in Connection with Certain Activities: Working on the Machine
26
Dangers in Connection with Certain Activities: Working on Wheels and Tyres
27
Behaviour in Dangerous Situations and in Case of Accidents
28
Safety Routines
28
Shutting down and Safeguarding the Machine
28
Securing Raised Machine and Machine Parts against Lowering
29
Carrying out Oil Level Check and Oil and Filter Element Changes Safely
29
Running Actuator Test
30
Safety Sign on the Machine
30
Information Signs on the Machine
35
Safety Equipment
40
SMV Emblem
42
Data Memory
43
Machine Description
44
Machine Overview
44
Overload Protections on the Machine
45
Identification Plate
45
Scope of Delivery
46
Function Description Net Wrapping
47
Function Description of Twine Tying
48
Technical Data
50
Dimensions
50
Weights
50
Technically Permitted Maximum Speed (Road Travel)
50
Airborne Noise Emission
50
Ambient Temperature
51
Tyres
51
Safety Chain
51
Bale Dimensions
51
Twine Wrapping and Tying Material
51
Net Wrapping and Tying Material
51
Requirements for Tractor - Power
52
Tractor Requirements - Hydraulics
52
Requirements for Tractor - Electrics
52
Requirements for Tractor - Brake System
52
Consumables
52
Oils
53
Lubricating Greases
53
Initial Operation
54
Checklist for Initial Operation
54
Scope of Delivery
54
Adjusting the Drawbar Height
55
Universal Shaft
57
Mounting the Universal Shaft on the Machine
57
Adjusting the Length of the Universal Shaft
58
Mounting Universal Shaft Bracket
58
Commissioning
59
Connecting Machine to Tractor
59
Mounting the Universal Shaft on the Tractor
60
Connecting Hydraulic Hoses
61
Connecting Hydraulic Brake (Export)
62
Connecting/Disconnecting Compressed Air Connections for the Compressed Air Brake
62
Connecting the Road Lighting
63
Mounting Safety Chain
64
Mounting the Catch Loop
65
Connecting the KRONE DS 100 Operation Unit
66
Connecting KRONE Terminal DS 500
67
Connecting the KRONE ISOBUS Terminal (CCI 800, CCI 1200)
69
Connecting Foreign ISOBUS Terminal
71
Connecting Joystick
72
Connecting the Camera to the KRONE ISOBUS Terminal CCI 800 or CCI 1200
75
Operation
76
Preparation before Baling
76
Filling the Bale Chamber
77
Completing the Baling Process, Starting Tying Cycle and Ejecting Round Bales
79
Reducing the Pressure on the Side Walls of the Bale Chamber
79
Operating the Support Jack
79
Releasing/Applying the Parking Brake
80
Using Ladders for the Tying System
81
Fitting Wheel Chocks
82
Removing/Mounting the Safety Device Which Prevents Unauthorised Use
83
Pick-Up
83
Bringing the Pick-Up to Transport/Working Position
83
Setting the Pick-Up Working Height
84
Activating/Deactivating the Bearing Pressure Relief for the Pick-Up
85
Crop Press Roller Unit
86
Setting the Crop Press Roller Unit
87
Removing/Mounting the Baffle Sheet on the Crop Press Roller Unit
87
Lifting/Lowering the Feeder Rotor Floor
88
Net Wrapping
88
Inserting the Net Roll
88
Inserting the Net
90
Cutting the Net
92
Using Pivoted Wrapping and Tying Material Supply
92
Twine Tying
94
Connecting Spools of Twine with each Other
94
Inserting Tying Twine
95
Swivelling the Twine Box to and Fro
98
Open/Close Tailgate
98
Using the Stop Cock of the Tailgate
99
Removing Crop Blockages
99
Crop Blockage at the Right-Hand and Left-Hand End of the Pick-Up
99
Crop Blockage under Feed Rotor
100
Crop Blockage in the Baling Element
100
KRONE Operation Unit DS 100
102
Overview
102
Switching the Operation Unit On/Off
103
Call Road Travel Screen
103
Accessing the Working Screen
104
Direction Display
104
Start Tying
105
Switching the Working Lights On/Off
106
Switching Warning Beacon On/Off
106
Setting the Bale Diameter
106
Setting Advance Signaling
107
Setting the Sensitivity of the Direction Display
108
Setting the Baling Pressure
108
Setting the Core, Centre and Edge of the Round Bale
109
Setting the Number of Net Layers
112
Setting the Tying Start Delay
112
Displaying the Customer Counter
113
Sensor Test for Digital and Analogue Sensors
114
Calibrating Sensors
115
Actuator Test for Digital and Analogue Actuators
117
Error Messages
119
Manual Operation of the Tying System
120
Setting User Preferences
121
Touchable Display
122
Design DS 500
123
KRONE ISOBUS Terminal (CCI 800, CCI 1200)
125
Touchable Display
125
Switching Terminal On/Off
126
Design of Display
127
Design of the KRONE Machine Application
127
Setting Units on the Terminal
128
Foreign ISOBUS Terminal
129
Varying Functions to KRONE ISOBUS Terminal
129
Terminal Machine Functions
130
Status Line
130
Keys
131
Displays on the Working Screen
133
Displays on the Information Bar
135
Direction Display
136
ISOBUS Shortcut Button (ISB)
138
Accessing the Working Screen
139
Automatic Call of the Road Travel Screen
140
Adjusting Bale Diameter
140
Operating TIM 1.0 (Tractor Implement Management)
141
Mode of Operation of TIM 1.0
141
TIM Displays and Keys on the Working Screen
142
Activating TIM Functions
143
Pausing TIM Functions
144
Operating Machine Via Joystick
144
Auxiliary Functions (AUX)
144
Auxiliary Assignment of a Joystick
145
Terminal Menus
148
Menu Structure
148
Recurrent Icons
149
Selecting a Menu Level
150
Selecting a Menu
150
Changing Value
151
Changing Mode
152
Tying in the Menu Level
153
Menu 1 "Number of Net Layers" (Net Wrapping)
154
Menu 1 "Number of Twine Layers" (Twine Tying)
154
Menu 3 "Advance Signalling
155
Menu 4 "Tying Start Delay
155
Menu 6 "Electronic Baling Pressure Adjustment
156
Menu 7 "Sensitivity of Direction Display
157
Menu 8 "Select Type of Tying" (for the "Net Wrapping and Twine Tying" Version)
158
Menu 9 "Filling Correction
159
Menu 10 "Manual Operation" (for the "Net Wrapping" Version)
160
Menu 10 "Manual Operation" (for Version with "Net Wrapping and Twine Tying")
161
Menu 11 "Correction of Start/End Position of the Twine Tying System (for "Net Wrapping and Twine Tying" Version)
163
Menu 12 "Moisture Measurement
165
Menu 12-1 "Error Message for Moisture Measurement
165
Menu 12-2 "Correction Value for Moisture Measurement
166
Menu 13 "Counters
168
Menu 13-1 "Customer Counter
168
Menu 13-2 "Total Counter
170
Menu 14 "ISOBUS
171
Menu 14-5 "KRONE Smartconnect
172
Menu 14-6 "Configuring TIM Software" (for "TIM 1.0" Version)
173
Menu 14-9 "Switching between Terminals
174
Menu 15 "Settings
175
Menu 15-1 "Sensor Test
176
14.22.1.1 Adjusting Sensor B08 "Feed Rotor Floor Top Position
178
Adjusting Sensor B61 "Tying 1 (Passive)
179
Menu 15-2 "Actuator Test
180
Menu 15-3 "Software Info
182
Menu 15-4 "Error List
182
Driving and Transport
185
Preparing the Machine for Road Travel
186
Parking the Machine
186
Securing the Universal Shaft
187
Checking Road Travel Lighting
188
Dismounting the Guide Wheels of the Pick-Up for Road Travel
188
Preparing the Machine for Shipment
189
Checklist for the Transport of the Machine
189
Securing the Front Hood
190
Lifting the Machine
190
Lashing the Machine
191
Settings
193
Setting the Baling Pressure
193
Setting Net Overhang on the Wrapping Material Brake
193
Setting Rubber Cloth on the Net Wrapping
194
Adjusting the Twine Tension at the Twine Box
194
Adjusting the Twine Tension at the Twine Brake
195
Checking/Adjusting Blades at the Twine Tying System
195
Setting Oil Quantities for the Central Chain Lubrication Unit
197
Setting the Bale Ejector
198
Service & Maintenance
199
Observe the Service Record Booklet
199
Maintenance Table
199
Maintenance - before the Season
199
Maintenance - after the Season
200
Maintenance - Once after 10 Hours
200
Maintenance - Once after 500 Round Bales
201
Maintenance - Every 10 Hours, at Least Daily
201
Maintenance - Every 50 Hours
202
Maintenance - Every 250 Hours
202
Maintenance - Every 1,000 Round Bales
202
Maintenance - Every 2 Years
202
Lubrication Chart
202
Lubricating the Universal Shaft
206
Tightening Torques
207
Checking/Maintaining Tyres
211
Servicing the Main Gearbox
212
Cleaning the Machine
213
Clean the Bushing and the Drawbar Eye
215
Cleaning Drive Chains
215
Relieving Baling Belts
216
Checking the Screw Connections on the Drawbar
216
17.13 Checking and Adjusting the Cleaning Rollers
218
Checking and Adjusting Scraper on the Feed Roller
219
Checking the Fire Extinguisher
220
Removing Corrosion from Net Support / Holder
220
Releasing the Cam Clutch on the Universal Shaft
221
Adjust Drive Chains
221
Drive Chain of the Baling Unit (No. 1)
221
Drive Chain of the Rotor (No. 2)
222
Drive Chain of the Feed Roller and the Starter Roller (No. 3)
223
Servicing Chain Lubrication Unit
223
Checking Oil Level, Topping up Oil and Cleaning Filter
223
Position of the Oil Brushes
224
Servicing Compressed Air Brake (for Version with "Compressed Air Brake")
226
Clean Air Filter
226
Drain Condensation Water from the Compressed Air Tank
226
Retighten Tensioning Straps at the Compressed Air Tank
227
Servicing the Hydraulic System
228
Before Working on the Hydraulic System
228
Checking Hydraulic Hoses
228
Malfunction, Cause and Remedy
229
Disturbances at the Pick-Up or During Picking up of Crops
229
Disturbances During or after the Baling Process
230
Disturbances at the Tying Unit or During the Tying Cycle
232
Malfunctions on the Chain Lubrication Unit
234
Faults of the Electrics/Electronics
234
Error Messages
234
Possible Error Types (FMI)
235
Remedying Sensor/Actuator Error
236
Checking the Ratchet on the Wrapping Material Brake
237
Checking Positions of the Feed Rocker Arm
237
Setting the Tailgate Lock
240
Checking the Pressure Limiting Valve
241
Filling the Accumulator
241
Cleaning Deflection Rolls and Baling Belts
242
Car Jack Contact Points
242
Waste Disposal
244
Index
245
Declaration of Conformity
255
Advertisement
Advertisement
Related Products
Krone Comprima V 150-1
Krone Comprima V 180-1
Krone Comprima V 210
Krone VariPack V 190 XC
Krone VariPack V 165 XC
Krone VariPack V 165
Krone Comprima V 150 XC
Krone Comprima V 180 XC
Krone Fortima V 1500 MC
Krone COMPRIMAF V 1801 XC
Krone Categories
Farm Equipment
Lawn Mower
Lawn and Garden Equipment
Industrial Equipment
Utility Vehicle
More Krone Manuals
Login
Sign In
OR
Sign in with Facebook
Sign in with Google
Upload manual
Upload from disk
Upload from URL