Sign In
Upload
Manuals
Brands
IPCGansow Manuals
Floor Machine
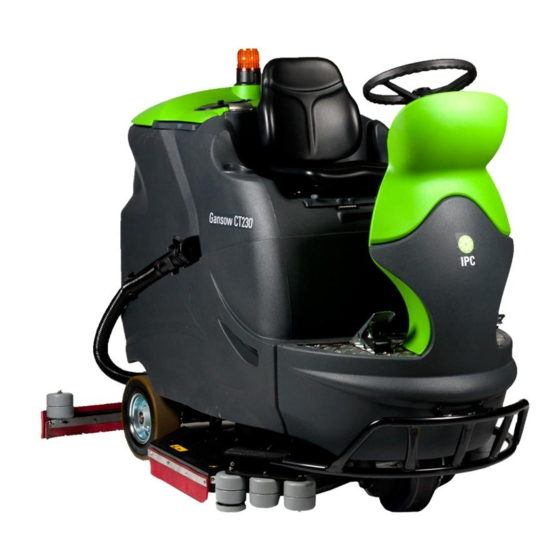
CT 230 BT 85
IPCGansow CT 230 BT 85 Manuals
Manuals and User Guides for IPCGansow CT 230 BT 85. We have
1
IPCGansow CT 230 BT 85 manual available for free PDF download: Technical & Service Manual
IPCGansow CT 230 BT 85 Technical & Service Manual (207 pages)
Brand:
IPCGansow
| Category:
Floor Machine
| Size: 25 MB
Table of Contents
Technical Specifications
2
Quick Guide
4
Preparation/Operation
4
Daily Maintenance
5
Replacing the Squeegee Blades
5
Brush Attachment/Release
5
Troubleshooting
5
Electronic PCB Programming
6
Default Values
6
User Programming
7
Index
10
Brush Head
12
Checking the Current Draw of the Brush Motors
13
Checking the Current Draw of the Brushes from the Control Panel
14
Checking the Current Draw of the Brush Motors During Washing
22
Checking and Replacing the Brush Motor Carbon Brushes
24
Disassembly
24
Reassembly
29
Version BT 85
30
Carbon Brush Measurements
31
Head Actuator Current Draw - Replacement
32
Checking Brush Head Actuator Current Draw
33
Checking Current Draw on the Fuse Wires
33
Checking Absorption on the Control Panel Board Wires
36
Checking Head Actuator Operation Manually
39
Replacing the Brush Head Actuator
42
Checking Head Actuator Operation Manually on the Bench
46
Checking Operation of the Motor
49
Checking Operation of the Internal Micro Switches
50
Disassembling the Brush Head - Brush Motors - Carbon Brushes
55
Disassembling the Brush Head
56
Disassembling and Replacing the Brush Motors
59
Remounting the 850 Head
62
Remounting the 1050 Head
63
Checking and Replacing the Brush Motor Carbon Brushes on the Bench
66
Disassembly Version BT 105
66
Disassembly Version BT 85
68
Replacing the Brush Head Flaps
69
Replacing the Brush Centring Flaps
70
Replacing the Brush Centring Bearing and Roller
71
Replacing the Front and Back Flaps
72
Replacing the Side Flaps
73
Cleaning, Checking and Replacing the Solenoid Valve
74
Cleaning the Solenoid Valve
75
Checking And/Or Replacing the Solenoid Valve
77
Controlling And/Or Replacing the Compensator
81
Tanks - Suction Assembly
84
Checking the Draw of the Suction Motor
85
Replacing the Suction Motor
90
Squeegee and Actuator Assembly
94
Checking the Current Draw of the Electromechanical Actuator
95
Checking Squeegee Actuator Operation Manually
98
Replacing the Squeegee Actuator
102
Checking Motor and Internal Micro Switch Operation
108
Replacing the Squeegee Blades (Flaps)
114
Regulating the Squeegee
117
Detergent Hoses/Pump Cleaning - Filters
119
Cleaning the Filters
120
Water Fill Filter
120
Output Water Filter
121
Replacing the Output Water Filter
123
Checking Operation of the Detergent Pump + Solenoid Valve
125
Checking the Output Voltage (V)
125
Checking Operation of the Solenoid Valve
126
Checking Operation of the Detergent Pump
128
Checking Detergent Pump Operation Directly
130
Checking Operation of And/Or Replacing the Float Switch
133
Dirty Water Tank Float Switch
133
Detergent Tank Float Switch
134
Checking the Detergent Tank Float Switch
135
Replacing the Detergent Tank Float Switch
139
Checking the Dirty Water Tank Float Switch
140
Replacing the Dirty Water Tank Float Switch
144
Drive Assembly
146
Drive Circuit Board
147
Checking Electrical Connections and the Presence of Voltage
148
Checking the Input Signals on the Drive Logic Board
150
Replacing the Drive Circuit Board
153
Drive Motor Wheel
154
Checking and Replacing the Motor Wheel Carbon Brushes
155
Checking the Carbon Brushes
159
Checking Functioning of the Thermal Cutout
160
Checking with the Motor Dismounted
160
Checking and Replacing the Thermal Cutout
162
Check with the Motor Mounted
162
In Case of Emergency
164
Replacing the Rubber Tyred Motor Wheel Ring
165
Replacing the Complete Drive Motor (Motor Wheel)
170
Accelerator Pedal
173
Replacing the Accelerator Pedal
174
Replacing the Accelerator Potentiometer And/Or Micro Switch
175
Brake Pedal
179
Replacing the Pedal / Adjusting the Brakes
180
Checking, Adjusting And/Or Replacing the Micro Switch
182
Slow Steering Sensor
184
Replacing And/Or Regulating the Steering Sensor
185
Circuit Boards, Wiring
186
Control Panel Board
187
Connecting the Chem-Dose Switch on the Control Panel
188
Functions Circuit Board
189
Removing the Functions Circuit Board
190
Important Electrical Components
191
Contactor TL1 (Functions) and TL2 (Drive)
192
Disassembling And/Or Replacing the Chem-Dose Pump
193
Wiring Diagram
195
Error Codes - Troubleshooting
196
Curtis Drive Board Alarms
197
Functions Board Alarms and Display
199
The Display Does Not Light up
201
The Machine Moves Forward Slowly
201
The Machine Does Not Move Forwards
202
The Brushes Do Not Rotate
202
The Head Does Not Descend
203
There Is no Suction
203
The Suction Motor Is Not Working
204
The Squeegee Does Not Move (up and Down)
204
No Water Is Delivered
205
Advertisement
Advertisement
Related Products
IPCGansow CT 230 BT 105
IPCGansow 1010 S
IPCGansow 1020 S
IPCGansow Cleantime 60
IPCGansow JET 1000 S
IPCGansow Categories
Floor Machine
Blower
More IPCGansow Manuals
Login
Sign In
OR
Sign in with Facebook
Sign in with Google
Upload manual
Upload from disk
Upload from URL