Sign In
Upload
Manuals
Brands
Heyl Manuals
Measuring Instruments
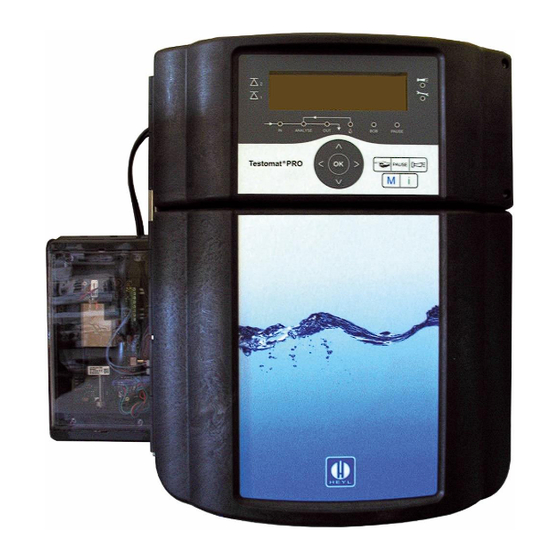
Testomat PRO Ca SELF CLEAN
Heyl Testomat PRO Ca SELF CLEAN Manuals
Manuals and User Guides for Heyl Testomat PRO Ca SELF CLEAN. We have
1
Heyl Testomat PRO Ca SELF CLEAN manual available for free PDF download: Operating Instructions Manual
Heyl Testomat PRO Ca SELF CLEAN Operating Instructions Manual (90 pages)
Process titrator for calcium hardness
Brand:
Heyl
| Category:
Measuring Instruments
| Size: 4 MB
Table of Contents
Table of Contents
2
1 General Information
6
Use and Storage of the Instruction Manual
6
Symbols
6
Warnings and Safety Instructions in this Manual
6
Pictograms
7
Typographical Highlights
7
Limitation of Liability
7
Failure to Comply with the Instructions
7
Intended Use
7
Qualification of Personnel
8
Use of Non-Approved Spare Parts
8
Unauthorised Conversions
8
2 Your Safety
9
Personal Injury
9
Property Damage
10
3 Technical Data
11
Available Reagents
12
Other Operational Requirements
12
4 Setup and Function
14
Internal Structure of Testomat PRO Ca SELF CLEAN
14
Product Description
15
Functions of the Control and Display Elements
16
Switching the Testomat PRO Ca SELF CLEAN On/Off
16
Display Functions
17
Control and Function Keys
18
Meaning of the Symbols in the Menu
19
Control Elements on the Control Board
19
Relay Outputs
20
Signal Inputs and Signal Outputs
20
Stop Input
20
External Delete (External Acknowledge)
21
Water Meter Input
21
Measuring Point Switch-Over
22
Current Interface 0/4 - 20 Ma
22
Calculation of Output Currents
22
Serial Interface
23
Description of the SD Card Functions
25
Operating Elements of the Microclip Micro Dosing Pump
26
5 Prepare the Product for Use
27
Installation
27
Remove the Packaging Material
27
Delivery Includes
27
Requirements for the Installation Site
27
Assemble Equipment
27
Assembly of the Micro-Dosing Pump on the Testomat PRO Ca SELF CLEAN
29
Connecting the Water Intake
30
Connecting the Water Drain
31
Expose Cable Bushing
31
Connect Mains Voltage
32
Connect System Components
34
Connect Inputs and Outputs
36
Connect Current Interface
38
Insert SD Card
38
Commissioning
39
Insert Reagent Bottle
39
Open Water Intake
40
Operation after Idle Times
40
6 Instrument Setting and Data Entry
41
Enter Program Values
41
Structure of the Service Menu
41
Structure of the Information Menu I
44
Structure of the Basic Program
44
Set up Password Protection
46
Set Date and Time
46
Select Language
47
Setup OLED
47
Select Operating Mode
47
Configure Interval Pause
48
Select Measurement Value Unit
49
Set Limit Value Monitoring
49
Input Operating Mode of LV1 and LV2 Limit Value Outputs
49
Switching Functions, Multiple Limit Value Exceedance
50
Set Programmable Switching Output aux
51
Input Flush Time
51
Select Water Meter
52
Measuring Points
52
Set Dosing of Reagent B
52
Program Alarm (Fault Signal Output)
53
Set up Signal Inputs and Outputs
54
Set up Current Interfaces 0/4 - 20 Ma
54
Set up RS232 Interface
54
Set up the SD Card Functions
55
Restore Factory Default Setting
55
Cleaning Function
56
Venting the Microclip Dosing Pump
56
7 Connect to Network
57
Perform Network Settings
57
Checklist for Network Configuration
57
Web Interface Configuration Menus
59
Addresses of the Web Interface
60
Using Monthly Data Display
60
Using the Current Measured Value Display
60
Set up E-Mail Dispatch
61
File Access with FTP
61
File Access with Web Interface
62
Evaluating the CSV Files on the PC
62
Message Forwarding to TCP/IP Port
63
Perform Network Logger Maintenance
63
Further Documentation & Help
63
8 Operation
64
Normal Operation
64
Operational Monitoring: Alarm/Message
64
Firmware Update
65
Menu-Driven Firmware Update
65
Manual Firmware Update
66
Firmware Update Ethernet Converter
67
Troubleshooting and Repair
67
Further Possible Errors
71
Error Messages after Self-Test
72
Firmware Update Error List
73
Troubleshooting Network Connection
75
9 Servicing and Maintenance
76
Leak Resistance Test
76
Replacing Reagents
77
Cleaning Measuring Chamber and Sight Glasses
77
Cleaning the Filter Housing
78
Replacing Fuses
78
Replacing the Backup Battery
81
Maintenance of Pump Head
82
Replacing the Pump Head
82
Reset Counter
82
10 Accessories, Consumables, Spare Parts
83
Spare Parts
83
Accessory
84
Consumables
84
11 Information on the Repair of Products and Exchange of Parts
85
12 Required Information When the Product Is no Longer Needed
86
Check List Testomat PRO Ca SELF CLEAN
87
Device Settings Testomat PRO Ca SELF CLEAN
88
Conformity Declaration
89
Advertisement
Advertisement
Related Products
Heyl Testomat PRO FE
Heyl Testomat ECO
Heyl Testomat EVO TH series
Heyl Testomat EVO TH 2005
Heyl Testomat EVO TH 2100
Heyl Testomat EVO TH 2025
Heyl Testomat EVO TH 2250
Heyl Testomat 808 Series
Heyl Testomat EVO TH
Heyl Testomat 2000
Heyl Categories
Measuring Instruments
Controller
Media Converter
Test Equipment
Analytical Instruments
More Heyl Manuals
Login
Sign In
OR
Sign in with Facebook
Sign in with Google
Upload manual
Upload from disk
Upload from URL