Sign In
Upload
Manuals
Brands
handi quilter Manuals
Sewing Machine
Pro-Stitcher QM30010-2
handi quilter Pro-Stitcher QM30010-2 Manuals
Manuals and User Guides for handi quilter Pro-Stitcher QM30010-2. We have
1
handi quilter Pro-Stitcher QM30010-2 manual available for free PDF download: User Manual
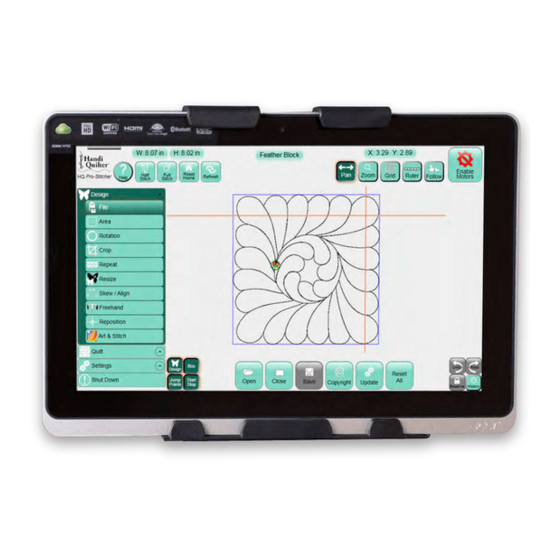
handi quilter Pro-Stitcher QM30010-2 User Manual (139 pages)
Brand:
handi quilter
| Category:
Sewing Machine
| Size: 6.87 MB
Table of Contents
How to Use this Manual
2
Table of Contents
3
Important Safety Instructions
8
Www.handiquilter.com Table of Contents |
8
1 Table of Conents
8
3 Installation Instructions
12
Congratulations on Your HQ Pro-Stitcher® Purchase
12
Grounding
13
Parts List
13
Installation (HQ Fusion and HQ Avanté)
16
Installation of the X-Rack and Y-Rack
16
To Install the X-Rack
16
To Install the Y-Rack
18
Y-Encoder Circuit Board Replacement
19
To Replace the Y-Encoder
19
To Set up the HQ Pro-Stitcher Carriage
21
To Attach the Tablet Computer
24
Installation (HQ Sixteen and HQ Avanté with 4-Wheel Carriage)
27
Set Frame Height
27
If You Have a Portable Professional Frame
27
If You Have an HQ Studio Frame
28
Installation of the X-Rack and Y-Rack
28
To Install the X-Rack
28
To Install the Y-Rack
30
Y-Encoder Assembly Installation (HQ Sixteen Only)
31
Install the Power Cord Retaining Clamp (HQ Sixteen Only)
32
C-Pod Replacement (HQ Sixteen Only)
33
Set up the New Carriage
34
To Turn on and Shut down HQ Pro-Stitcher
40
To Turn on HQ Pro-Stitcher
40
To Shut down HQ Pro-Stitcher
40
Getting Started with HQ Pro-Stitcher
41
To Move the Quilting Machine after the Software Has Been Loaded
41
To Use the USB Flash Drive
41
To Use an External Keyboard
42
4 HQ Pro-Stitcher® Overview
44
Handlebar Control
44
Enable or Disable the Carriage Motors
45
Overview of the HQ Pro-Stitcher Screen
45
Menu Options
45
Panel Buttons
46
Work Area
46
Selected Vs. Non-Selected Buttons
47
Gray Buttons
47
Top Toolbar Buttons
47
To Get On-Screen Help
48
To Cycle the Needle up or down to Form a Half Stitch
48
To Cycle the Needle to the up Position
48
To Display the On-Screen Grid
48
To Quickly Position the Design and Crosshairs on the Screen
49
To Move the On-Screen View
49
To View the Design Larger or Smaller
49
To Move the Design on the Screen
49
To Select One or more Designs
50
To Select a Single Design
50
To Choose and Group Multiple Designs
50
To Name a Group
51
To Change the Stitch Order of Multiple Designs
51
To Measure Distances in a Design or on the Quilt
51
Crosshairs
52
Art & Stitch
54
5 Design Menu
58
Design History
58
Baseline
59
To Baseline a Design
59
To Work with Design Files
61
To Find the Key Code for Encrypted Files
61
Open, Close, Save, and Duplicate Design Files
61
To Access Recently Used Designs
61
To Load a Design from the Design Library
61
To Save a Design
62
To Save a Group as a Design or a Project
62
To Save Designs or Projects to a New Folder
63
To Duplicate a Design
63
To View Design Information
63
To Load a Pro-Stitcher Software Update
64
To Return a Design to Its Original Settings
64
Create and Use Areas
65
To Clear an Area
65
To Create a Rectangular Area Using 2 Corner
65
To Override the Width or Height of an Area
66
Multi-Point
67
To Create an Area with Multiple Points
67
To Keep Track of How Many Points You Have Marked
67
Rotate Designs
68
2-Point Rotation
69
To Rotate a Design According to an Angle on the Quilt
69
To Fine Tune the Angle of Rotation
70
Rotation of Repeated Designs
71
To Rotate Repeated Designs Individually
71
To Rotate Repeated Designs as a Group
71
Crop Menu
72
Treatment of Loose Ends
72
To Perform a Tieoff at Jump Points
72
To Stitch between Jump Points
72
Crop Designs Based on Areas or Start and End Points
73
To Crop Everything Outside the Defined Area
73
To Crop Everything Inside the Defined Area
73
To Isolate and Crop a Portion of a Design
73
Repeat Menu
75
Repeat Main
75
To Repeat a Design
75
To Change the Size of the Gap between Repeated Designs
75
To Stretch a Design to Fill an Area
76
To Calculate the Optimal Number of Repeats for an Area
76
Point 2 Point
76
To Join Horizontally Repeated Designs
76
To Join Vertically Repeated Designs
77
Repeat Wrapping
77
To Wrap Rows
78
To Wrap Columns
78
To Horizontally Wrap the Design Window
79
To Vertically Wrap the Design Window
79
To Manually Wrap the Design Window
80
Treatment of Jump Points
80
Resize Menu
81
To Resize a Design
81
Skew / Align Menu
83
To Horizontally Align Blocks Within an Area
83
To Align a Triangle Design
84
To Skew a Design to Fit a Convex Area
85
To Skew a Design to Fit a Concave Area
86
Freehand Menu
87
To Switch to Free-Motion Quilting
87
To Switch to Free-Motion Quilting
88
Record the Movements of Your Freehand Quilting
88
To Record Freehand Motion
88
To Mark and Record Straight Lines
89
To Add Jumps to Your Recorded Design
89
Reposition Menu
90
To Position a Design to the Intersection of the Crosshairs
90
To Position a Design Based on the Home Location
92
To Position a Design Based on the Center Point
92
To Position a Design's Start Point on the Quilt
92
To Position a Design's End Point on the Quilt
92
To Reposition a Design Up, Down, Left, or Right
93
Swap Start/End
93
To Swap the Quilting Start and End Points
93
7 Quilt Menu
94
To Choose between Stitching or Tracing the Design, Bounding Box, or Area Perimeter
94
To Immediately Stop the Machine from Quilting
94
Before You Stitch the Design on the Quilt
95
To Verify the Position of the Design's Bounding Box on the Quilt
95
To Verify the Position of the Defined Area on the Quilt
95
Move the Quilting Machine with Pro-Stitcher
96
To Change the Speed at Which the Machine Moves
96
To Move the Quilting Machine from Within Pro-Stitcher
96
To Stitch a Straight Line Using the Move Buttons
96
Pro-Stitcher as a Horizontal or Vertical Channel Lock
97
To Stitch a Horizontal or Vertical Line with the Channel Lock
97
Adjust Settings While Quilting
97
To Adjust Commonly Used Stitch Settings
98
To Adjust the Quilting Speed While Quilting
98
To Adjust the Auto Jump Threshold While Quilting
98
To Adjust Stitches Per Inch While Quilting
99
To Manage the Tieoff Settings While Quilting
99
To Change the Thread Pullup Settings While Quilting
100
To Change the Pause Delay Settings While Quilting
100
Adjust Settings While Quilting Is Paused
101
To Pause Quilting
101
To See How Far into a Design the Machine Has Stitched
102
Change the Start or End Point of a Design
102
To Begin Quilting from a Point Other than the Design's Start Point
103
To End Quilting at a Point Other than the Design's End Point
103
To Adjust Start and End Points with the Scroll Bars
103
To Set a Start or End Point to a Jump Point in the Design
103
8 Settings Menu
106
Control How Fast Pro-Stitcher Operates
106
To Set the Default Speed
106
Control How Pro-Stitcher Handles Jumps
106
To Set the Auto Jump Threshold
107
Control the Number of Stitches Per Inch
107
To Set the Stitches Per Inch
107
Control How Pro-Stitcher Performs Tie-Offs
108
To Have Pro-Stitcher Perform a Tie-Off at the Beginning of Stitching
108
To Have Pro-Stitcher Perform a Tie-Off at the End of Stitching
108
To Indicate How Many Tie-Off Stitches Pro-Stitcher will Perform
108
To Set the Length of each Tie-Off Stitch
108
To Select the Method of Tie-Off Stitch: Micro or Tack
109
Control How Pro-Stitcher Handles Bobbin-Thread Pullups
109
To Turn on Bobbin-Thread Pullups
109
To Turn on Automatic Bobbin-Thread Pullups
110
Control the Delay Following a Bobbin-Thread Pullup
110
To Set the Pause Delay
110
To Set Pause Delay in Seconds
110
To Set Pause Delay in Inches
110
Advanced Menu
111
General Options
111
To Create a Simulation License
111
To Turn on or off the Thread Break Sensor (HQ Fusion Machines Only)
113
To Verify Settings before Quilting
113
Communications Options
113
To Stop Communications between Pro-Stitcher and the Quilting Machine
114
To Reconnect Motors
114
To Reconnect the Machine
114
Speed Profile
115
To Set Your Speed Profile
115
Motor Option
115
When to Adjust the Motor Torque Limit
115
To Adjust the Motor Torque Limit
116
Logging Options
116
About
116
Shut down
116
To Shutdown All Software and Power down the Computer
116
To Shutdown the Software and Computer, and then Start up Again
117
To Exit Pro-Stitcher but Keep the Computer Running
117
To Restart the Pro-Stitcher Software from Windows
117
9 Troubleshooting
118
10 Warranty
124
HQ Pro-Stitcher Limited Warranty
124
Warranty Exclusions
124
Specific Exclusions
125
Exclusive Remedy
125
Warranty Claims
126
Shipping Cost
126
Product Service and Maintenance
126
Warranty Registration Card
128
11 Handi Quilter Printouts
132
12 Tutorials
134
13 Designs
136
14 My Ideas
138
Advertisement
Advertisement
Related Products
handi quilter HQ Sweet Sixteen QM30270
handi quilter Avante QM30239
handi quilter HQ Sweet Sixteen QM30277
handi quilter Avante QM30235
handi quilter Sweet sixteen QM30271
handi quilter QM30269
handi quilter Fusion QM32469
handi quilter HQ 24 Fusion
handi quilter HQ Amara 20
Handi-Quilter HQ Forte 24
handi quilter Categories
Sewing Machine
Sewing Machine Accessories
Indoor Furnishing
More handi quilter Manuals
Login
Sign In
OR
Sign in with Facebook
Sign in with Google
Upload manual
Upload from disk
Upload from URL