Sign In
Upload
Manuals
Brands
G&D Manuals
Extender
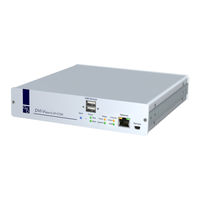
DVI-Vision-CAT-MC4-ARU
G&D DVI-Vision-CAT-MC4-ARU Manuals
Manuals and User Guides for G&D DVI-Vision-CAT-MC4-ARU. We have
1
G&D DVI-Vision-CAT-MC4-ARU manual available for free PDF download: Installation And Operating Manual
G&D DVI-Vision-CAT-MC4-ARU Installation And Operating Manual (140 pages)
DVI-Vision-CAT series
Brand:
G&D
| Category:
Extender
| Size: 1 MB
Table of Contents
Deutsch
4
Table of Contents
4
Sicherheitshinweise
6
Die DVI-Vision-CAT-Serie
8
Verfügbare Gerätevarianten
8
Lieferumfang
9
Installation
10
Vorbereitung
10
Installation des Rechnermoduls
11
Installation des Arbeitsplatzmoduls
15
Inbetriebnahme
18
Startvorgang
18
On-Screen-Display des Arbeitsplatzmoduls
18
Erstkonfiguration der Netzwerkeinstellungen
19
Konfiguration der Netzwerkschnittstelle
19
Konfiguration der Globalen Netzwerkeinstellungen
20
Bedienung
21
Konkurrierende Bedienung des KVM-Extenders
21
Exklusive Bedienung des KVM-Extenders
21
Steckdose Schalten
22
Verwendung des Reset-Tasters
23
Wiederherstellung der Standardeinstellungen
23
Temporäre Deaktivierung der Netzfilterregeln
24
Konfiguration
25
Übersicht der Funktionen und Standardeinstellungen
25
Bedienung des On-Screen-Displays am Arbeitsplatz
26
Anzeige des On-Screen-Displays am Arbeitsplatz
26
Aufbau des On-Screen-Displays
26
Bedienung des On-Screen-Displays
27
Grundlegende Bedienung der Webapplikation
28
Start der Webapplikation
28
Sicherheitshinweise des Webbrowsers
28
Benutzerauthentifizierung Gegenüber der Webapplikation
29
Konfigurationseinstellungen
30
Änderung des Hotkeys
30
Änderung der OSD-Taste
31
On-Screen-Display mit Doppeltem Tastendruck Starten
32
Änderung der Exklusiv-Taste
33
Änderung der Zeitspanne der Eingabesperre
34
Berechtigung für Exklusiven Zugriff des Arbeitsplatzes
35
Änderung der Videobetriebsart der Arbeitsplätze
36
Auswahl des EDID-Modus des KVM-Extenders
38
Verwendung des Freeze-Modus
39
USB-HID-Modus Auswählen
41
Unterstützung für Spezialtastaturen
44
Änderung des Scancode-Sets einer PS/2-Tastatur
45
Tastatur für Start des Arbeitsplatzmoduls Erforderlich
47
Wartezeit des Bildschirmschoners Einstellen
48
Tastaturlayout für Eingaben Innerhalb des Osds Auswählen
49
Wiederherstellung der Standardeinstellungen
50
Farbe der Informationseinblendung Ändern
51
Anzeige der Informationseinblendung
52
Transparenz des On-Screen-Displays Einstellen
53
Position der Informationseinblendung Ändern
54
Position des On-Screen-Displays Ändern
54
Weiterführende Informationen
55
Empfehlungen zu den Twisted-Pair-Kabeln
55
Übertragung der KVM-Daten (Transmission)
55
Übertragung der USB-Daten der ARU2-Variante
56
Unterstützung Beliebiger Grafikauflösungen
56
Übertragenen Bildda
56
Chen Somit jenen des Grafikkartenausgangs
56
Weitergegeben. Frequenzen und Bildlage des Signals am Rechnermodul Entspre
56
DDC-Weiterleitung mit Cache-Funktion
57
Pin-Belegung der RS232-Buchse/Schnittstelle
58
Bedeutung der Leds an der Frontseite
59
Statusanzeigen
59
Bedeutung der Leds an der Rückseite
60
Allgemeine Eigenschaften der Serie
61
Technische Daten
61
Spezifische Eigenschaften der Single-Channel-Geräte
63
Spezifische Eigenschaften der Multi-Channel-Geräte
64
Strom- und Leistungsaufnahme
67
About this Manual
70
English
72
Safety Instructions
74
Available Variants
76
The DVI-Vision-CAT Series
76
Package Contents
77
Installation
78
Preparation
78
Installing the Computer Module
79
Installing User Modules
83
On-Screen Display of the User Module
87
Start-Up
87
Starting Process
87
Configuring the Network Interface
88
Initial Configuration of the Network Settings
88
Configuring Global Network Settings
89
Concurrent Operation of the KVM Extender
90
Operating the KVM Extender Exclusively
90
Operation
90
Switching Power Outlets
91
Resetting the Default Settings
92
Using the Reset Button
92
Temporarily Deactivating the Netfilter Rules
93
Configuration
94
Overview of Functions and Default Settings
94
Operating the On-Screen Display at the Console
95
Showing the On-Screen Display at the Console
95
Layout of the On-Screen Display
95
Operating the On-Screen Display
96
Basic Operation of the Web Application
97
Starting the Web Application
97
Security Advice for Web Browsers
97
User Authentication against the Web Application
98
Configuration Settings
99
Changing Hotkeys
99
Changing the OSD Key
100
Opening the On-Screen Display Via Double Keypress
101
Changing the Exclusive Key
102
Changing the Time Span of the Input Lock
103
Right for Exclusive Access to the Console
103
Changing the Video Mode of Consoles
105
Selecting the EDID Mode of the KVM Extender
106
Freeze Mode
107
Selecting the USB-HID Mode
108
Support of Special Keyboards
112
Changing the Scancode Set of PS/2 Keyboards
112
Keyboard Required to Start the User Module
114
Adjusting the Waiting Period of the Screensaver
115
Selecting a Keyboard Layout for Inputs Via OSD
116
Resetting the Default Settings
117
Changing the Colour of the Information Display
118
Information Display
119
Adjusting the Transparency of the On-Screen Display
120
Changing the Position of the Information Dispaly
121
Changing the Position of the On-Screen Display
121
Further Information
122
Recommendations for Twisted Pair Cables
122
Transmission of KVM Data
122
Transmission of USB Data of ARU2 Variants
123
Support of any Resolution
123
DDC Transmission with Cache Function
124
Pin Assignment of the RS232 Socket/Interface
125
Meaning of the Leds on the Front Panel
126
Status Leds
126
Meaning of the Leds on the Back Panel
127
General Features of the Series
128
Technical Data
128
Specific Features of Single-Channel Devices
130
Specific Features of Multi-Channel Devices
131
Current and Power Consumption
134
Advertisement
Advertisement
Related Products
G&D DVI-Vision-CAT-AR
G&D DVI-Vision-CAT-ARU
G&D DVI-Vision-CAT-ARU2
G&D DVI-Vision-CAT-MC2-AR
G&D DVI-Vision-CAT-MC2-ARU2
G&D DVI-Vision-CAT-MC3-AR
G&D DVI-Vision-CAT-MC3-ARU
G&D DVI-Vision-CAT-MC3-ARU2
G&D DVI-Vision-CAT-MC4-AR
G&D DVI-Vision-CAT-MC4-ARU2
G&D Categories
Switch
Extender
Network Hardware
Control Unit
Power Supply
More G&D Manuals
Login
Sign In
OR
Sign in with Facebook
Sign in with Google
Upload manual
Upload from disk
Upload from URL