Sign In
Upload
Manuals
Brands
Fukuda Manuals
Medical Equipment
CardiMax 4
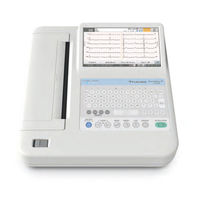
User Manuals: Fukuda CardiMax 4 Electrocardiograph
Manuals and User Guides for Fukuda CardiMax 4 Electrocardiograph. We have
1
Fukuda CardiMax 4 Electrocardiograph manual available for free PDF download: Operation Manual
Fukuda CardiMax 4 Operation Manual (236 pages)
ELECTROCARDIOGRAPH
Brand:
Fukuda
| Category:
Medical Equipment
| Size: 7 MB
Table of Contents
Table of Contents
3
Introduction
11
Preface
11
About this Manual
12
Composition of this Manual
12
Expression Used in this Manual
12
An Example of Safety Symbol
13
Reminders to Use the Device Safely
13
Safety Notations
13
Symbols on the Device
13
Safety
14
Precautions When Using with Other Device
15
Application to Heart
16
Connecting the Power Cable
16
System Components (Accessories)
16
Leakage Current
17
Precautions for Safe Operation of Medical Electrical Equipment
17
Precautions Concerning the LAN
19
Precautions for Battery Pack
19
Storage, Transportation, and Disposal
20
Cleaning and Disinfection
21
Precautions for Safe Operation under Electromagnetic Disturbances
21
Precautions Concerning Automatic Analysis of ECG
22
Precautions Concerning Interpretation
22
Troubleshooting
23
Guidance on Electromagnetic Disturbances
24
Battery
28
Messages and Remedies
28
Thermal
28
Communication
29
Examination
29
File
29
Chapter 1 General Description
31
Features of this ECG
31
Intended Purpose
31
Indication for Use
31
Convenient Functions
32
Names of Parts and Their Functions
34
Types and Functions of Operation Panel Keys
36
How to Read the LCD
37
How to View the Icons
38
Basic Operation Procedure
40
Display Operation
40
Changing the Examination Type
42
Displaying the Menu
42
Character Entry
43
Chapter 2 Installation
45
Notes on Installation Site
45
Using the Optional Battery
46
Precautions When Handling a Battery
46
Charging the Battery
47
Operating by Battery Power
48
Checking the Remaining Battery Power
48
Connecting the Cables
49
Turning ON/OFF the Power
51
To Turn on the Power
51
To Turn off the Power
52
Loading the Recording Paper
52
Connecting to the Network
55
Example of Network Configuration
55
Configuring Network Settings
56
Connecting Optional Devices
57
Chapter 3 Preparation before Examination
59
Attaching the Electrodes
59
Before the Attachment
59
Attachment
60
Performing Electrode Check
61
Checking the Date and Time
61
Selecting the Filters
62
Setting the Sensitivity
63
Check Carefully
63
Chapter 4 Entering Patient Information
65
Patient Data Categories
65
Entering Patient Information
65
Loading Information from the DMS (Master ID)
71
Using Information on SD Card
72
Registering the Patient Information
72
Retrieving the Patient Information Using the ID Number
73
Retrieving the Patient Information by Specifying the Patient
74
Searching the Patient Information
74
Deleting the Unnecessary Patient Information
75
Chapter 5 12-Lead Examination
79
Type of Waveform Recording/Printing
79
Recording/Printing Automatically
80
Preparation
80
Starting Printing
80
Examples of Printing
82
Function that Can be Used after Measurement
85
Correcting the Patient Information
86
Manual Recording/Printing
86
Starting Manual Recording/Printing
86
Examples of Printing
88
Printing Waveforms from Several Seconds before (Review Recording/Printing)
89
Principle of Review Printing
89
How to Perform Review Printing
89
Printing Commentary
90
What Is Commentary
90
Setting to Print Commentary
90
Printing
91
Examples of Printing
92
Extending Printing
92
Auto Extension
92
Optional Extension
92
Examples of Printing
93
Printing the Time Comparison Report
93
Examples of Printing
94
Other Functions
94
Printing Marks
94
Resetting the Waveform
95
Continuously Printing the same Lead
95
Printing Two or more Copies of the same ECG Data
95
Chapter 6 12-Lead Examination (Advanced Function)
97
Checking the Waveforms Using the Freeze Function
98
Freezing the Waveforms
98
Checking the Saved Waveforms
101
To Perform Auto Printing
102
To Perform Manual Printing
103
Recording the ECG Waveforms at Rest and after Exercise
105
Details of the Examination
105
To Start Recording
106
Examples of Printing
107
ACS Diagnostic Support Function
109
Required Settings
110
Entering the ACS Inquiry When Abnormal Finding
110
Entering the ACS Inquiry before the Examination
111
Entering the ACS Inquiry from the Analysis Result Display
112
Functions on the ACS Analysis Result Display
113
Printing Reports
113
Examples of Printing
114
Explanation of the Analyzed Result
115
Explanation of the ACS Summary Report
116
Explanation of the ACS Guide Report
116
Auto Capture Function
117
Required Settings
118
Waveform Acquisition
118
R Wave Detection Lead Auto Switch Function
119
Wave Comparison Report
119
Examples of Printing
120
Chapter 7 Arrhythmia ECG Examination
121
Required Settings
121
Setting the Examination Lead
121
Setting the Waveform Recording Time
122
Printing While Measuring Arrhythmia
122
Starting Recording/Printing
122
Function that Can be Used after Measurement
124
Aborting the Examination
124
Examples of Printing
125
Chapter 8 Rhythm Measurement
127
Printing While Measuring Rhythm Waveform
127
Functions that Can be Used after Examination
129
Examples of Printing
131
Chapter 9 File Transfers
133
Functions
133
Handling Media
133
Precautions When Using the SD Card/Usb Memory
133
Files and Folders
134
Initializing the Data
134
Saving Examination Data
135
How to Save Data
135
Saving Data Automatically
135
Saving Data Manually (Simple Operation)
136
Saving Manually (File Utility Operation)
136
Saving the Reports in DICOM Format
138
Procedure to Save in DICOM Format
138
Saving Automatically
138
Saving Manually (Simple Operation)
138
Saving Manually (File Utility Operation)
139
Saving the Reports in PDF Format
140
Procedure to Save in PDF Format
140
Saving Automatically
140
Saving Manually (Simple Operation)
140
Printing the Reports on External Printer
142
Connecting the External Printer
142
Procedure to Print on the External Printer
142
Printing Automatically
142
Printing Manually (Simple Operation)
143
Reading Examination Data
144
Loading
144
Searching Data
145
Printing Thermal Reports
146
Printing the Data List
147
Deleting Examination Data
147
Deleting Data from the List
147
Restoring Deleted Data
148
Correcting Examination Data
149
Copying Examination Data
150
Naming Folders
151
Changing Folder to Save Data
152
Communication History
153
Searching Communication History Data
153
Erasing the Communication History
155
Examples of Printing
155
Chapter 10 DICOM Work List
157
Functions
157
Preparing for Communication with External Device
157
Connecting the External Device
157
Settings Required for Communication
158
Selecting Work List and Conducting Examination
159
Searching the Work List Information
160
Fixing the Work List by Connecting the ID Reader
161
Chapter 11 Ordering System
163
Functions
163
Preparing for Communication with External Devices
164
Connecting the Communication Device
164
Settings Required for Communication
164
Selecting Order Information and Conducting Examination
166
Searching Order Information
167
Displaying Order Information Using ID Reader
168
Displaying Comments
169
Chapter 12 Printing Daily Report
171
Contents of Daily Report
171
Printing Daily Report
171
Chapter 13 Settings
173
Overview of Settings
173
Window Operation Procedure
173
ECG Control
174
General
175
Lead/Print
175
Sensitivity
176
Custom Key
176
Buzzer Control
176
Printer Output
177
Localization
177
Patient Information
177
Patient
178
Dept
179
Medicine-Tech. Name
180
File
181
General
181
Storage Conditions
182
Pdf
182
Communication
182
General
183
DMS Settings
183
Ordering
184
Dicom
184
Shared Folder
185
Printer
185
External Device
186
ID Reader 1 and 2
186
12-Lead Examination
187
General
187
File
188
Freeze
190
Filter
191
12-Lead Manual Printing
191
12-Lead Auto Printing
191
Extra Recording
194
Arrhythmia ECG Examination
195
General
195
Filter
195
File
196
Auto Printing
196
Printer Output/Pdf
196
Rhythm Measurement
197
General
197
Filter
197
File
197
Auto Printing
198
Printer Output/Pdf
198
Post-Load Examination
198
General
199
Freeze
199
Filter
200
Rest (Auto Print)
200
Post (Auto Print)
203
Post (Periodic Print)
205
Post (Other)
208
Extra Recording
208
Changing Functions Keys on the Examination Screen
210
Saving and Printing the Settings
211
Saving Settings on a SD Card
211
Printing Settings
211
Chapter 14 Maintenance and Inspection
213
Daily Check
213
Daily Check Procedure
213
Periodic Check
214
Periodic Check Procedure
215
Electrical Safety Inspection Procedure
217
Safety Specification of this Device
218
Earth Leakage Current
218
Touch Current
219
Patient Leakage Current (from Patient Connection to Ground)
219
Patient Leakage Current (When External Voltage Is Applied to SIP/SOP)
219
Patient Leakage Current (When External Voltage Is Applied to Patient Connection of Type F Applied Part)
220
Patient Auxiliary Current
220
Consumable Parts
221
Replacement Period of Consumable Parts
221
Cleaning and Disinfection
222
Cleaning the Device
222
Cleaning the Accessories
223
Correcting the Date and Time
224
Chapter 15 Appendix
225
Specifications
225
Standard Items
227
System Components
227
Combination Example of Medical and Non-Medical Equipments
229
Check List
230
Glossary
233
Advertisement
Advertisement
Related Products
Fukuda CardiMax Series
Fukuda CardiMax 2
Fukuda 8000 Series
Fukuda DS-8500
Fukuda FX-8400
Fukuda LX-8000 Series
Fukuda LX-8100
Fukuda LX-8100(G)
Fukuda Categories
Laser Level
Measuring Instruments
Medical Equipment
Transmitter
Test Equipment
More Fukuda Manuals
Login
Sign In
OR
Sign in with Facebook
Sign in with Google
Upload manual
Upload from disk
Upload from URL