evertz 7825DSK2-LG-3G Manuals
Manuals and User Guides for evertz 7825DSK2-LG-3G. We have 1 evertz 7825DSK2-LG-3G manual available for free PDF download: Instruction Manual
evertz 7825DSK2-LG-3G Instruction Manual (176 pages)
Logo Inserters and Downstream Keyer
Brand: evertz
|
Category: Computer Hardware
|
Size: 2 MB
Table of Contents
-
Overview17
-
Definitions19
-
Installation25
-
Mounting29
-
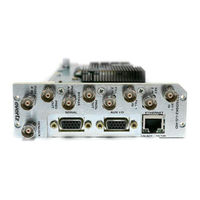
Video Inputs31
-
Video Tab52
-
Time Tab54
-
Network Tab58
-
Sub Net Mask58
-
Gateway58
-
MAC Address58
-
General Tab58
-
Port Entry59
-
General61
-
Controls61
-
MCP Controls62
-
Dsk Tab62
-
Matte Tab63
-
Target Logo67
-
Eas Tab72
-
Presets Tab74
-
Media Tab75
-
Parameters85
-
Settings86
-
Deleting a File114
-
Tcp/Ip127
-
Html Setup Page141
-
Main Index Page141
-
WAV File Playout144
-
METAR Setup Page145
-
Set Time Page146
-
Proxy Setup Page148
-
Reboot Page149
-
Specifications153
-
Video Reference153
-
Electrical154
-
Physical154
-
Overview157
-
Gpi Scripting165
-
Index173
Advertisement