Sign In
Upload
Manuals
Brands
Essilor Manuals
Edger
Mr Blue 2.0
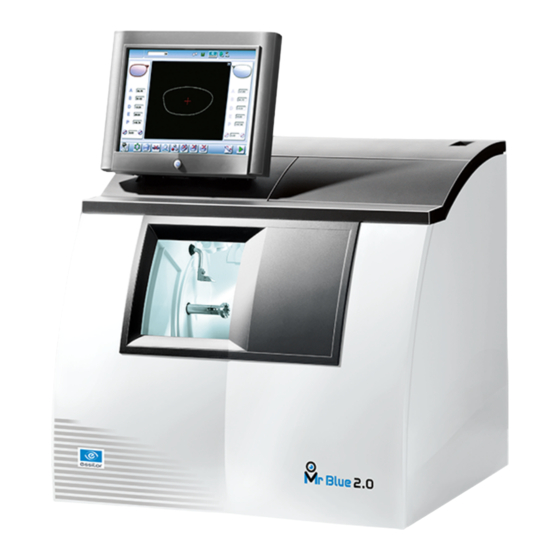
Essilor Mr Blue 2.0 Patternless Edger Manuals
Manuals and User Guides for Essilor Mr Blue 2.0 Patternless Edger. We have
2
Essilor Mr Blue 2.0 Patternless Edger manuals available for free PDF download: User Manual
Essilor Mr Blue 2.0 User Manual (152 pages)
Tracer-Centerer-Blocker
Brand:
Essilor
| Category:
Lathe
| Size: 7 MB
Table of Contents
Table of Contents
3
Introduction
7
First Steps with Mr. Blue
9
Descriptive Diagrams
11
Instructions for Use
13
Turning on the Tracer-Centerer-Blocker
13
Turning off the Tracer-Centerer-Blocker
14
Using the Touch Screen and Keypads
14
Tracing Screen
15
Tracing
17
The Tracing Environment
19
Menu Screen
19
Jobs and Working Modes
21
Displaying the Binocular View
21
Shape Management and Storage
22
Menu Screen
22
Job List
24
Creating a Job
24
Working in Current Job Mode (Job A)
25
Tracing a Rimmed Frame
26
Tracing a High-Base Frame
28
Tracing a Pattern, a Demo Lens or Recut Lens
30
Optical Tracing
30
Mechanical Tracing
32
Inputting the Curve and the Frame Base after Monocular Tracing
34
Centering a Lens
37
Centering Environment
39
Menu Screen
39
Centering Modes
41
Centering a Single Vision Lens
42
Centering a Single Vision Lens in Automatic Mode
43
Centering a Single Vision Lens Using Three Focimeter Dots
45
Centering a Single Vision Lens Using Re-Marked Micro-Engravings
48
Lens Fit" Function
50
Centering a Single Vision Lens in Manual Mode
51
Centering a Progressive Lens
52
Centering a Progressive Lens Using Re-Marked Micro-Engravings
53
Centering a Progressive Lens Using Manufacturer Markings Mode
55
Centering a Progressive Lens in Manual Mode
57
Centering Bifocal / Trifocal Lenses
58
Centering a Bifocal Lens in Automatic Mode
59
Centering a Bifocal Lens Using Three Focimeter Dots
61
Centering a Bifocal Lens in Manual Mode
62
Centering an Executive Lens
64
Centering an Executive Lens in Automatic Mode
65
Centering an Executive Lens Using Three Focimeter Dots
66
Centering an Executive Lens in Manual Mode
68
Centering a MID-Distance Lens
69
Centering a MID-Distance Lens Using Re-Marked Micro-Engravings
71
Centering a MID-Distance Lens Using Manufacturer Markings Mode
72
Centering a MID-Distance Lens in Manual Mode
74
Centering a Lens for a High-Base Frame
76
Markings Database
77
Menu Screen
77
Add a New Marking
78
Blocking a Lens
80
Modifying the Lens Shape
83
Menu Screen
85
Modifying a Shape
86
Enlarging, Reducing or Rotating a Shape
86
Free-Form Modification
88
Retouching a Shape
89
Archiving / Saving a Shape
90
Preparing a Drilled Job
91
Legend Screen
93
Configuring a Drilling Point
94
Creating a Drilling Point
96
Delete One Drilling Point
97
Dimensioning a Drilling Point
97
Adjusting the Position of a Drilling Point
98
Drilling Models
101
Importing a Model
101
Saving a Model
102
Preparing Lens Edging
103
Menu Screen
105
Edging Settings
106
Tracer-Centerer-Blocker Configuration
109
Configure the Tracer-Centerer-Blocker
111
Time, Date and Language
111
Connections
111
Screensaver
113
Customize the Tracer
113
Working Mode and Measurement Display
113
Decentration Mode
115
Action Bar
115
Restore the Factory Settings
118
Maintenance & Servicing
119
Carrying out the Autotests
121
Checks and Calibration
122
Checking and Calibrating the Tracing Table
122
Checking and Calibrating the Centerer-Blocker
124
Calibrating the Touch Screen
125
Make a Backup of the Jobs and the Display Configuration
127
Remote Control" Function
128
Statistics and Technical Log
131
Tracer Cycles
131
Technical History and Errors
131
Maintain and Clean the Tracer-Centerer-Blocker
132
Precautions Required
132
Cleaning the Protective Glass of the Hartmann Plate
133
Change the Roll of Pads
133
M'eye Sign and M'eye Touch
135
The "Engraving" Function on the Tracer-Centerer-Blocker
137
Using the "Creative Distortion" Function on the Tracer-Centerer-Blocker
137
Technical Data
139
Tracer-Centerer-Blocker
140
Environment
141
General Information
143
Symbols
144
Modifications
144
Declaration of Conformity
144
Copyright
144
Materials and Products
144
Safety Instructions
145
Electromagnetic Waves
145
License Agreement for M'EYE Sign™ (Engraving) Software
145
General Information
145
Accepted Use of the Software and Restrictions
145
Liability
145
Disclaimer of Warranties
145
Limited Liability
146
Termination
146
Applicable Law
146
Entirety of the Agreement; Authentic Language
146
Glossary
147
Advertisement
Essilor Mr Blue 2.0 User Manual (132 pages)
cutting edger
Brand:
Essilor
| Category:
Edger
| Size: 8 MB
Table of Contents
Table of Contents
3
Introduction
7
First Steps with Mr. Blue
9
Descriptive Diagrams
11
Using the Edger
13
Turning on the Edger
13
Switching off the Edger
14
Using the Touch Screen and Keypads
14
Edging Screen
15
Edging a Lens
17
Edger Working Environment
19
Menu Screen
19
Calling up a Shape
21
Lens Set-Up and Feeling
21
Perform a Beveling
23
Automatic Beveling
24
Legend Screen for Customized Bevels
25
Customized Beveling
26
Modifying the Bevel Curve
27
Modifying the Bevel Curve at a Particular Point
27
Displacing the Bevel Curve
28
High-Base Beveling
28
Captioned Screens
29
High-Base Beveling
31
Perform a Step Beveling (Option)
35
Mounting of the Step Bevel Tool
37
Captioned Screens
40
Adjusting the Step Bevel Finish
41
Perform a Step Bevel
46
Grooving
50
Automatic Grooving
51
Customized Groove Legend Screen
51
B. Customized Groove Legend Screen
52
Customized Grooving
53
Modifying the Groove Curve
54
Modifying a Point in the Groove Curve
54
Displacement of the Groove Curve
55
Flat-Edge Finishing
55
Mixed Job
56
Legend Screens
56
Configuring the Mixed Finish
57
Drilled Job
58
Automatic Drilling
59
Legend Screen for Customized Drilling
60
Customized Drilling
61
Polishing
61
Chamfering
62
Perform a Retouching
63
Configuring the Edger
65
Configure the Edger
67
Time, Date and Language
67
Connections
68
Screensaver
68
Adjusting the Precision of the Edger
69
Adjusting the Diameter of the Finished Lenses
69
Adjusting the Position of the Bevel and Groove
70
Adjusting the Diameter of Drill-Holes
70
Adjusting the Chamfer
71
Adjusting the Groove
72
To Adjust the Engraving
72
Adjust the Position of High-Base Bevel
73
Adjust the Position of the Step Bevel
74
Restore the Factory Settings
75
Maintenance & Servicing
77
IV. Maintenance & Servicing
77
Carrying out the Autotests
79
Calibrating the Touch Screen
80
Consult the Preventive Maintenance Screen of the "Small Tools" Module
80
Changing or Cleaning the Edger Tools
82
Changing or Cleaning the Mill Bit
83
Changing or Cleaning the Drill Bit
84
Changing the Engraving Tip
86
Statistics and Technical Log
88
Edger Cycles
88
Technical History and Errors
90
Maintaining and Cleaning the Edger
90
Clean the Door, the GMD Module and the Wheels (High-Base and Step Bevel)
91
Dressing the Wheels
91
A. Precautions Required
91
Using to M'eye Sign
93
To Activate to M'EYE Sign
95
To Carry out an Engraving
97
To Prepare the Engraving
97
Performing Engraving
107
Setting up the Favorites
111
To Produce a Creative Shape
112
On Essibox
112
On the Edger
119
Technical Data
121
Edger
122
Environment
123
General Information
125
Symbols
126
Modifications
126
Declaration of Conformity
126
Copyright
126
Materials and Products
126
Safety Instructions
127
Electromagnetic Waves
127
License Agreement for M'EYE Sign™ (Engraving) Software
127
General Information
127
Accepted Use of the Software and Restrictions
127
Liability
127
Disclaimer of Warranties
128
Limited Liability
128
Termination
128
Applicable Law
128
Entirety of the Agreement; Authentic Language
128
Glossary
129
Advertisement
Related Products
Essilor Delta 2 Classic
Essilor Delta 2 Drill
essilor MMW
Essilor Categories
Medical Equipment
Measuring Instruments
Edger
Laboratory Equipment
GPS
More Essilor Manuals
Login
Sign In
OR
Sign in with Facebook
Sign in with Google
Upload manual
Upload from disk
Upload from URL