Sign In
Upload
Manuals
Brands
ekwb Manuals
Computer Hardware
EK-AIO Elite 280 D-RGB
ekwb EK-AIO Elite 280 D-RGB CPU Cooler Manuals
Manuals and User Guides for ekwb EK-AIO Elite 280 D-RGB CPU Cooler. We have
1
ekwb EK-AIO Elite 280 D-RGB CPU Cooler manual available for free PDF download: Installation Manual
ekwb EK-AIO Elite 280 D-RGB Installation Manual (90 pages)
Brand:
ekwb
| Category:
Computer Hardware
| Size: 32 MB
Table of Contents
English
2
Table of Contents
2
1 Safety Precautions
3
2 Enclosed in this Package
4
Mounting Kit
4
3 Installation - Intel Lga-115X Socket
5
Step 1: Removing the Motherboard
5
Step 2: Attaching the Backplate to the Motherboard
5
Step 3: Attaching Mounting Screws
5
Step 4: Installing the Fans to the Radiator
5
Step 5: Removing the Cold-Plate Protective Cover
5
Step 6: Mounting Brackets Installation
5
Step 7: Pump Unit Installation
5
Step 8: Installing the Assembly of Fans and the Radiator into a Pc Case
6
Step 9: Pump - Connecting Cables
6
Step 10: Fans - Connecting Cables
7
Optional Step! Applying the Thermal Compound
7
4 Installation - Intel Lga-20Xx Socket
8
Step 1: Attaching Mounting Screws (Lga-20Xx)
8
5 Installation - Amd Am4 Socket
8
Step 1: Removing the Original Plastic Hold-Down Clamps (Amd)
8
Step 2: Attaching Mounting Screws (Amd)
8
Step 3: Installing the Fans to the Radiator (Amd)
8
Step 4: Removing the Cold-Plate Protective Cover (Amd)
8
Step 5: Mounting Brackets Installation (Amd)
9
Step 6: Pump Unit Installation (Amd)
9
Step 7: Installing the Assembly of Fans and the Radiator into Apc Case (Amd)
9
Step 8: Pump - Connecting Cables (Amd)
9
Step 9: Fans - Connecting Cables (Amd)
10
Optional Step! Applying the Thermal Compound
11
6 Support and Service
11
7 Social Media
11
Deutsch
13
1 Sicherheitsvorkehrungen
14
2 In diesem Paket Enthalten
15
Montagesatz
15
3 Installation - Intel Lga-115X-Buchse
16
Schritt 1: Entfernen des Motherboards
16
Schritt 2: Befestigen Sie die Rückwand am Motherboard
16
Schritt 3: Befestigungsschrauben Anbringen
16
Schritt 4: Einbau der Lüfter in den Kühler
16
Schritt 5: Entfernen der Kühlplattenschutzfolie
16
Schritt 6: Anbringung von Montagehalterungen
16
Schritt 7: Installation der Pumpeneinheit
16
Schritt 8: Einbau der Lüfterbaugruppe und des Kühlers in ein Pc-Gehäuse
17
Schritt 9: Pumpenanschlusskabel
17
Schritt 10: Lüfter - Verbindungskabel
18
Optionaler Schritt!! Wärmeleitpaste Auftragen
18
4 Installation - Intel Lga-20Xx-Buchse
19
Schritt 1: Befestigungsschrauben Anbringen (Lga-20Xx) (Amd)
19
5 Installation - Amd Am4 Buchse
19
Schritt 1: Entfernen der Originalen Kunststoffniederhalter (Amd)
19
Schritt 2: Befestigungsschrauben Anbringen (Amd)
19
Schritt 3: Einbau der Lüfter in den Kühler (Amd)
19
Schritt 4: Entfernen der Kühlplattenschutzfolie (Amd)
19
Schritt 5: Anbringung von Montagehalterungen (Amd)
20
Schritt 6: Installation der Pumpeneinheit (Amd)
20
Schritt 7: Einbau der Lüfterbaugruppe und des Kühlers in ein Pc-Gehäuse (Amd)
20
Schritt 8: Pumpenanschlusskabel (Amd)
20
Schritt 9: Lüfter - Verbindungskabel (Amd)
21
Optionaler Schritt!! Wärmeleitpaste Auftragen
22
6 Support und Service
22
7 Soziale Medien
22
Español
24
1 Precauciones de Seguridad
25
2 Adjunto en Este Paquete
26
Kit de Montaje
26
3 Instalación - Socket Lga-115X de Intel
27
Paso 1: Supresión de la Placa Base
27
Paso 2: Fijación de la Placa Posterior a la Placa Base
27
Paso 3: Fijación de Los Tornillos de Sujeción
27
Paso 4: Instalación de Los Ventiladores en el Radiador
27
Paso 5: Extracción de la Lámina Protectora de la Placa de Frío
27
Paso 6: Instalación de Los Soportes de Montaje
27
Paso 7: Instalación de la Bomba
27
Paso 8: Instalación del Conjunto de Ventiladores y Radiador en una Carcasa de Ordenador
28
Paso 9: Bomba - Conexión de Los Cables
28
Paso 10: Ventiladores - Conexión de Los Cables
29
Paso Opcional!! Aplicación del Compuesto Térmico
29
4 Instalación - Socket Lga-20Xx de Intel
30
Paso 1: Fijación de Los Tornillos de Sujeción (Lga-20Xx)
30
5 Instalación - Socket Amd Am4
30
Step 1: Removing the Original Plastic Hold-Down Clamps (Amd)
30
Paso 2: Fijación de Los Tornillos de Sujeción (Amd)
30
Paso 3: Instalación de Los Ventiladores en el Radiador (Amd)
30
Paso 4: Extracción de la Lámina Protectora de la Placa de Frío (Amd)
30
Paso 5: Instalación de Los Soportes de Montaje (Amd)
31
Paso 6: Instalación de la Bomba (Amd)
31
Paso 7: Instalación del Conjunto de Ventiladores y Radiador en una Carcasa de Ordenador
31
Paso 8: Bomba - Conexión de Los Cables (Amd)
31
Paso 9: Ventiladores - Conexión de Los Cables
32
Paso Opcional!! Aplicación del Compuesto Térmico
33
6 Soporte y Servicio
33
7 Redes Sociales
33
Français
35
1 Consignes de Sécurité
36
2 L'emballage Contient
37
Kit de Montage
37
3 Installation du Support du Processeur Intel Lga-115X
38
Étape 1 : Retrait de la Carte Mère
38
Étape 2 : Fixation de la Plaque Arrière À la Carte Mère
38
Étape 3 : Fixation des Vis de Montage
38
Étape 4: Fixation des Ventilateurs Sur Le Radiateur
38
Étape 5: Retrait de la Feuille de Protection de la Plaque Froide
38
Étape 6: Fixation des Supports de Montage
38
Étape 7: Fixation de la Pompe
38
Étape 8 : Fixation de L'ensemble Composé Par Les Ventilateurs Et Le Radiateur Sur un Boîtier D'ordinateur
39
Étape 9: Pompe - Branchement des Câbles
39
Étape 10 : Ventilateurs - Câbles de Connexion
40
Étape Facultative !! Application du Composant Thermique
40
4 Fixation du Support du Processeur Intel Lga-20Xx
41
Étape 1: Fixation des Vis de Montage (Lga-20Xx)
41
5 Fixation du Support du Processeur Amd Am4
41
Étape 1: Retrait des Supports D'origine en Plastique (Amd)
41
Étape 2: Fixation des Vis de Montage (Amd)
41
Étape 3: Fixation des Ventilateurs Sur Le Radiateur (Amd)
41
Étape 4: Retrait de la Feuille de Protection de la Plaque Froide (Amd)
41
Étape 5: Fixation des Supports de Montage (Amd)
42
Étape 6: Fixation de la Pompe (Amd)
42
Étape 7 : Fixation de L'ensemble Composé Par Les Ventilateurs Et Le Radiateur Sur un Boîtier D'ordinateur (Amd)
42
Étape 8: Pompe - Branchement des Câbles (Amd)
42
Étape 9: Ventilateurs - Câbles de Connexion (Amd)
43
Étape Facultative !! Application du Composant Thermique
44
6 Support Et Service
44
7 Réseaux Sociaux
44
日本語
46
1 安全上の注意事項
47
2 パッケージの付属品
48
3 取り付け方法 - Intel Lga-115X ソケッ ト
49
ステップ 1: マザーボードを取り外す
49
ステップ 2: マザーボードにバックプレートを取り付ける
49
ステップ 3: マウントスクリューの取り付け
49
ステップ 4: ラジエーターにファンを取り付ける
49
ステップ 5: コールドプレート保護カバーの取り外し
49
ステップ 6: マウントブラケッ トの取り付け
49
ステップ 7:ポンプユニッ トの取り付け
49
ステップ 8: ファンの組み立てとラジエーターのPcケースへの取り付け
50
ステップ 9:ポンプ - 接続ケーブル
50
ステップ 10: ファン - ケーブルの接続
51
別途オプション!! 放熱グリスの塗布
51
4 取り付け方法 - Intel Lga-20Xx ソケッ ト
52
ステップ 1: マウントスクリューの取り付け(LGA-20Xx
52
5 取り付け方法 - Amd Am4 ソケッ ト
52
ステップ 1:オリジナルのプラスチック製ホールダウン式クランプを取り外す(Amd
52
ステップ 2: マウントスクリューの取り付け(Amd
52
ステップ 3: ラジエーターにファンを取り付ける (Amd)
52
ステップ 4: コールドプレート保護カバーの取り外し (Amd)
52
ステップ 5: マウントブラケッ トの取り付け(Amd
52
ステップ 6:ポンプユニッ トの取り付け (Amd)
53
ステップ 7: ファンの組み立てとラジエーターのPcケースへの取り付け (Amd)
53
ステップ 8:ポンプ - 接続ケーブル (Amd)
53
ステップ 9: ファン - ケーブルの接続 (Amd)
54
6 サポートおよびサービス
55
7 ソーシャルメディ ア
55
Português
57
1 Medidas de Segurança
58
2 Incluído Neste Pacote
59
Kit de Montagem
59
3 Instalação - Intel Lga-115X Socket
60
Passo 1: Remover a Placa Principal
60
Passo 2: Prender a Placa de Apoio À Placa Principal
60
Passo 3: Prender os Parafusos de Fixação
60
Passo 4: Instalar as Ventoinhas no Radiador
60
Passo 5: Remover a Película Protetora da Cold-Plate
60
Passo 6: Instalação de Suportes de Montagem
60
Passo 7: Instalação da Unidade da Bomba
60
Passo 8: Instalar a Montagem das Ventoinhas E Do Radiador Na Caixa Do Pc
61
Passo 9: Bomba - Cabos de Ligação
61
Passo 10: Ventoinhas - Cabos de Ligação
62
Passo Opcional!! Aplicar O Composto Térmico
62
4 Instalação - Socket Intel Lga-20Xx
63
Passo 1: Prender os Parafusos de Fixação (Lga-20Xx)
63
5 Instalação - Socket Amd Am4
63
Passo 1: Remover as Braçadeiras de Fixação Em Plástico (Amd)
63
Passo 2: Prender os Parafusos de Fixação (Amd)
63
Passo 3: Instalar as Ventoinhas no Radiador (Amd)
63
Passo 4: Remover a Película Protetora da Cold-Plate (Amd)
63
Passo 5: Instalação de Suportes de Montagem (Amd)
64
Passo 6: Instalação da Unidade da Bomba (Amd)
64
Passo 7: Instalar a Montagem das Ventoinhas E Do Radiador Na Caixa Do Pc (Amd)
64
Passo 8: Bomba - Cabos de Ligação (Amd)
64
Passo 9: Ventoinhas - Cabos de Ligação (Amd)
65
Passo Opcional!! Aplicar O Composto Térmico
66
6 Apoio Técnico
66
7 Redes Sociais
66
Русский
68
1 Меры Безопасности
69
2 В Этот Пакет Входят
70
Монтажный Комплект
70
3 Установка - Intel Lga-115X Socket
71
Шаг 1: Снятие Материнской Платы
71
Шаг 2: Прикрепление Бэкплейта К Материнской Плате
71
Шаг 3: Установка Крепежных Винтов
71
Шаг 4: Установка Вентиляторов На Радиатор
71
Шаг 5: Снятие Защитной Фольги Охлаждающей Плиты
71
Шаг 6: Установка Монтажных Кронштейнов
71
Шаг 7: Установка Насосного Агрегата
71
Шаг 8: Установка Блока Вентиляторов И Радиатора В Корпус Пк
72
Шаг 9: Насос - Соединительные Кабели
72
Шаг 10: Вентиляторы - Соединительные Кабели
73
Необязательный Шаг!! Нанесение Термопасты
73
4 Установка - Intel Lga-20Xx Socket
74
Шаг 1: Установка Крепежных Винтов (Lga-20Xx)
74
5 Установка - Amd Am4 Socket
74
Шаг 1: Снятие Оригинальных Пластмассовых Прижимных Скоб (Amd)
74
Шаг 2: Установка Крепежных Винтов (Amd)
74
Шаг 3: Установка Вентиляторов На Радиатор (Amd)
74
Шаг 4: Снятие Защитной Фольги Охлаждающей Плиты (Amd)
74
Шаг 5: Установка Монтажных Кронштейнов (Amd)
75
Шаг 6: Установка Насосного Агрегата (Amd)
75
Шаг 7: Установка Блока Вентиляторов И Радиатора Вкорпус Пк (Amd)
75
Шаг 8: Насос - Соединительные Кабели (Amd)
75
Шаг 9: Вентиляторы - Соединительные Кабели (Amd)
76
Необязательный Шаг!! Нанесение Термопасты
77
6 Поддержка И Сервис
77
7 Социальные Сети
77
Advertisement
Advertisement
Related Products
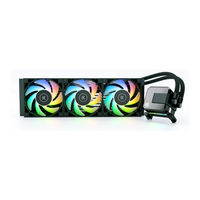
ekwb EK-AIO Elite 360 D-RGB
EKWB EK
ekwb EK-Quantum Magnitude
ekwb EK-Quantum Vector TUF RX 6900
ekwb EK-Quantum Velocity 2 D-RGB AM4
ekwb EK-Pro AM5 Series
ekwb EK-Quantum Vector FE RTX 3090 D-RGB+Backplate
ekwb EK-Quantum Vector FTW3 RTX 3070
ekwb EK-FC2080 + Ti Classic
ekwb EK-Quantum Vector RE RTX 3080 Active Backplate D-RGB
ekwb Categories
Computer Hardware
Accessories
Computer Accessories
Enclosure
Water Pump
More ekwb Manuals
Login
Sign In
OR
Sign in with Facebook
Sign in with Google
Upload manual
Upload from disk
Upload from URL