Sign In
Upload
Manuals
Brands
Domino Manuals
Printer
A-SERIES
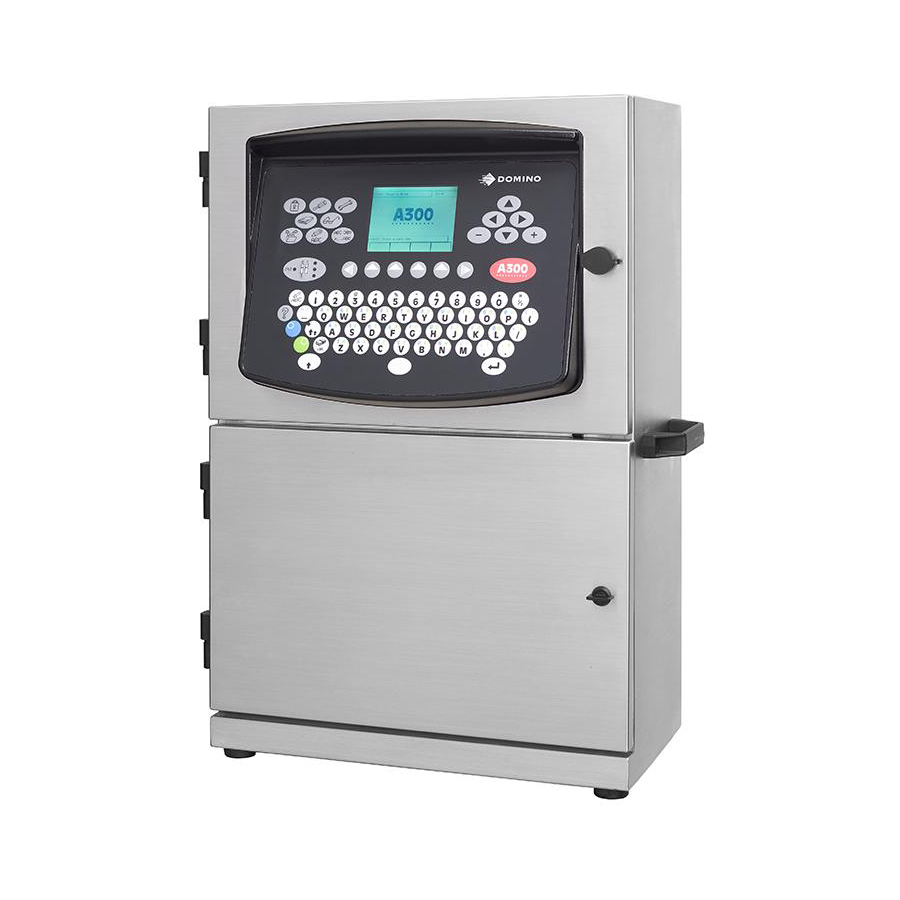
Domino A-SERIES Manuals
Manuals and User Guides for Domino A-SERIES. We have
4
Domino A-SERIES manuals available for free PDF download: Operation And Maintenance Manual, User Manual
Domino A-SERIES Operation And Maintenance Manual (337 pages)
Brand:
Domino
| Category:
Printer
| Size: 7 MB
Table of Contents
Domino A--Series Ink Jet Printer Operation and Maintenance Manual
5
Declaration of Conformity
2
Fcc Notice
4
Part 1 : Health and Safety
11
Table of Contents
11
Chapter 1 Part 1 : Health and Safety
13
Introduction
13
Basic Requirements
13
Fire Risk
14
Storage
14
Spillages and Disposal
16
Symbols
17
Part 2 : Introduction
19
General
23
Part 2 : Introduction
23
Printer Specification
24
Cabinet
24
Data Input
24
Print Head
24
Environment
25
General
25
Ink System
25
Printer Control
26
Display
26
On/Off Switching
27
CHAPTER 2 Part
27
Part
29
General Purpose Keys
30
Currency Key
31
Help Key
31
Password System
31
Importing and Exporting Data
32
Unicode Character Entry
32
User Port
32
Topic Keys
29
Part
32
Front Panel Topic Key Menus
33
Part 3 : Operation
35
Shut down
37
Start--Up
37
Ink Reservoir Replacement
38
Ink and Make--Up Cartridge Replacement
40
Creating a Message
41
Display Contrast
41
General Information
41
To Delete the Message from Store
42
To Print the Message
42
To Save the Message
42
To Enter a Clock Entry
43
To Select an Existing Message
43
To Enter a Serial Number
45
To Enter a Shift Code
46
To Enter a Text Field
46
To Create a Machine Readable Code
47
Appendix B Compressor Driven Airdryer
53
Issue 1 Sept
53
Introduction 1
54
Machine Does Not Print
70
Printer Faults
70
Part 5 : Reference
73
Storage 1
74
Glossary of Terms
77
Print Definitions
78
Lockout
79
Screen Descriptions
79
Message Editor
80
Font Size
80
Print Message
80
Insert Clock
81
Serial Number
81
Advanced Serial Number
82
Bold On/Off
83
Edit
83
Message Monitor
80
Appendix A Installation
83
CHAPTER 3 Part 6 Printer Description
83
Index
83
Dblspace On/Off
84
Insert Logo
84
Shift Code
84
Clock Offsets
85
Text Field
85
End MRC
86
Start MRC
86
Symbols 1
86
MRC Text
87
Message Bold
88
Special Setup
88
Toggle Mrcs
88
Counted Repeats
89
Dynamic Control
89
Reverse Control
89
Counted Products
90
Inverse Control
90
Message Offset
91
Repeat Printing
91
Product Select
92
Raster
92
Message Store
93
Print Message
93
Select Message
93
Stop Message Printing
93
Delete Message
94
Save Message
94
Export Message
95
Import (P:\)
95
Storage Stats
95
Delete Logo
96
Import (R:\)
96
Logo Store
96
Export Logo
97
Import (P:\)
97
Import (R:\)
97
Stop All Printing
97
Storage Stats
97
Inverse Control
98
Message Bold
98
Print Setup
98
Repeat Printing
98
Enable Printing
99
Print Delay
99
Change Height
100
Reset Serial Number
100
Change Width
101
Export Messages
102
Import Messages
102
Memory Card
102
Machine Setup
103
Master Clock
103
Serial Port
103
Day Names
104
Ink Data
104
Product Counter
104
Alpha Hours
105
Month Names
105
Time Format
105
Password Setup
106
Beeper
107
Set Currency
107
Service
108
Print Head
109
Ink System
110
Viscosity
111
External I/F
113
Config
114
Change Resvr
115
Event Log
115
Backup Printer
116
Product Sequence Simulation
116
Part 6 : Printer Description
117
Part 6 : Printer Description
119
Print Head
119
Details
119
Cabinet
121
Electronics System
128
Power off
130
Printer off
130
Ready to Print
130
Ink System
132
General
132
Ink Circuit
132
Part 7 : Maintenance
139
Part 7 : Maintenance
140
Ink System -- Access
141
Preventative Maintenance
141
Preventative Maintenance Reports
143
Main Filter Replacement
149
Air Filter Replacement
151
Manifold Seal Check
151
Obtain Ink Information
151
10. Pressure Window Check
154
11. Modulation Window Check
154
12. Pump Speed Check
154
13. Print Head Cleaning
155
14. Obtain a Print Sample
155
Airdryer Service
155
Part 8 : Repair
157
Print Head Repair
159
Nozzle Plate Removal and Cleaning
159
Drive Rod Replacement
160
Drop Generator Replacement
162
Strobe Assembly Replacement
166
Charge Electrode Replacement
169
Charge Electrode Alignment
170
Deflector Plate Replacement
172
Gutter Tube and Sensor Replacement
173
Gutter Alignment
175
Electronic System Repairs
177
Access
177
Power Switch and External Connector Replacement
178
Fuse Replacement
178
HV Power Supply Replacement
179
External Interface PCB Replacement
179
Front Panel PCB Replacement
180
Ink System Interface PCB Replacement
181
Printer Control PCB Assembly Replacement
181
Fan Replacement
182
Power Filter Replacement
182
Ink System Repairs
183
Pump Replacement
184
Solenoid Valve Replacement
185
Pressure Transducer Replacement
186
Peltier Replacement
187
Pressure Relief Valve (1Psi) Refurbishment
188
Viscometer Replacement
190
Jet Pump Refurbishment
191
Part 9 : Spares and Accessories
193
Accessories
194
Consumables
194
Tools
194
First Level Spares
195
Second Level Spares
195
Printhead Assembly
197
Ink System -- General
200
Ink Management Block
202
Electronics Door Assembly
205
Electronics Door Assembly A100
207
Electronics Inner Door
209
Electronics Cabinet
211
Part 10 : Options
213
Alarm Beacon
217
Installation
217
Bulb Replacement
217
Cable Assembly Beacon Port
218
Beacon Connections
218
Cable Assembly Alarms
219
Alarm Connections
219
Rs232 Comms Option Kit
220
Positive Air Pump Assembly
222
Airdryer Connection Kit
223
Airdryer (Air Driven)
224
Airdryer (Compressor Driven)
225
Bench Mounting Stand
226
Stationary Stand
227
Storage Cabinet
228
Conduit Retainer Kit
229
90 Degree Printhead and Conduit
230
Peltier Option Kit
231
Shaft Encoder
232
Photocell Assembly Proximity
235
Inductive Sensor
236
Photocell Assembly Fibre Optic
237
Conversion (Ink Type 138Bk)
238
Conversion (Ink Type 234Bk)
238
Appendix A : Installation
241
Initial Inspection
244
Preparing the Printer for Use
245
Start--Up
246
Preparing the Ink System
246
Setting the Master Clock
248
Setting the Clock Offsets
249
Software Identification
249
Product Detection
249
Stroke Source
250
Print Delay
250
Character Height and Width
250
Beeper
251
To Create a Print Sample
251
Inverse Printing
252
Reverse Printing
252
Shut down
252
Printer Installation
255
Cabinet Positioning
255
Conduit and Print Head Positioning
255
External Air Supply (Print Head
256
Electrical Supply
258
External Connections
258
Product Detector Installation
259
Product Detector Positioning
259
Appendix B : A--Series Compressor Driven Airdryer
262
Appendix B : A--Series Compressor
264
Introduction
264
Product Safety
265
Specification
265
Description
266
Airdryer -- General
267
Airdryer -- Installation
269
Airdryer -- Electronics
270
2000 Hour Maintenance
272
Peltier Air Filter Replacement
272
Compressor Filter Replacement
273
Inlet Filter Replacement
273
Air Flow Check
274
Humidity Check
275
4000 Hour Maintenance
276
Compressor Piston Seal and Valve Replacement
276
Fault Finding and Repair
279
Fault Diagnosis
279
Air Pressure Faults
279
Humidity Faults
281
Power, Alarms, Sensors and Overheating Faults
282
Fuse Replacement
286
Power Indicator Replacement
286
Sounder Replacement
286
Alarm Beacon Lamp Replacement
286
Cabinet Fan Replacement
287
Pressure Switch Replacement
287
Humidity Sensor Replacement
287
Pressure Regulator Replacement
288
Quick Release Connectors
288
Solenoid Valve Replacement
288
Main Switch Replacement
289
PCB Removal and Replacement
289
Peltier Assembly Replacement
291
Peltier Assembly Fan Replacement
292
Needle Valve Refurbishment and Adjustment
296
Transformer Replacement
297
Inline Orifice Replacement
298
Service Diagrams
299
Airdryer PCB Assembly MK2 Service Diagram
299
Airdryer Wiring Diagram
300
Airdryer Power Diagram
301
Spares and Test Equipment
303
First Level Spares
303
Second Level Spares
303
Test Equipment
303
Service Kits
303
Airdryer Components
305
Sounder, Fan and Beacon Components
307
PCB and Power Components
309
Appendix B : Air Driven Airdryer
312
Appendix B : A--Series Air Driven Airdryer
314
Appendix B : Air Driven Airdryer
314
Introduction
314
Product Safety
315
Specification
315
Description
316
Airdryer --General
316
Airdryer -- Installation
318
2000 Hour Maintenance
320
Fault Finding and Repair
322
External Indicators
322
Fault Diagnosis
322
Fuse Replacement
325
Humidity Sensor Replacement
325
PCB Removal and Replacement
327
Humidity Check
328
Service Diagrams
329
Spares
333
First Level Spares
333
Second Level Spares
333
Test Equipment
333
Airdryer General (1
334
Airdryer General (2
336
Advertisement
Domino A-SERIES User Manual (62 pages)
Brand:
Domino
| Category:
Laboratory Equipment
| Size: 3 MB
Table of Contents
Table of Contents
2
Contents of Ec Declaration of Conformity
5
Fcc Notice
6
European Emc Statement
6
Health and Safety
7
Symbols
7
Inks and Fluids Information
8
Storage
9
Fire Risk
9
Spillages and Disposal
10
Electro-Static Discharge
11
General
12
Description
12
Intended Use
12
A320I Printer
12
A420I Printer
13
A520I Printer
13
Printer Specification
14
Print Head
14
Cabinet
15
A320I, A420I
15
A520I
15
External Connections
16
Ink System
16
Environment
17
Touchpanel Type 3
17
Initial Installation
18
Cabinet Positioning
18
Cabinet Mounting
18
Preparing the Ink System
19
I-Tech Module Installation
21
Ink Cartridge Installation
23
Make-Up Cartridge Installation
23
Start-Up
24
Touchscreen (Quickstep)
24
Qvga
24
Shut down
25
Recommendations for a Long Shut down
25
Printer Control
26
Touchscreen (Quickstep)
26
General
27
Editor Screen
27
QVGA (A320I A420I Only)
28
Printer States
30
Display Contrast
30
QVGA Screen
30
Creating a Message
31
Touchscreen (Quickstep)
31
Add Text
31
Add a New Offset Clock
32
QVGA (A320I, A420I Only)
33
Font Options
33
Clock Options
35
To Save the Message
37
Touchscreen (Quickstep)
37
Qvga
37
To Print the Message
37
Ink and Make-Up Cartridge Replacement
38
Make-Up Filter Replacement
40
I-Tech Module Replacement
42
Entering the I-Tech Module Data Code
42
Touchscreen (Quickstep)
42
Qvga
43
Replacing the I-Tech Module
44
Air Filter Replacement
46
Fault Finding
47
Qvga Reference
49
Print Width and Height
49
Print Height
49
Print Width
49
Message Orientation
49
Topic Buttons
51
General Purpose Buttons
52
Help Button
54
Currency Button
54
Lockout
54
Cleaning the Print Head
55
Nozzle Plate Removal and Cleaning
57
Standard Print Head
58
XS Print Head
60
Domino A-SERIES User Manual (42 pages)
Brand:
Domino
| Category:
Laboratory Equipment
| Size: 0 MB
Table of Contents
Table of Contents
2
Health & Safety
4
Introduction
4
Basic Requirements
4
Storage
5
Fire Risk
6
Spillages and Disposal
7
Operation
8
Starting up and Shutting down
8
Start-Up
8
Shut down (Not Opaque)
9
Shut down (Opaque)
9
Long Shut down (Opaque)
10
User Maintenance
11
Foodgrade Maintenance
11
Print Head Cleaning
12
Ink Reservoir Replacement
13
Ink and Make-Up Cartridge Replacement
15
Main Filter Replacement
17
Printer Controls
18
Display Contrast
18
General Information
18
Printer Control
19
Control Panel
19
Display
20
Jet On/Off Switching
21
Topic Keys
23
General Purpose Keys
24
Unicode Character Entry
26
Importing and Exporting Data
27
Memory Card
27
Back-Up/Restore Card
27
User Port
27
Creating a Message
28
To Create the Message
28
To Enter a Clock Entry
28
To Set the Clock Offsets
29
Special Fields
29
To Enter a Serial Number
29
To Enter a Shift Code
31
To Enter a Text Field
31
To Create a Machine Readable Code (MRC)
32
To Create a Bar Code
33
To Import Logos
35
To Import a Single Logo
35
To Save the Message
35
To Print the Message
35
Print Parameters
36
Message Offset
36
Print Delay
36
Character Height and Width
37
Message Orientation
37
Reverse Printing
37
Inverse Printing
38
Repeat Printing
38
Import Messages
39
Export Messages
39
Fault Finding
40
Printer Faults
40
Advertisement
Domino A-SERIES User Manual (42 pages)
EGG CODER INK JET PRINTER
Brand:
Domino
| Category:
Laboratory Equipment
| Size: 1 MB
Table of Contents
Ec Declaration of Conformity
5
FCC Notice
6
Amendment Record
7
Table of Contents
8
Menu Maps
10
Introduction
13
General
13
Screen Descriptions
14
Egg Grader
14
Egg Service Dialog
15
Message Editor
16
Message Store (Quick Assign Mode Only)
17
Quick Assign
17
Assign Message
18
Moba Systems
19
Moba 3500, 5000, 5100, 6000, 8000, Omnia 250 and 330 Graders
19
Cable Wiring Diagram
19
Connections
20
Block Diagram
21
Diamond Systems
22
Cable Wiring Diagram
24
Pin to Pin Connections
25
Master Slave Cable
25
Diamond Cable 1
26
Diamond Cable 2
26
Block Diagram
27
Selecta Systems
28
Cable Wiring Diagram
29
Pin to Pin Connections
30
Selecta Cable 1
30
Selecta Cable 2
31
Master Slave Cable
31
Block Diagram
32
Repairs
33
Egg Interface PCB Replacement
33
PC104 Memory Expansion PCB Replacement
34
PC104 Egg Controller PCB Replacement
34
Inverter PCB Replacement
35
Front Panel PCB Replacement
36
LCD Assembly Replacement
37
Spares
39
Second Level Spares
39
General
39
Electronics Cabinet
41
Advertisement
Related Products
Domino Ax Series
Domino Ax130i
Domino Ax150i
Domino Ax350i
Domino Ax550i
Domino A320i
Domino A520i
Domino i-Tech A322i
Domino i-Tech A422i
Domino 8D3211001DU
Domino Categories
Printer
Laboratory Equipment
Hob
Controller
Machine Vision Systems
More Domino Manuals
Login
Sign In
OR
Sign in with Facebook
Sign in with Google
Upload manual
Upload from disk
Upload from URL