Sign In
Upload
Manuals
Brands
Copystar Manuals
Copier
CS-1820
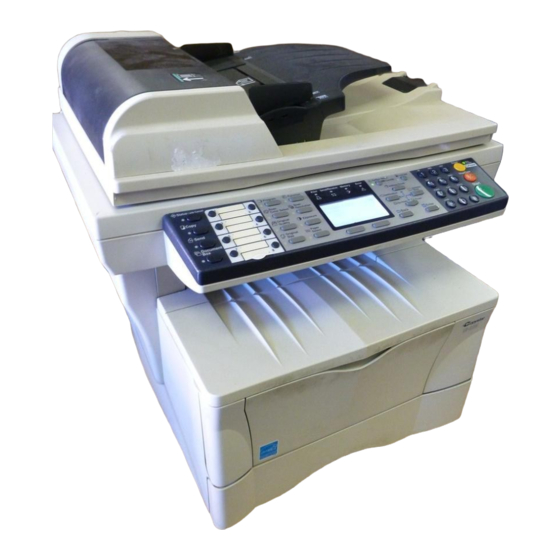
Copystar CS-1820 Manuals
Manuals and User Guides for Copystar CS-1820. We have
2
Copystar CS-1820 manuals available for free PDF download: Service Manual, User Manual
Copystar CS-1820 Service Manual (274 pages)
Brand:
Copystar
| Category:
Copier
| Size: 5 MB
Table of Contents
Table of Contents
9
Safety Precautions
4
Installation Precautions
6
Handling Precautions
9
Troubleshooting
9
Assembly and Disassembly
10
Specifications
13
Names of Parts
15
Main Body
15
Operation Panel
16
Drum
17
Installation Environment
17
Unpacking and Installation
18
Installation Procedure
18
Connecting the Cable
33
Connecting the Network Cable
33
Connecting the Printer Cable
34
Installing the Document Processor (Option)
35
Installing the Expanding Memory (Option)
38
Installing the Fax System (Option)
39
Maintenance Mode
42
Executing a Maintenance Item
42
Maintenance Modes
43
Contents of Maintenance Mode Items
44
U051 Adjusting the Amount of Slack in the Paper
47
U060 Adjusting the Scanner Input Properties
47
U063 Adjusting the Shading Position
48
U065 Adjusting the Scanner Magnification
48
U066 Adjusting the Leading Edge Registration for Scanning an Original on the
48
U067 Adjusting the Center Line for Scanning an Original on the Contact Glass
48
U071 Adjusting the DP Scanning Timing
48
U074 Adjusting the DP Input Light Luminosity
49
U087 Turning the DP Scanning Position Adjust Mode On/Off
49
U089 Outputting a MIP
50
U101 Setting the Other High Voltages
51
U144 Setting Toner Loading Operation
52
U157 Checking/Clearing the Developing Drive Time
52
U161 Setting the Fusing Control Temperature
53
Primary Stabilization Fusing Temperature
53
System Settings
59
Executing a System Setting Item
59
System Settings
60
Service Settings
62
Executing a Service Setting Item
62
Contents of Service Setting Items
63
Secondary Stabilization Fusing Temperature
65
Number of Sheets for Fusing Control
65
Paper Misfeed Detection
70
Paper Misfeed Indication
70
Paper Misfeed Detection Conditions
71
Paper Misfeeds
73
Self-Diagnosis
77
Self-Diagnostic Function
77
Self-Diagnostic Codes
77
Image Formation Problems
84
No Image Appears (Entirely White)
84
No Image Appears (Entirely Black)
84
Image Is too Light
84
Background Is Visible
84
A White Line Appears Longitudinally
84
A Black Line Appears Longitudinally
84
A Black Line Appears Laterally
84
One Side of the Print Image Is Darker than the Other
84
Black Dots Appear on the Image
84
Electrical Problems
91
Cooling Fan Does Not Operate
91
The Feed Clutch Does Not Operate
91
The Scanner Motor Does Not Operate
91
The Exposure Lamp Does Not Turn off
92
The Heater Lamp Does Not Turn off
92
The Heater Lamp Does Not Turn on
92
The MP Feed Clutch Does Not Operate
92
Main Charging Is Not Performed
93
Others
93
When the Power Switch Is Turned on
93
Mechanical Problems
94
Abnormal Noise Is Heard
94
Multiple Sheets of Paper Are Fed at One Time
94
No Primary Paper Feed
94
No Secondary Paper Feed
94
Paper Jams
94
Skewed Paper Feed
94
The Scanner Does Not Travel
94
Precautions for Assembly and Disassembly
95
Precautions
95
Removing the Process Unit
96
Removing the Principal Outer Covers
97
Removing the Front Top Cover/Face-Down Output Tray
97
Removing the Left Cover
98
Removing the Right Cover
98
Removing the Feed Roller
99
Removing the MP Feed Roller
100
Removing the Transfer Roller
102
Removing the Primary Circuit Pwbs
103
Removing the Engine PWB
103
Removing the Main PWB
104
Removing the Power Supply PWB and High Voltage PWB
106
Removing the Bias PWB
107
Removing the Main Motor and Drive Unit
108
Removing and Splitting the Fuser Unit
112
Removing the Separation Craws
114
Removing the Heater Lamp
115
Removing the Heat Roller
116
Removing the Thermistor
118
Removing the Thermal Cutout
119
Removing the Press Roller
120
Removing the Laser Scanner Unit and the Eraser Lamp
123
Removing the ISU Unit
126
Removing the Exposure Lamp
128
Removing the Scanner Mirror a
130
Removing the Scanner Motor
131
Removing the Main Charger Unit
134
Adjustment the Maintenance Mode
135
Adjusting the Leading Edge Registration of Image Printing
135
Adjusting the Center Line of Image Printing
136
Adjusting the Amount of Slack in the Paper
137
Adjusting Magnification of the Scanner in the Main Scanning Direction
138
Adjusting Magnification of the Scanner in the Auxiliary Scanning Direction
139
Adjusting the Scanner Leading Edge Registration
140
Adjusting the Scanner Center Line
141
Adjusting the Margins for Scanning an Original on the Contact Glass
142
Adjusting the DP Magnification
143
Adjusting the DP Leading Edge Registration
144
Adjusting the DP Trailing Edge Registration
145
Adjusting the DP Center Line
146
Adjusting the Margins for Scanning the Original from the DP
147
Upgrading the Firmware on the Main PWB
148
Paper Feeding System
150
Paper Feed Control
151
Paper Feeding Mechanism
152
Original Scanning System
153
ISU Unit
155
Electrophotographic System
156
Electrophotographic Cycle
156
Process Unit Mechanism
157
Main Charging
158
Photo Conductive Drum
158
Charging the Drum
159
Exposure
160
Laser Scanner Unit
161
Drum Surface Potential
162
Development
163
Transfer
164
Fusing
165
Fuser Unit Mechanism
166
Cleaning
167
Electrical Parts Layout
168
Main Unit
168
Scanner Unit
169
Main PWB
170
Engine PWB
176
Eraser Lamp Control Circuit
178
Heater Lamp Control Circuit
179
Polygon Motor Control Circuit
182
Power Supply PWB
186
Bias PWB
188
High Voltage PWB
189
Interlock Switch
190
Operation Pwb
193
Scanner Pwb
195
Table of Contents
208
Specifications
209
Parts Names
212
Main Body
212
Operation Panel
213
Mechanical Construction
214
Installation
215
Unpacking and Installation
215
Maintenance Mode
219
Executing a Maintenance Item
219
Maintenance Mode Item List
220
Maintenance Item Contents
221
Contents of Maintenance Mode Items
222
U600 Initializing All Data
222
U601 Initializing Permanent Data
223
U603 Setting User Data
224
U604 Setting User Data
224
U605 Clearing Data
224
U610 Setting System
225
Setting the Number of Lines to be Ignored When Receiving a Fax (A4R, 8 1/2 X 11) in the Auto Reduction Mode
225
Setting the Number of Lines to be Ignored When Receiving a Fax at 100% Magnification
225
Setting the Number of Lines to be Ignored When Receiving a Fax in the Auto Reduction Mode
225
U611 Setting System
226
Setting the Number of Adjustment Lines for Automatic Reduction
226
Setting the Number of Adjustment Lines for Automatic Reduction When A4 Paper Is Set
226
Setting the Number of Adjustment Lines for Automatic Reduction When Letter Size Paper Is Set
226
U612 Setting System
227
Setting the Automatic Printing of the Protocol List
227
U620 Setting the Communication System
228
U625 Setting the Trasmission System
228
Setting the Auto Redialing Interval
228
Setting the Number of Times of Auto Redialing
228
U630 Setting Communication Control
229
Setting the Communication Starting Speed
229
Setting the Reception Speed
229
U631 Setting Communication Control
231
Setting ECM Reception
231
Setting ECM Transmission
231
Setting the Frequency of the CED Signal
231
U632 Setting Communication Control
232
Setting the DIS Signal to 4 Bytes
232
Setting the Reception of a Short Protocol Transmission
232
Setting the Short Protocol Transmission
232
U633 Setting Communication Control
233
Enabling/Disabling V.34 Communication
233
Setting the Number of Times of DIS Signal Reception
233
Setting the Reference for RTN Signal Output
233
Setting the V.34 Symbol Speed (3429 Hz)
233
U634 Setting Communication Control
234
U640 Setting Communication Time
234
U641 Setting Communication Time
235
Setting the T0 Time-Out Time
235
Setting the T1 Time-Out Time
235
Setting the Ta Time-Out Time
236
Setting the Tb1 Time-Out Time
236
Setting the Tb2 Time-Out Time
236
Setting the Tc Time-Out Time
236
Setting the Td Time-Out Time
237
Executing a System Setting Item
245
System Settings
245
Common Setting
246
Date/Timer Setting
246
FAX Setting
246
Report
246
Document Box Setting
248
Edit Address Book
248
Executing a Service Setting Item
250
Service Settings
250
Contents of Service Setting Items
251
Error Code
253
Error Codes
253
Error Code
254
Table of General Classification
254
U004XX Error Code Table: Interrupted Phase B
256
U006XX Error Code Table: Problems with the Unit
257
U008XX Error Code Table: Page Transmission Error
257
U009XX Error Code Table: Page Reception Error
257
U010XX Error Code Table: G3 Transmission
258
U011XX Error Code Table: G3 Reception
260
U017XX Error Code Table: V.34 Transmission
261
U018XX Error Code Table: V.34 Reception
261
U023XX Error Code Table: Relay Command Abnormal Reception
261
U044XX Error Code Table: Encrypted Transmission
261
Self Diagnosis
262
Self Diagnostic Codes
262
1-6 Upgrading the Firmware
263
Upgrading the Firmware on the Fax Control PWB
263
2-1 Electrical Parts Layout
265
Electrical Parts Layout
265
2-2 Operation of the Pwbs
266
Fax Control PWB
266
Ncu Pwb
270
Advertisement
Copystar CS-1820 User Manual (4 pages)
Brand:
Copystar
| Category:
All in One Printer
| Size: 0 MB
Table of Contents
Basic Specifications
4
Paper Supply
4
Copy Functions
4
Paper Handling Options
4
Additional Options
4
Advertisement
Related Products
Copystar CS-1620
Copystar CS-2020
Copystar CS-6030
Copystar CS-8030
Copystar CS-1635
Copystar CS 181
Copystar CS-1650
Copystar CS 180
Copystar CS-1530
Copystar CS-2560
Copystar Categories
All in One Printer
Copier
Printer
Fax Machine
Disc Duplicator
More Copystar Manuals
Login
Sign In
OR
Sign in with Facebook
Sign in with Google
Upload manual
Upload from disk
Upload from URL