Sign In
Upload
Manuals
Brands
Carbide 3D Manuals
Wood Router
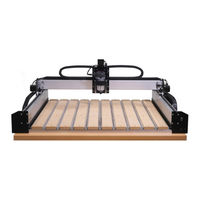
Shapeoko 4 XXL
Carbide 3D Shapeoko 4 XXL Manuals
Manuals and User Guides for Carbide 3D Shapeoko 4 XXL. We have
1
Carbide 3D Shapeoko 4 XXL manual available for free PDF download: Assembly Manual
Carbide 3D Shapeoko 4 XXL Assembly Manual (43 pages)
Brand:
Carbide 3D
| Category:
Wood Router
| Size: 8 MB
Table of Contents
Table of Contents
2
Welcome and Congratulations
2
Inventory.
3
Important Safety Instructions
3
Step 1 - Baseframe
3
Review Box 1 Components
4
Position Crossmembers and Drag Chain Support Panels
5
Assemble Baseframe
5
Install Cable Tie Mounts
5
Review Box 2 Components
6
Install Y-Left Rail
7
Install Y-Right Rail
7
Review Box 3 Components
8
Eccentric Nuts and V-Wheels Explained
9
Open V-Wheels
9
Install X-Axis Gantry
10
Review Box 4 Components
11
Install Front-Right Endplate
12
Install Back-Right Endplate
13
Install Y-Left Endplates
13
Square Machine
14
Install Side Skirts
14
Review Box 5 Components
15
Open Eccentric Nuts
16
Pre-Assemble V-Wheels
16
Install X/Z Carrier Plate
16
Attach Belt Clip to Belt
17
Install X-Motor and Belt
17
Install Data Drag Chain Head Bracket
19
Install Router Drag Chain Head Bracket
19
Install X/Z Assembly
20
Install X-Axis Drag Chain Support Panel
20
Install Y-Axis Belts
21
Install Y-Left Belt
21
Install Y-Right Belt
22
Step 2 - Y-Rails
6
Step 3 - Gantry
8
Step 4 - Endplates
11
Step 5 - X/ZAssembly
15
Step 6 - Drag Chain
24
Install X-Axis Drag Chain
24
Secure X-Axis Drag Chain Head and Tail
24
Attach Transition Bracket to Y-Axis Drag Chain Head
25
Install X/Y Transition Bracket and Y-Axis Drag Chain
25
Secure Y-Axis Drag Chain Tail
25
Attach Cable Tie down
25
Review Box 7 Components
26
Install Router Mount
27
Install Router
27
Prepare Drag Chains
28
Insert Power Cable
28
Attach Transition Bracket to Y-Axis Drag Chain Head
29
Install X-Axis Drag Chain
29
Secure X-Axis Drag Chain Head and Tail
29
Install X/Y Transition Bracket and Y-Axis Drag Chain
30
Secure Y-Axis Drag Chain Tail
30
Attach Cable Tie down to Drag Chain Support Panel
30
Step 8 - Hybrid Table
32
Install Hybrid Extrusions
32
Install MDF Strips
32
Step 9 - Controller
33
Review Box 9 Components
33
Install Controller Mount
34
Install Controller
34
Attach Grounding Wire
34
Connect Controller Cables
35
Connect Cables
36
Tidy Cables
36
Connect Power and USB
37
Install an End Mill
37
Step 10 - Set up Machine-Control Software
38
Download CAD/CAM and Machine-Control Software
38
Connect to Machine
38
Update Machine Settings
38
Check Proximity Switches
38
Home the Machine
38
Set up Bitsetter Accessory (Optional)
39
Set Post Processor in Carbide Create (Optional)
39
Extras.
40
Beginner Tutorials
40
Projects and Inspiration on Youtube and Cutrocket
40
Join Our Community
40
Software User Guides and Tutorials
40
Machining Guides
40
Material Guide Videos
40
Workholding and Dust Collection Videos
40
Glossary of Terms
41
Advertisement
Advertisement
Related Products
Carbide 3D Shapeoko XXL
Carbide 3D Shapeoko XL
Carbide 3D SHAPEOKO 3
Carbide 3D Shapeoko HDZ 4.0
Carbide 3D Shapeoko Z-Plus
Carbide 3D Shapeoko Proximity Switch Kit
Carbide 3D Shapeoko PRO
Carbide 3D Shapeoko HDM
Carbide 3D Shapeoko 5 Pro
Carbide 3D Shapeoko 3 XXL
Carbide 3D Categories
Control Systems
3D Printers
Power Tool
Network Router
Switch
More Carbide 3D Manuals
Login
Sign In
OR
Sign in with Facebook
Sign in with Google
Upload manual
Upload from disk
Upload from URL